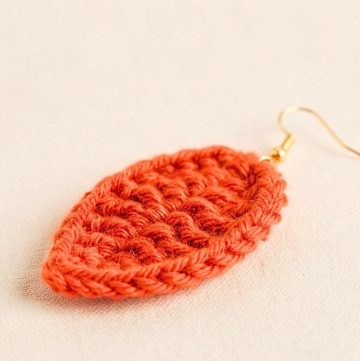

Looking for a tiny Christmas tree you can carry or hang? This granny-triangle crochet design turns simple clusters into a festive keychain or miniature tree ornament.

A little triangle can do double duty during the holidays. This crochet Christmas tree starts with classic granny-style clusters that build outward into a simple triangular shape, then adds a small trunk and star-like detail to give the flat tree its festive character. At around 3–4 inches tall, it is small enough for a keychain, gift wrapping, or a Christmas crochet tree branch.
As you work through the tutorial, you’ll see how the first granny round establishes the three corners, how the next round expands those corners without losing the triangle shape, and where the trunk and decorative details are added afterward. The instructions also show how to finish the back neatly and attach the keychain ring securely, so the finished crochet piece can actually be used rather than simply displayed.
Credit Poplar Crochet
Materials & Tools Needed
- Yarn: Acrylic yarn, typically green for the tree, yellow for the star, and brown for the trunk
- Crochet Hook: 3 mm
- Hardware: Keychain ring
- Tools: Yarn needle and scissors
Finished Size & Customization Ideas
The finished tree typically measures about 3-4 inches tall, although the exact size will vary with your yarn tension and the number of tree-body rounds worked.
The same little tree can be used in several ways. Attach the keychain ring for a practical holiday accessory, or use the finished crochet tree as a small ornament.
For extra decoration, sew on tiny colorful beads or add French knots as miniature ornaments. You can also carry a strand of metallic thread together with the acrylic yarn as you crochet to give the tree a subtle festive sparkle.
Pattern Abbreviations
- ch: Chain
- sl st: Slip stitch
- dc: Double crochet
- tr: Treble crochet
- st(s): Stitch(es)
- sp(s): Space(s)
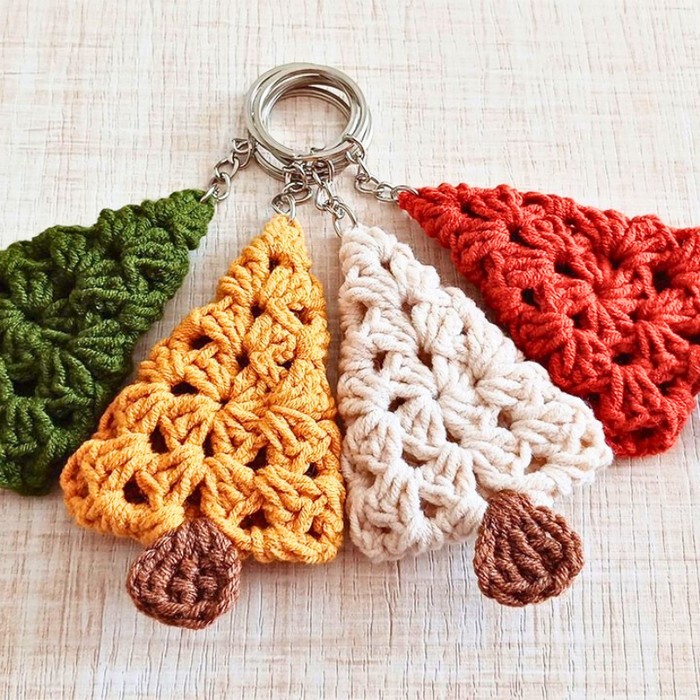
Start the Granny Triangle Tree
The tree begins as a small three-sided granny triangle. The important part of the first round is establishing three evenly spaced corner spaces; these corners are what allow the triangle to grow in the following rounds.
Round 1: Ch 5 and sl st into the first chain to form a ring. Sl st into the ring, then ch 3, which counts as the first dc. Work 2 dc into the ring, followed by ch 1. Work 3 dc into the ring, followed by ch 1. Work 3 dc into the ring, followed by ch 1. Sl st into the top of the beginning ch 3 to close the round.
Triangle Check: Before starting Round 2, identify the three open ch-1 spaces around the center. These are the three corners of your triangle. Keeping track of them now makes the expansion sequence much easier to follow.

Expand the Tree Shape
The second round begins adding width to the triangle. Each corner receives the increase sequence that allows the sides to grow while the three-cornered shape remains recognizable.
Round 2: Ch 3, then work 2 dc into the first corner space. In the next ch-1 corner space, work 3 dc, ch 1, 3 dc. Repeat the same (3 dc, ch 1, 3 dc) sequence in the remaining corner space. Sl st to the top of the starting chain to close the round.
The corner sequence is what controls the shape here. Rather than adding stitches randomly along the sides, the extra clusters are concentrated at the corners so the tree continues expanding outward as a triangle.

Continue Building the Tree
The tutorial continues the tree body by repeating the same corner-expanding principle until the tree reaches the desired size.
For each additional round, continue using the established granny-triangle sequence, working the corner increase into each corner space so the three points remain evenly distributed.
Shape Guide: As the tree grows, check that the three corner areas are still easy to identify. If one corner becomes difficult to find, pause before continuing; the next round depends on those spaces being correctly placed.
Continue adding rounds until the tree body reaches the size you want, keeping the same corner-expanding sequence throughout.

Add the Trunk and Decorative Details
Once the main triangular tree body is complete, the lower center needs to be located before adding the trunk detail. The slip stitches help move the working yarn into the correct starting position without adding extra height to the tree.
Positioning: Make 2 sl sts to carry the yarn over to the appropriate starting point, typically the center bottom space where the trunk will be placed.
Trunk/Detail Sequence: Ch 4, then work 3 tr into the designated space. Ch 4, make 1 sl st, and then ch 4.
This sequence creates the decorative addition shown in the tutorial, including the star-like or trunk detail that finishes the tree shape.
Placement Check: Look at the tree from the front before fastening off. The added detail should sit against the center of the triangular tree rather than pulling noticeably toward one side.

Keep the Back Neat
The tree is small, so loose yarn ends can become especially visible on the back. Use a yarn needle to weave in all remaining ends carefully.
Work the needle through the back of the crochet rather than across the front surface, keeping the front of the tree clean and uncluttered.
If you added multiple colors for the star or trunk, finish each end before attaching the hardware so there are fewer loose tails to manage afterward.
Attach the Keychain Ring
Once the crochet is completely finished, attach the keychain ring to the very top point of the Christmas tree. If your decorative star extends to the top, attach the ring through the top of the star instead.
Make sure the ring is secured firmly enough to withstand regular handling. The attachment point should pass through a stable section of crochet rather than a loose edge or isolated loop.
The finished tree can now be carried as a seasonal keychain or used as a miniature Christmas ornament, depending on how you choose to display it.

Turn the Tree Into Your Own Holiday Style
The triangular base gives you a simple shape to customize without changing the basic crochet structure. Traditional green, yellow, and brown make the tree instantly recognizable, while colorful beads can turn the surface into a tiny decorated Christmas tree.

For a little extra sparkle, carry metallic thread alongside the acrylic yarn as you work the tree body. Even a small amount of shimmer can make the 3–4 inch tree stand out when it catches the Christmas lights.