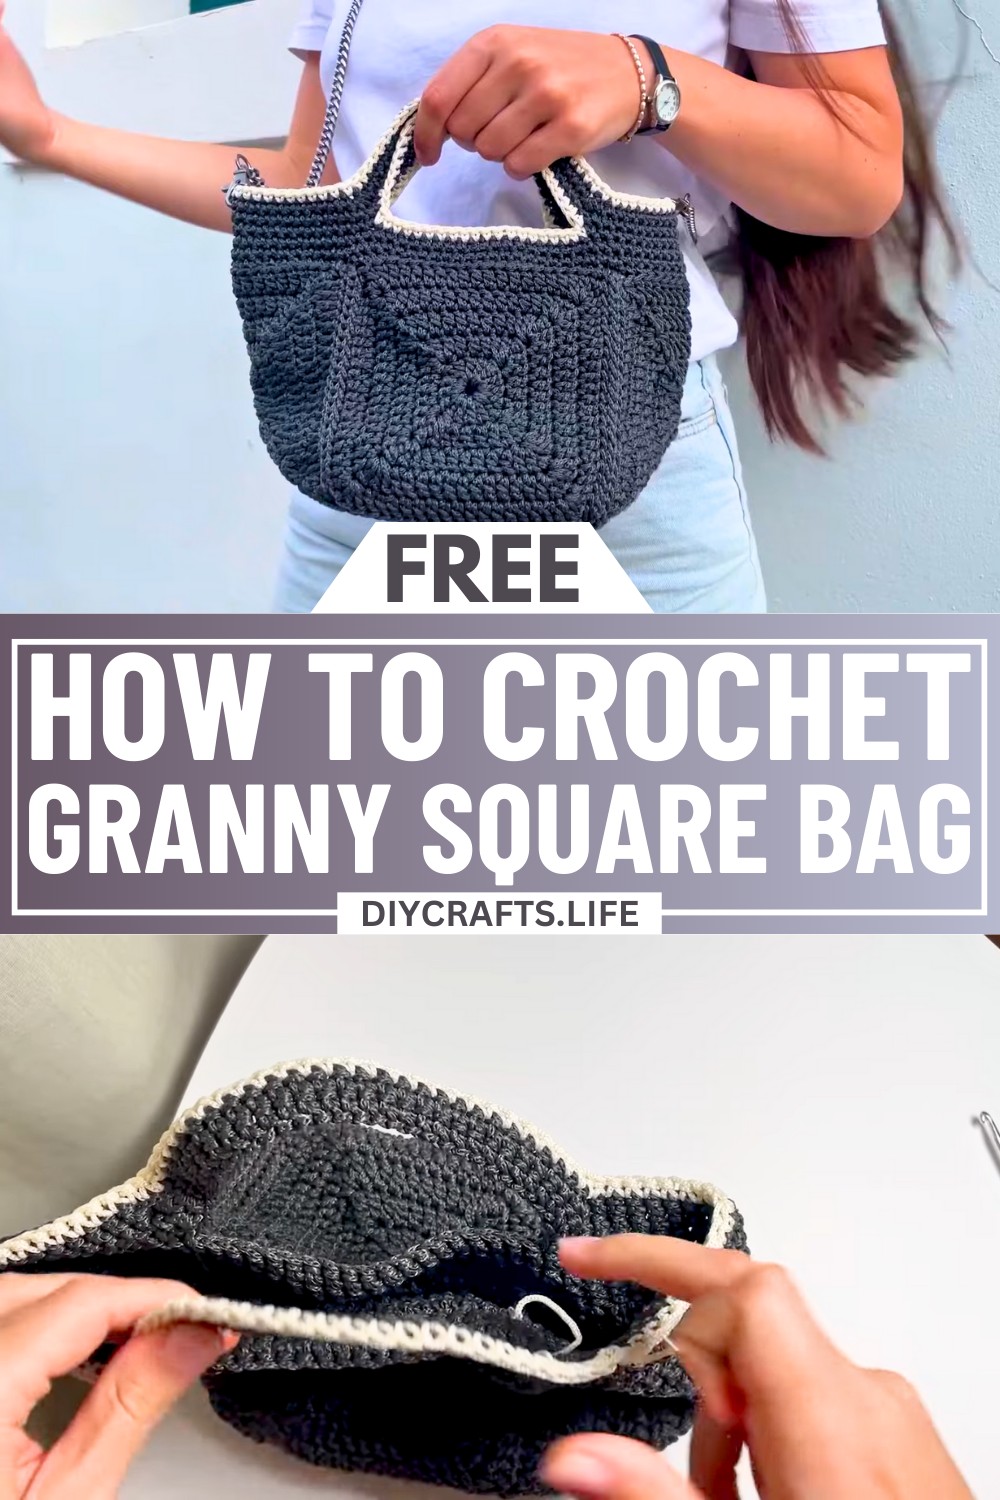
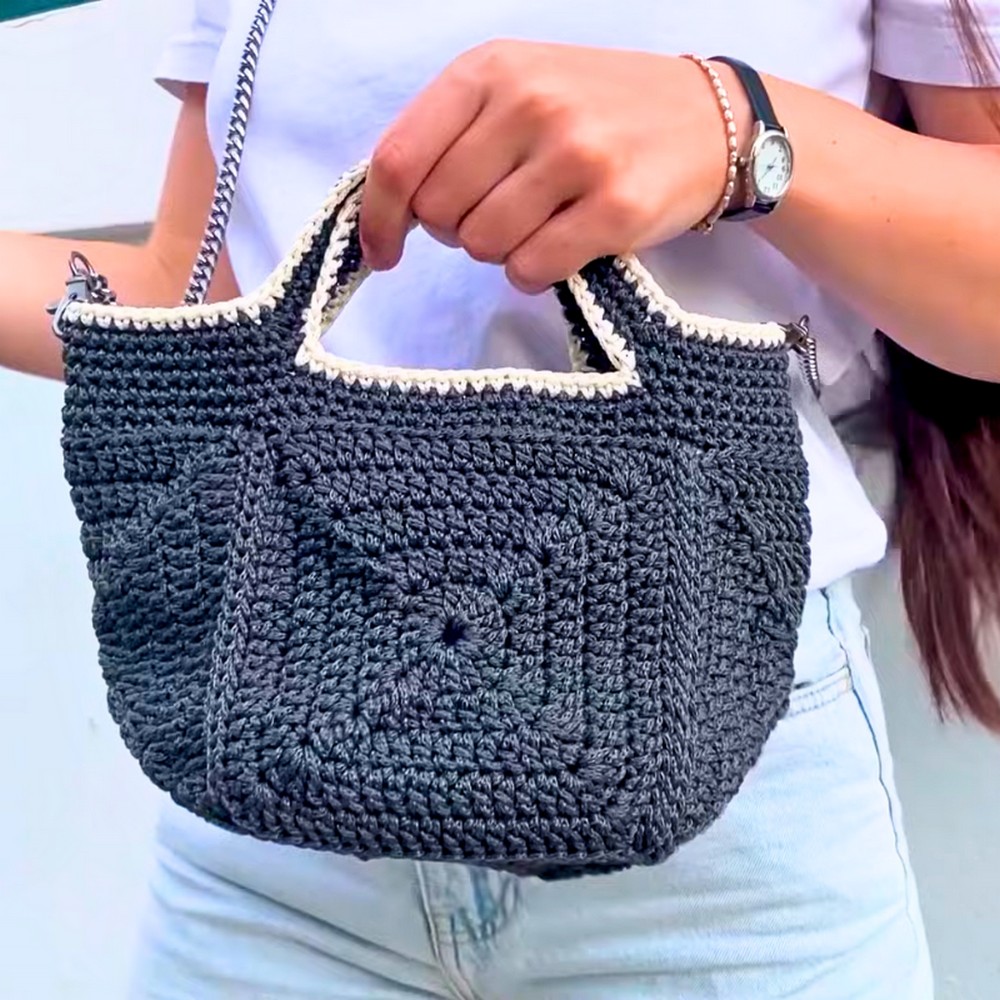
Make your everyday accessories a true work of art with a stylish twist! This crochet granny square bag is the perfect blend of vibrant charm and practical design. Its timeless patterns are brought to life with bright colors and textures, creating a bold, eye-catching accessory that pairs effortlessly with any outfit.
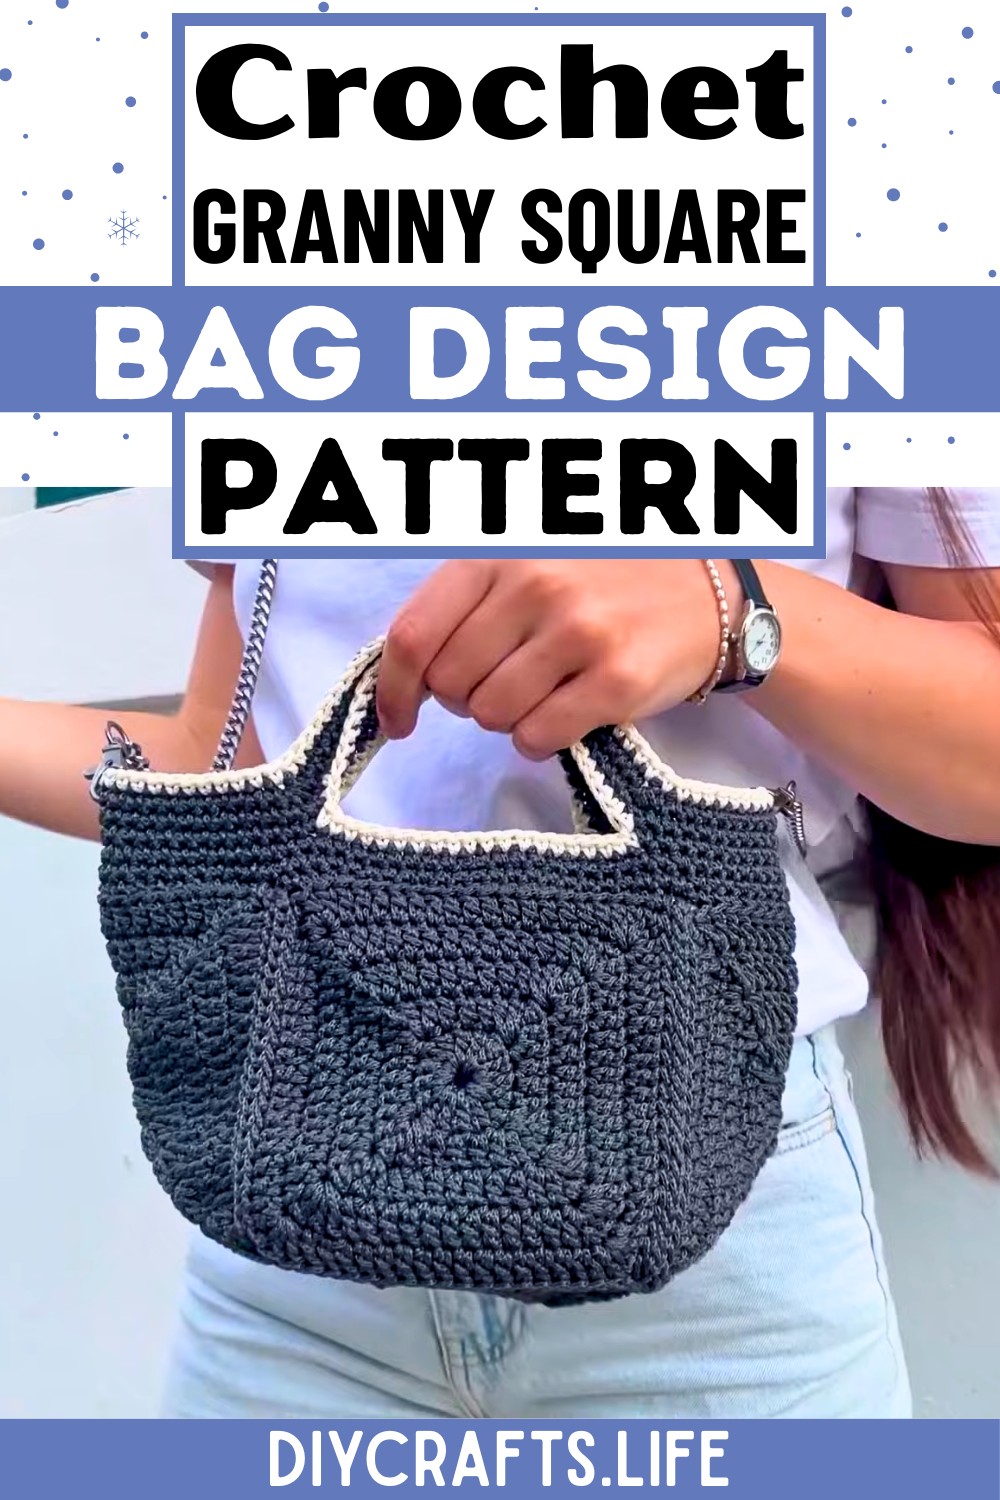
This design reimagines the classic granny square by transforming it into a trendy, functional bag. With its unique geometric layout, sturdy stitching, and customizable size, this bag is more than just an accessory—it’s a statement piece. Whether you’re heading to the market, a casual gathering, or just want something fun and handmade, this bag combines creativity and everyday convenience in the most beautiful way.
Credit madebymara
Required Materials
To make the Crochet Granny Square Bag, you will need:
- Yarn of your choice – The tutorial uses Mac Yarn.
- Crochet hook – Size 4 mm is recommended for Mac Yarn.
- Tapestry/Blunt needle – For sewing and weaving in loose ends.
- A pair of scissors.
- Optional stitch markers – Useful for marking important stitches, particularly when attaching the squares or handles.
Important Notes
- Magic Circle: The project begins with a magic circle, which is an essential technique for creating closed circular spaces in crochet.
- Treble and Double Crochets: Knowing the difference between treble (double treble in some crochet terminology) and double crochet stitches is critical for shaping the granny square's corners and edges.
- Consistency in Loops: When attaching squares or working on the bag's brim and handles, always work into the back loops only for clean edges.
- Corners for Granny Square: Each corner of a granny square contains 2 double crochets, 1 treble crochet, and 2 more double crochets in the same stitch to maintain the shape.
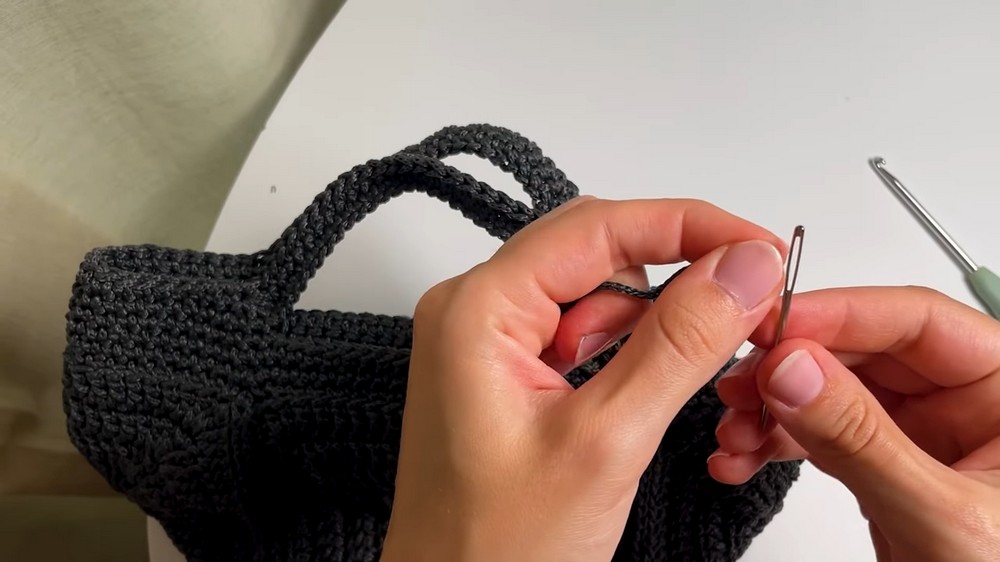
- Weaving Ends Securely: After finishing the bag, hiding and weaving in loose ends securely will ensure a polished look and prevent unraveling.
- Handle Customization: The bag handle length can be adjusted based on your preference, simply by creating additional chains for the desired handle size.
Step-by-Step Instructions
Part 1: Making a Granny Square
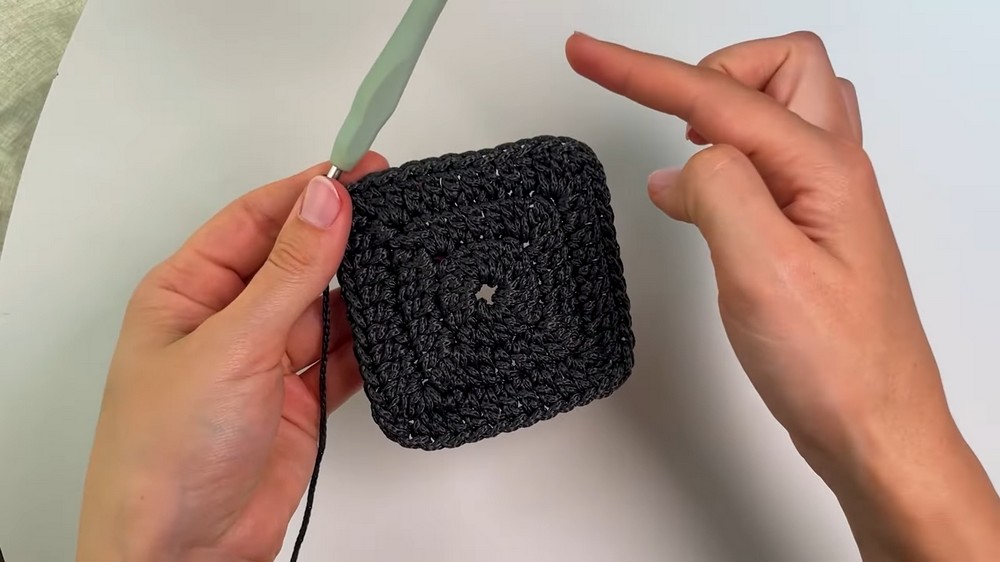
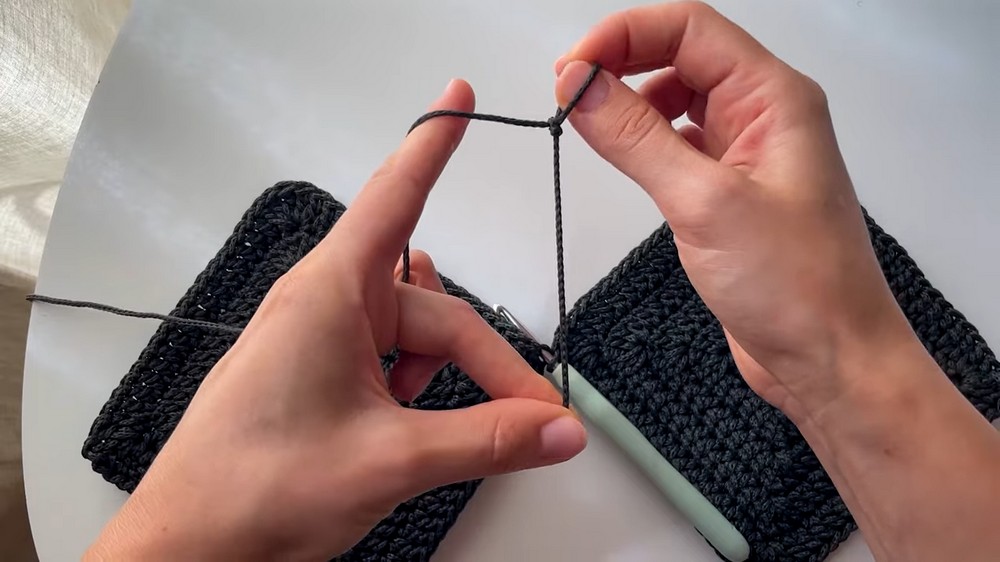
- Start with a Magic Circle:
- Wrap the yarn around your first two fingers to create an "X."
- Insert your hook under the bottom yarn, yarn over the top and twist. Pull up a loop to form your first chain.
- Chain 4: These 4 chains act as the first treble crochet for the corner stitches.
- Work the Center of the Square:
- After chaining 4, perform 3 double crochet stitches into the magic circle.
- Add another treble crochet to create a corner. Follow with 3 more double crochets and then another treble crochet.
- Repeat this pattern (3 double crochets + 1 treble crochet) until the magic circle forms a square.
- Close the Square:
- Pull the tail of the magic circle tightly to close it.
- Slip stitch into the 4th chain of the initial chain-4 created to connect the square.
- Building Additional Rounds:
- Always start a new round by chaining 4 (represents the first treble crochet at the new corner).
- At each corner, you must add 2 double crochets, 1 treble crochet, and 2 double crochets in the same stitch, while maintaining double crochets along the sides between the corners.
- Repeat this process as necessary until the square reaches the desired size.
- Once the square is complete: Bind off the yarn, leaving a tail for weaving, and secure loose ends. The tutorial creates squares that are 14x14 cm with 5 rounds total.
- Create More Squares: You will need 5 granny squares in total: one for the base and four for the sides of the bag.
Part 2: Attaching the Granny Squares
- Line up two squares you wish to attach, placing them with the right sides facing out.
- Use your hook to work slip stitches through the back loops only of both squares to join them. Continue this process for all four sides, ensuring a neat and sturdy connection.
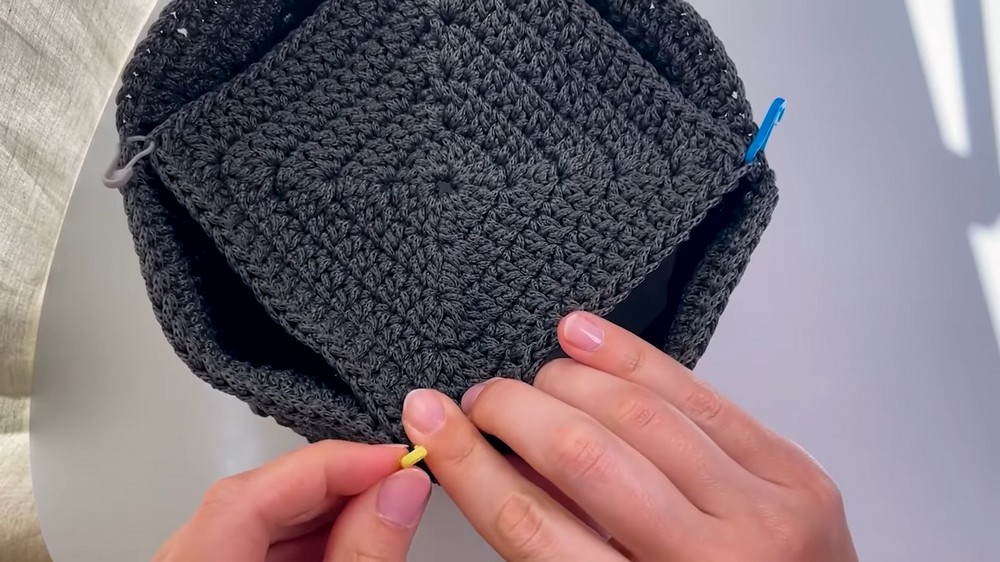
- To attach the base, use stitch markers to secure the bottom square to the sides. Attach it using the same slip stitch method, again working into the back loops.
- At the corners of the bag, ensure you insert through the entire stitch (rather than just the back loops) to avoid gaps at the corners. Once complete, bind off, weave in, and cut any excess yarn.
Part 3: Creating the Brim
- Start at any corner: Create a slip knot and attach it to the hook.
- Chain 2 (to account for bumpy edges) and work single crochets across the brim, inserting your hook into the back loops only to maintain a clean look.
- At the end of each row, finish with a slip stitch. Then, chain 1 and continue with single crochets for the next round. In these rounds, work through the entire stitch, rather than just the back loops.
Part 4: Adding Bag Handles
- Determine the handle placement using stitch markers to mark where each handle should start and end.
- In the marked stitch, begin with a single crochet, then chain as many stitches as required for the handle length. Attach the chain to the opposite marker with a single crochet.
- Continue single crocheting along the brim and repeat this process for the second handle.
- Once both handles are attached, single crochet along the chain "back loops" to add structure. Finish with a slip stitch at the end of the round.
Part 5: Finishing Touches
- For the edges of the handles, leave three stitches before the end of each handle and work three single crochets together to create a rounded edge (decrease stitch).
- Work single crochets on both sides of the handles in the rounds above to improve the handle's strength and appearance.
- Finish with a slip stitch at the end of the handles and cut the yarn, forming a secure knot.
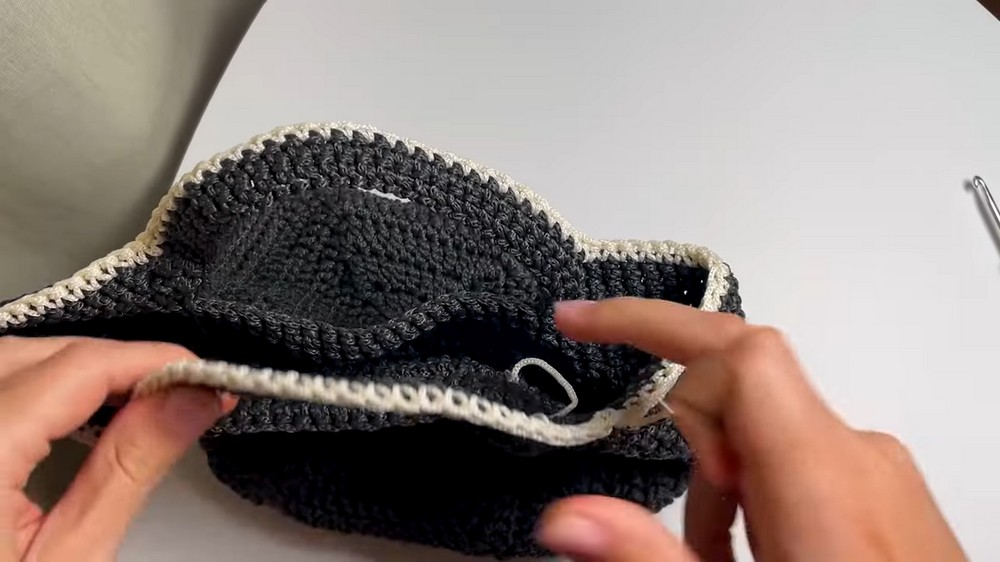
Optional (Adding Extra Color)
- To add an additional layer of color, follow the same brim process, starting with a slip knot and working single crochets in back loops across the brim. This step can also be done for the inner part of the handles as decorative detailing.
Final Steps
- After completing all the squares, handle, and colors, ensure all tail ends are woven in and secured to prevent unraveling.
- Flip the bag to its right side (if inside out). Your Crochet Granny Square Bag is now complete!