
Here you’ll find a tiny crochet avocado hair clip with a bright face, stitched limbs, and a neat felt backing, making a playful accessory from simple crochet pieces.
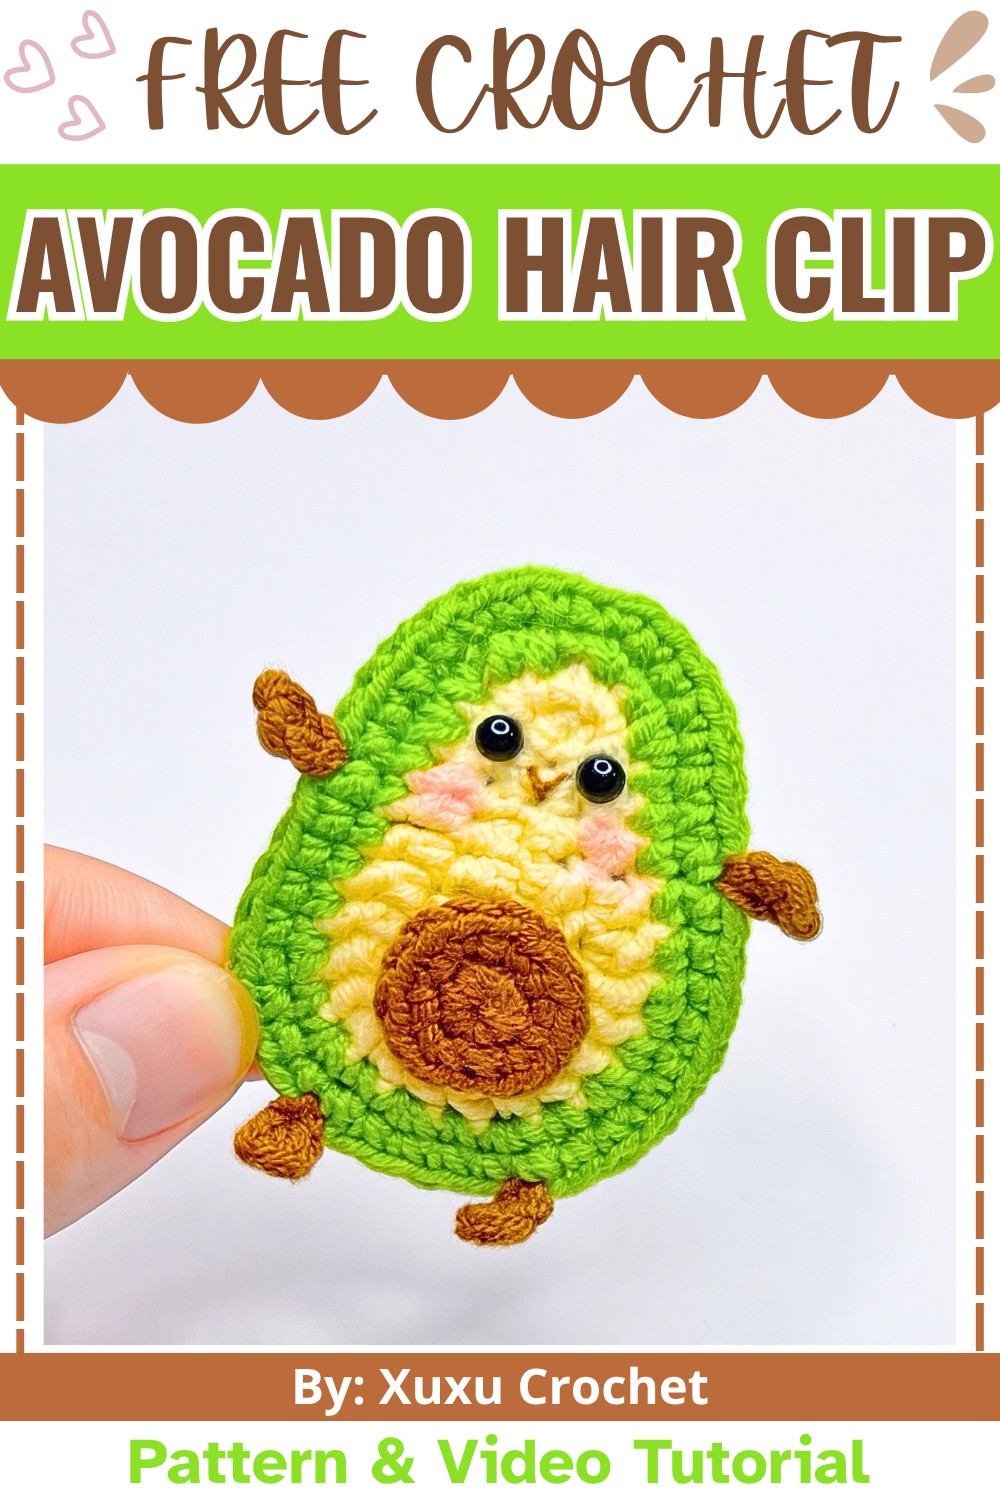
Tiny fruit accessories are an easy way to turn crochet skills into something useful and playful. This avocado design stays compact enough for a 5 cm snap clip while combining shaping, color changes, and small character details in one piece.
This crochet tutorial covers the avocado body, green outer edge, brown pit, little arms and legs, then shows how to add facial details and attach the finished crochet piece to a snap hair clip. Simple placement and finishing guidance help keep the accessory neat from front to back.
Credit Xuxu Crochet
Materials & Tools
- Yarn: Baby yarn in light yellow for the inner body, green for the outer peel, and brown for the pit, arms, and legs.
- Crochet Hook: 2.0 mm.
- Hair Clip: 5 cm metal snap hair clip.
- Safety Eyes: Two 4 mm safety eyes, or small black beads or embroidered eyes.
- Felt or Fabric: Matching material for the backing.
- Adhesive: Hot glue gun or fabric adhesive.
- Yarn Needle: For weaving in ends and finishing.
- Scissors: For yarn and felt trimming.
- Stitch Markers: For keeping track of designated stitches.

Finished Size & Customization
Finished avocado measures approximately 5 cm long, making it suitable for standard snap hair clips.
For extra character, add rosy pink cheeks with blush or pink thread beside the smile. Slightly changing yarn weight or hook size can also create a larger or smaller plush accessory.
Pattern Abbreviations & Terminology
- ch: Chain stitch
- sl st: Slip stitch
- sc: Single crochet
- hdc: Half double crochet
- dc: Double crochet
- inc: Increase - work 2 stitches into the same designated stitch
- st(s): Stitch(es)
- (...) x N: Repeat instructions inside parentheses the specified number of times

Step-by-Step Crochet Instructions
Step 1: Start the Avocado Body
Using light-yellow yarn, make a slip knot and chain 8 stitches.
Skip the first chain from the hook. Work into the back bumps of the remaining 7 chains. This gives the starting edge a cleaner appearance and helps prevent loose gaps.
Work:
- 1 sc in the second chain and place a stitch marker in this first sc.
- 1 sc in the 3rd chain.
- 1 sc in the 4th chain.
- 1 hdc in the 5th chain.
- 1 dc in each of the next 2 chains.
In the final chain, work 6 dc into the same chain.
Teaching point: These 6 dc create the rounded bottom curve that gives the avocado its characteristic wider base.
Step 2: Work Back Along the Opposite Side
Continue around the opposite side of the foundation chain.
While working, trap the starting yarn tail beneath your stitches so it becomes woven in rather than remaining loose.
Work:
- 1 dc in each of the next 2 stitches.
- 1 hdc in the next stitch.
- 1 sc in each of the final 3 stitches.
Remove the stitch marker, then make 1 sl st into the first stitch to join.
Chain 1 to prepare for the next row.
Shape check: The first row should now resemble a narrow avocado outline with a pronounced rounded bottom.
Step 3: Widen the Lower Curve
For Row 2, begin with chain 1.
Work 1 inc in each of the first 2 stitches.
Continue with:
- 1 sc in next stitch.
- 1 hdc in next stitch.
- 1 dc in each of next 2 stitches.
- 2 dc in each of the next 6 stitches.
- 1 dc in each of next 2 stitches.
- 1 hdc in next stitch.
- 1 sc in next stitch.
- 1 inc in each of the final 2 stitches.
The six increase clusters along the bottom curve expand the rounded section without changing the narrower upper shape.

Step 4: Change From Yellow to Green
Begin Row 3 by changing to green yarn at the final joining stitch.
Insert hook into the joining stitch, yarn over with green yarn, and pull it through the stitch and loop on hook to complete the slip stitch.
Chain 1 with green.
As you continue, lay both yarn tails across the top of your stitches so the new stitches enclose them.
Helpful tip: Keep the hidden tails positioned along the same direction as your stitches. This makes them easier to cover neatly and reduces loose ends at the back.
Step 5: Shape the Green Peel
Work the opening section of Row 3:
- 1 sc in first stitch.
- 1 inc in next stitch.
- 1 sc in next stitch.
- 1 inc in next stitch.
- 1 sc in each of next 4 stitches.
Then repeat: (1 sc, 1 inc) × 6
After the repeated increases, work:
- 1 sc in each of next 4 stitches.
- 1 sc in next stitch, 1 inc in next.
- 1 sc in next stitch, 1 inc in final stitch.
Trim any excess hidden yarn tails if necessary.
The increases should follow the avocado outline rather than making the green border excessively loose.
Step 6: Complete the Outer Border
For Row 4, slip stitch into the first stitch to join, then chain 1.
Work 1 sc into every stitch around the entire outer perimeter.
This final green round gives the avocado a clean peel-colored border and evens out its outer edge.
Fasten off, leaving a short tail.
Thread the tail onto your yarn needle and weave it seamlessly across the first stitch to close the round neatly. Secure the remaining end on the back.
Result check: The finished body should have a rounded lower section, narrower upper section, and continuous green border.

Step 7: Make the Brown Pit
Switch to brown yarn.
Create a magic ring and chain 1.
Work 6 sc directly into the magic ring, then pull the starting tail firmly to close the center.
For Round 2, slip stitch into the first stitch to join and chain 1.
Work 1 inc in every stitch around, giving you 12 sc total.
Fasten off, leaving a longer tail for attachment.
Pull the magic ring closed again and knot the two yarn tails securely on the back.

Step 8: Add the Tiny Arms
Make 2 arms using brown yarn.
Find an attachment point along the side of the avocado, roughly one row below the future eye position.
Pull brown yarn through the selected stitch and chain 3.
Skip the first chain from the hook, then work:
- 1 sc in the second chain.
- 1 sl st in the final chain.
- 1 sl st back into the same base stitch where the yarn was attached.
Fasten off and pull the tails toward the back.
Weave the ends securely inside the body.
Repeat on the opposite side so both arms sit symmetrically.
Step 9: Add the Legs
Position the legs near the lower base, leaving approximately 8 stitches between the two attachment points.
Attach brown yarn and chain 3.
Skip the first chain, then work:
- 1 sc in the second chain.
- 1 sl st in the final chain.
- 1 sl st into the base stitch to secure the limb.
Cut the yarn and pull the tails toward the back to weave them in.
Repeat for the second leg.
Placement check: Both feet should sit at similar heights so the avocado character looks balanced when viewed from the front.
Step 10: Add the Face and Pit
Position the two 4 mm safety eyes on the upper light-yellow section.
Keep their spacing even before securing them.
Using a single strand of brown thread, embroider a small, neat smile centered between and slightly below the eyes.
Now position the brown pit in the center of the yellow body and glue or sew it securely in place.
Helpful tip: Check the complete face before permanently securing the pit. Even small adjustments to eye or smile placement can change the expression.

Step 11: Prepare the Felt Backing
Lay the completed avocado flat on matching felt.
Trace around its outline and cut the felt to the same general shape.
Fold the felt in half and make a small horizontal slit through its center.
Slide the top mechanism of the 5 cm metal snap hair clip through this opening so the clip mechanism comes through securely.
Check the backing: The clip should sit centered behind the avocado rather than leaning toward either side.

Step 12: Attach the Hair Clip
Apply hot glue or fabric adhesive generously across the back of the crocheted avocado.
Press the felt-backed hair clip firmly against the glued surface.
Allow the adhesive to dry completely before trimming.
Once secure, use precision scissors to remove excess felt around the edges so the backing stays hidden behind the clean crochet border.
Step 13: Check the Finished Accessory
Before wearing or gifting the avocado hair clip, check:
- Safety eyes are firmly secured.
- Smile is centered.
- Brown pit is attached securely.
- Arms and legs are evenly positioned.
- Felt does not extend beyond the crochet border.
- Snap clip opens and closes freely.
- Backing is firmly attached.
The finished crochet avocado is now ready to wear or give as a small handmade gift.