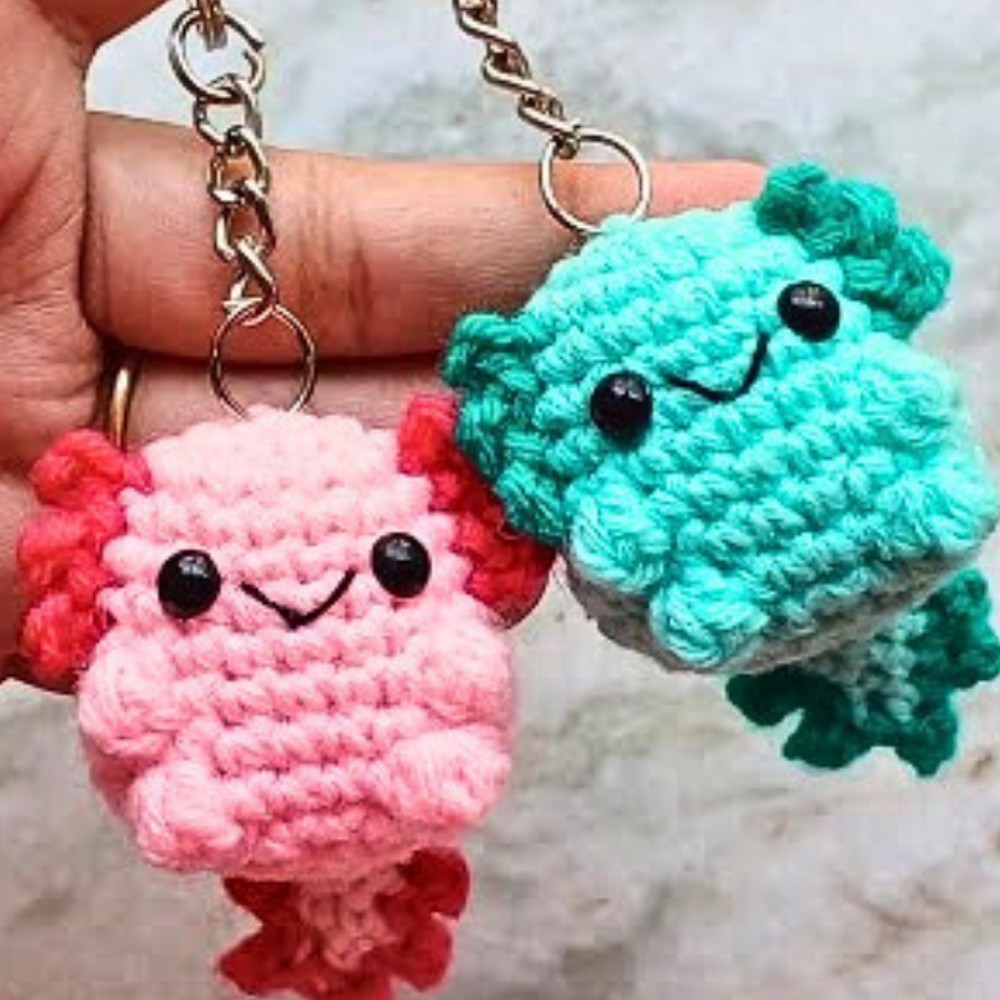
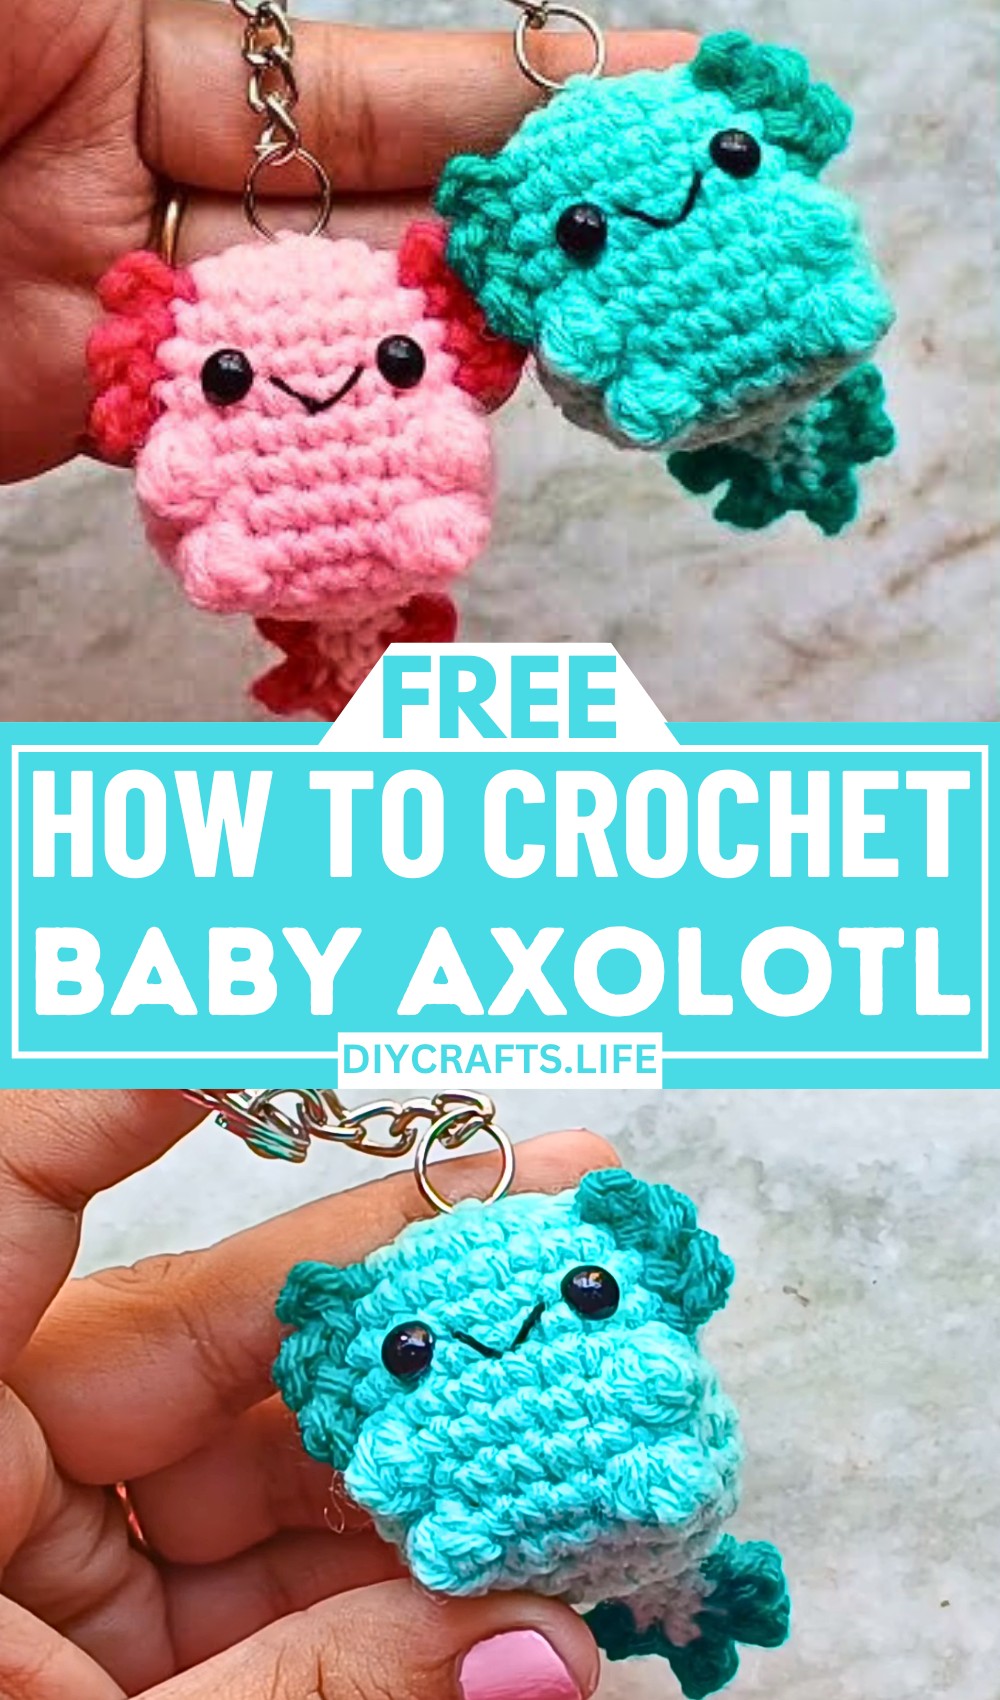
Create a charming baby axolotl amigurumi with playful embroidered details, delicate gills, and bubble-stitch arms and legs! Sized perfectly for keychains, this adorable crochet project is beginner-friendly with easy-to-follow steps. Its minimal sewing and magical design make it ideal for gifting or as a personal keepsake.
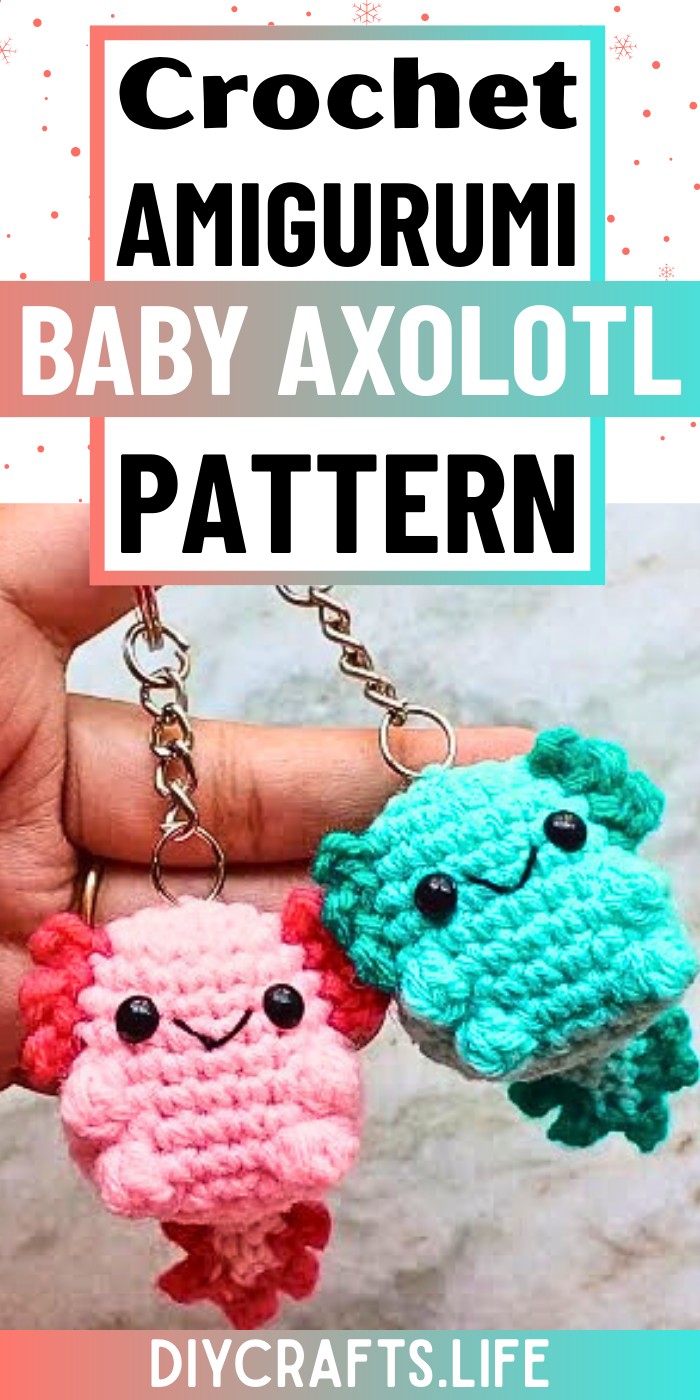
This baby axolotl amigurumi stands out with its unique gills, tiny bubble-stitch limbs, and versatile design. Made with durable, tight stitches and 4 mm safety eyes, it’s perfect as a keychain accessory or collector's item. Crafted to last, it offers a fun balance of cuteness and practical usability.
Crochet Baby Axolotl
Crocheting the axolotl is an enjoyable and approachable process. From magic circles to invisible decreases, the tutorial guides you through each step in creating the sturdy body, lively gills, and detailed smile. Perfect for beginners, the manageable size and minimal sewing make this a fun and quick project.
Credit elisi sevdası
Materials and Preparation
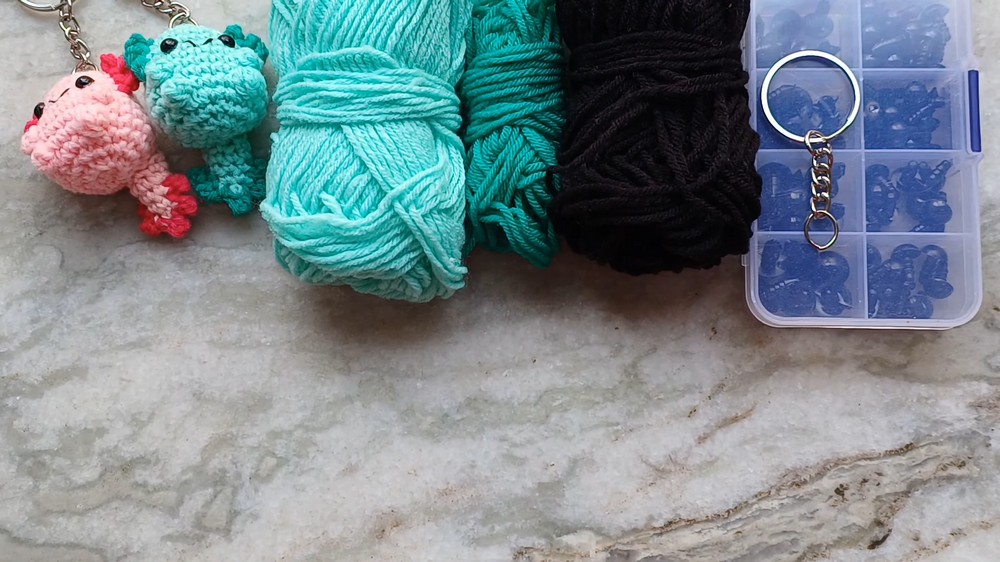
To create this adorable baby axolotl amigurumi, you will need the following:
- Yarn:
- Light and dark shades of the same color for the body and gills (4-ply recommended).
- Black yarn for embroidering the smile.
- Hook:
- 3 mm crochet hook (smaller than the recommended 4 mm for 4-ply yarn to create tight stitches).
- Safety Eyes: 4 mm safety eyes.
- Keychain Accessories: Blank keychain and jump rings (optional, for a keyring).
- Stuffing: For filling the body of your amigurumi.
- Additional Tools:
- Yarn needle.
- Stitch markers (paperclips or contrasting yarn can also be used).
- Scissors.
Abbreviations and Notes
Below are the crochet abbreviations you'll encounter in the pattern:
- CH: Chain
- SC: Single Crochet
- INC: Increase (two single crochets in one stitch)
- DEC: Decrease (two stitches combined into one)
- BLO: Back Loop Only
- MC: Magic Circle
- BUBBLE: Bobble stitch (a cluster of partial DC worked into one stitch)
Notes and Tips:
- Continuous Rounds (No Joining): This amigurumi is worked in continuous rounds, requiring a stitch marker to mark the last stitch in each round.
- Tight Stitches: Use a smaller crochet hook to prevent stuffing from showing through the fabric.
- Shaping: Push and adjust bubble stitches and other details as you go for the best appearance.
- Sewing Only for Tail: Minimal sewing is needed in this pattern! The tail is the only piece requiring assembly.
Gauge, Approximate Size, and Pattern Notes
- Gauge: Not critical for this project, but tight stitches are recommended to keep stuffing in place.
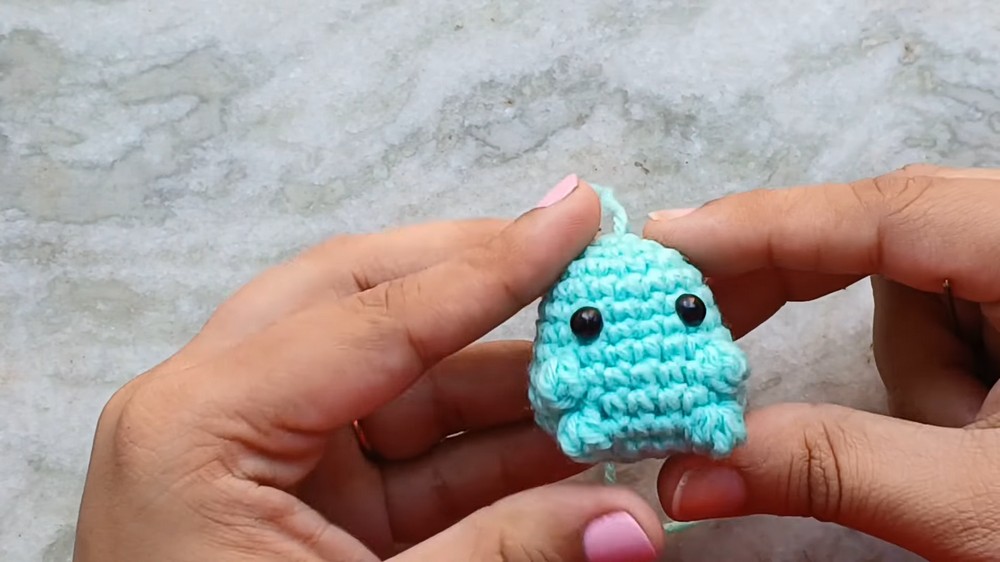
- Finished Size: Approximately 3–4 inches tall, small enough to use as a decorative keychain or to sit on a shelf.
- Special Techniques:
- Magic Circle
- Bobble Stitch (for limbs and decorative gills)
- Invisible Decrease (to seamlessly shape the axolotl’s body)
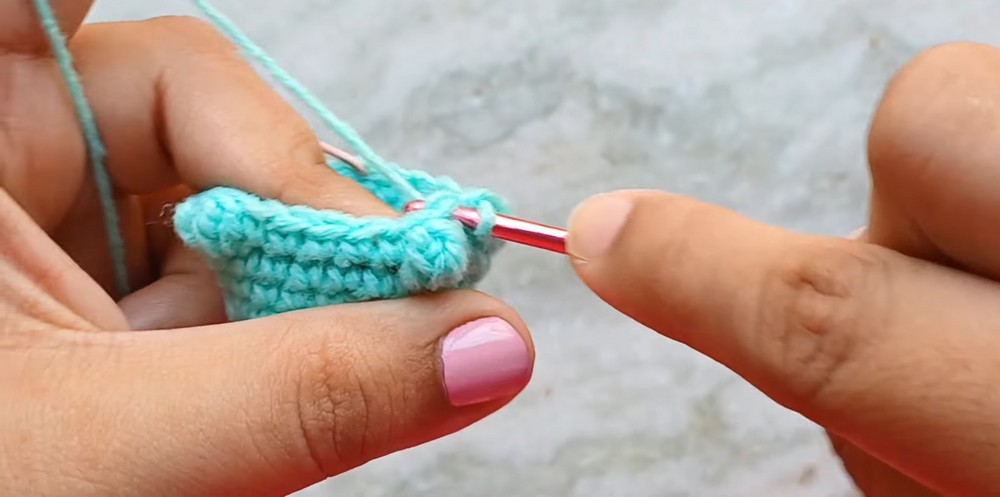
Step-by-Step Pattern
Body
- Round 1 (MC): Create a Magic Circle. CH 1 (does not count as a stitch), then make 6 SC into the circle. Pull the tail to tighten. (6 SC)
- Round 2: INC in each stitch (2 SC in every stitch). (12 SC)
- Round 3: [SC, INC] in alternate stitches. Repeat this pattern around. (18 SC)
- Round 4: SC in each stitch around. (18 SC)
- Round 5: [SC in the next 5 stitches, INC in the next] – repeat three times. (21 SC)
- Round 6: SC in each stitch around. (21 SC)
- Round 7: [SC in 6 stitches, INC in the next stitch] – repeat three times. (24 SC)
Adding Face Details
- Insert Safety Eyes: Place 4 mm safety eyes between rounds 5 and 6. Position the eyes about 3 stitches apart, aligned with the arms. Push in the safety backings.
- Embroider the Smile: Using black yarn, embroider a smile between rounds 6 and 7, just under the eyes. Create a “straight stitch” smile first, then shape it by tucking the yarn at the middle of the mouth to create a curve. Hide the yarn ends inside.
Arms (Bubble Stitch):
- Round 8: SC in the first 8 stitches. In the next stitch, make a bubble stitch:
- Yarn over, insert into the stitch, pull up a loop. (3 loops on hook).
- Yarn over, pull through 2 loops, leaving 1 loop.
- Repeat the process 3 more times into the same stitch. You’ll be left with 5 loops on the hook. Yarn over and pull through all loops to complete the bubble.
- SC into the next stitch to “push out” the bubble.
Continue SC into the next 5 stitches, create another bubble stitch, then SC into the remaining stitches to complete the round. (24 SC, including 2 bubbles).
Legs (Bubble Stitch):
- Round 10: SC in the first 9 stitches, then make a bubble stitch. SC in the next 4 stitches, make another bubble stitch, then SC in the remaining 9 stitches. (24 SC, including 2 new bubbles).
Decreasing for the Head:
- Round 11: [SC in 2 stitches, INV DEC across the next 2 stitches] – repeat all the way around. (18 SC)
- Round 12: [SC in 1 stitch, INV DEC] – repeat all the way around. (12 SC)
Add Stuffing: Firmly stuff the body, but don’t overstuff. Push the stuffing down evenly with your fingers.
- Round 13: Decrease in every stitch across the round. (6 SC)
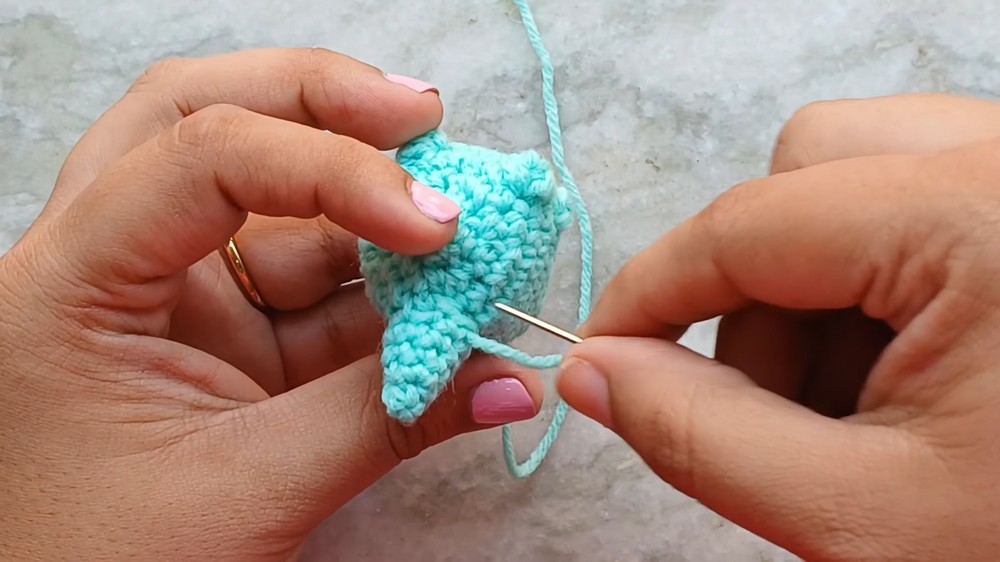
Cut a tail, then fasten off. Weave the tail through the front loops of the remaining stitches to close the hole. Pull tight and weave the tail into the body.
Tail
- Round 1 (MC): Make an MC, then make 4 SC into it. (4 SC)
- Round 2: [SC, INC] in alternate stitches around. (6 SC)
- Round 3: SC in each stitch around. (6 SC)
- Round 4: SC in the first 2 stitches, INC in the next 2 stitches, then SC in the last 2 stitches. (8 SC)
- Round 5: SC into all stitches around. (8 SC)
Assembly:
- Lightly stuff the tail, then position it at the back center of the body. Make sure the curve of the tail is upright. Using the long tail from the tailpiece, sew the tail securely to the body. Hide excess yarn in the body.
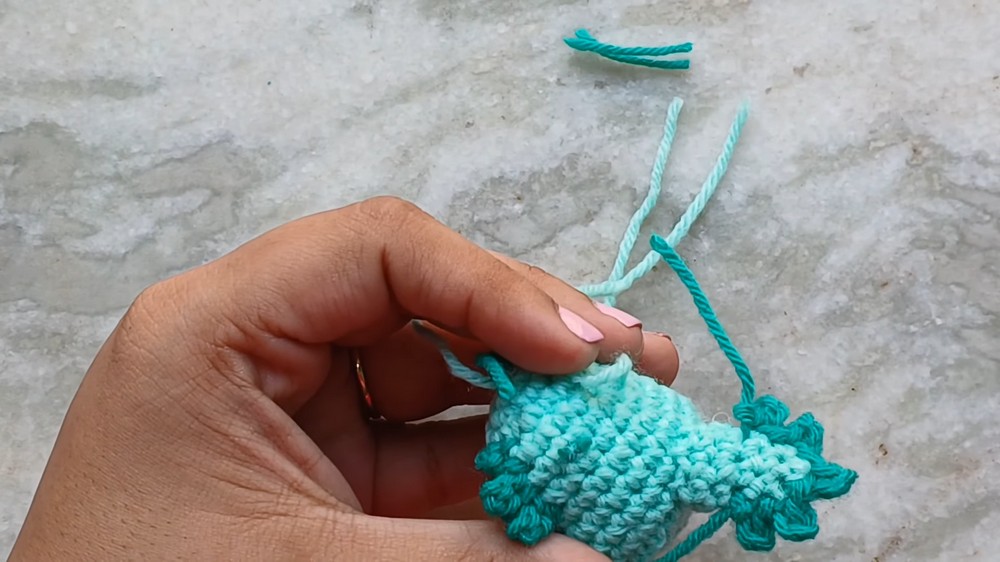
Gills (Using Dark Yarn)
- Slip stitch between rounds 6 and 7, one stitch away from the safety eye.
- Chain 3, then slip stitch into the first chain to create a small picot loop.
- Move up to the next row and slip-stitch above the first gill, keeping the rows evenly spaced. Create 3 gills on each side of the face.
- Repeat on the other side to ensure symmetry.
Finishing Touches
- Keychain Attachment (Optional): Thread the yarn tail at the center top of the head onto a yarn needle. Pull it through the keychain jump ring, back into the head, and secure tightly with several knots.
- Weave in Ends: Securely weave in and hide all yarn tails neatly inside the body.
- Final Check: Shape the arms, legs, tail, and gills. Add a bit of fine adjustment if necessary.
Pattern Question
Question: Can I use a larger crochet hook than the recommended 3 mm?
Answer: Using a larger hook (like 4 mm) might make your stitches looser, allowing stuffing to show. For best results, stick to 3 mm for tight, neat stitches.
Conclusion
This crochet baby axolotl design combines whimsical charm with easy-to-learn techniques. Whether as a keychain, gift, or decoration, this project’s crisp details and beginner-friendly approach make it as entertaining to create as it is to own!