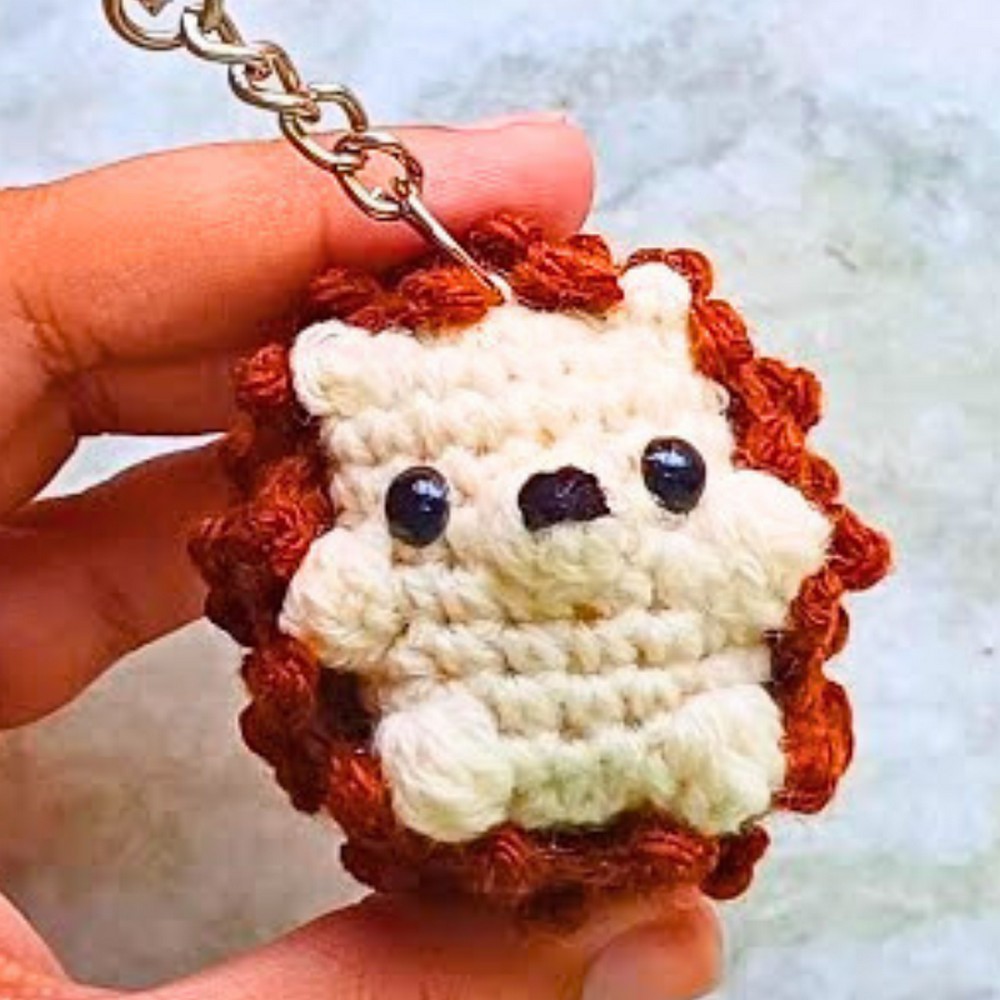
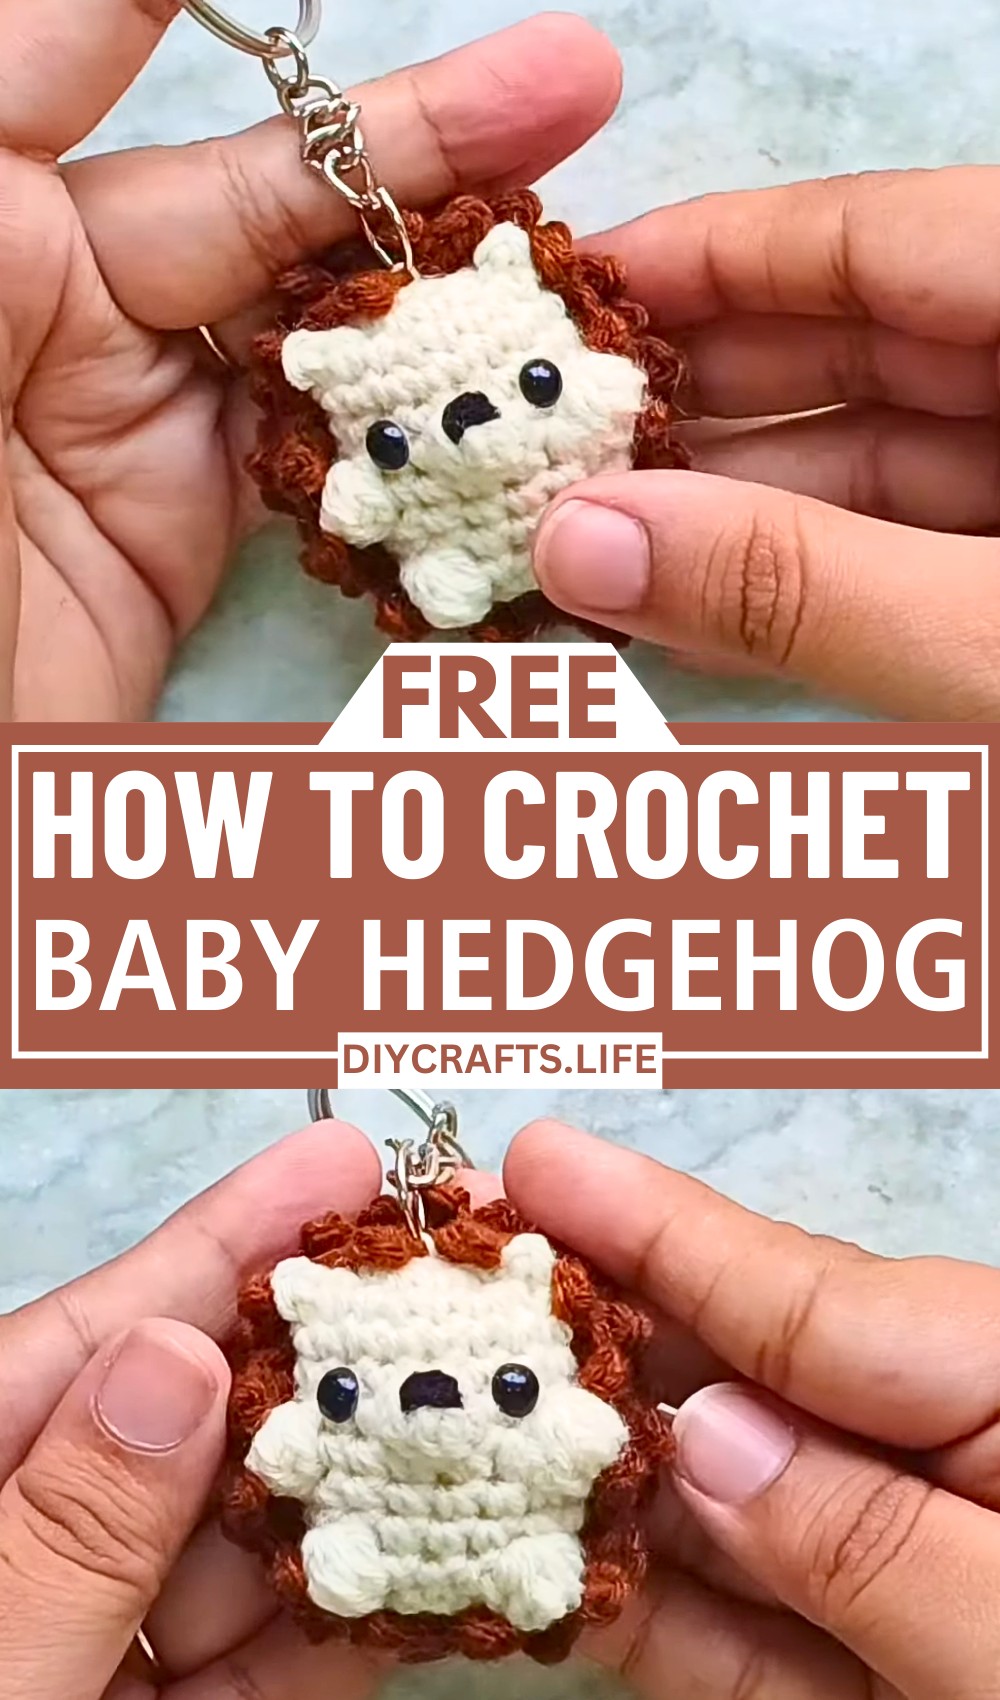
Create your very own baby hedgehog amigurumi! This adorable crochet design features charming, staggered spikes, a cute embroidered nose, and petite details like bubble-stitch arms and legs. Versatile and purposeful, it can be transformed into a keychain, perfect for gifting or personal use.

This baby hedgehog amigurumi excels as a handmade decoration, a soft shelf display, or a functional keychain. Crafted with tight stitches to prevent stuffing visibility, it features a textured, durable design and handcrafted spikes, making it a standout, practical, and highly appealing choice for amigurumi fans.
Crochet Baby Hedgehog Amigurumi
The tutorial guides you step-by-step through magic circles, stitch increases, bubble-stitch limbs, and embroidered noses. The spikes challenge your creativity with an elegant staggered design, keeping the crafting process engaging and fun. It’s rewarding for both beginners and experienced makers.
Credit elisi sevdası
Materials and Preparation
To crochet this adorable Baby Hedgehog Amigurumi, you’ll need the following materials:
Yarn:
- Beige yarn (for the body) – medium weight (Category 4 yarn)
- Brown yarn (for spikes) – medium weight (Category 4 yarn)
- A small amount of black yarn (for the nose embroidery)
Crochet Hook:
- 3 mm crochet hook (smaller than the recommended size to ensure tight stitches).
Additional Tools:
- 4 mm safety eyes.
- A keychain blank (optional if making a keychain).
- Stitch marker (or an alternative like a paper clip or a piece of contrasting yarn).
- Stuffing for amigurumi.
- Yarn needle.
- Scissors.
Abbreviations and Notes
Here are the crochet abbreviations used in this pattern:
- MC: Magic Circle
- SC: Single Crochet
- Inc: Increase (place 2 SC in the same stitch)
- Dec: Invisible Decrease (work into the front loops only)
- Sl St: Slip Stitch
- Ch: Chain
Important Notes:
- This amigurumi is worked in continuous rounds. Do not join rounds; use a stitch marker to mark the last stitch of each round to keep track.
- Use tight stitches to prevent stuffing from showing through.
Gauge, Approximate Size, and Pattern Notes
Gauge:
Gauge is not critical for this project, but it's recommended to use tight stitches for an amigurumi design.
Finished Approximate Size:
The finished hedgehog will be approximately 3–4 inches tall, depending on yarn tension.
Special Techniques:
- Popcorn Stitch/Bobble Stitch (for the nose, arms, and legs).
- Invisible decrease techniques are used to shape certain parts of the design.
- Magic circle foundation is required.
No need to create a gauge swatch, as amigurumi sizing is flexible.
Step-by-Step Crochet Pattern
PART 1: Crochet the Body
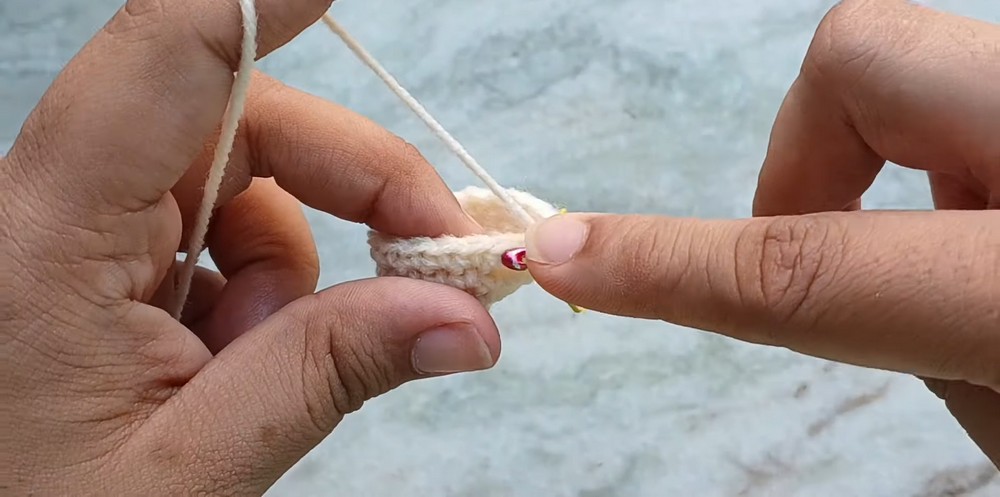
- Round 1: Begin with beige yarn and create a Magic Circle (MC).
- Chain 1 (this does not count as a stitch) and make 6 SC into the magic circle.
- Pull the tail to tighten the circle. [6 stitches]
- Round 2: Increase in every stitch. Place 2 SC in each stitch around. [12 stitches]
- Round 3: Work an alternating pattern: SC in the first stitch, then Inc in the next stitch. Repeat (SC, Inc) around. [18 stitches]
- Rounds 4–5: Work 1 SC in every stitch to maintain the stitch count. [18 stitches per round]
PART 2: Add the Details to the Body
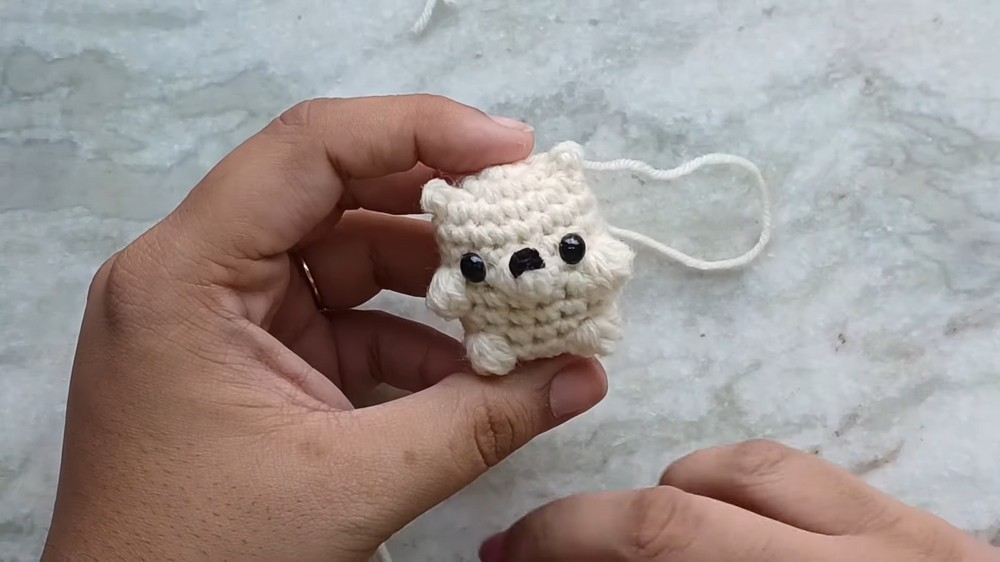
- Round 6 (Nose):
- SC into the first 9 stitches. In the 10th stitch, make a bobble stitch as follows:
- Yarn over, insert hook into the stitch, pull up a loop (3 loops on hook).
- Yarn over, pull through 2 loops. Repeat 5 more times, ending with 6 loops on the hook.
- Yarn over and pull through all 6 loops. Push the bobble stitch forward to form the nose.
- SC into the next 8 stitches. [18 stitches]
- SC into the first 9 stitches. In the 10th stitch, make a bobble stitch as follows:
- Round 7 (Arms):
- SC into the first 6 stitches. Make a bobble stitch in the 7th stitch.
- SC into the next 5 stitches, then make another bobble stitch in the following stitch.
- SC in the remaining stitches to complete the round. [18 stitches with two bobble arms formed]
PART 3: Add Safety Eyes
- Place safety eyes between Rounds 5 and 6, one stitch away from the nose. Attach backing to secure.
PART 4: Legs
- Round 10: SC 8 stitches, then make a bobble stitch in the 9th stitch. SC 3 stitches, make another bobble stitch, then SC 5 stitches to complete the round. [18 stitches]
PART 5: Close the Body
- Round 11: Begin decreasing. Work: 1 SC, then Dec (invisible decrease) over the next two stitches. Repeat this sequence around. [12 stitches]
- Stuff the amigurumi firmly at this point.
- Round 12: Decrease into every stitch around. [6 stitches]
- Fasten off and leave a long tail. Weave the tail through the front loops of the last round to close the hole securely.
PART 6: Spikes
- Use brown yarn.
- Round 1: Begin with a Magic Circle (MC) and make 6 SC into the magic circle. Tighten the circle. [6 stitches]
- Round 2: Work in Back Loops Only (BLO). Place 2 SC in each stitch around. [12 stitches]
- Round 3: Alternate SC and Inc in BLO. [18 stitches]
- Round 4: Alternate 2 SC and Inc in BLO. [24 stitches]
- Rounds 5–8: Work SC in BLO for each stitch around. [24 stitches per round]

Create Spikes in Front Loops:
- Make spikes using the leftover Front Loops from Rounds 1–8:
- Chain 3, turn your work, and slip stitch in the last two chains. Skip 1 stitch and slip stitch into the next stitch to attach.
- Repeat this pattern to make spikes for each front loop across the round.
- Stagger spike placement in the following rounds by skipping 2 stitches at the beginning of the new round before continuing.
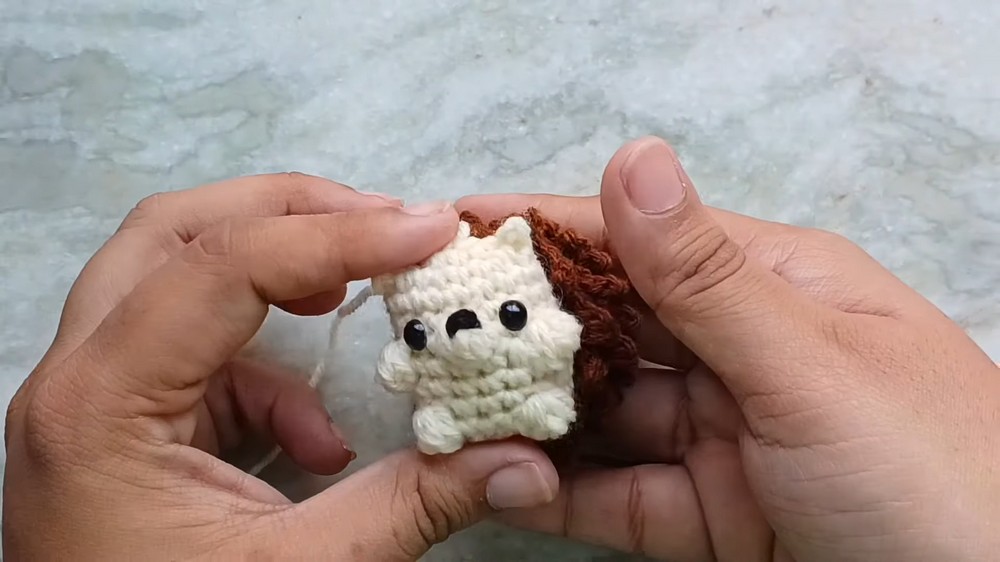
PART 7: Assemble the Hedgehog
- Align the brown spiked section to the beige body. Use a yarn tail to securely sew the pieces together.
- Embroider the nose using black yarn. Place stitches around the centre of the popcorn stitch for the nose. Tie off securely and hide ends.
- Add small beige ears by slip stitching into the designated stitch above the safety eyes. Chain 2, slip stitch back, and fasten off.
- Optional: Attach the keychain ring using the tail left on the top of the head.
Finishing Touches
- Weave in all loose ends.
- Check the amigurumi for even stuffing and adjust if necessary.
- Your adorable Baby Hedgehog Amigurumi is ready!
Pattern Question
Question: How can I ensure the hedgehog spikes are staggered correctly?
Answer: Skip two stitches at the start of rounds when needed, ensuring the slip stitch falls behind spikes from the previous round. This keeps the staggered appearance natural and aligned.
Conclusion
This baby hedgehog amigurumi offers a delightful crochet challenge with charming results. With precise instructions for every step, you’ll enjoy crafting a decorative, versatile piece that’s both adorable and highly functional.