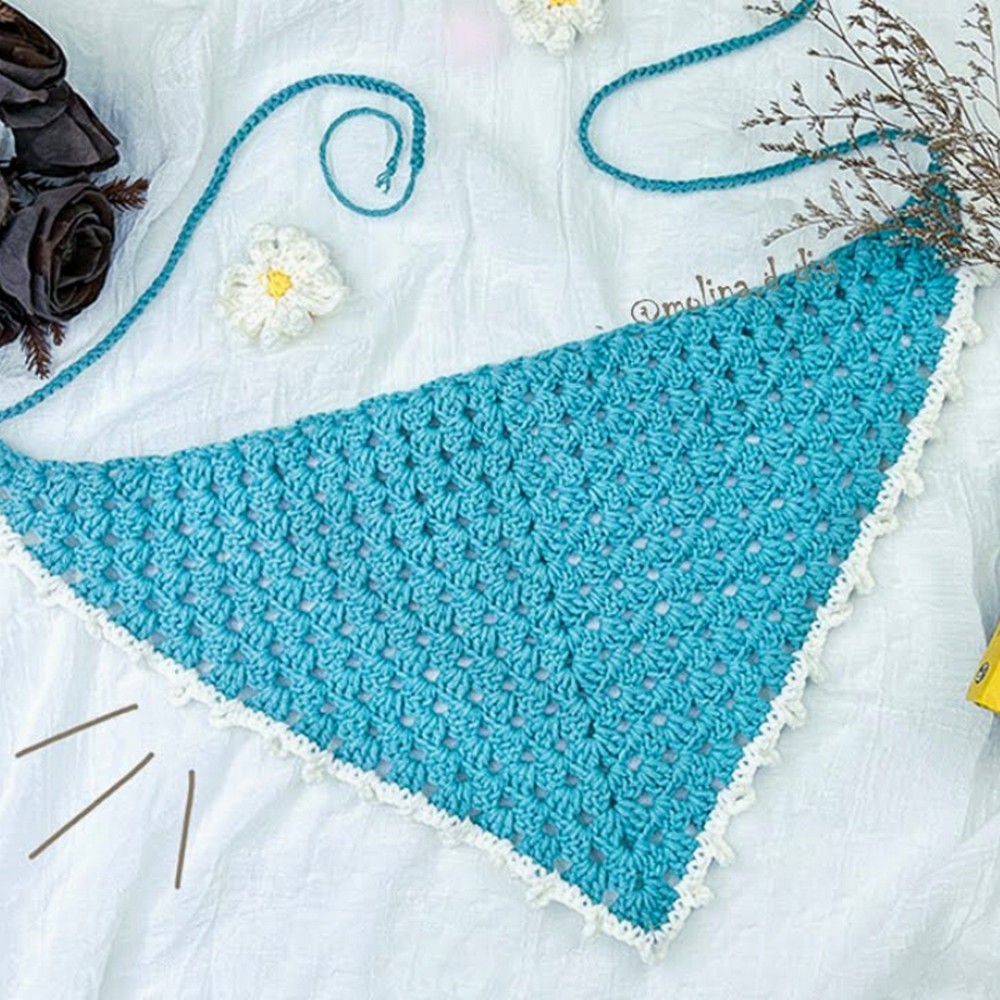
Create a chic and functional accessory with the Granny Triangle Bandana! This crochet project is beginner-friendly and adds a playful yet elegant accent to any outfit. Its versatile design, customizable in color and size, makes it suitable for casual outings, festivals, or daily wear.
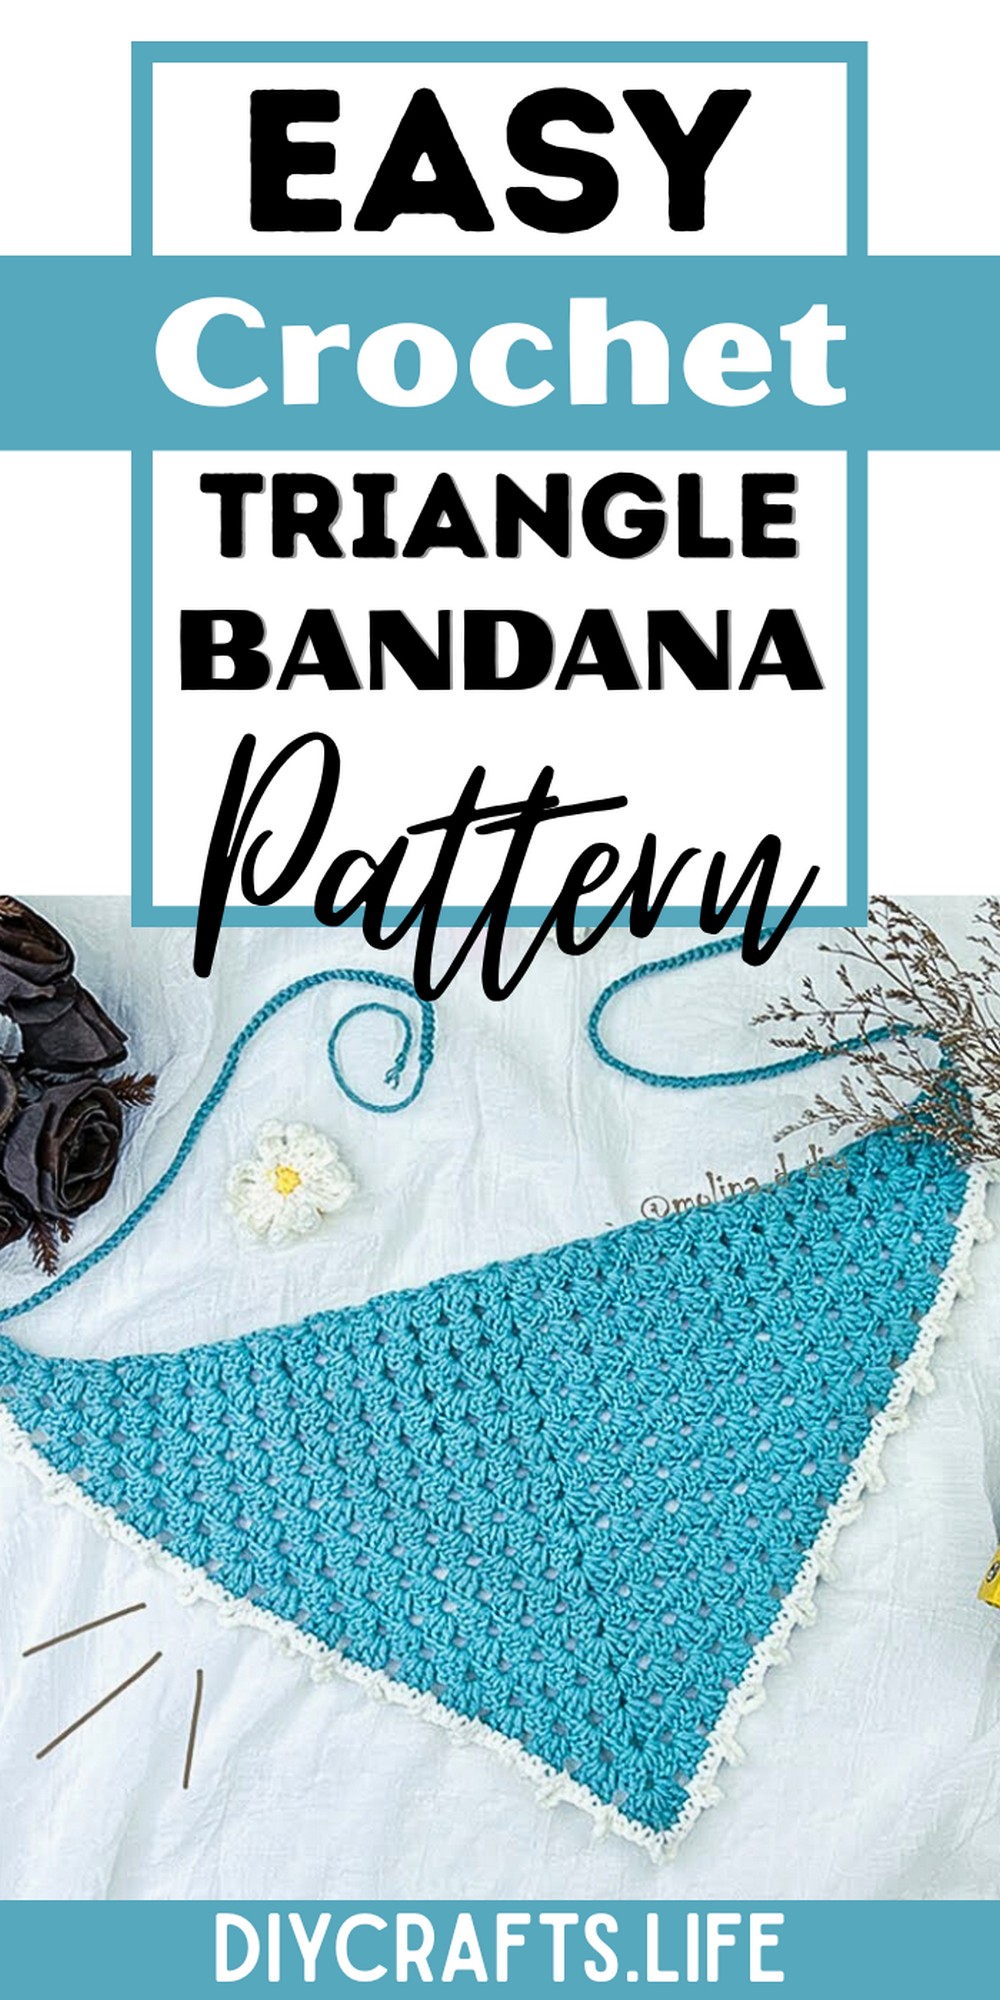
The Granny Triangle Bandana is both practical and stylish. It’s lightweight yet durable, perfect for various weather conditions. The intricate pattern adds charm, while its adjustable straps ensure optimal comfort. Ideal for quick projects or gifting, this bandana is as appealing as it is useful.
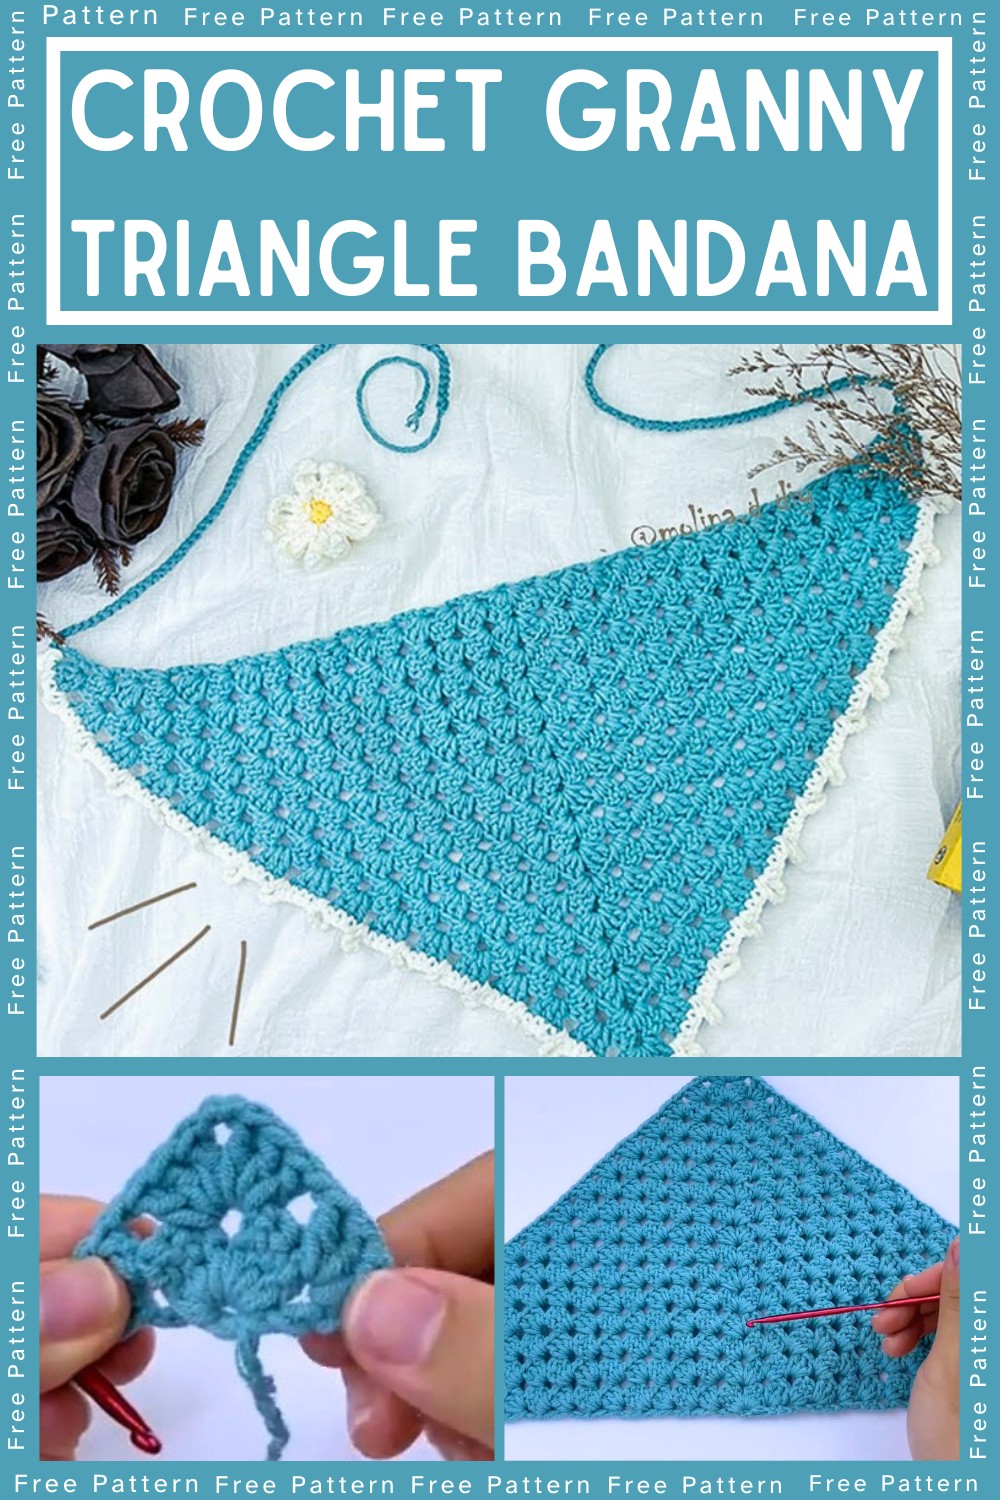
Crochet Granny Triangle Bandana
Crafting the Granny Triangle Bandana is a delightful project suitable for crocheters of all skill levels. With simple steps and endless customization, this pattern offers creative freedom to mix colors and adjust sizes. Whether you're a beginner or seasoned crafter, this bandana is a stylish accessory you'll love making.
Materials and Preparation
To crochet the Granny Triangle Bandana, you'll need the following materials:
- Yarn: 5-ply yarn (125g; any type works, but ensure yarn matches hook size).
- Hook: 3.5mm crochet hook (alternatively, 3mm or 4mm hooks).
- Scissors: For cutting yarn.
You can use different yarn weights and colors to customize the look based on your preferences.
Abbreviations and Notes
Abbreviations:
- SC: Single Crochet
- DC: Double Crochet
- CH: Chain
- SS: Slip Stitch
Notes:
- This pattern uses basic crochet techniques, ideal for beginners.
- A corner is created by chaining 2 within the circle in specific rows.
- Ensure tension is consistent throughout the project for even stitches.
- The white edging and straps are optional but add a polished look to the bandana.
Gauge, Approximate Size, and Pattern Notes
- Gauge: Gauge isn't strictly required for this project, but you can create a small swatch to check tension consistency.
- Finished Size: Approximate size can vary depending on how many rows you complete, but typically works well for a triangular bandana around 17 rows tall.
- Pattern Notes: The bandana grows progressively row by row, creating a triangle shape. Pay attention to the corners for clean shaping.
Step-by-Step Pattern
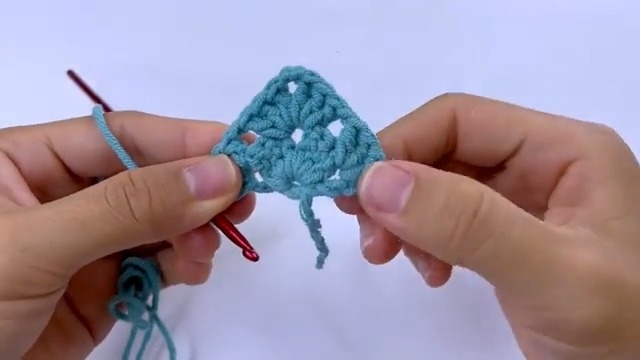
Foundation Row
- Make a slip knot and then CH 4.
- In the first chain, make a SS to form a small circle.
Row 1
- CH 4 (counts as a DC and CH 1).
- Inside the circle: 3 DC, CH 2 (to form a corner), 3 DC, CH 1, DC.
Row 2
- CH 4 (turn your work).
- Make 3 DC in CH 1 space, CH 1, 3 DC in CH 2 space, CH 2 (corner), 3 DC in same CH 2 space, CH 1, DC in CH 1 space, CH 1, DC in same CH 1 space.
Row 3
- CH 4 (turn your work).
- Make 3 DC in CH 1 space, CH 1, 3 DC in next CH 1 space, CH 1, 3 DC in CH 2 space, CH 2 (corner), 3 DC in same CH 2 space, CH 1, DC in CH 1 space, CH 1, DC in same CH 1 space.
Repeat Rows
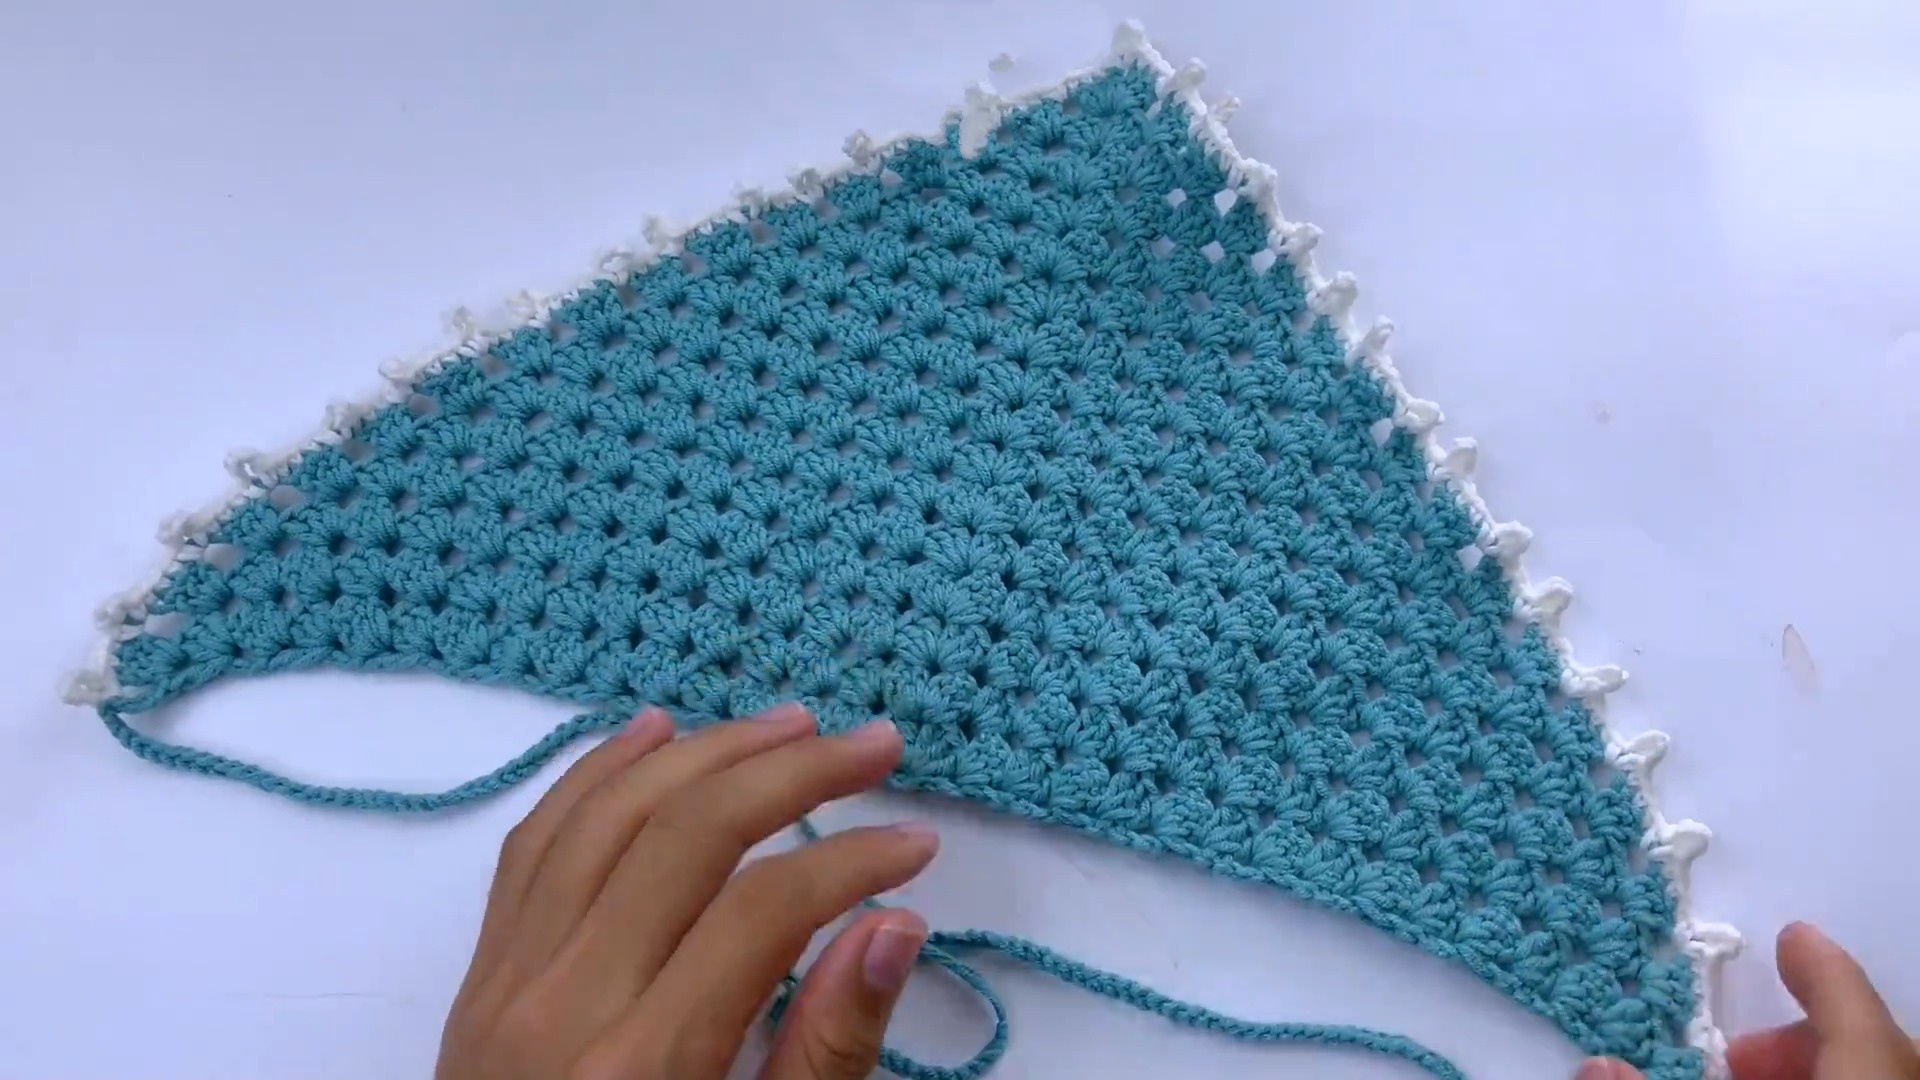
Repeat the process outlined in Row 3 until you reach Row 17 (or desired size). The triangle will grow larger with each row you add.
Adding Straps
- At one end, CH 50 to form a strap.
- Repeat on the other side to create a second strap.
Adding Edging
- Attach white yarn to the edge.
- Start with 1 SC, then CH 5.
- SC in CH 1 spaces or stitches as you continue around the triangle. Repeat this process to create a decorative edge.
Finishing Touches
Tie off the yarn, weave in the ends, and admire your work! Your Granny Triangle Bandana is now complete. Enjoy customizing the bandana even further by experimenting with bold colors or softer tones.
Pattern Question
Question: Can I use a different yarn weight and hook size for this pattern?
Answer: Absolutely! While the tutorial uses 5-ply yarn and a 3.5mm hook, you can adjust the yarn weight and hook size to suit your preferences. Just ensure they match to achieve uniform stitches.
Conclusion
The Granny Triangle Bandana is a delightful crochet project for all skill levels. Its straightforward design allows for endless customization, making it enjoyable and rewarding. Whether for personal use or gifting, this handmade bandana is a must-try for anyone seeking both beauty and functionality in their craft.


