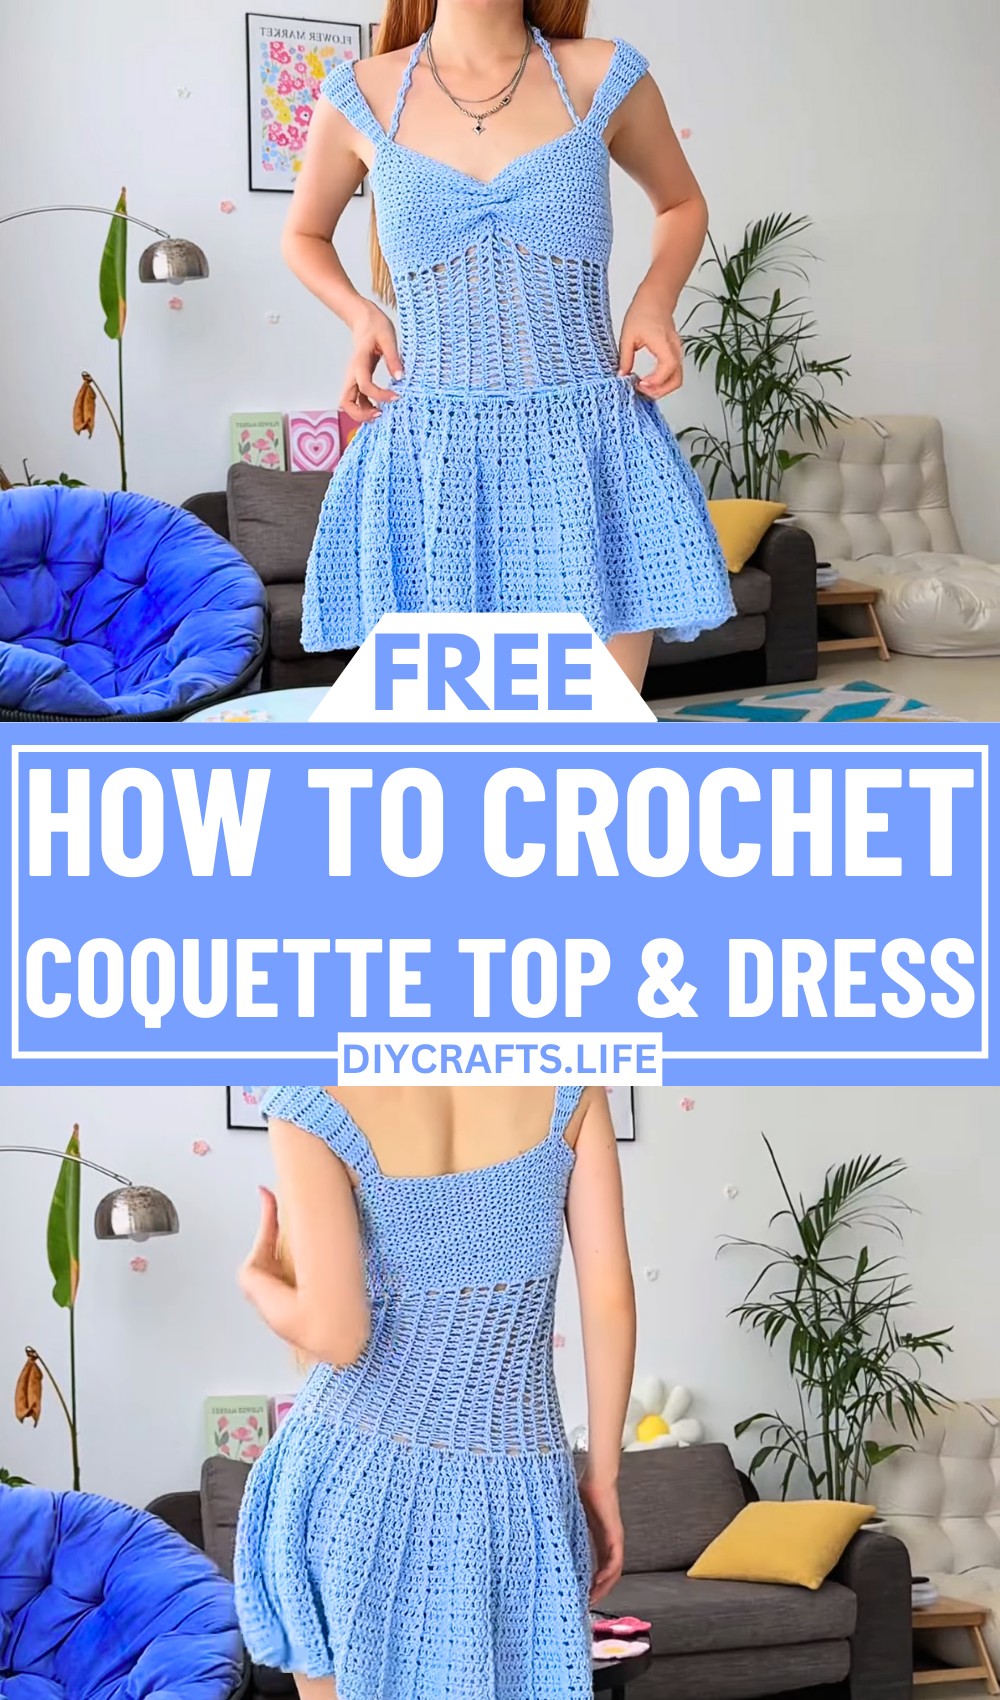
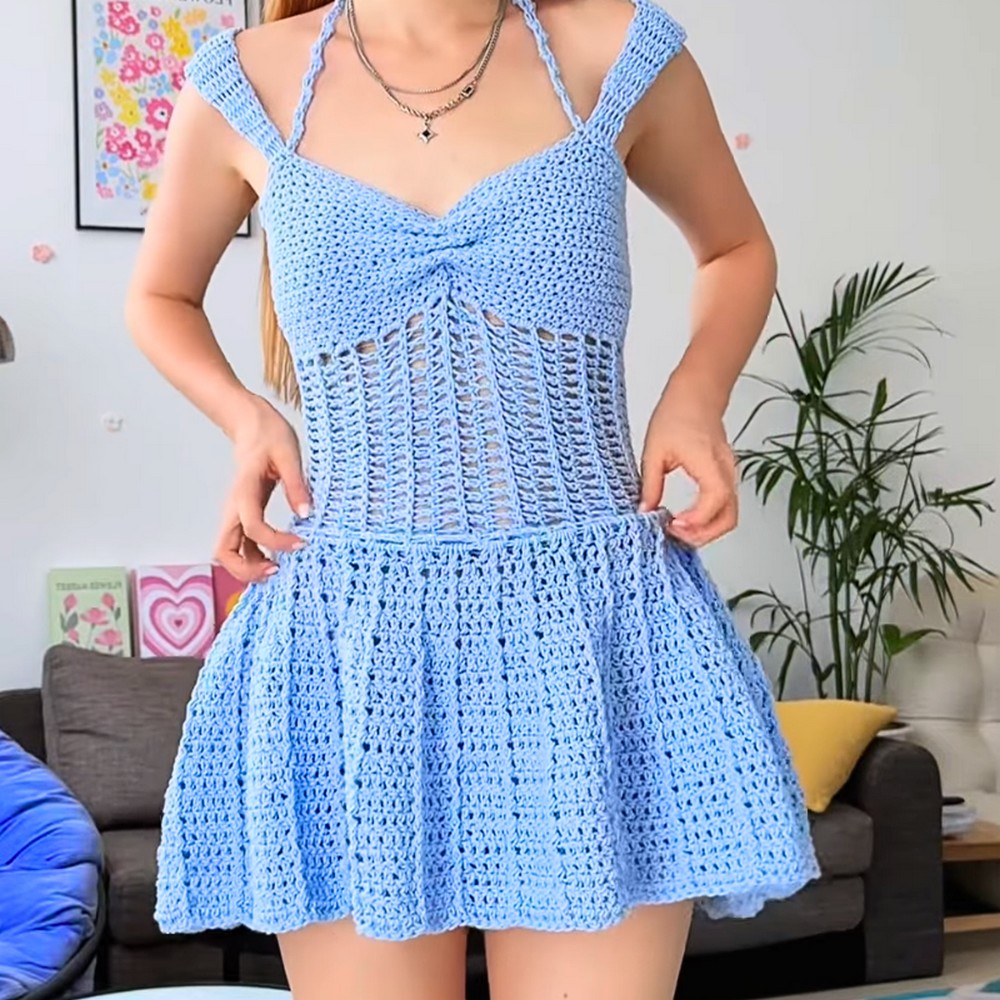
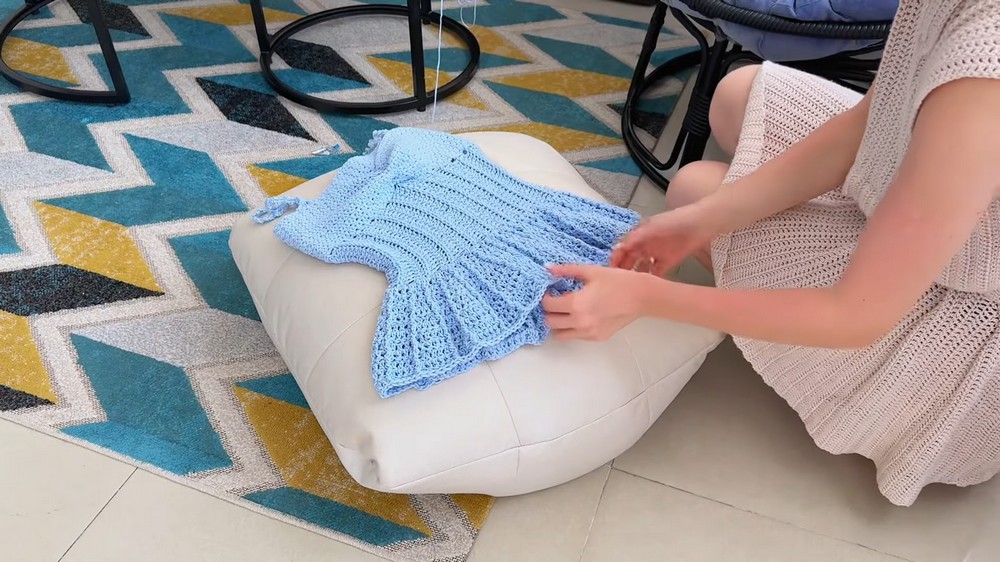
Create a timeless blend of grace and charm with the Crochet Coquette Top & Dress. This stunning pattern is an invitation to craft a piece that feels effortlessly elegant yet refreshingly wearable. With its delicate details and airy structure, this design is perfect for any season, adding a splash of handmade sophistication to your wardrobe.
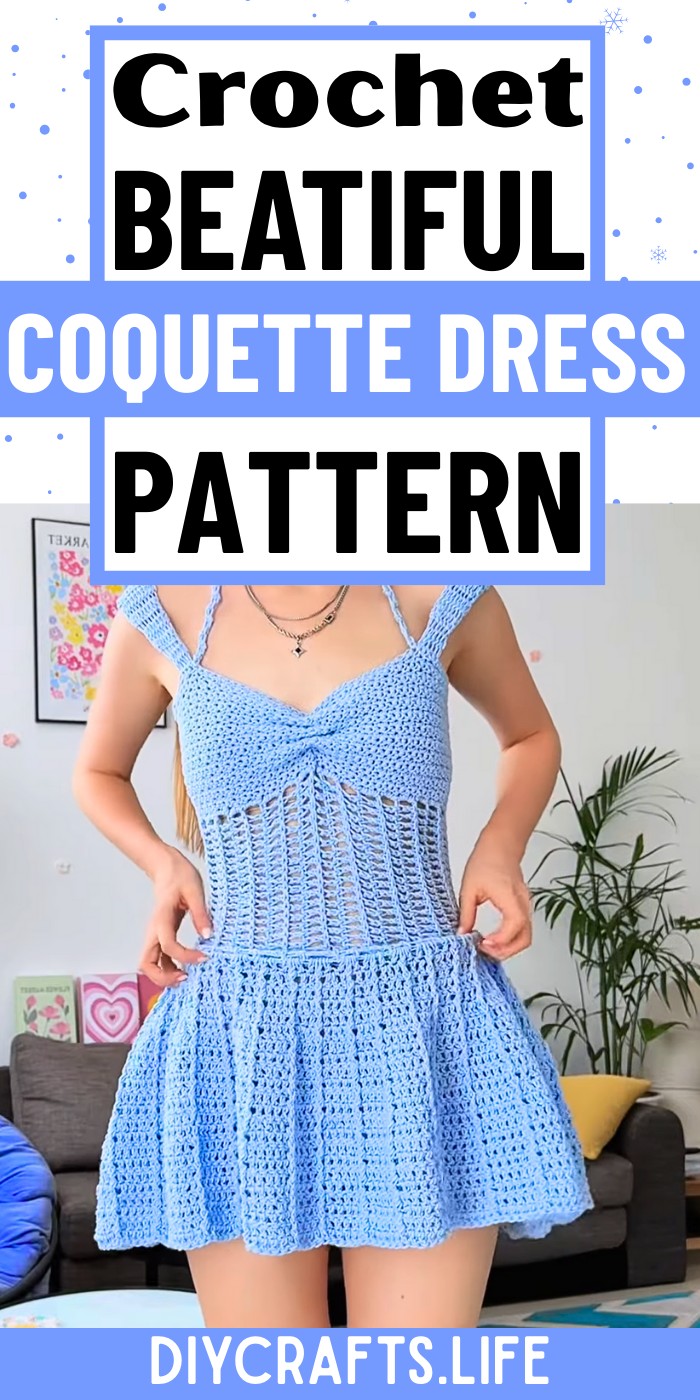
Customizable Crochet Coquette Top & Dress
The Crochet Coquette Top & Dress is special for its ability to transform from a casual breezy top to a stylish and graceful dress. Its seamless design features soft flowy textures paired with intricate patterns, turning every stitch into a beautiful visual story. Whether you want to keep it casual or go for a more dressed-up look, this versatile piece lets you infuse your personal touch.
Credit WONDER NETTING
Materials & Tools Needed
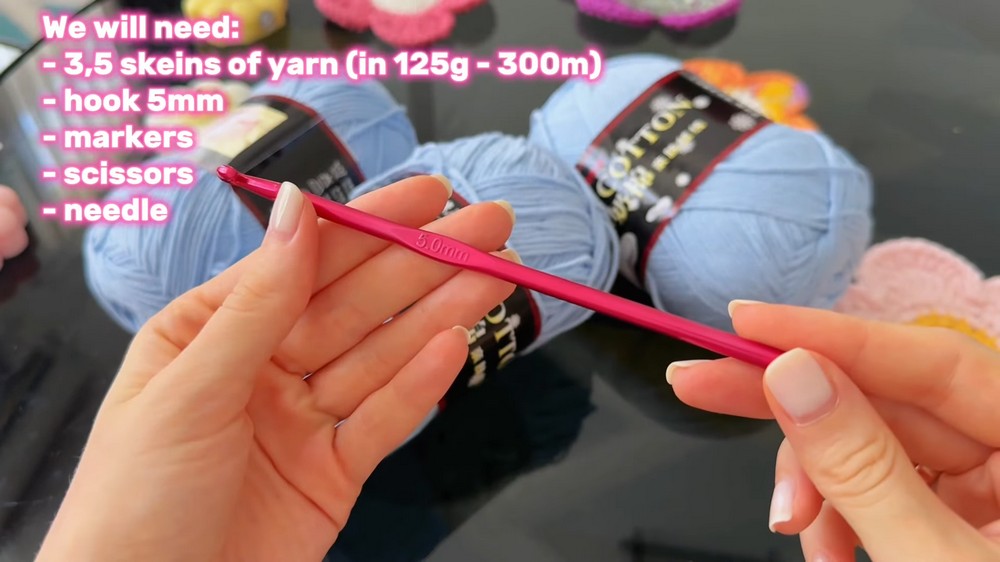
Below is the list of materials and tools required to crochet the coquette top and dress:
- Yarn:
- For the top, you will need 1-2 skeins of yarn.
- For the dress, approximately 3.5 skeins (~435g).
- Recommended yarn: milk cotton or any stretchy yarn for comfort and flexibility.
- Crochet Hook:
- 5mm crochet hook (suitable for the recommended stretchy yarn).
- Additional Tools:
- Markers: To mark straps or key stitches.
- Needle: For sewing straps and weaving in ends.
- Scissors: To cut yarn ends.
- Tape Measure: To measure the circumference, length, or gauge.
Finished Size & Customization Ideas
Approximate Size Details:
- Top dimensions:
- Height: ~14cm for the top part.
- Width (half laid flat): ~31.5cm.
- Combined top and bottom dimensions (dress):
- Height: ~29cm (combined).
- Width: ~33cm.
The dress effectively stretches by ~5cm due to the choice of yarn and construction technique, making it adaptable for various body sizes.
Customization Ideas:
- Adjusting Size:
- Cast on fewer chains than recommended for the waist area because the dress and top stretch significantly (suggest starting with 20-23 chains for the waist).
- Add more rows for the top part to increase height if needed.
- Changing Style:
- Use different yarn weights: Thicker yarn for a cozier, winter-friendly look, or thinner yarn for a lightweight summer dress.
- Longer straps, adding ties or halters for a different wear style.
- Color Play:
- Use multiple colors for stripes or gradients.
- Create color changes within specific sections, such as making the straps or skirt part in contrasting shades.
- Skirt Design:
- Skip convex/concave stitches for a simpler look.
- Add ruffles or flares for a more textured and decorative skirt section.
Pattern Abbreviations & Terminology
Below are abbreviations and terms used:
- Ch: Chain
- SC: Single Crochet
- DC: Double Crochet
- Convex DC: Double crochet worked from the front side of the stitch.
- Concave DC: Double crochet worked from the back side of the stitch.
- Skip: Skip a stitch.
- Sl St: Slip Stitch
- Rows: Refers to crochet rows that combine stitches.
- Increase: Crochet multiple stitches into a single stitch to expand width.
- Decrease: Combine two stitches into one stitch to reduce width.
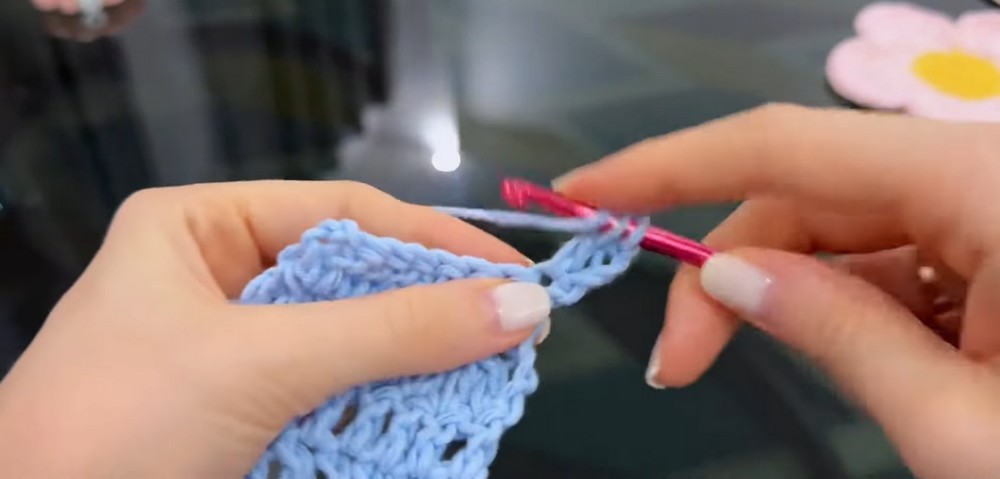
Step-by-Step Crochet Instructions
Top Construction
Step 1: Waist Section
- Foundation chain: Make a chain of 20-26 air loops (depending on desired width).
- Row 1:
- Yarn over, insert into the 4th chain from the hook.
- Work double crochet (DC) across the row.
- Rows 2 to X:
- Turn work, and crochet single crochet above each stitch.
- Maintain the edge by crocheting into the braid loops or back loops (optional for appearance).
- Continue working even rows until the section fits your chest circumference. Ensure rows are divisible by 2 (recommended: ~38 rows).
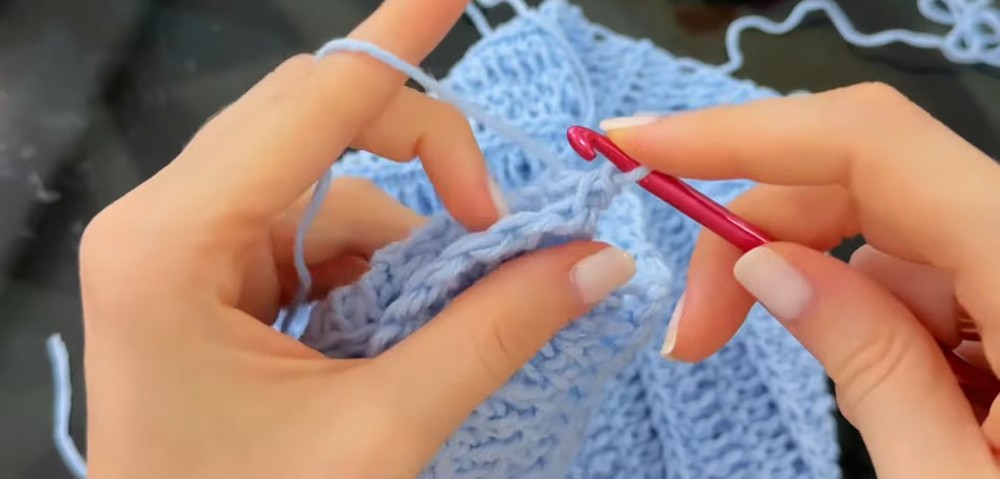
Step 2: Joining Edges
- Connect edges using slip stitches. Insert hook through consistent loops (back/front loops or braid).
- The seam should be nearly invisible when properly aligned.
Step 3: Straps
- Mark placement for straps: Try on the top and use markers to define strap positions.
- Work straps using single stitches or alternate between increasing and decreasing rows to shape the straps.
- Attach straps securely using a needle and weave in ends.
Dress/Skirt Construction
Step 4: Base of Skirt
- With the top complete, attach yarn near the seam.
- Row 1:
- Make 3 double crochet stitches into each row of the top’s edge to create the skirt base.
- Subsequent Rows:
- Alternate between convex double crochet (worked on the front) and concave double crochet (worked from the back).
- Introduce increases every few stitches to expand the skirt width. (See tips below).
Step 5: Increases
Follow this guideline for increases:
- Row 3: Increase every 6th stitch.
- Row 7: Increase every 7th stitch.
- Continue this pattern until achieving desired width/flare.
Step 6: Ending Rows
- After 22 rows, reduce increases (e.g., every 12 stitches).
- Finish with 8 rows without increases for a gradual end.
Optional Decorative Straps
For extra flair:
- Work a chain of 8 for decorative straps.
- Crochet double stitches, increasing on the first and last stitch of each row for added volume.
- Sew decorative straps to the neckline or provide as halter straps.
Final Touches
- Preferences: Skip ruffles or additional stitches as desired.
- Secure Ends: Trim threads and weave in any loose ends.
- Fit Adjustments: Use remaining yarn for waist gathering or neckline finishing.
Tips & Notes:
- The dress stretches significantly—begin with fewer chains or tighter rows for waist measurements.
- Beginner-friendly: Since convex and concave stitches are optional, beginners can skip them for a simpler look.
- You can make this dress/top in just a few days with practice!