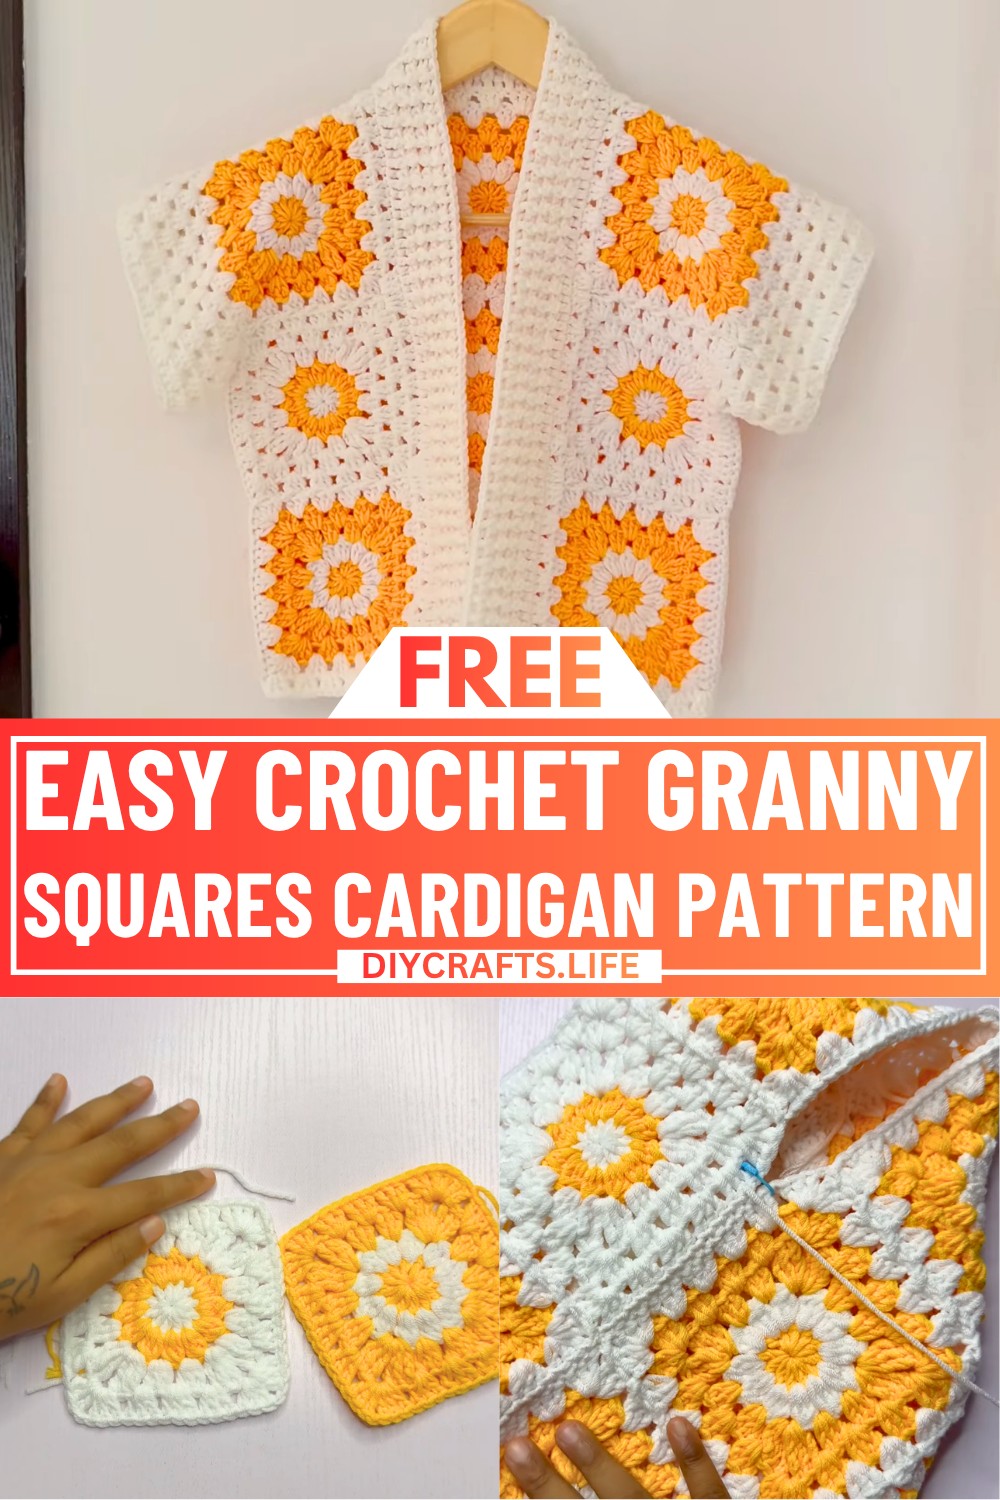
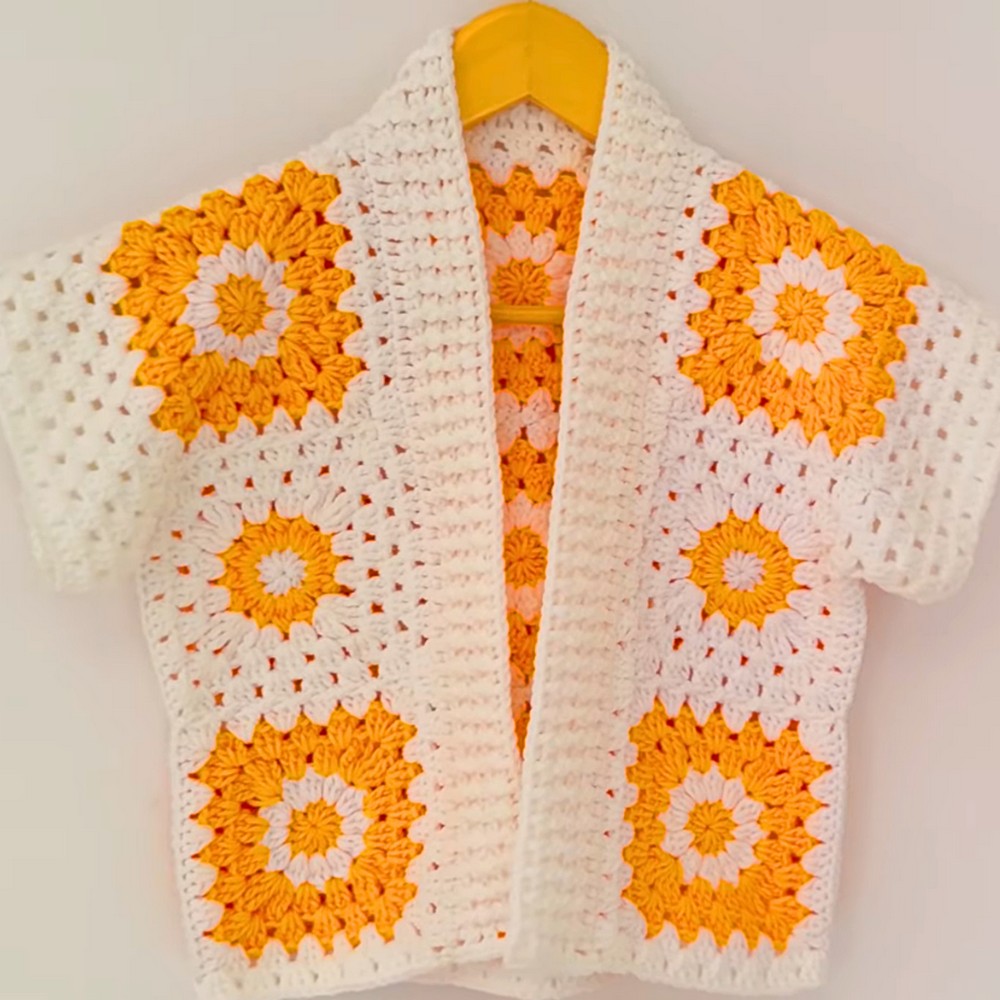
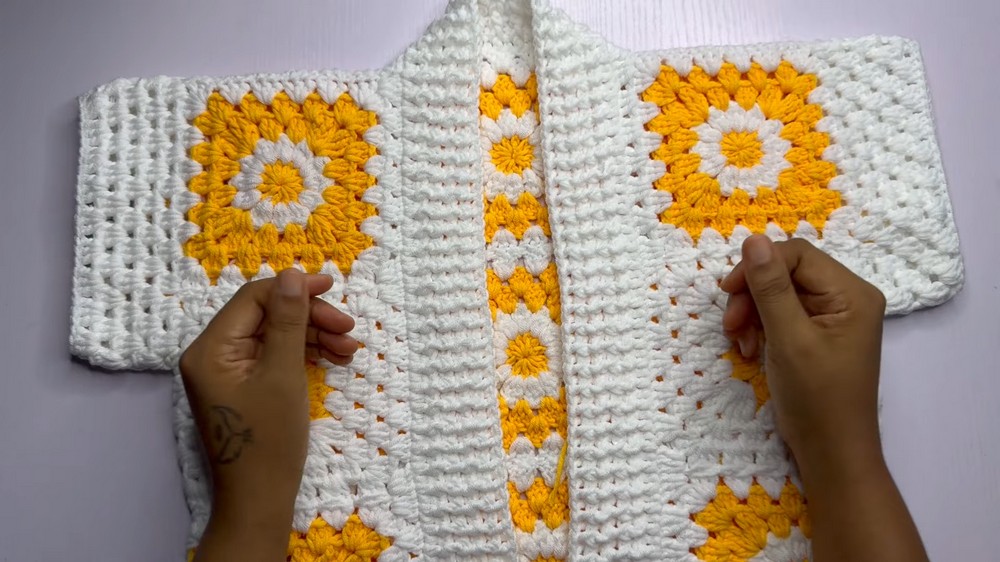
This granny square cardigan is full of color and texture, making it fun and stylish. Each square adds to the design, turning simple yarn into a cute and cozy piece you can wear with anything. Whether paired with jeans or a dress, it’s sure to stand out. The process is easy and enjoyable, with plenty of ways to make it your own.

Crochet Granny Squares Cardigan Pattern
This design is a panel-style cardigan built from classic granny squares, joined in clean rows for both front and back. Simple stitches—double crochet, clusters, and front and back post ribbing—create a snug trim at the sleeves and front edge, giving the cardigan a sharp finish. The layout lets you adjust length, width, and sleeve style with ease: add more squares for an adult size, keep it short and sweet for kids, or play with color changes for a bold or soft mood. It works as a light layer in cotton yarn or a warmer piece in wool, turning a simple square motif into a piece of wearable art that reflects your style.
Credit FTK Crochet
Materials & Tools Needed
- Yarn: 5-ply cotton yarn (or any preferred yarn). The tutorial uses white and yellow yarn.
- Alternative: You can choose any yarn weight, but adjust your hook size accordingly.
- Crochet Hook: 4mm
- Tapestry Needle: For weaving in ends and joining panels.
- Scissors: For cutting yarn.
- Measuring Tape: For ensuring proper sizing and fit.
- Stitch Markers: Useful for marking armholes and alignment during assembly.
Finished Size & Customization Ideas
- Tutorial Size: Designed for a child (8 years old). Individual granny squares measure 5 inches each after adding the final edge row. Panel length is 15.5 inches.
- Custom Sizing:
- Adult Size: Larger sizes can use additional granny squares to widen or lengthen the panel. For example:
- Front panels: 2 squares wide, and as long as needed.
- Back panel: 3 to 5 squares wide.
- Adjust placement of the ribbing and armhole openings based on your size.
- Adult Size: Larger sizes can use additional granny squares to widen or lengthen the panel. For example:
Pattern Abbreviations & Terminology
- ch: Chain
- dc: Double Crochet
- fpdc: Front Post Double Crochet
- bpdc: Back Post Double Crochet
- sl st: Slip Stitch
- yo: Yarn Over
- sp: Space
- Cluster: 3 double crochet stitches worked together in one space.
- Treble (tr) Crochet: Double yo before inserting the hook.
Skill Level: Beginner to Intermediate
Terminology: US Crochet Terms
Step-by-Step Instructions
The cardigan construction consists of granny squares for the body, joined together to form front and back panels, with additional ribbing for the border and sleeves. Follow these steps exactly as per the tutorial:
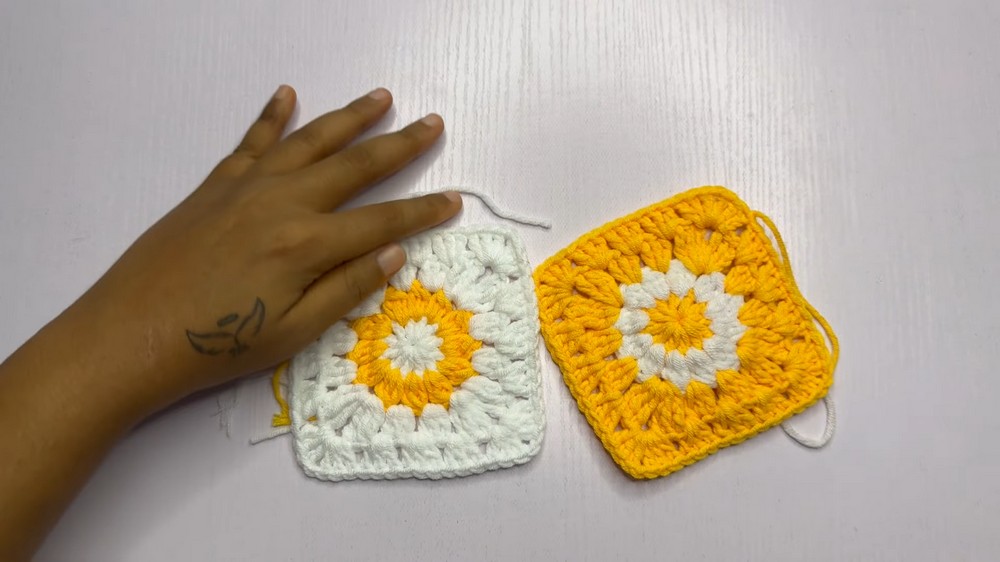
Part 1: Crochet a Granny Square
- Start with Magic Circle:
- Make a magic circle. Chain 3 (counts as first dc).
- Round 1:
- Work 12 DCs into the magic circle. Pull the tail tight to close the center.
- Sl st into the 3rd chain of the starting ch-3 to close the round.
- (12 DC)
- Round 2 (Change Color):
- Attach the new color to any sp between the DCs.
- Ch 3 (counts as first DC). Work a cluster (group of unfinished DCs joined together).
- Each cluster will consist of 3 incomplete dc stitches brought together with a single pull-through.
- Chain 1 between each cluster. Work 12 clusters total.
- Sl st to the top of the starting ch-3 to close the round.
- (12 Clusters).
- Round 3 (Change Color):
- Attach your new yarn color to any corner sp.
- Ch 4 (counts as the first tr). Work 3 trebles, ch 1, 3 trebles into every corner sp to create corners. Between corners, place 3 DCs into each sp.
- Join the round with a sl st into the starting ch-4.
- (4 corners; clusters between corners).
- Round 4 (Continue Last Color):
- Ch 3 and work into every corner sp and side sp as follows:
- Corners: 3 DC, ch 1, 3 DC.
- Sides: 3 DC in each sp between clusters.
- Sl st into the starting ch-3 to complete the round.
- Ch 3 and work into every corner sp and side sp as follows:
- Final Round (Add Row of Clusters):
- Add 1 additional row of 3 DC clusters around to enlarge the square if desired (use the same color).
Part 2: Create the Panels
- For an 8-Year-Old Size:
- Front Panels: 3 granny squares tall by 1 granny square wide.
- Back Panel: 3 granny squares tall by 3 granny squares wide.
- Adjust the number of squares for larger sizes.
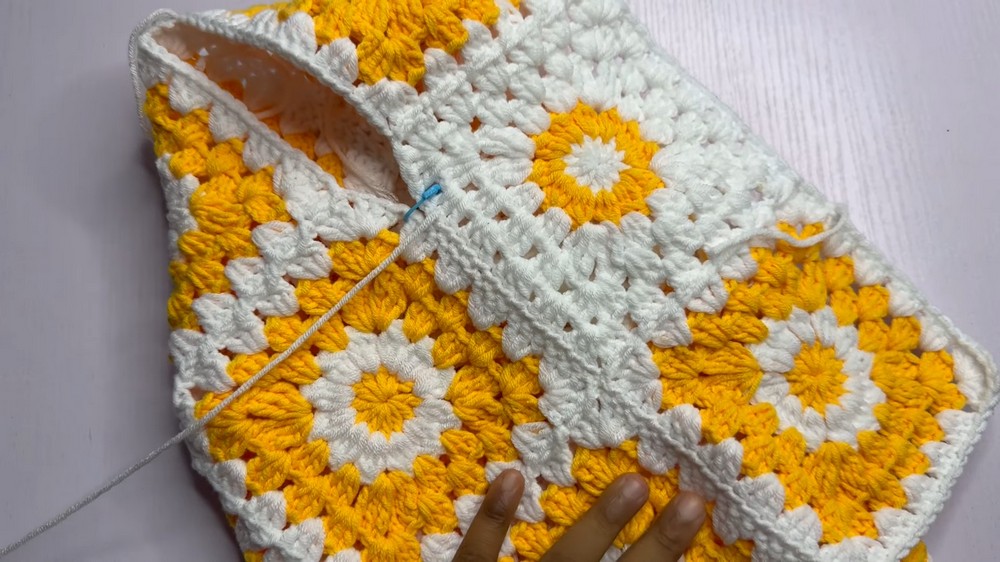
Joining the Squares:
- Use the Tapestry Needle Method:
- Place two squares side by side (right sides up).
- Align the stitches. Sew using the tapestry needle with whipstitch or mattress stitch.
- Ensure clusters align for a tidy look.
Part 3: Assemble the Cardigan
- Join the Shoulders:
- Attach the front panels to the back panel at the shoulders.
- Sew across the top edge of the squares to create the shoulders. Leave space for the neck opening.
- Join Side Seams:
- Measure the armhole opening (e.g., 6 inches for a child size). Mark with stitch markers.
- Sew the sides together below the armhole marking.
Part 4: Sleeves
- Attach yarn at the armhole edge.
- Row 1: Work 3 DC clusters around the armhole, spacing evenly.
- Rows 2–5: Continue working clusters in rounds for short sleeves. Adjust length as desired.
- Slip stitch to close rounds before moving to the next.
Part 5: Ribbing (Front Border and Hem)
- Attach yarn at the bottom corner of the cardigan’s front edge.
- Row 1: Work 1 row of 3-DC clusters along the edge of the cardigan (along the front panels, around the neckline, and back down to the hem).
- Continue a second row along the bottom hem for consistency.
- Ribbing Rows (Front Border):
- Row 2+: Use front post double crochet (fpdc) and back post double crochet (bpdc) alternately for ribbing.
- Repeat for 3–5 rows to create a thick ribbed border.
- Row 2+: Use front post double crochet (fpdc) and back post double crochet (bpdc) alternately for ribbing.
- Tie off and weave in ends.
Part 6: Finishing Touches
- Weave in all loose ends with a tapestry needle.
- Optional Add-Ons:
- Add buttons along the ribbing and corresponding buttonholes.
- Use decorative edges or embellishments if desired.