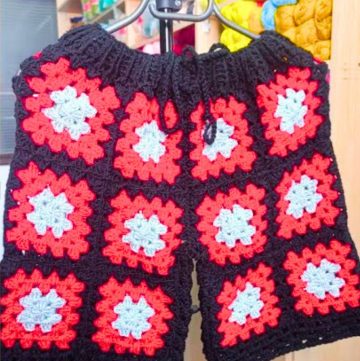
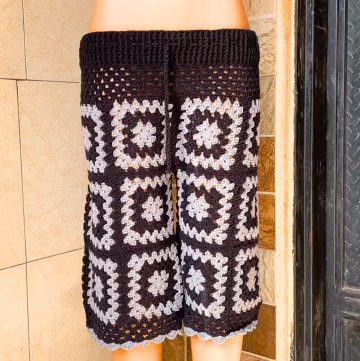
Crochet granny stitch shorts are a bright and stylish way to add handmade flair to your wardrobe. These shorts are perfect for summer days, lounging at home, or pairing with a matching top for a fun two-piece outfit. What makes them special is their simple yet beautiful design using the granny stitch — a classic crochet technique that combines ease and elegance.

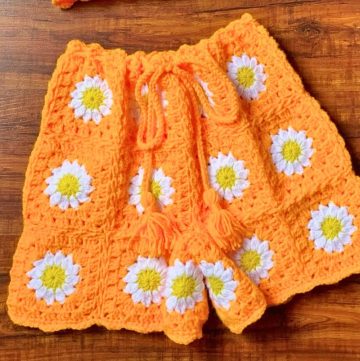
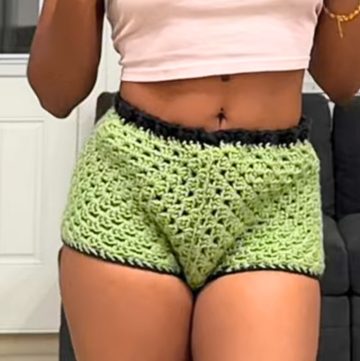
These Crochet shorts combine comfort with charm and can be adjusted to fit anyone. The key features include a stretchy waistband created with single crochets and a customizable granny stitch pattern that makes up the body and legs. You can use your favorite yarn colors or stick to a pair of complementary shades, like yellow and cream as shown in the tutorial, to make them uniquely yours. Lightweight and breezy, these shorts are great for relaxing while still looking stylish.
If you're thinking about making these, the process is simple. Starting from the waistband, you crochet with single stitches for stretch and a great fit. Then, you switch to the granny stitch pattern to add structure and design to the shorts. Finally, the crotch and leg areas are crafted, leaving plenty of room to adjust depending on the length you prefer — whether short, mid-length, or even long for pants. Add a drawstring or elastic waistband for added ease of wear, and you’re ready to go!
Credit FTK Crochet
Materials & Tools Needed
- Yarn: Yellow and cream/off-white (or any two colors of your choice).
- Hook: 4 mm crochet hook.
- Tape Measure: To measure hips and desired length.
- Stitch Markers: 4 for marking corners.
- Tapestry Needle: For weaving in ends.
- Scissors: For cutting yarn.
Finished Size & Customization Ideas
- Sizes: The shorts are sized based on your hip measurements and customized to your desired length.
- Customization Ideas:
- Adjust band height by increasing chain count during its creation.
- Lengthen shorts for high-waist or full-length pants/trousers by adding extra rows to the granny stitch pattern.
- Use elastic for the waistband or create a drawstring using chains.
- Mix more colors for stripe effects if desired.
Pattern Abbreviations & Terminology
- Ch: Chain
- Sl st: Slip Stitch
- SC: Single Crochet
- DC: Double Crochet
- Cluster: Three DCs worked into the same stitch or space
- BLO: Back Loop Only

Step-by-Step Detailed Crochet Instructions
1. Begin with the Band
- Make a Slip Knot and chain 10 (or desired height for your waistband).
- Row 1:
- Ch 1, skip the first ch, and SC into each stitch across (10 SC).
- Ensure your stitch count is consistent for uniformity.
- Row 2 (BLO):
- Ch 1, turn. Work SC into the first stitch (regular SC).
- For the next 8 stitches, work SC into only the BLO.
- On the last stitch, work a regular SC.
- Rows 3 onwards:
- Repeat Row 2 until your band wraps snugly around your hips.
- Stretch as you go for accuracy by wrapping the band loosely around your hips.
- Note: In the tutorial, the band was completed in 111 rows. Adjust based on measurements.

2. Join the Band
- Fold the band flat, ensuring no twists.
- Use slip stitches:
- Insert hook through the first stitch on one side and the corresponding stitch on the opposite side.
- Sl st across stitches of both edges for a clean seam.
- Seam should align seamlessly with the back.
3. Add Single Crochet Around the Band
- Turn to the front side of the band.
- Work SC around the top edge by placing:
- 1 SC into each stitch flat edge.
- 2 SC into bumps or curves visible along the band.
4. Start Granny Stitch Rows
- Row 1:
- Ch 3 (counts as first DC), work 2 more DC in the first stitch (form 1st cluster).
- Skip 2 stitches, DC 3x into the 3rd stitch (next cluster).
- Repeat: Skip 2, cluster (DC 3x) across the round.
- Sl st into top of Ch-3 to close.
- Row 2 and subsequent rows:
- Ch 3, turn. Work 2 DC into the first space (cluster).
- Work clusters into spaces between clusters (previous row), skipping individual DCs.
- Sl st into top of Ch-3 to close each round.
- Continue working rows of granny stitch clusters till the 8-inch length (calculated below the waistband) is achieved.

5. Create the Crotch (Divide Legs)
- Lay shorts flat, ensuring the seam is at one corner (back center).
- Mark the four corners with stitch markers for division (front, back, two sides). Count clusters to ensure symmetry. Example: 14 clusters per corner.
- Create the Crotch Bridge:
- Attach yarn to one side’s middle corner.
- Ch 21 (or # of chains required based on thigh circumference).
- Sl st to the opposite corner.
- Cut yarn and tie securely.
6. Begin Right Leg
- Attach yarn to the center of the crotch bridge (middle chain).
- Row 1:
- Ch 3, work a cluster into the same chain.
- Skip 2 chains or spaces, create clusters in 3rd space.
- Continue working around entire leg opening. On bridge chains, maintain skipping 2 chains rule.
- Sl st at Ch-3 to close round.
- Row 2 onward:
- Ch 3, turn. Work clusters into spaces between clusters from the previous row.
- Repeat until desired leg length is achieved (5 rows for shorts in tutorial).
- You can alternate colors every two rows to achieve stripes.
7. Work Left Leg
- Repeat the process for the second leg:
- Attach yarn to the center of the crotch bridge.
- Work the granny stitch pattern exactly as for the first leg.

8. Finishing Steps
- Create Drawstring:
- Ch 200–250 (adjustable).
- Weave through the waistband using a tapestry needle.
- Weave Ends:
- Use a tapestry needle to weave loose ends neatly into stitches.
- Adjust Fit:
- Try the shorts on. If adjustments are needed, modify the drawstring or add elastic.
Tips for Personalization
- Adjust cluster counts at the crotch bridge for larger or smaller thigh circumferences.
- Add more rows for high-waist shorts or longer shorts/pants.
- Try different color combinations for creative designs.