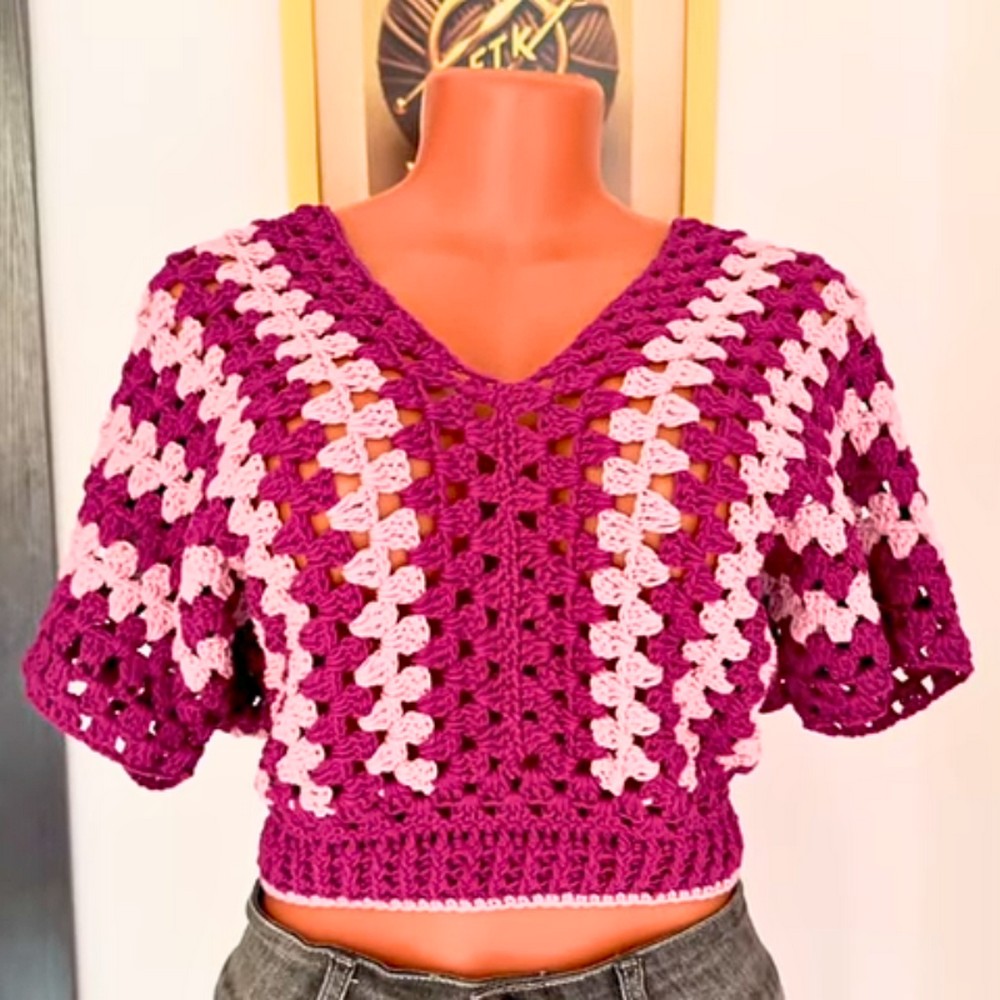
Step into effortless style with a piece that turns heads and warms hearts! The Granny Stitch Top is the ideal blend of charm and thread artistry, offering a fresh take on a timeless pattern. Perfect for those moments when you want something playful yet elegant—this crochet pattern invites your imagination to stitch together a wearable masterpiece, tailoring its length, colors, and dimensions to fit your vibe.
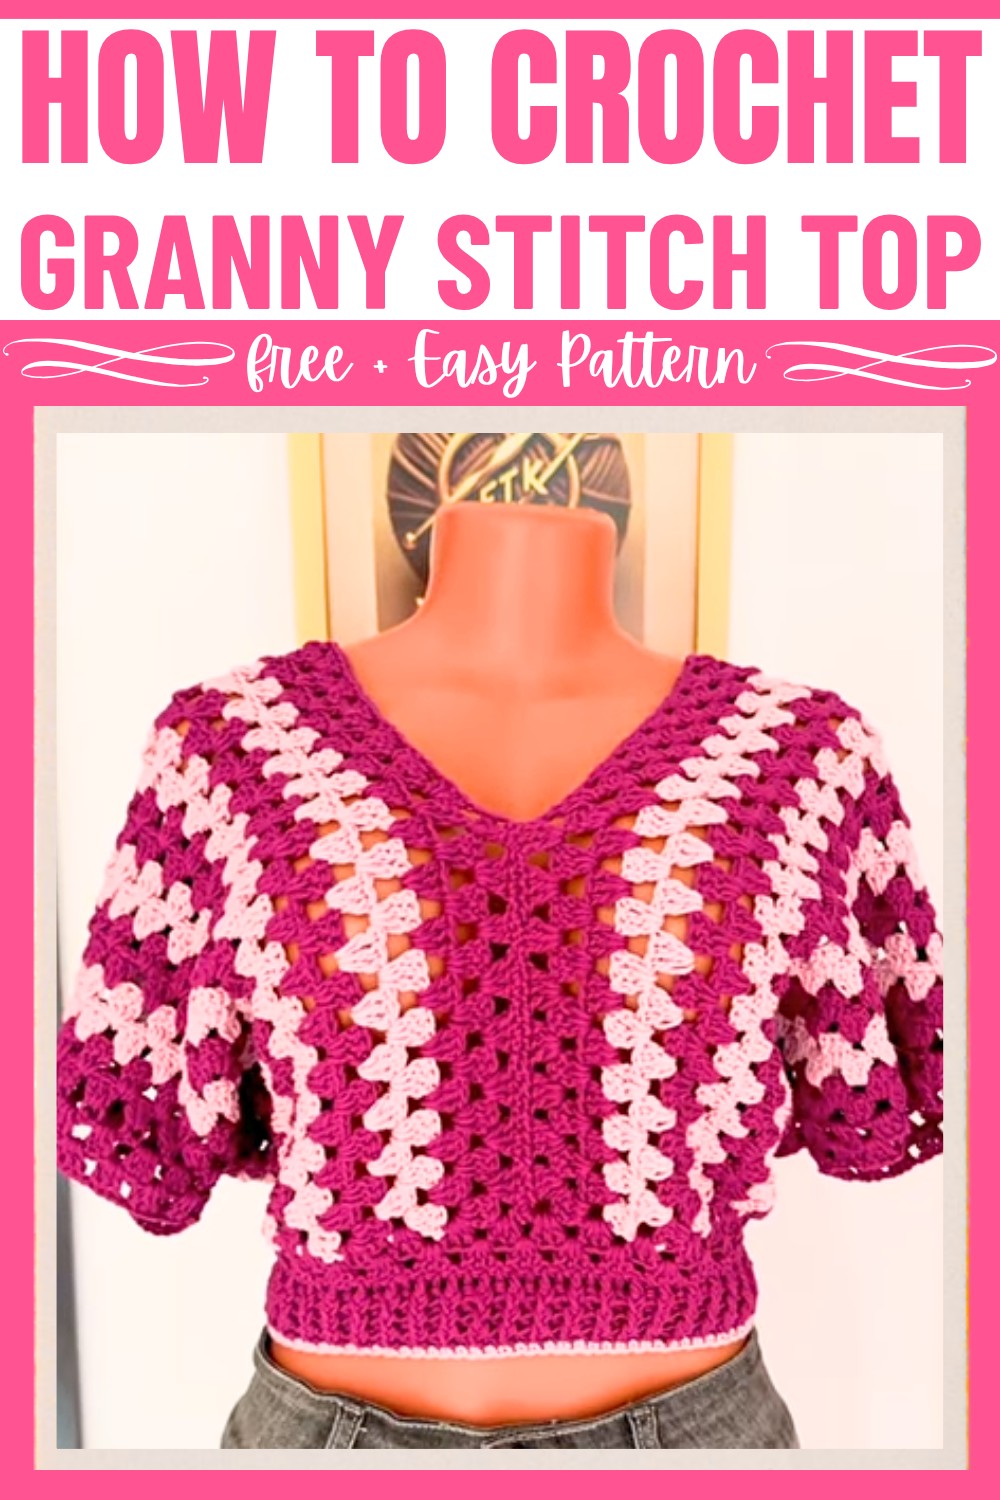
Crochet Granny Stitch Top
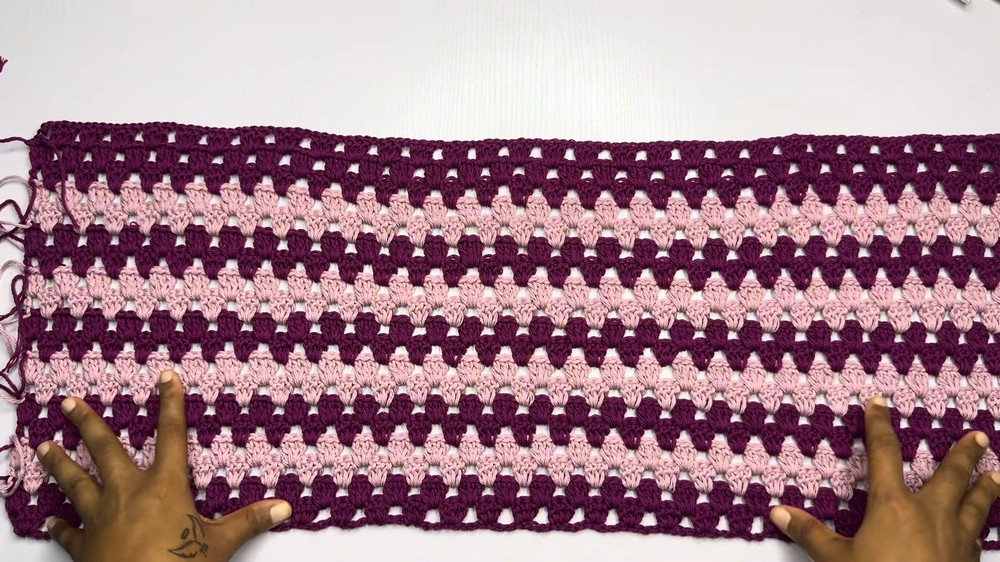
This design stands out for its simple yet striking granny stitch clusters combined with endless customization options. If you opt for a cropped look or extend it for more coverage, the pattern adjusts to your aesthetic preferences. Featuring soft cotton fleece yarn for comfort and breathability, and clever techniques such as front- and back-post stitches to craft a textured band, this design proves that classic motifs can find a unique place in modern fashion. Let your creativity shine with this versatile top that combines craftsmanship with flair.
Credit FTK Crochet
Materials & Tools Needed:
- Yarn: Cotton fleece yarn (80% cotton, 20% merino wool) — approx. 2 skeins, depending on size and desired length.
- Suggested weight: Medium-weight yarn.
- You can use other yarn types, but make sure to match the corresponding hook size.
- Crochet Hook: Size 4 mm (adjust based on your yarn).
- Measuring Tape (for customizing your top to fit).
- Stitch Markers: To mark sections for joining.
- Tapestry Needle: For sewing panels together.
- Scissors: To cut yarn.
Finished Size & Customization Ideas:
- Bust Measurement: This pattern example uses 40 inches for the bust size, but you can adjust this by modifying the foundation chain. Note: The actual bust width is achieved after joining panels.
- Top Length: Measure from your shoulder to your desired length (under the bust for a crop top). For a longer top, increase the foundation chain.
- In the example: Shoulder to under-bust measurement is 14 inches, but this length is doubled (28 inches) for your foundation chain.
- Customization:
- Adjust neck size by varying the number of clusters joined at the top.
- Add extra rows to the hem for a longer top.
- Extend sleeve length if desired.
Pattern Abbreviations & Terminology:
(Terminology in US terms)
- ch: Chain
- st(s): Stitch(es)
- sl st: Slip Stitch
- dc: Double Crochet
- sp: Space
- cluster (granny stitch): 3 double crochets worked into the same stitch
- rep: Repeat
Step-by-Step Instructions:
1. Foundation Chain (Starting the Panels)
- Measurements: Measure from your shoulder to under your bust (or desired crop top length). Multiply this length by 2 for the foundation chain measurement.
- Example: 14 in x 2 = 28 inches.
- Ensure that the chain is made in multiples of 4.
- For the tutorial example: Chain 120 to measure 28 inches.
- Start the first panel.
2. Row 1 (Granny Stitch Row)
- Chain 5 (counts as 1 dc and 1 ch).
- Skip 5 stitches and work 1 cluster (3 dc) into the 6th stitch.
- Chain 1, skip next 3 stitches, and work 1 cluster into the 4th stitch.
- Repeat the pattern: [ch 1, skip 3 sts, cluster in the 4th st], across the row.
- At the end of the row:
- Chain 1, skip the last 2 stitches, and work 1 dc into the last stitch.
- Turn your work.
3. Row 2 and Repeating Rows
- Chain 3 (counts as your first dc).
- Work 2 dc into the first chain space to form a cluster.
- Chain 1, and for each chain space in the previous row, work 1 cluster into the space.
- Repeat until the end of the row.
- At the end, finish with a cluster in the last space.
- Turn your work.
4. Color Changes (Optional)
- If using multiple colors, switch to a new color after completing two rows in the current color:
- Cut the yarn, leave a small tail, and fasten off.
- Attach your new color yarn by tying it in the first stitch of the next row.
- Continue your pattern as described.
5. Panel Completion
- Repeat the granny stitch rows until your panel width matches half of your bust measurement.
- Example: For a 40-inch bust, each panel should measure 10 inches.
- The tutorial completed 19 rows to reach 10 inches in height.
- After completing the first panel, make another identical panel.
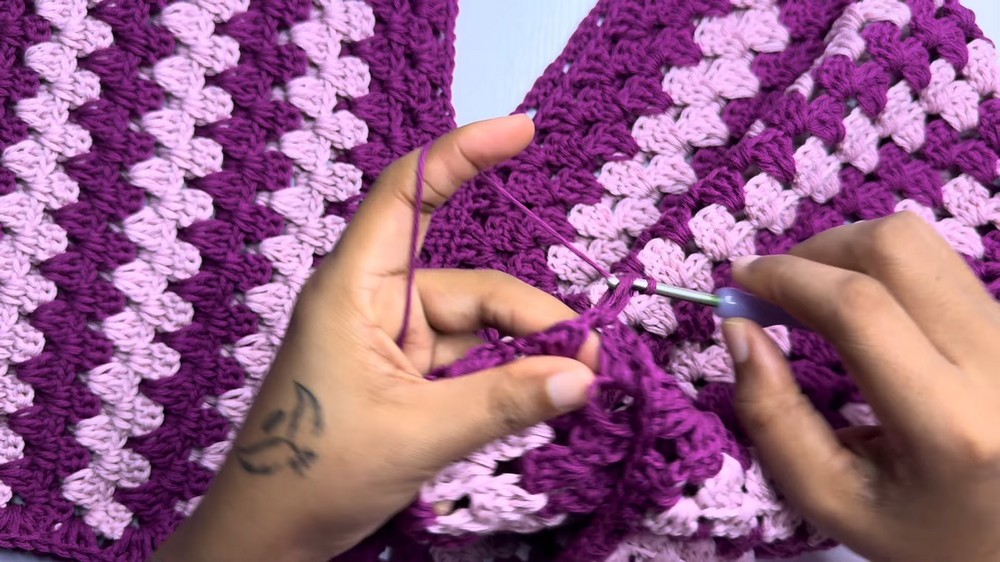
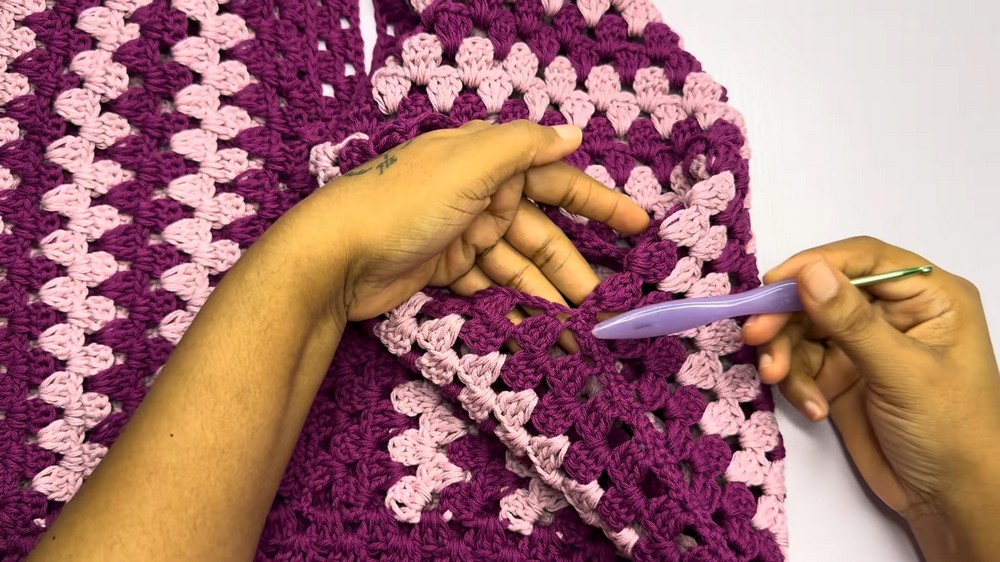
6. Joining Panels
Once both panels are ready:
- Place the panels together with the right sides facing outward (if your stitches look identical on both sides, this doesn’t matter).
- Use stitch markers to:
- Leave space for the neckline (center-top opening). Decide how wide you want this (example uses 6 clusters or 12 inches across).
- Leave space for the armholes: Measure your armhole circumference (example uses 18 inches total — 9 inches for the front and 9 for the back).
- Side seams:
- Use a tapestry needle or crochet slip stitch to seam.
- Sew from the bottom to the armhole marker.
- Shoulder seams:
- Sew from the outer edges to the neckline markers.
7. Bottom Band
- For the band, we're making rows of clusters (granny stitches) around the bottom edge, but without chains between clusters.
- Row 1:
- Attach yarn at any point on the hem.
- Chain 3, and work 1 cluster (3 dc) in every space around the hem without ch 1 between clusters.
- Join the final stitch to the top of the first chain with a sl st.
- Row 2:
- Chain 3 and turn. Repeat the same cluster pattern.
- Rows 3–4:
- Switch to alternating front post and back post double crochet stitches to create a ribbed texture (optional).
- Continue for 2 more rows or until the desired band thickness is reached.
8. Sleeves
- To add sleeves, attach yarn to the armhole seam.
- Work in rounds starting with granny stitches:
- Round 1: Work clusters in each space around the armhole, chaining 1 between clusters.
- Round 2: Repeat Round 1 until the desired sleeve length.
- Optionally, add a ribbed trim (using front/back post double crochets) to the sleeve hem.
9. Finishing Touches
- Fasten off all yarn ends.
- Weave in all loose ends with the tapestry needle.
- Block the top if necessary for proper shaping.
Recap of Customizations:
- Alter the width and length easily based on personal measurements.
- Add rows to the sleeves or bottom for a longer, fuller look.
- Mix and match yarn colors for stripes or patterns.
Notes
- Recommended to check your gauge before starting.
- Always make sure stitch counts and clusters align on both panels during joining for a polished finish.