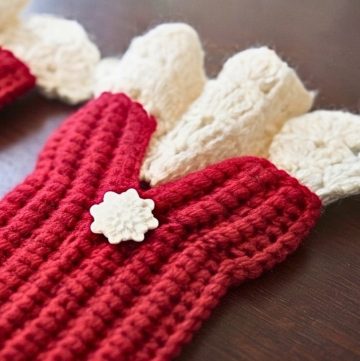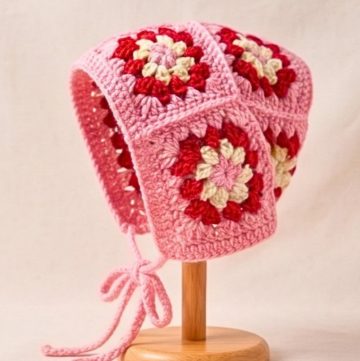

A beautifully crafted crochet headband can transform an everyday look with effortless charm. This stylish handmade piece blends comfort and elegance, making it a wonderful accessory year-round.
Whether you prefer a simple design or something more decorative, it adds a polished touch while keeping your hair neatly in place. Its timeless appeal makes it a favorite for everyday wear and as a thoughtful handmade crochet gift.

The best accessories combine beauty with everyday practicality. You can style a crochet headband or headdress with different outfits and customize it in colors that reflect your personal taste.
It offers a relaxing, enjoyable crochet experience for beginners and experienced makers alike. Once finished, this versatile item becomes a piece you'll enjoy wearing again and again.
Credit Jovelyn Kweento
Materials & Tools Needed
- Yarn:
- White: Medium-weight yarn (acrylic or cotton) for the headband base.
- Red: Medium-weight yarn for the ruffled headdress body.
- Gold: Metallic gold or metallic thread yarn for the decorative edge.
- Crochet Hook:
- 3.0 mm crochet hook.
- Headband Base:
- 1 standard plastic headband or hair hoop frame (approx. 14–15 inches long).
- Additional Notions:
- Scissors.
- Yarn needle.
Finished Size & Customization Ideas
- Sizing:
- Standard adult size headband.
- Fits frames approx. 14–15 inches in length.
- Adjustability:
- To adjust, increase or decrease the foundation chain in multiples of 1.
- Ensure the chain length matches the headband size.
- Color Customization:
- Floral/Fairy Aesthetic: Pastel tones.
- Gothic Theme: Black and dark red or other dramatic color schemes.
Pattern Notes
- Construction:
- The base sleeve is created using White yarn, crocheted directly around the plastic headband for a strong foundation.
- The ruffles are made with Red yarn using high-density treble crochet increases.
- A chain-3 picot edge worked in Gold yarn adds a decorative flair.
- Turning Chains:
- ch 1: Does not count as a stitch.
- ch 3: Counts as a double crochet (dc).
- ch 4: Counts as a treble crochet (tr).
Pattern Abbreviations & Terminology (US Terms)
- ch: chain
- sc: single crochet
- dc: double crochet
- tr: treble crochet (yarn over twice)
- sl st: slip stitch
- st(s): stitch(es)
Tips Before You Start
- Base Fit:
- Measure the plastic headband and cut the initial chain accordingly so the length matches the headband.
- Ensure you leave approximately 1 inch exposed at both ends of the headband.
- This ensures comfort when worn behind the ears while also preventing the sleeve from covering the entire length.
- Tension:
- For the base row (typically in White), aim for a consistent tension while working.
- The tension should be moderately firm to ensure the sleeve fits snugly around the headband and doesn’t slide during use or wear.
Extra Suggestions:
- Test fit your project frequently as you progress to confirm it matches the headband’s dimensions.
- Consider using a headband color that complements your sleeve design for a polished look.
- If you're unsure about measurements, it's better to start slightly longer; you can always adjust later.
Difficulty Highlights
- Skill Level: Intermediate
- Key Skills:
- Working stitches around a plastic headband frame
- Double crochet rows
- Treble crochet density ruffling
- Metallic picot border stitching

Step-by-Step Detailed Crochet Instructions
Part 1: White Base Sleeve
Row 1:
- Using White yarn, create a slip knot.
- Chain (ch) 65.
Row 2:
- Insert hook into the 2nd chain from the hook, single crochet (sc) across to the end.
- Turn. (64 sc)

Row 3:
- Ch 1, single crochet (sc) in each stitch (st) across.
- Turn. (64 sc)
Row 4 (Attaching to Headband):
- Fold the white strip over the top curve of the plastic headband frame.
- Single crochet (sc) along the edge, working through both layers to wrap and securely enclose the plastic headband inside the white crochet sleeve.
- Fasten off the white yarn and weave in ends.

Part 2: Red Ruffled Body
Row 1:
- Join Red yarn with a slip knot at the first stitch of the white headband base.
- Ch 3 (counts as 1 double crochet [dc]), then double crochet (dc) in each stitch across the entire headband base.
- Turn. (64 dc)
Row 2 (Ruffle Layer):
- Ch 4 (counts as 1 triple crochet [tr]).
- Work 2 tr in every single stitch across the row (1 st, 2 tr repeat pattern).
- This drastic increase in stitch count will automatically form the lush ruffled headdress fold.
- Fasten off red yarn.

Part 3: Gold Metallic Border
Row 1:
- Join Gold metallic yarn at the beginning of the red ruffle edge.
Edge Sequence:
- Ch 3, slip stitch (sl st) into the next stitch.
- Repeat *ch 3, sl st in next st* continuously along the outer ruffled perimeter.
Finishing:
- Fasten off gold yarn.

Final Assembly
Finishing Ends:
- Use a yarn needle to weave all loose tail ends (White, Red, Gold) neatly into the inside of the crochet sleeve.
Adjusting Ruffles:
- Fluff and evenly distribute the red and gold ruffles along the top arch of the headband.
- Ensure they fan out evenly when worn.
Conclusion
Your Christmas-Inspired Crochet Headband / Headdress is now complete! The rich red folds trimmed with shimmering gold make this piece a festive statement for holiday gatherings, costumes, or special occasions. Enjoy wearing (or gifting) this handmade beauty.