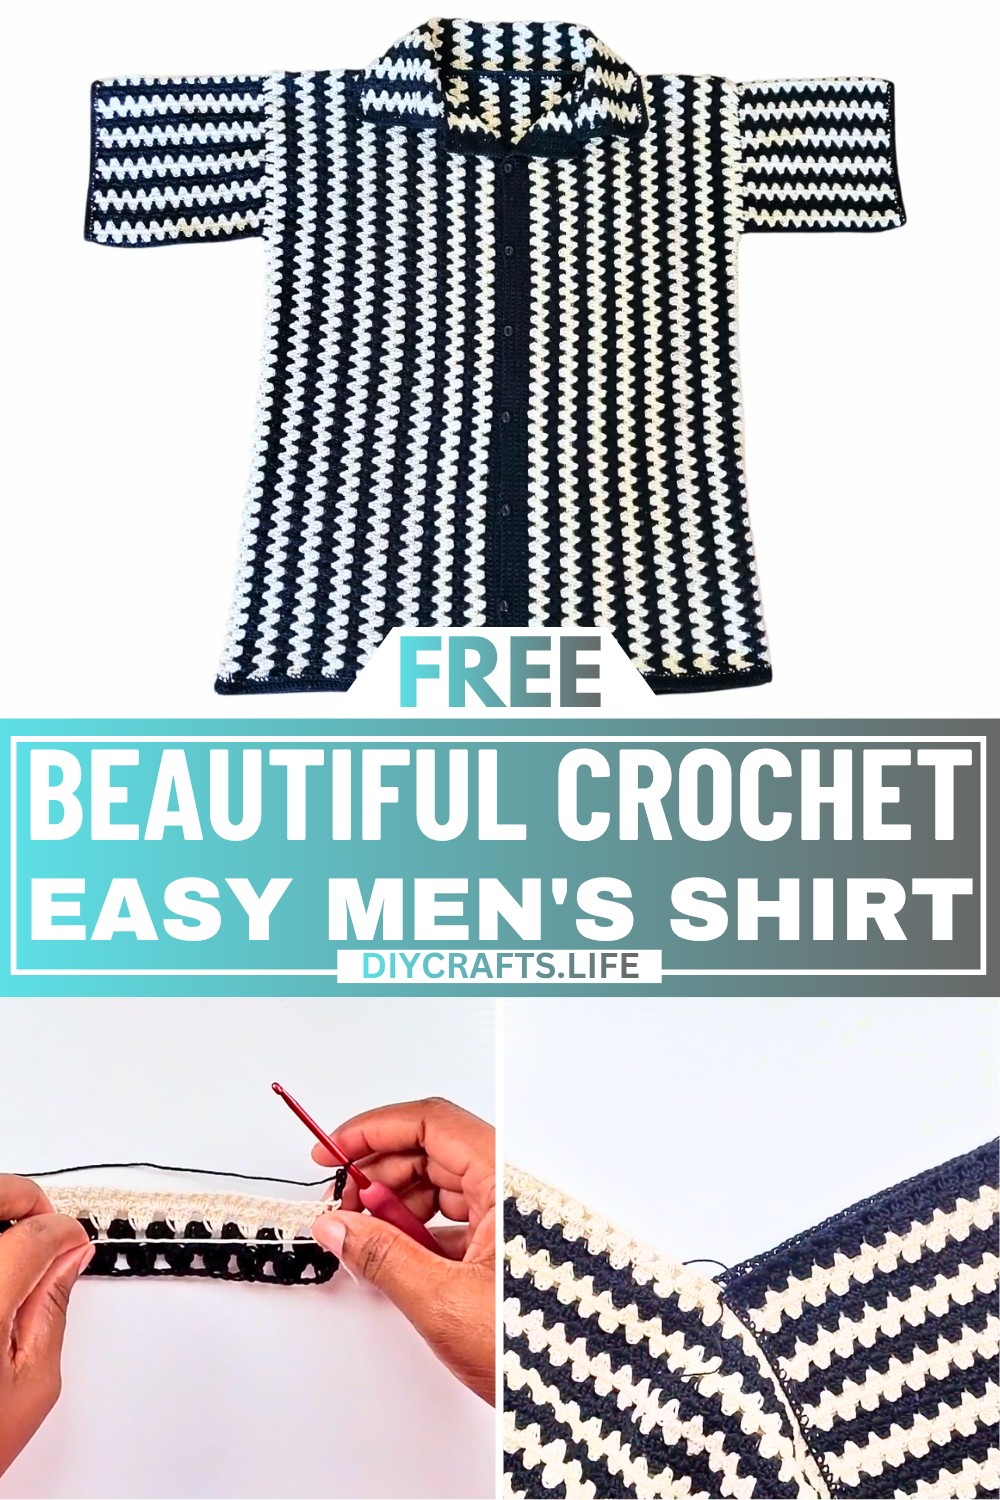
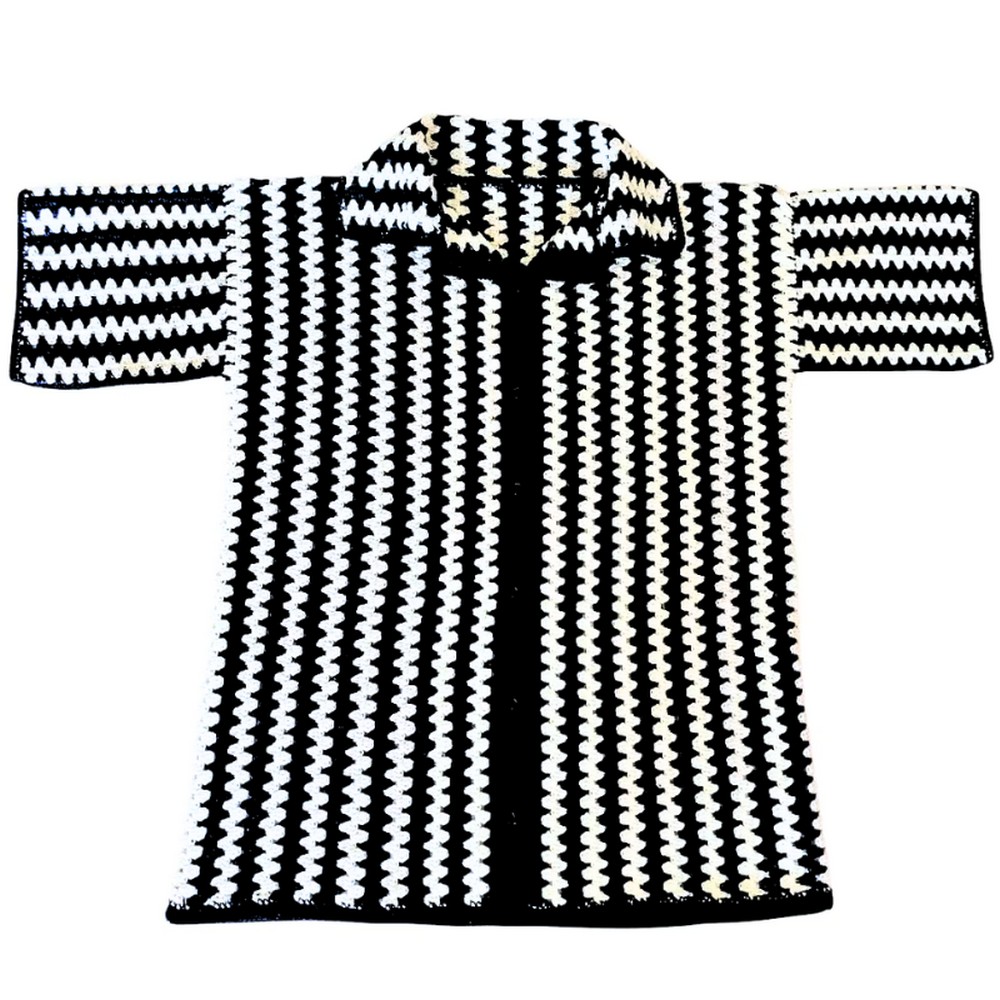
This crochet men's shirt is a wonderful and unique handmade creation, perfect for everyday wear or special occasions. Unlike traditional shirts, this one is breathable, lightweight, and versatile, making it ideal for casual outings, relaxing at home, or showcasing a creative style. Its design combines practicality and beauty, making it a one-of-a-kind wardrobe piece.
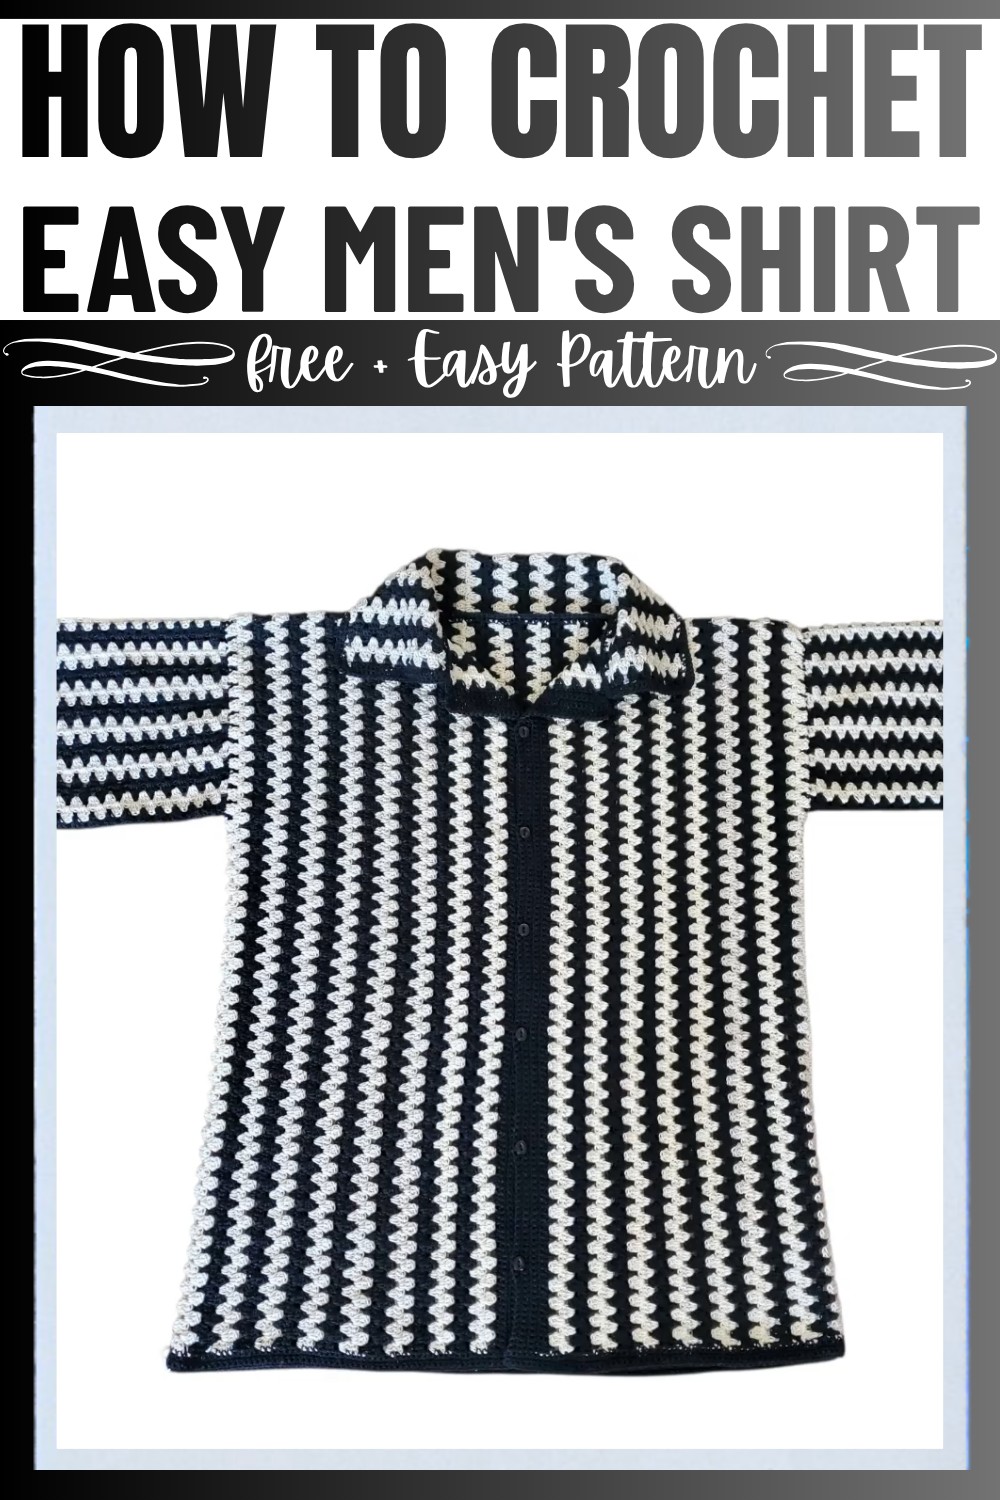
The shirt is created with care using crochet techniques, resulting in a detailed and textured look that feels modern yet timeless. While the tutorial walks you through how to make it, the process is straightforward and enjoyable, allowing you to craft something truly personal. Whether you're making it for yourself or as a thoughtful gift, this shirt blends comfort, style, and creativity seamlessly.
Credit Creative Hands by SHAY
Materials & Tools Needed
- Yarn: Aunt Lydia’s Crochet Thread 8 skein each Color:Natural & Black
- Crochet Hook Size: 3.5mm crochet hook.
- Stitch markers: To pin and align panels and sleeves.
- Darning Needle: For weaving in tail ends and final finishing.
- Measuring Tape: For precise measurements.
- Buttons: About 12mm (half-inch) buttons (quantity depends on closure style).
- Scissors
Finished Size
- Shirt: Designed for a size large men's shirt but can be customized as needed.
- Measurements:
- Front panel: Two panels, each 31 rows.
- Back panel: One solid panel, 62 rows.
- Sleeve: 16 inches wide and 7.5 inches long, totaling 46 rows.
- Collar: 48 rows with alternating color patterns.
Customization Ideas
- Adjusting Size:
- Make the shirt smaller by using a size 3 hook (or thinner yarn).
- Make it larger by increasing the initial foundation chain (keep chains in multiples of 3 + 2 for even stitching).
- Work closely with a measuring tape to ensure proper fit.
- Change Colors:
- Use any two complementary colors or even a gradient for a creative flair.
Pattern Abbreviations & Terminology
- ch = chain
- dc = double crochet
- sc = single crochet
- sl st = slip stitch
- st(s) = stitch(es)
- sp = space
- RS = right side of the fabric
- WS = wrong side of the fabric
Step-by-Step Crochet Instructions
Below is the breakdown of each shirt component (body panels, sleeves, buttons, collar) exactly as described in the scraped data with accurate steps.
Body Panels
- Foundation Chains:
- Large Shirt: Chain 132.
- Note: Chains must be in multiples of 3, plus 2 for even stitching.
- Row 1:
- Skip the first two chains, place 3 dc into the third chain (granny stitch cluster).
- Skip 2 chains, then place 3 dc into the next stitch.
- Repeat [skip 2, 3 dc] until the end of the chain sequence.
- Turn your work.
- Row 2 and Beyond:
- Chain 3 (counts as the first dc of the next row).
- Work 3 dc clusters into each space between the previous row’s clusters.
- Continue repeating until you’ve reached:
- Front Panels: 31 rows each.
- Back Panel: 62 rows total as a solid piece.
- Alternate colors every two rows (start with ivory, switch to black, etc.)
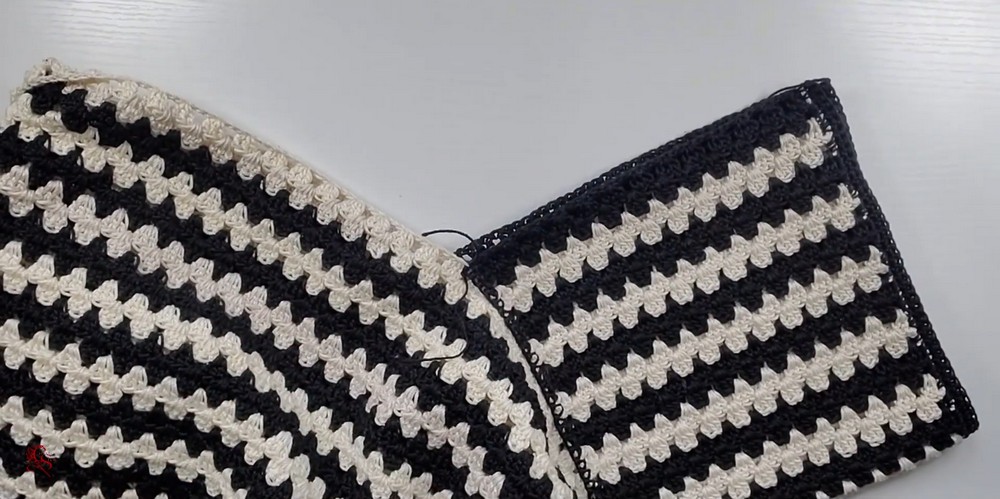
Joining Panels
- Preparation:
- Pin the front panels on top of the back panel with stitch markers. The opening will serve as the neckline.
- Sewing Shoulder Sections:
- Use a matching yarn color (ivory or black).
- Attach your yarn to the edge and work single crochets along the edge to join the shoulders.
- Ensure rows align (e.g., black joins black, ivory joins ivory).
Sleeves
- Foundation Chains:
- Chain 39 for sleeve width.
- Row 1:
- Skip 2 chains, work 3 dc clusters into the third chain.
- Repeat [skip 2, 3 dc] across.
- Subsequent Rows:
- Chain 3, turn your work, and continue row-by-row, alternating colors every 2 rows like the body panels.
- Total: 46 rows for the sleeve (16” width and 7.5” length).
- Bottom Edge of Sleeves:
- At the end, work 2 rows of single crochet along the edge for a clean finish.
Attaching Sleeves
- Align Sleeves:
- Align the center of the sleeve with the body panel's shoulder seam using stitch markers.
- Sewing:
- Use matching yarn to attach the sleeves using single crochet stitches. Begin at the top and work your way down the edges.
Side Seams
- Preparation:
- With the WS facing up, pin the shirt edges together using stitch markers. Leave an opening at the top for armholes (approximately 7 inches).
- Sewing:
- Match up rows carefully to keep colors aligned.
- Use single crochets to join from armpit down toward the hem.
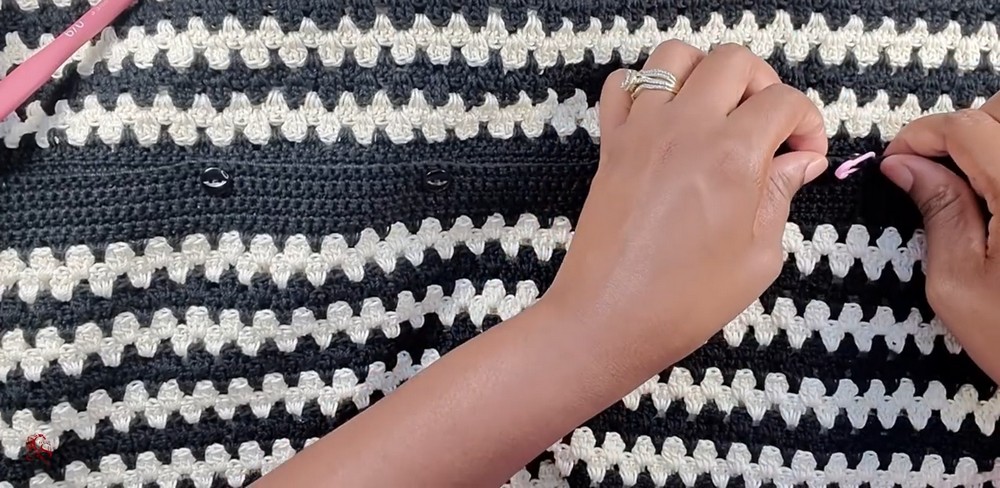
Button Closure
- Left Panel (Buttonholes):
- Work 4 rows of single crochet on the front edge.
- For buttonholes:
- At intervals, chain 1, skip 1 stitch, and continue single crochet.
- Add a buttonhole every 3.5 inches (or adjust based on desired button spacing).
- End with a row of single crochet, ensuring tidy edges around holes.
- Right Panel (Buttons):
- Work straight rows of single crochet on this side (no holes).
- Sew buttons onto the fabric using their alignment with the buttonholes.
Bottom Hem
- Add 3 rows of single crochet around the bottom edge for reinforcement and a polished finish.
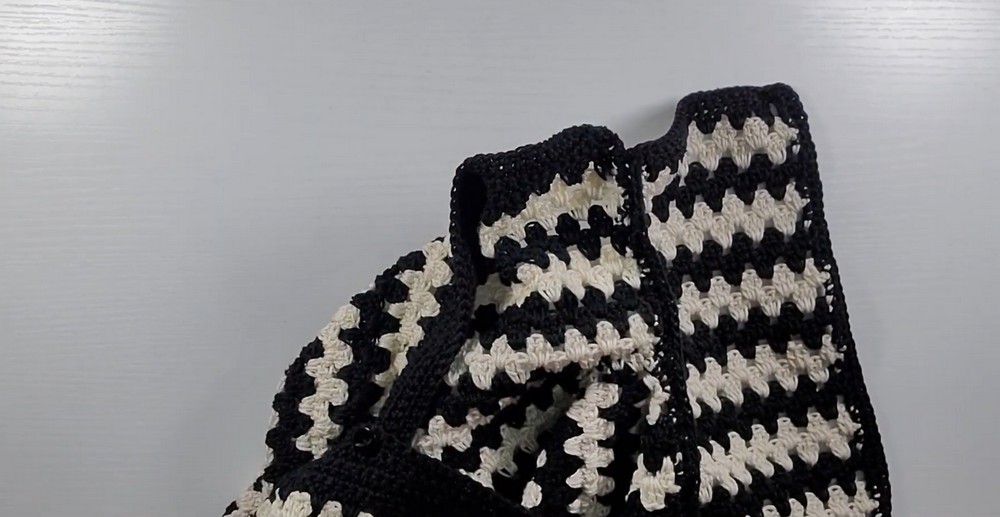
Collar
- Creating the Collar:
- Chain 24 for the base.
- Work the same granny stitch pattern as the panels, alternating colors every two rows.
- Total: 48 rows to form the collar.
- Attaching the Collar:
- Lay the collar’s RS on the shirt neckline's WS. Pin into place.
- Use single crochet to attach, ensuring both sides align symmetrically.
- Finishing Edges:
- Work 2 rows of single crochet around the outer edges, adding 3 stitches at sharp points for clean curves.
Final Steps
- Weave in Tail Ends:
- Use a darning needle to tidy up excess yarn at seams and color changes.
- Blocking (If Needed):
- Lay the shirt flat and lightly mist with water. Shape evenly for smooth edges.
- Admire Your Work!
Notes
- While black yarn might be hard to see, ensure good lighting when working.
- Constant alignment during sewing ensures a neat finish.