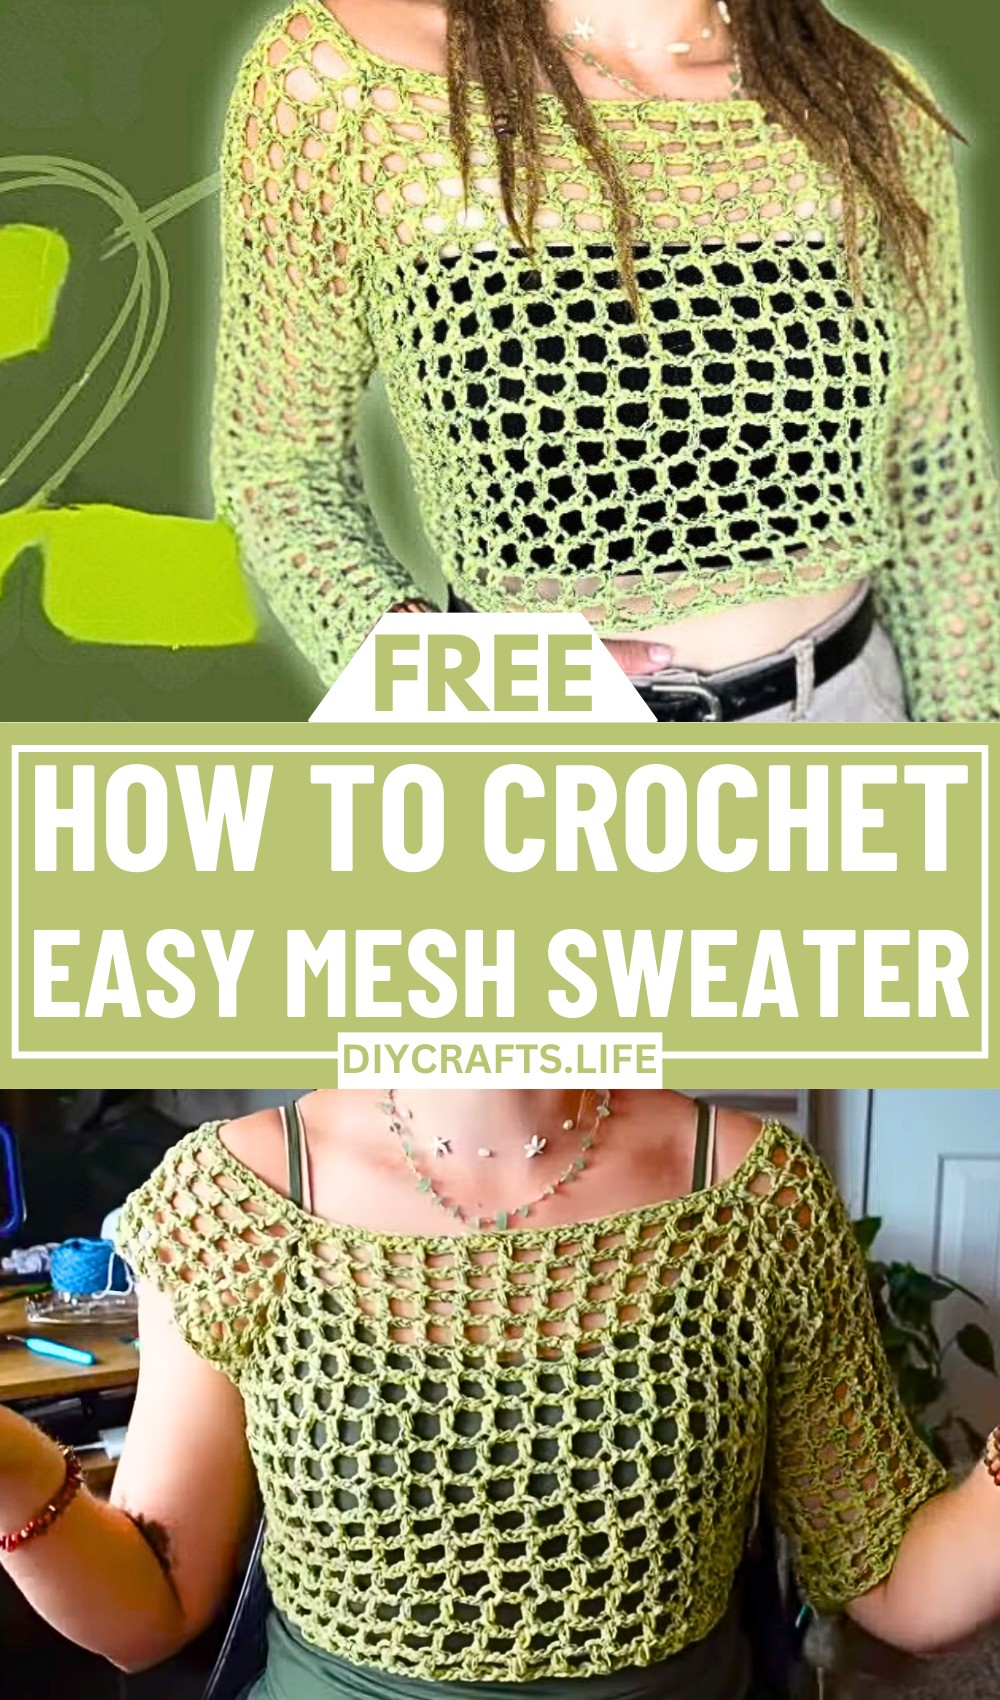
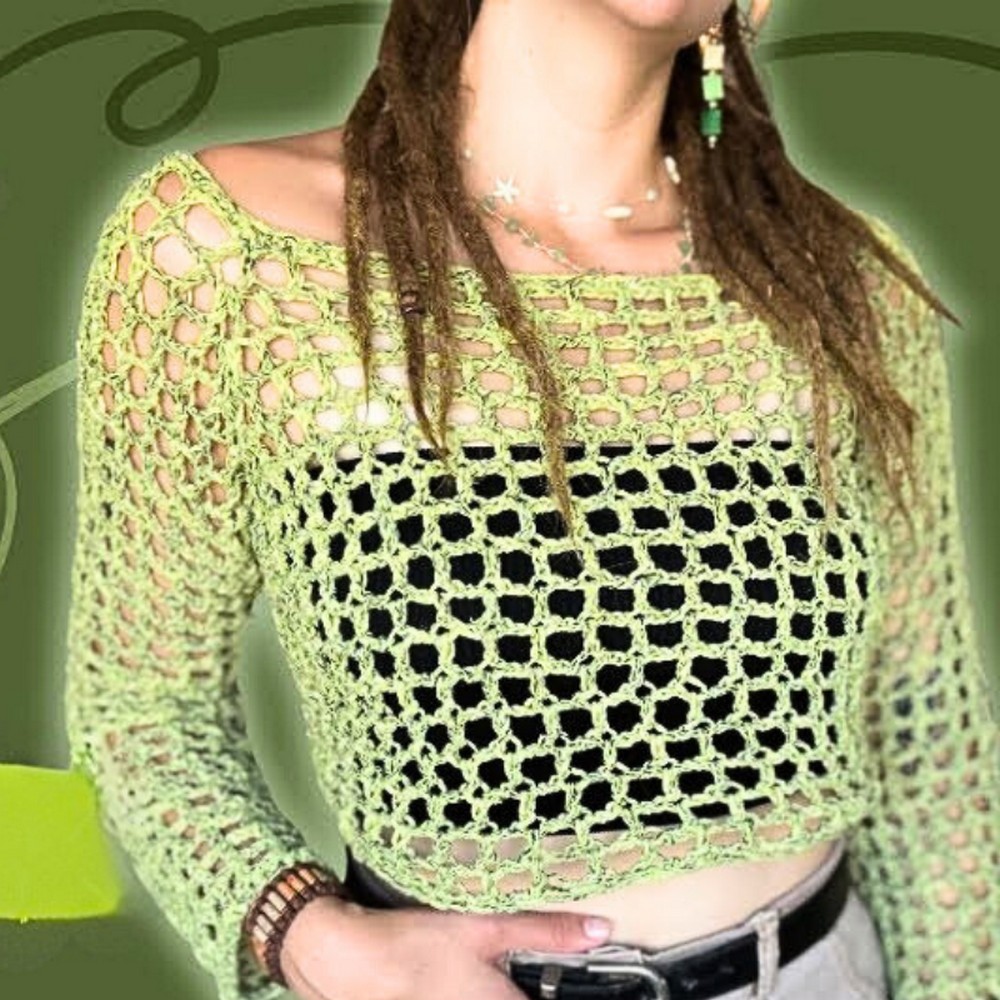
Step into the world of effortless style with this stunning crochet mesh sweater design, perfect for any season! Whether you're looking to layer it over a cute summer top or wear it as a cozy fall staple, this pattern is all about merging comfort with contemporary fashion. Its airy texture and delicate flow ensure you’ll stand out in any crowd while embracing versatility and creativity in your wardrobe.

Crochet Mesh Sweater
This made-to-measure, size-inclusive sweater is the ultimate blend of simplicity and sophistication. Designed to be worked from the top down, its customizable raglan fit allows you to shape it to your style and body perfectly. Its standout mesh stitch pattern is not only beginner-friendly but also a fantastic way to highlight various yarn types, from soft cotton blends to cozy polyester. Whether you're after fitted sleeves and a snug body or a loose and breezy silhouette, this design puts the creative reins in your hands, ensuring every stitch reflects your individual style.
Credit Kayla | Chromatic Creations
Materials & Tools Needed
Below are the materials and tools you'll need for creating the mesh sweater:
- Yarn:
- You can use any yarn weight, from thread to bulky yarn. Suggested yarn weights include:
- Cotton-bamboo blends for lightweight summer or breathable styles.
- Polyester or acrylic for thicker, warmer pieces (e.g., great for fall/winter).
- Example brands: Red Heart Super Saver, stash yarn, or any yarn of your choosing. Kayla recommends using yarn from your stash to customize the piece!
- You can use any yarn weight, from thread to bulky yarn. Suggested yarn weights include:
- Crochet Hook:
- Use a hook size larger than the recommended size for your yarn to create a flowy mesh look. Kayla used a size 7 hook for a looser and lacier fit.
- Stitch Markers:
- At least 4 stitch markers to mark increases while forming the neckline and raglan structure. If you don’t have stitch markers, try alternatives: yarn scraps, safety pins, or paper clips.
- Tapestry Needle:
- For weaving in ends once the sweater is complete (a necessary but tedious part!).
- Scissors:
- To cut your yarn while working. Alternatives like nail clippers can also be used.
Finished Size & Customization Ideas
Size:
This made-to-measure project is fully customizable and size-inclusive. The sweater is worked top-down, raglan style, with adjustments to fit your neckline, bust, and sleeve length.
Approximate starting points:
- Chain 80–100 for wider necklines that may fall off the shoulders.
- Chain fewer for a snug neckline.
Customization Suggestions:
- Yarn Weight:
- Use lighter yarn for summer-style mesh sweaters and heavier yarn for cozy fall/winter options.
- Neckline:
- Adjust your starting chain length to modify the neckline size. A smaller chain will result in a snug neckline, while a larger chain will create a loose, off-the-shoulder look.
- Fit/Style:
- To make the fit tighter, add decreases under the arms or while working the body. Decreases every other row are ideal for fitted styles.
- To add flow, work increases as you move down the body or sleeves.
- Sleeves:
- Adjust sleeve length based on your preference (short sleeves, ¾-length sleeves, or full sleeves). Add stretch or create a bell effect with increases near cuff areas.
- Color Choices:
- Switch colors between rows or sections for a striped or color-blocked design.
- Use self-striping or ombré yarn for a gradient effect.
Pattern Abbreviations & Terminology
Here are common terms used in the pattern:
| Abbreviation | Meaning |
|---|---|
| ch | Chain |
| sc | Single Crochet |
| dc | Double Crochet |
| sl st | Slip Stitch |
| st | Stitch |
| ch sp | Chain Space |
| yo | Yarn over |
| inc | Increase |
| dec | Decrease |
Terminology follows US Crochet Terms.
Step-by-Step Detailed Crochet Instructions
1. Beginning the Neckline
- Chain foundation: Chain an even number based on your desired neckline size (e.g., start with 100 chains).
- Slip stitch into the 1st chain to create a loop for the neckline.
- Mark stitch increase points:
- Divide the chain into 4 sections to mark the front, back, and shoulders. Example distribution for 100 chains:
- 20 stitches for each shoulder.
- 30 stitches for the front.
- 30 stitches for the back (15 on each side of the working yarn).
- Divide the chain into 4 sections to mark the front, back, and shoulders. Example distribution for 100 chains:
- Row 1:
- Single crochet into each chain. At the stitch markers, work:
- "sc, ch 1, sc" to create increases.
- Single crochet into each chain. At the stitch markers, work:
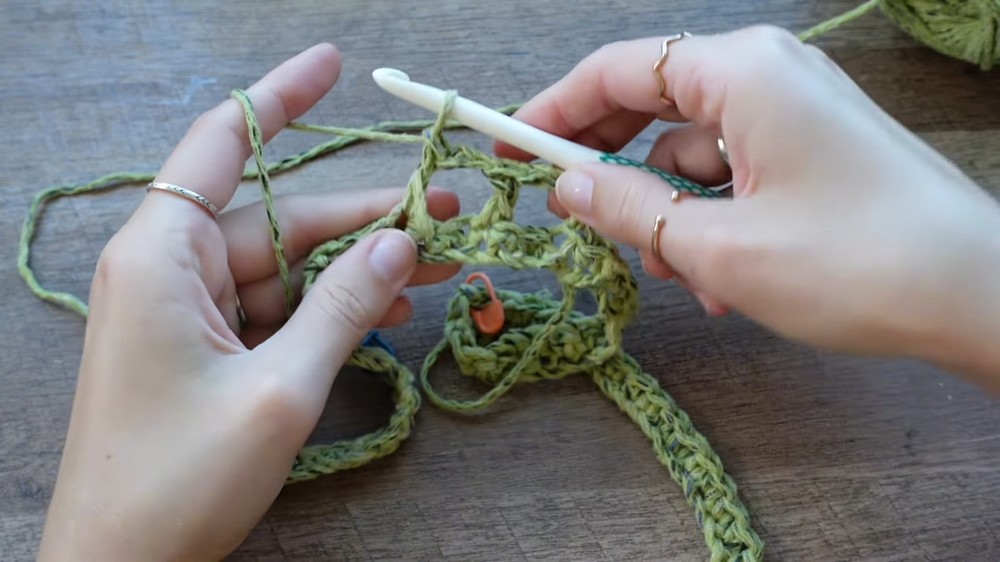
2. Forming the Raglan Structure
- Row 2 (Mesh Stitch):
- Chain 4 (counts as dc + ch 2).
- Work a mesh pattern: "dc into third stitch, ch 2, skip 2 stitches".
- At corners (increase points), work two double crochets into the ch-1 space:
- dc, ch 2 (move marker here), dc.
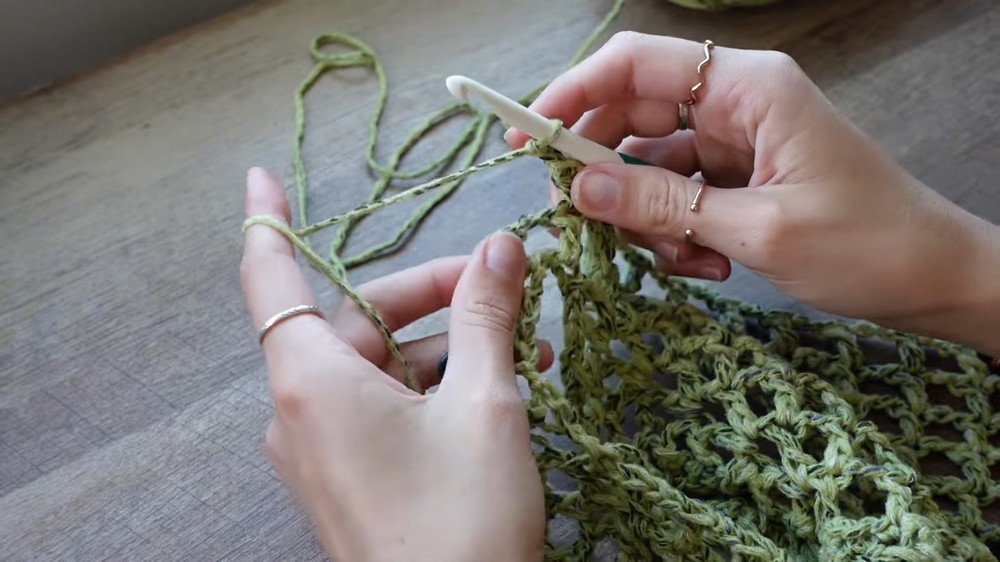
- Rows 3 and Beyond:
- Continue mesh pattern with increases at every stitch marker. Keep working until the raglan section passes your armpits (approximately 6 rows for Kayla’s fitted version).
3. Separating Sleeves from the Body
- Chain under the armholes to separate sleeves:
- For a fitted design, Kayla chained 12 stitches to create a snug fit. For a looser design, you can chain more.
- Attach chain to the opposite increase space to form the armhole. Repeat for both sleeves.
- Continue working the mesh stitch down the body, skipping the sleeve sections.
4. Working the Body
- Decreases (Optional):
- Add fitted decreases under both arms every other row to create a more tailored fit. Example decrease:
- Work dc2tog (double crochet two together) at underarm points.
- Add fitted decreases under both arms every other row to create a more tailored fit. Example decrease:
- Row after Row:
- Continue working the mesh stitch until you reach the desired body length.
- Add a single crochet border at the bottom for a finished edge.
5. Working the Sleeves
- Attach yarn under the armhole (start near the center for a clean seam).
- Rows:
- Work the same mesh stitch pattern around the sleeve. Skip unnecessary spaces near underarm chains for a smoother fit.
- Fitted Sleeves:
- If desired, add decreases every few rows for snug sleeves.
- For bell sleeves near the cuff, add increases every couple of rows.
6. Finishing Touches
- Borders:
- Add single crochet rounds at the neckline, bottom edge, and cuffs for polished edges.
- Weave in Ends:
- Use a tapestry needle to weave in all ends securely.
- Block the Sweater (Optional):
- Wet block or steam block to achieve the perfect stretch and drape.
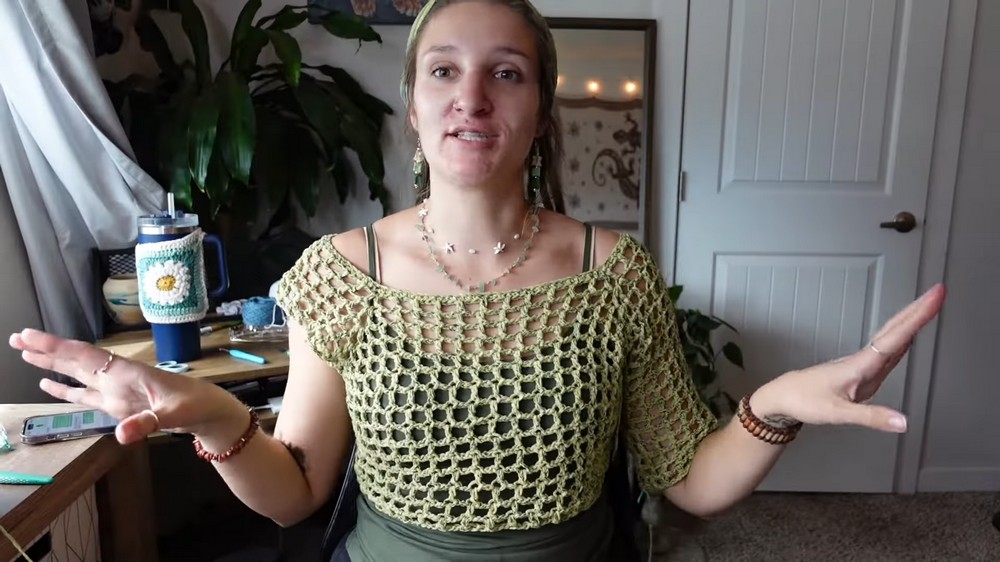
Key Tips
- Flexible Design: The sweater can fit all sizes since it’s made-to-measure. Adjust chains, rows, and section lengths as you go.
- Mistakes Are Okay: Slight mismatches in stitch counts (e.g., missing a stitch) can usually be adjusted without noticeable issues.
- Customize Freely: This tutorial encourages creativity – personalize the sweater to suit your style!
Enjoy creating your stylish mesh sweater! 🎉