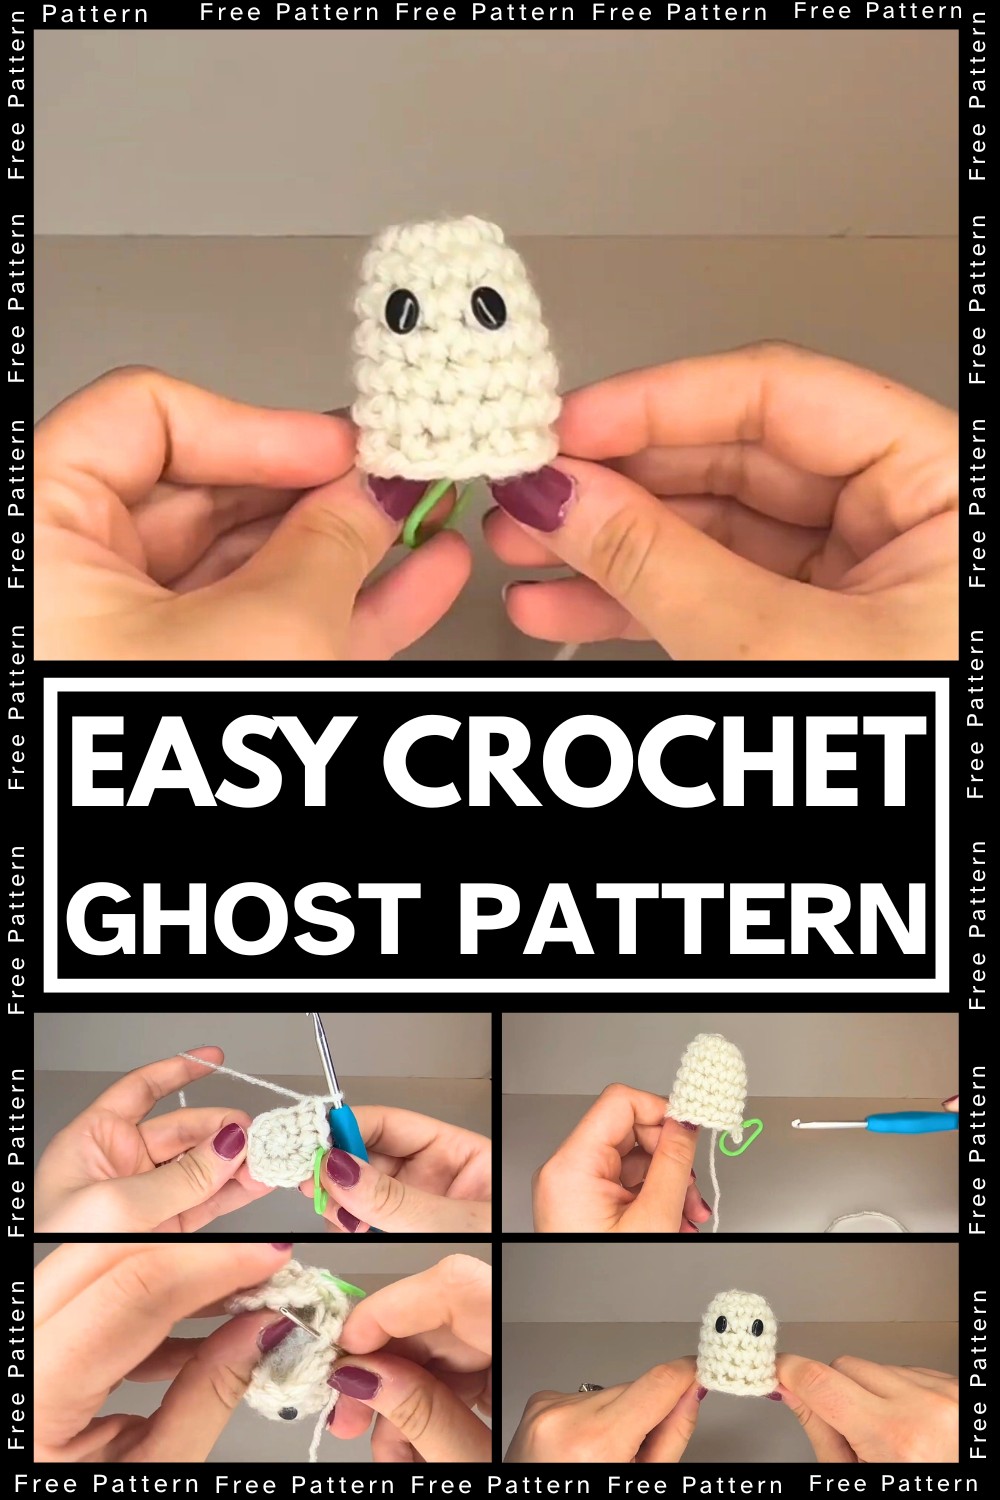
Get into the spooky spirit by crocheting an adorable mini ghost! This project is quick, fun, and perfect for Halloween decor or unique gifting. Its compact size adds charm to your spooky season setup, and with simple stitches, it’s a beginner-friendly way to craft a delightful keepsake.
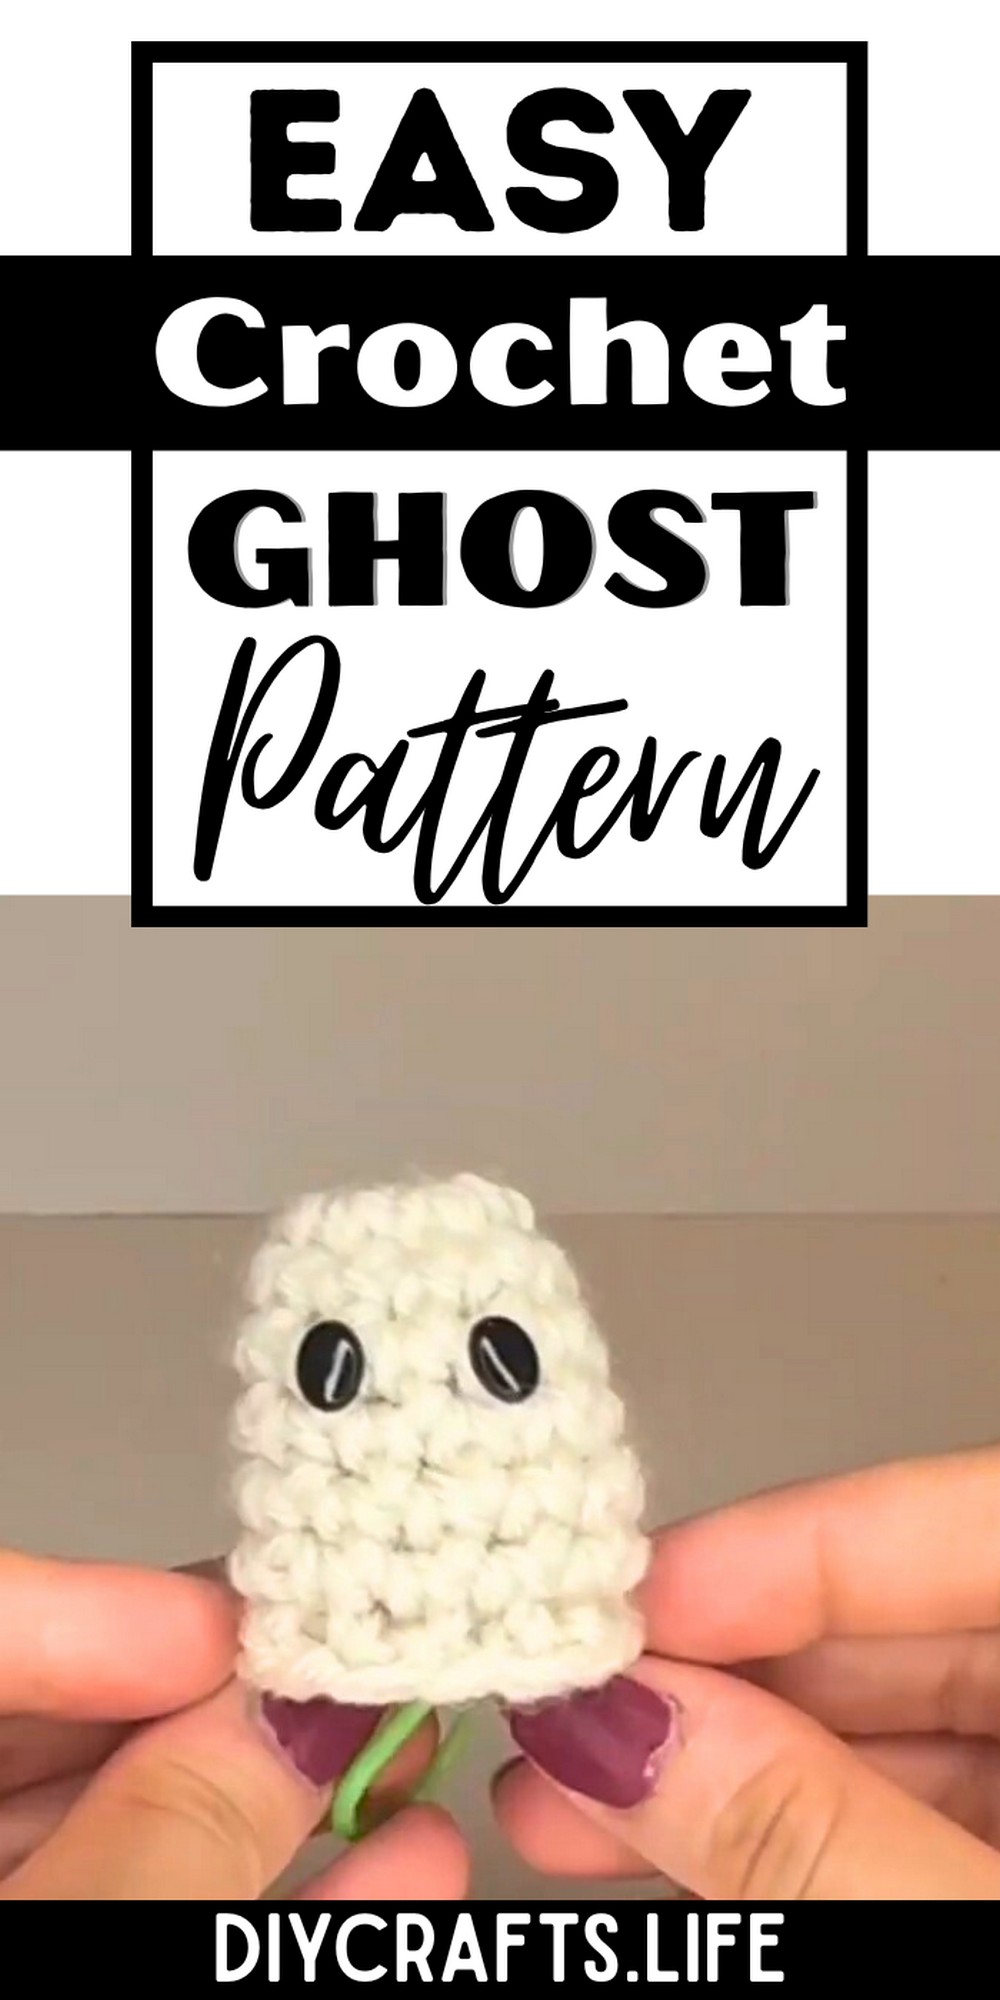
This mini ghost is versatile—use it as a Halloween decoration, keychain, or even a toy for kids. The durable structure, using medium acrylic yarn, ensures longevity, while safety eyes add an adorable touch. Its compact design and customizable features make it a fun addition to your handmade collection.
Crochet a Mini Ghost
Crafting this little ghost is both easy and relaxing, making it perfect for beginners and experienced crocheters alike. The pattern encourages creativity, allowing you to choose eye sizes or even crochet alternatives. With easy-to-follow rounds, you’ll love how customizable and satisfying this cute project is.
Materials and Preparation
To crochet this adorable mini ghost, gather the following supplies:
- Yarn: Medium (#4) weight off-white acrylic yarn
- Hook Size: 4 mm crochet hook
- Additional Tools:
- Stuffing for shaping
- Oval safety eyes (small size preferred) with backings
- Scissors
- Yarn needle
- Stitch marker (optional for tracking stitches)
Ensure your yarn and hook are compatible to create a smooth, even crochet texture.
Abbreviations and Notes
Here are the abbreviations used in this pattern:
- SC: Single Crochet
- Inc: Increase (two SCs in the same stitch)
- Slst: Slip Stitch
- FL: Front Loop
Additional Notes:
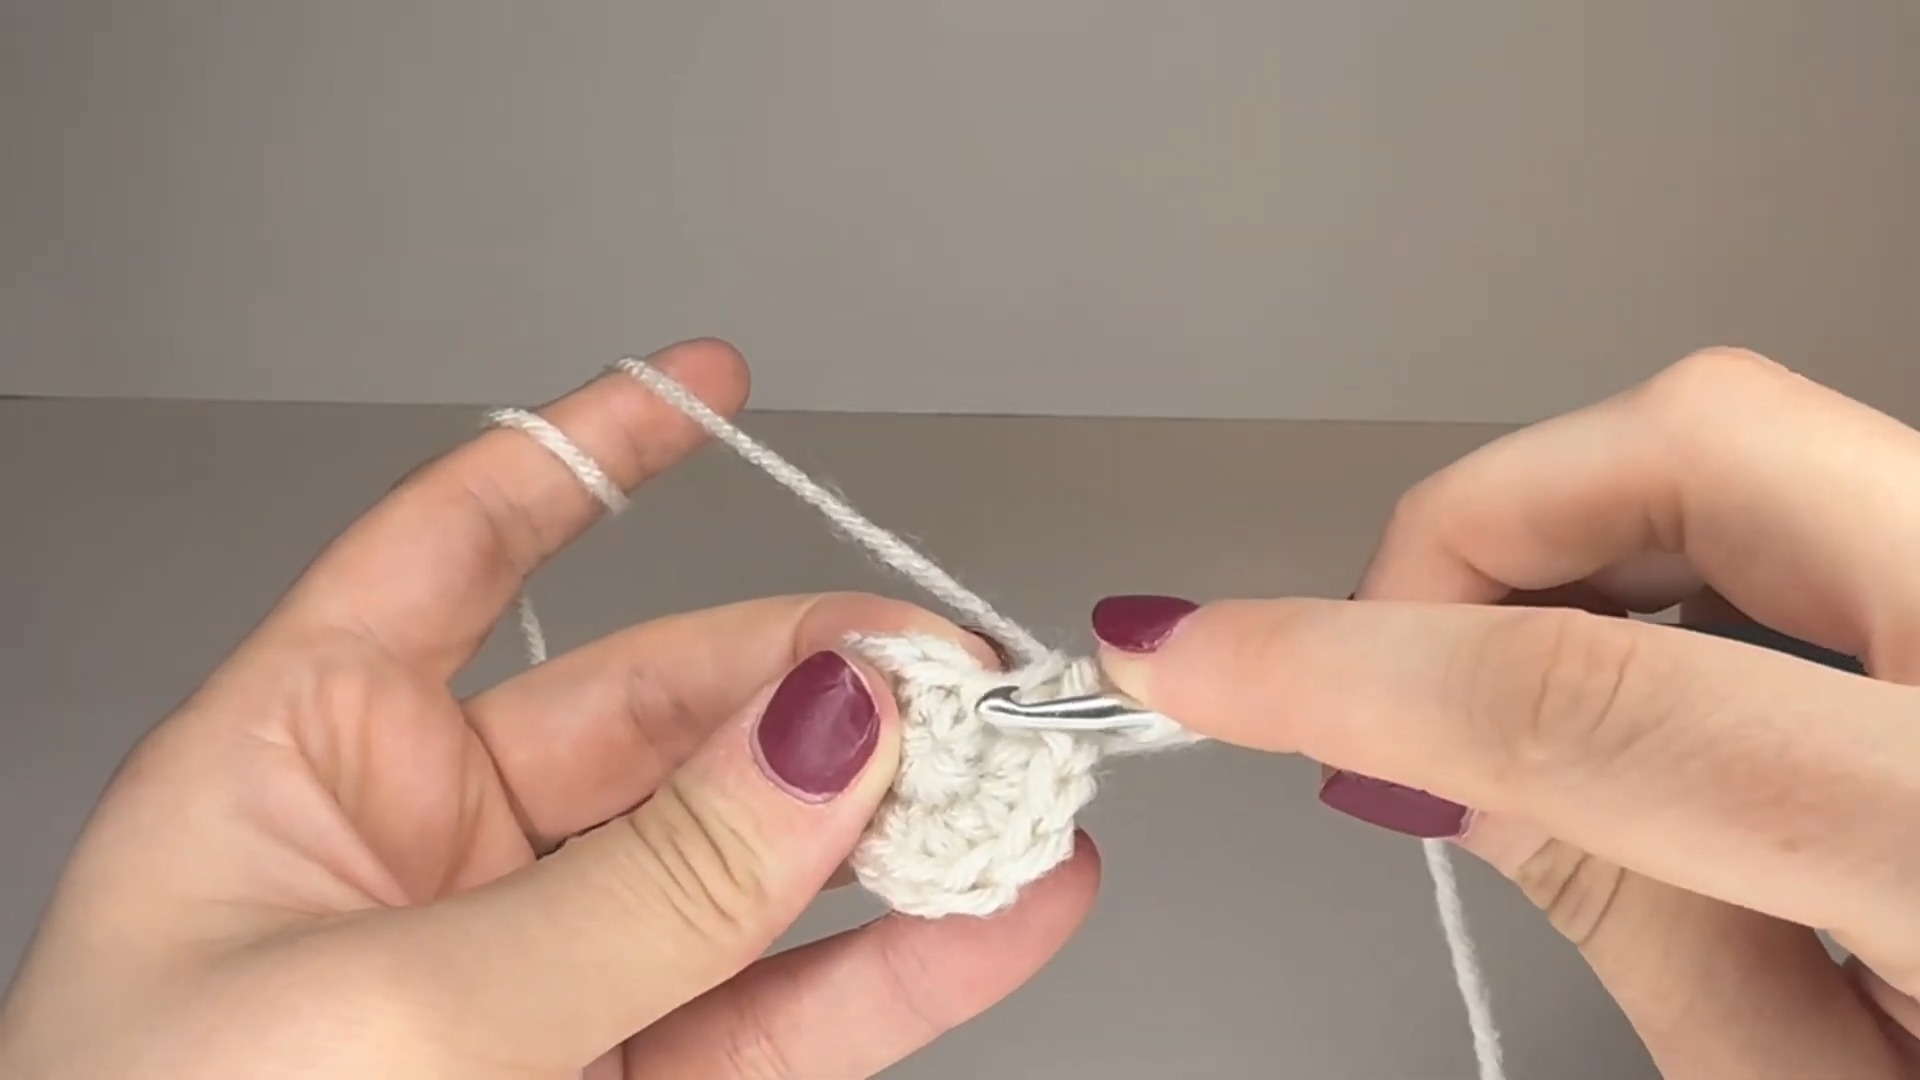
- This pattern begins with a magic circle, a popular technique used for creating a tight base for round projects. If you're unfamiliar with it, consider watching a tutorial.
- Round 8 requires working in front loops only, giving the ghost a cute ruffled edge.
- Use a stitch marker to track your rounds and maintain accuracy.
Gauge, Approximate Size, and Pattern Notes
- Gauge: This pattern does not specify stitch gauge, so an exact gauge swatch isn’t required. Simply stick to medium-weight yarn and a 4 mm hook for proper proportions.
- Approximate Size: The finished ghost is small and suitable as a keychain or desk decoration (about 3–4 inches tall, depending on your tension).
- Techniques Used: Magic circle, single crochet, increases, slip stitches, and front loop crocheting.

Step-by-Step Pattern
Body of the Ghost:
- Round 1:
- Start with a magic circle.
- Single crochet (SC) 6 into the magic circle. Cinch tightly to close the circle. (6 stitches at the end of this round)
- Round 2:
- Inc in each stitch (2 SCs per stitch). (12 stitches total)
- Rounds 3–7:
- SC in each stitch around. (12 stitches per round)
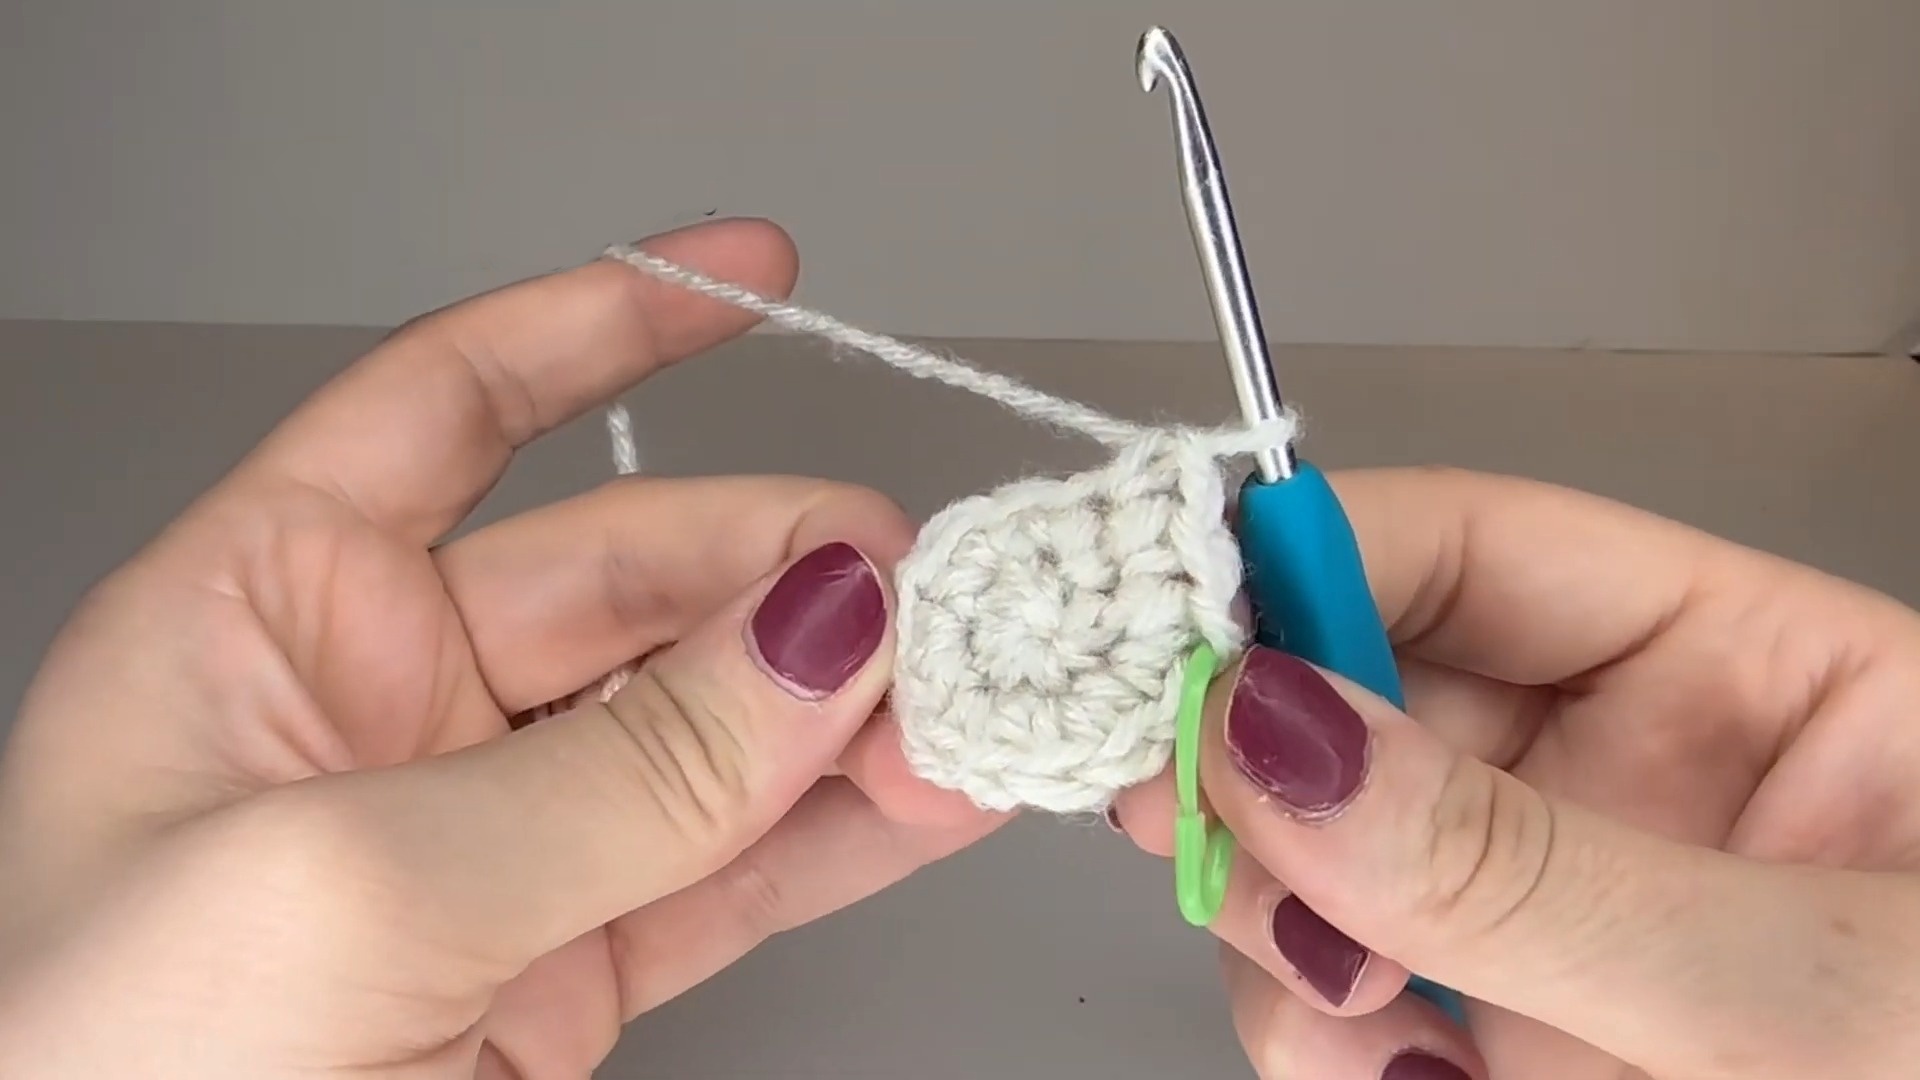
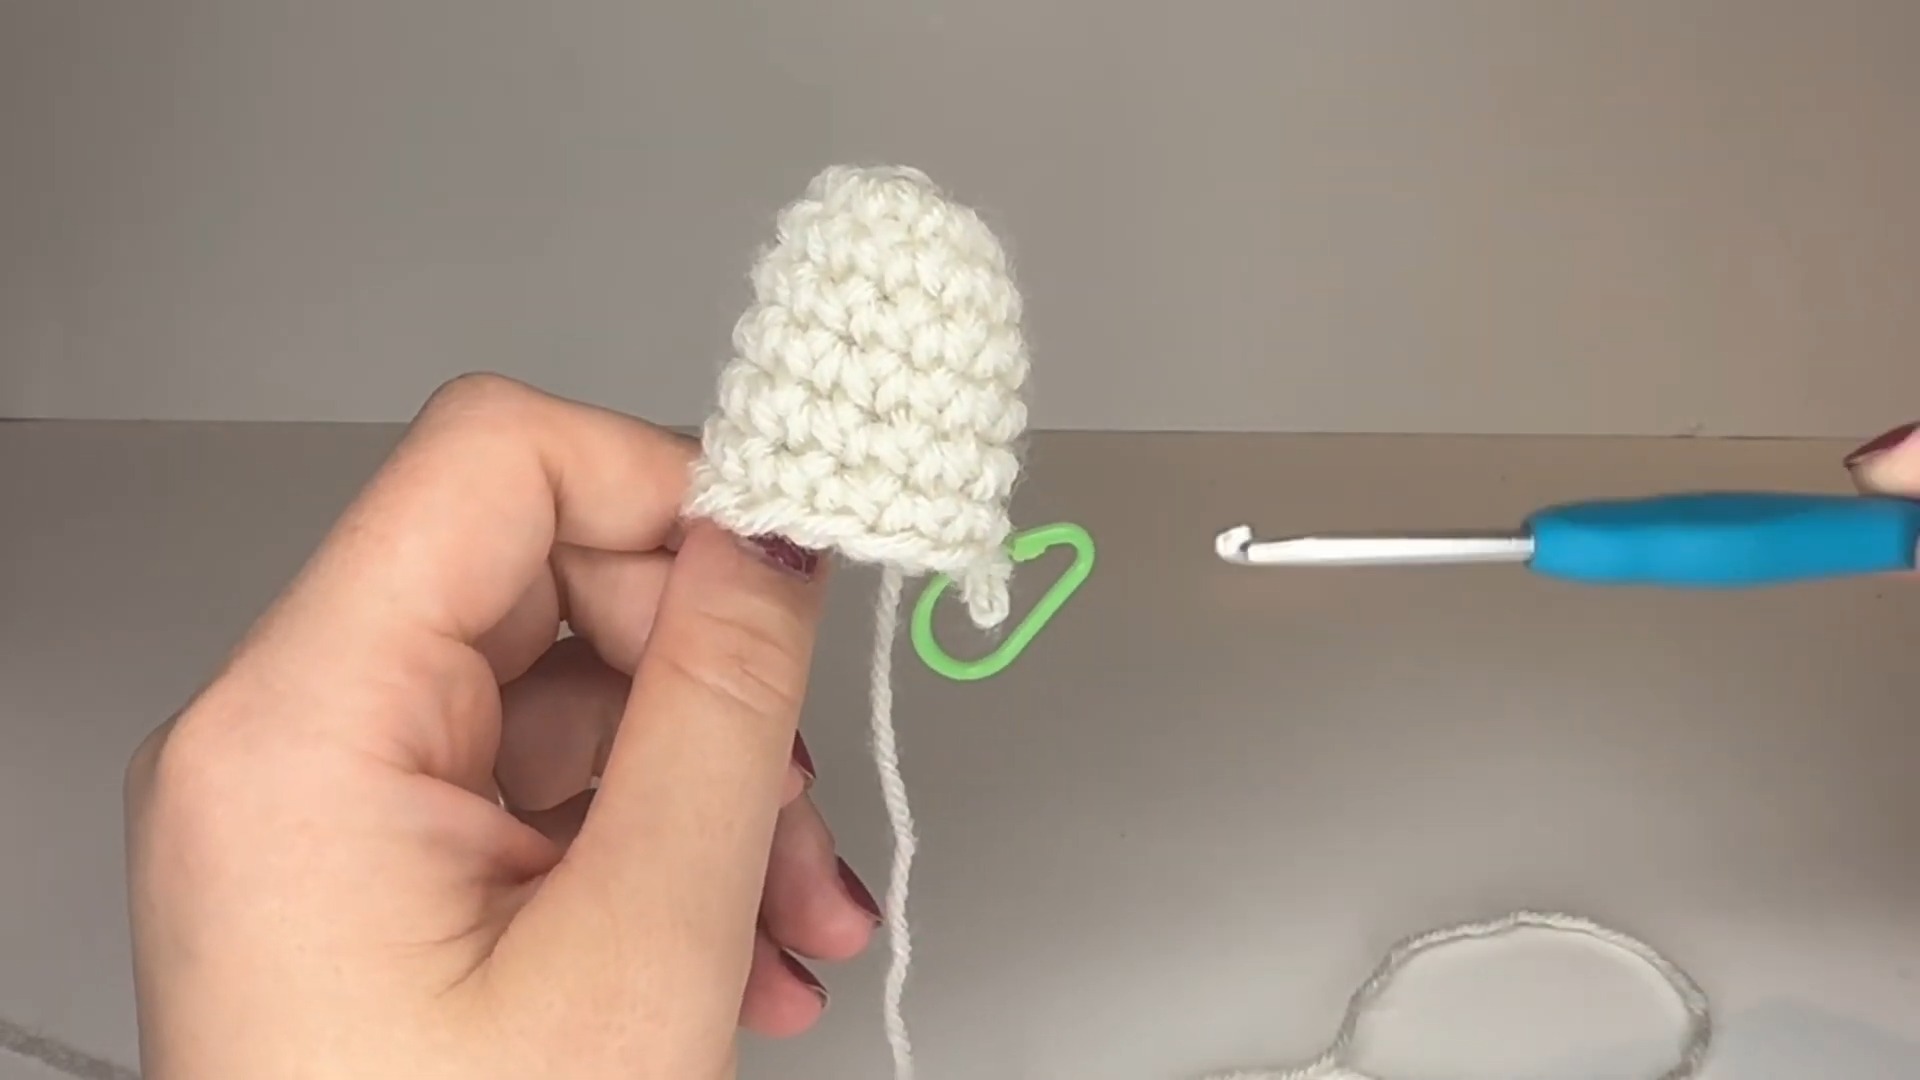
- Round 8:
- Work front loops only: Alternate between 1 SC and 1 Slst across the round. (12 stitches total)
- Fasten off with a Slst and chain 1. Leave a few inches of yarn for weaving.
Base of the Ghost:
- Round 1:
- Create a second magic circle. SC 6 into the circle. Cinch tightly. (6 stitches at the end of this round)
- Round 2:
- Inc into each stitch (2 SCs per stitch). (12 stitches total)
- Fastening Off:
- Finish with a Slst and chain 1. Leave a longer tail (a few inches) to attach the base to the ghost body.
Assembly:
- Attach the Eyes:
- Insert the oval safety eyes between rounds 4 and 5. Ensure they are evenly spaced along the ghost body. Secure tightly with the backings provided.
- Stuff the Ghost:
- Gradually fill the ghost with stuffing. Avoid overstuffing, as it may distort the shape. Add enough to maintain structure while leaving room for the base attachment.
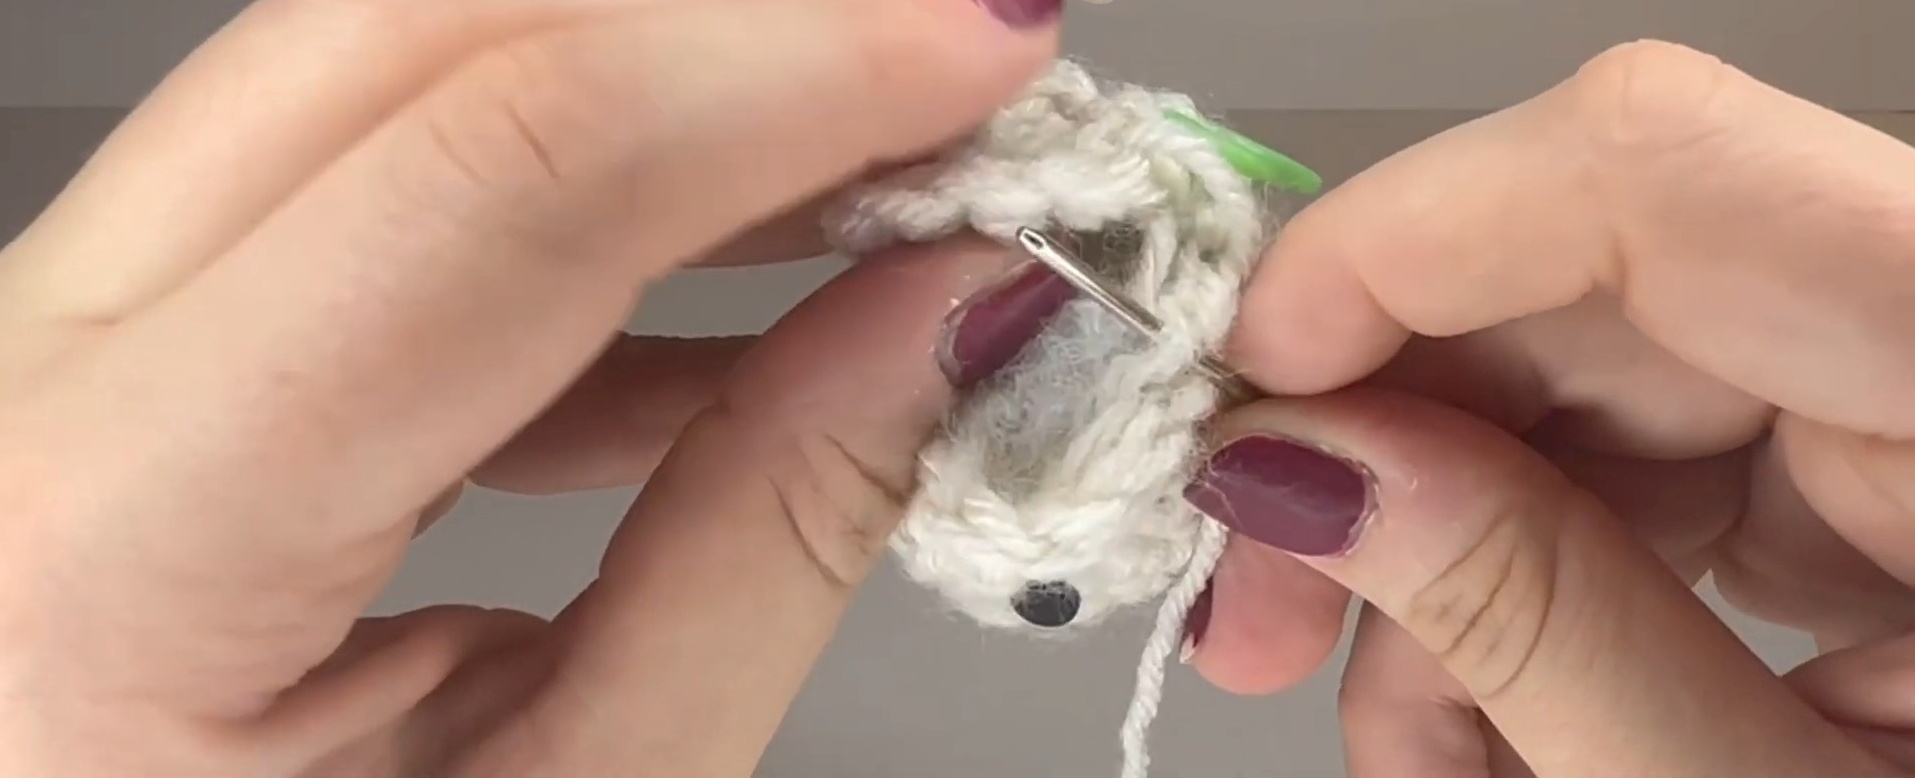
- Attach the Base:
- Using a yarn needle and the long tail from the base, weave through the back loops of round 8 and the base’s edge stitches. Ensure you are lining up evenly as you go.
- Stop halfway to finish stuffing, and then complete the closure. Secure tightly with a double knot.
Finishing Touches:
- Tuck in all loose ends using your yarn needle. Trim excess yarn carefully.
- Fluff and reshape the ghost as needed.
Pattern Question
Question: Can I use other types of yarn for this project?
Answer: Yes! While the tutorial suggests medium-weight acrylic yarn, you can experiment with other yarn types or weights. Keep in mind that changing the yarn may alter the size and texture of the finished ghost.
Conclusion
Crocheting this mini ghost is a fun and rewarding project that brings charm to any spooky setup. With its mix of ease, creativity, and personality, it’s perfect for gifting or crafting with loved ones. Get your hooks ready and enjoy making this delightful ghost today!


