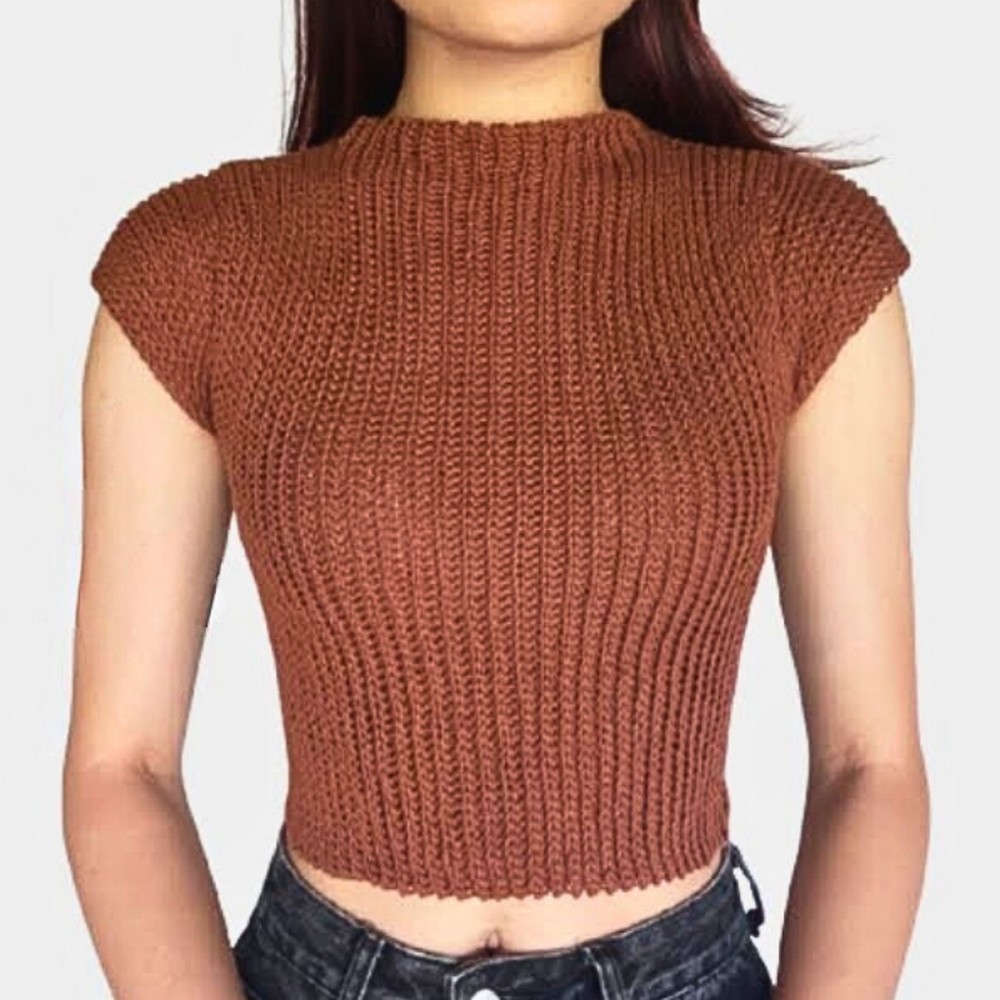
Create a stunning Crochet Mock Neck Top that combines chic style with superb functionality! This versatile project is perfect for layering or wearing solo. Elegantly tailored with a modern touch, it’s the ideal outfit staple for casual outings or dressy occasions.
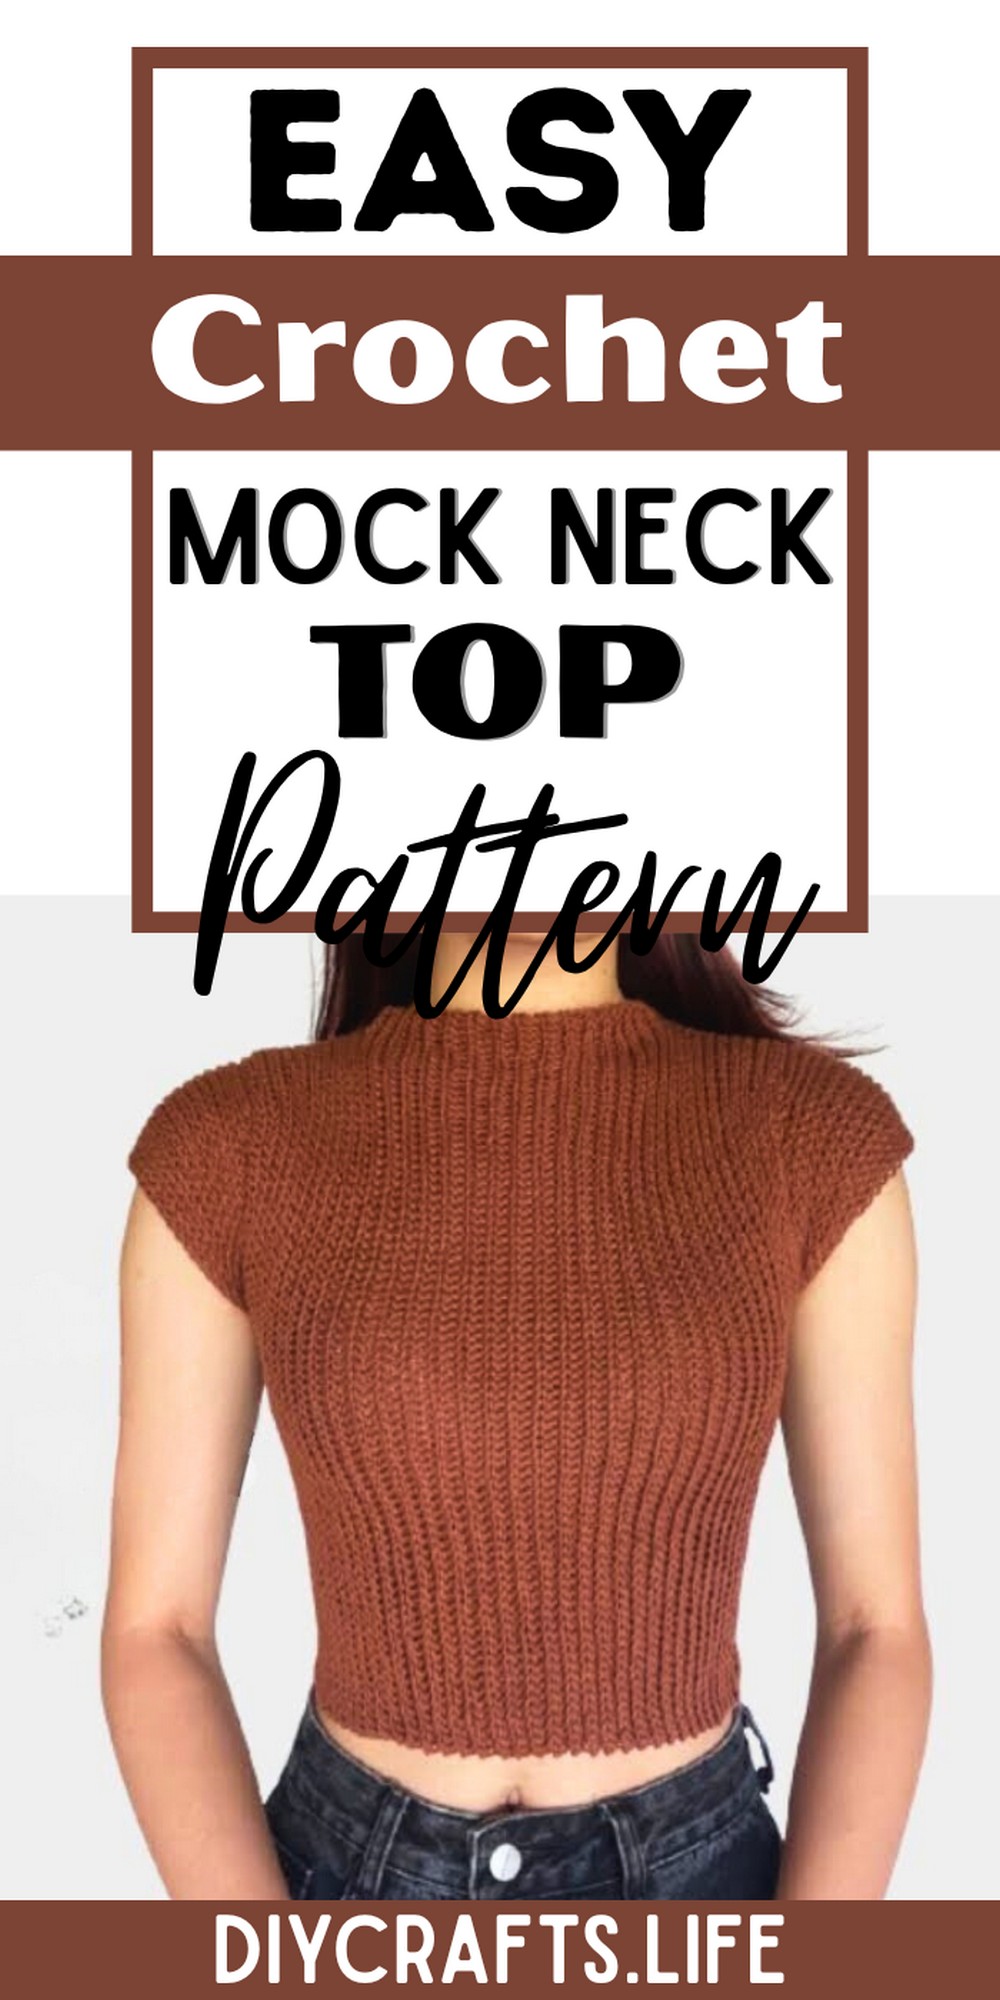
This crochet top shines with its timeless design and durability. Its mock neck provides warmth without sacrificing style, perfect for cooler weather or breezy days. The pattern ensures a flattering fit, making it an eye-catching, everyday wardrobe essential that’s easy to care for.
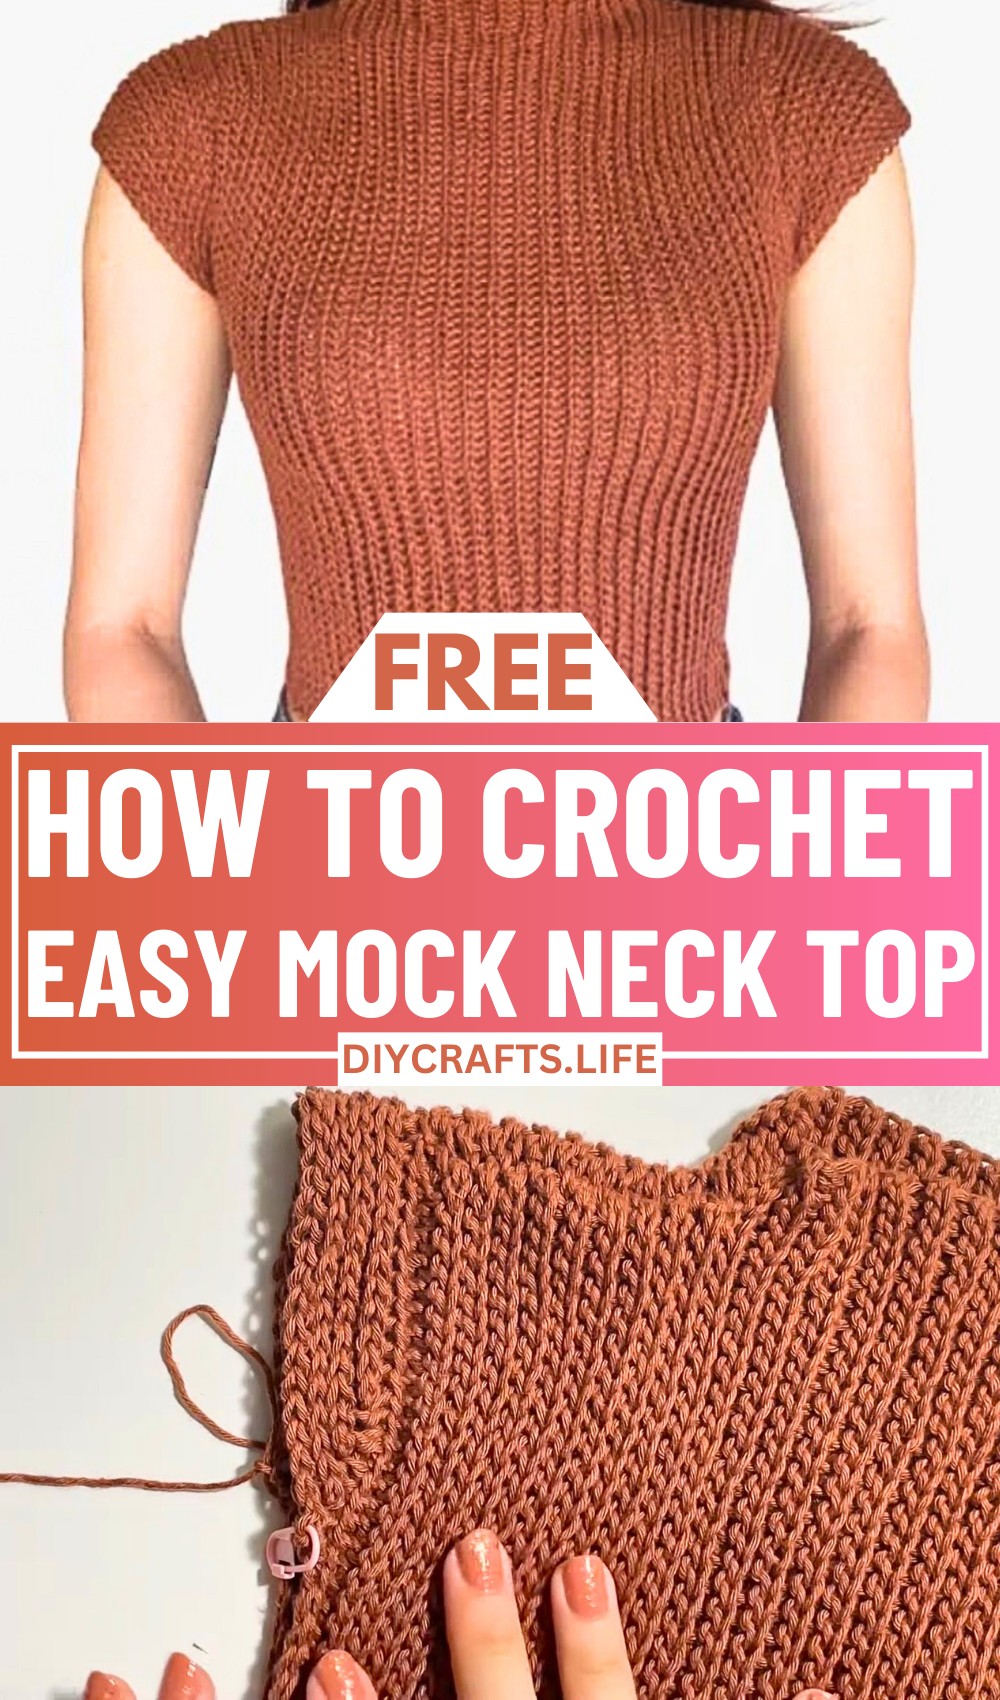
Crochet Mock Neck Top
Whether you’re a beginner or an experienced crocheter, the Mock Neck Top is a fun and rewarding project! With room for customization—color, length, and fit—you can truly make it your own. Plus, the step-by-step instructions ensure a smooth crafting journey for creative enthusiasts of all skill levels.
Materials and Preparation
Required Materials:
- Yarn: Number 2/Sport weight yarn (100% cotton recommended, or any yarn of choice)
- Crochet Hook: 4.5mm hook (or compatible with your yarn choice)
- Tools:
- Tape measure
- Scissors
- Darning needle
- Stitch markers
Yarn Weight Requirements:
This is a made-to-measure project, so you can adjust yarn type and weight based on your preference. The mock neck top is designed to stretch and fit snugly, so ensure a stretchy yarn is used if substitutions are made.
Abbreviations and Notes
Abbreviations Used:
- CH: Chain
- SL ST: Slip Stitch
- BL: Back Loop
Important Notes:
- This is a made-to-measure project. You will need to try on your work periodically to ensure the top fits correctly to your body.
- The slip stitch is the primary stitch used throughout the pattern, creating a stretchy fabric with a knit-like texture.
- Keep your stitches loose to ensure ease of stitching and optimal stretch.
- Mark the first stitch of every row/round to avoid losing track of stitches or adding extra stitches by accident.
- Use additional chains to account for shrinking when working with slip stitches.
Gauge, Approximate Size, and Pattern Notes
Gauge: Approximately 6cm width = 10 raised rows using number 2 weight yarn and 4.5mm hook.
Finished Dimensions:
- Sleeveless Version: Custom width based on your measurements from neck to underarm.
- Cap Sleeve Version: Approximate sleeve length = 8.5cm from the sleeve base to the end.
Pattern Notes:
No gauge swatch is necessary as this is a made-to-measure pattern.
Step-by-Step Pattern
Step 1: Create the Shoulder Panel
- Foundation Chain:
Create a chain that matches the desired length of the top, measured from the top of your shoulder to your desired endpoint (e.g., chest or waist). Add 3 extra chains to account for shrinkage. - Row 1:
- Skip the first CH, and begin working SL ST into the back loop of each CH.
- Mark the first stitch of the row.
- Turn and Continue:
- At the end of the row, CH 1, turn your work, and work SL ST into the back loop of each stitch.
- Repeat:
- Continue working SL ST in BL until the panel matches your desired width, stretching slightly as you measure.
Tip: Count the raised rows (e.g., ridges visible on the fabric) for accurate measurement. For example, 10 raised rows = 6cm width.
Step 2: Crochet the Mock Neck
- Add Height for Neck:
After completing the shoulder panel, chain the desired height for the neck portion. Measure this height against your neck and adjust as needed. - Work Slip Stitches in BL:
- Continue working SL ST in BL until the neck panel stretches across the front of your neck.
Example: For a mock neck measuring 12cm, use 17 raised rows.
Step 3: Make the Second Panel
- Repeat Steps 1 and 2 to create a second identical panel for the other side.
- Do Not Cut Yarn on the second panel—this will be used to seam the panels together.
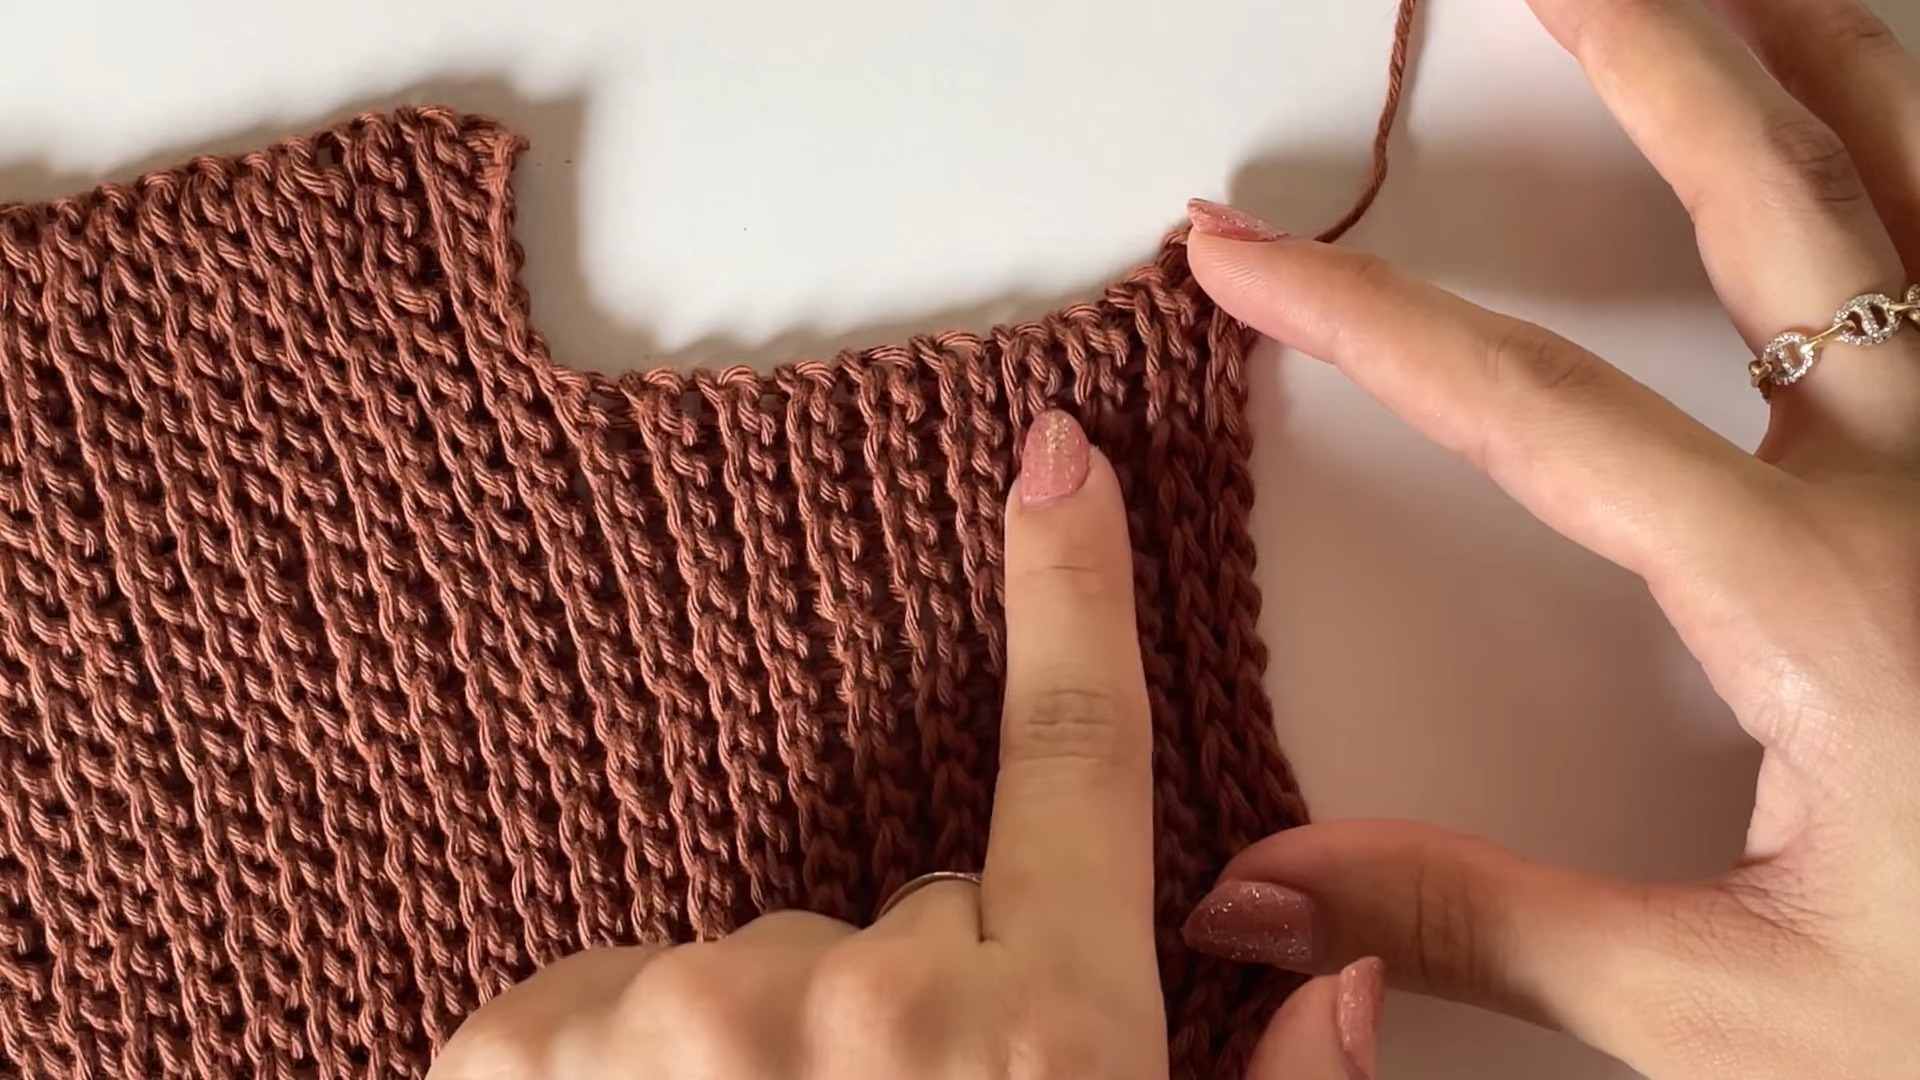
Step 4: Seam the Shoulder Panels
- Align Raised Rows:
Match the raised rows of both panels together to align the shoulders. - Slip Stitch Join:
- Chain 1.
- Insert your hook into the raised row of each panel, and use SL ST to join them together loosely.
- Repeat:
- Continue slip-stitching along each raised row until the entire shoulder seam is joined.
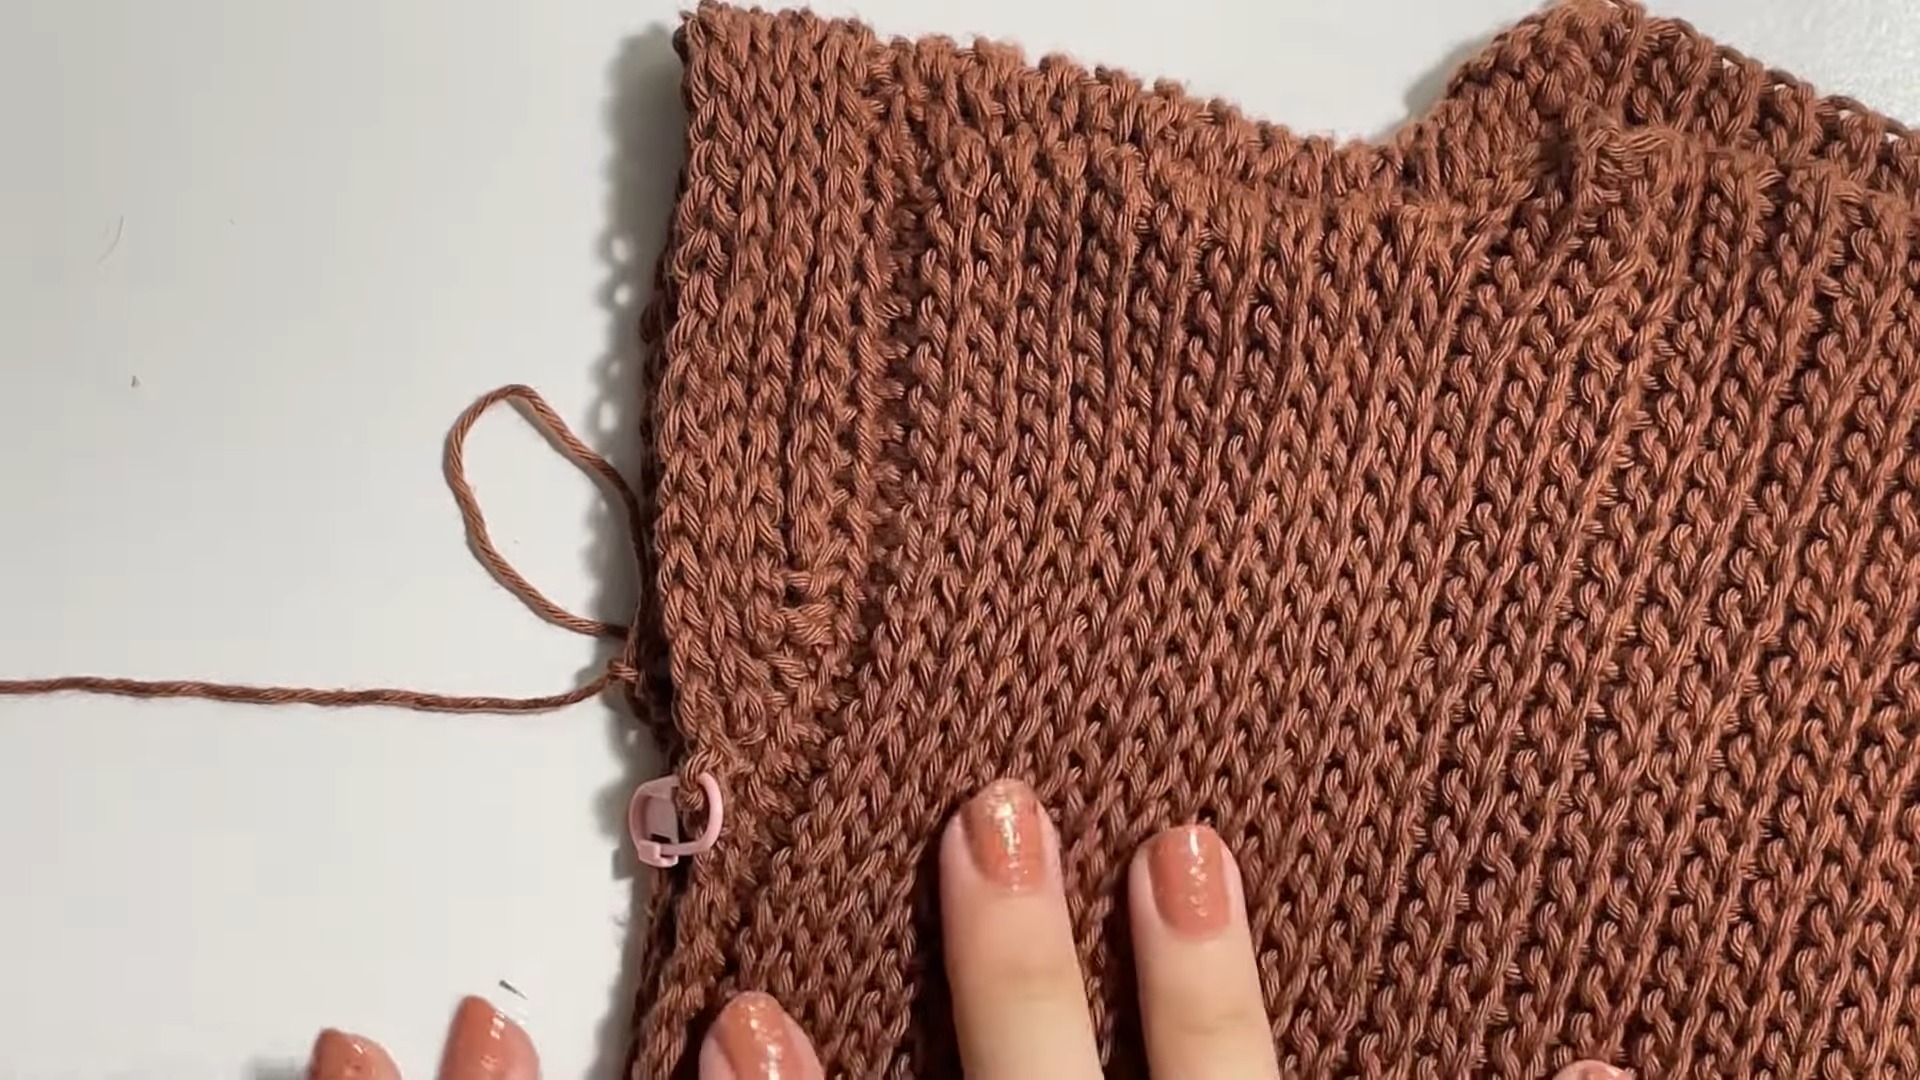
Step 5: Create the Armholes
- Mark Armhole Size:
- Put on the top and stretch the two panels together.
- Use stitch markers to mark the beginning and end of your armholes on both sides.
- Slip Stitch the Panels:
- Working on the wrong side, use SL ST to seam the panels together up to the armhole markers.
- Turn and Add Edging:
- Flip your work to the right side.
- Work one round of slip stitches around the armhole edges for a clean finish.
Step 6: (Optional) Add Cap Sleeves
- Mark Shoulder:
- Mark the shoulder seam (midpoint of the armhole) and divide the armhole stitches into two equal halves.
- Use additional markers to section off 8 stitches on each side of the shoulder seam.
- Attach Yarn:
- Attach yarn at one marked stitch. CH 1 and begin working SL ST in BL on one-half of the armhole section.
- Increase Rows:
- Continue working SL ST in BL, adding 2 extra slip stitches at the end of every normal row.
- Alternate Rows:
- Alternate between:
- Normal rows (with extra slip stitches at the end)
- Decreased rows, where the last two stitches are worked as SL ST two together.
- Alternate between:
- Continue:
- Alternate until the sleeve feels snug around your arm.
- Switch to normal rows when no further decreases are needed.
- Join and Finish:
- Slip stitch to join the base of the sleeve.
- Begin working in the round, decreasing every few rows if necessary, until the sleeve reaches your desired length.
- Final Round:
- For the last row, pick up both loops of each stitch (instead of BL only) and finish with a slip stitch. Chain 1, cut yarn, and weave in ends.
Finishing Touches
- Weave In Ends:
Use your darning needle to neatly weave in all loose yarn ends. - Block the Top (Optional):
If desired, lightly block the top to smooth out the stitches and edges.
Pattern Question:
Question: Can I adjust the pattern if I want a longer top or a looser fit?
Answer: Yes! You can add more rows to lengthen the top or use a larger hook size to achieve a looser fit. Adjust measurements as necessary to meet your desired style.
Conclusion
Crocheting a Mock Neck Top is an enjoyable creative experience—beautiful, functional, and customizable! Whether crafting for yourself or gifting, this project will become a favorite in your crochet repertoire. Start stitching today to design a wardrobe staple that’s uniquely yours!