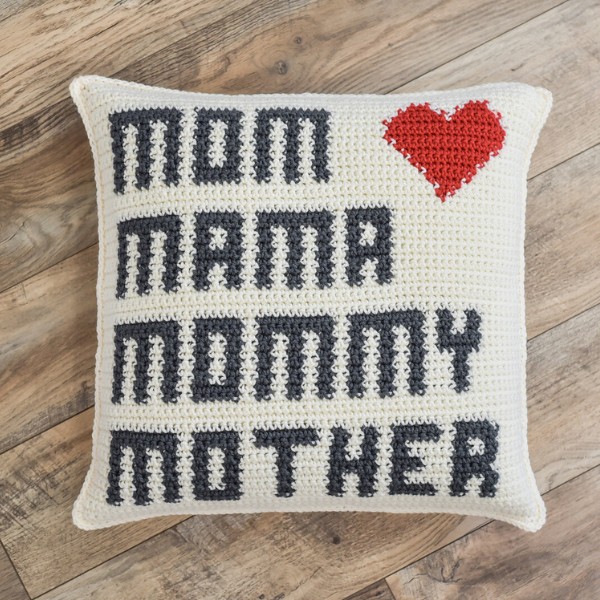
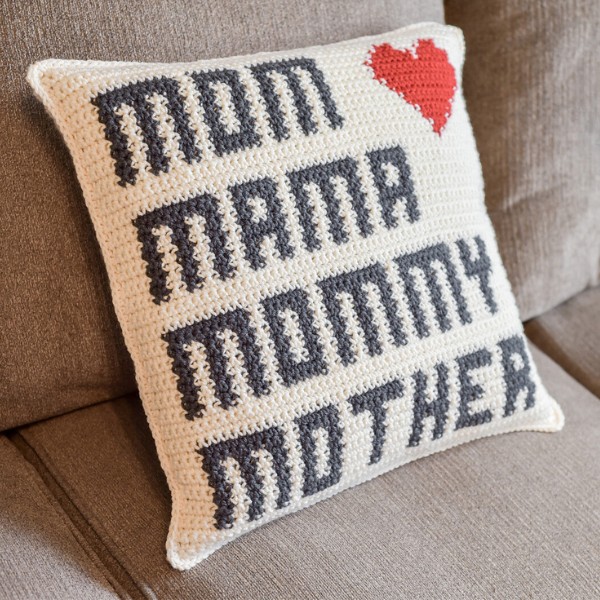
Surprise your mother this Mother's Day with a personalized gift - a beautiful crochet pillow! This tutorial is perfect for advanced beginners ready for a new challenge. It provides a step-by-step guide, from selecting the right yarn and mastering the stitches to customizing the color scheme and adding personal touches to words. The result will be a cozy 18"x18" pillow that your mom will love. It will serve as a warm and cozy keepsake and a practical gift that she can use.
Can I adjust the pillow size created in the Mother's Day Pillow Crochet Tutorial?
Absolutely! You can modify the pattern to create a pillow of a different size by changing the number of foundation chains and rows. Ensure your adjustments maintain the design's proportions.
Step-by-Step Making Overview
Choosing Your Materials:
- Yarn: Opt for colors that your mom loves. The project mainly uses Red Heart Super Saver yarn.
- Crochet Hook: Size H (5.00 mm) is recommended for a firm yet soft texture.
- Additional Supplies: Have a tapestry needle, scissors, and an 18"x18" pillow insert ready.
Graph & Pattern:
- A graph is used to follow the design. Each square on the graph represents one single crochet stitch. Odd number rows are worked from the right side (front) and even numbered rows from the wrong (back) side.
The graph and written pattern are available for free on theturtletrunk.com.
Making the Front Panel
Starting the Panel
- Foundation Row: Begin with a foundation single crochet row of 63 stitches as your base. Alternatively, you can chain 64, then single crochet into the second chain from the hook and each chain across for 63 stitches.
Working the Design
- Rows 2 to 5: Work one crochet into each stitch across these four rows, sticking with color A (white).
- Row 6 Introduction of Color: Add color B (charcoal) according to the graph or written pattern to form the words. This involves color changes and carrying yarn across the back of your work, maintaining even tension to avoid puckering.
Continuing with Colorwork
- Continue following the graph or pattern, working back and forth in rows. Manage your yarn colors neatly, especially when carrying yarn over several stitches.
- The tutorial demonstrates how to make smooth color changes and work on both the right and wrong sides of the panel while managing the yarn floats on the back of the work.
Completing the Front Panel
- Proceed with the color work until the front panel design is complete, featuring the heart and words ("mom," "mam," "mommy," and "mother").
Making the Back Panel
- Foundation Row: Like the front panel, start with a foundation single crochet row of 63 stitches or a chain of 6,4 followed by single crochets for three stitches.
- Build the Panel: Continue with one single crochet in each stitch across 63 rows, using color A only. This forms a solid back panel.
Assembling the Pillow
- Prepare the Panels: Place the completed front panel on top of the back panel, right sides facing out.
- Border and Seam: Starting in the top left corner, single crochet around the perimeter, working through both panels to join them. Include three single crochets in each corner to maintain a smooth edge. Leave one side partially open to insert the pillow.
- Insert the Pillow: Place the 18x18 inch pillow inside the cover through the opening.
- Close the Opening: Continue with single crochets to seal the opening, securing the insert inside.
- Finishing Touches: Fasten off and weave in all ends.
Final Touches
- Adjust the pillow insert to fit perfectly within the crochet pillow cover.