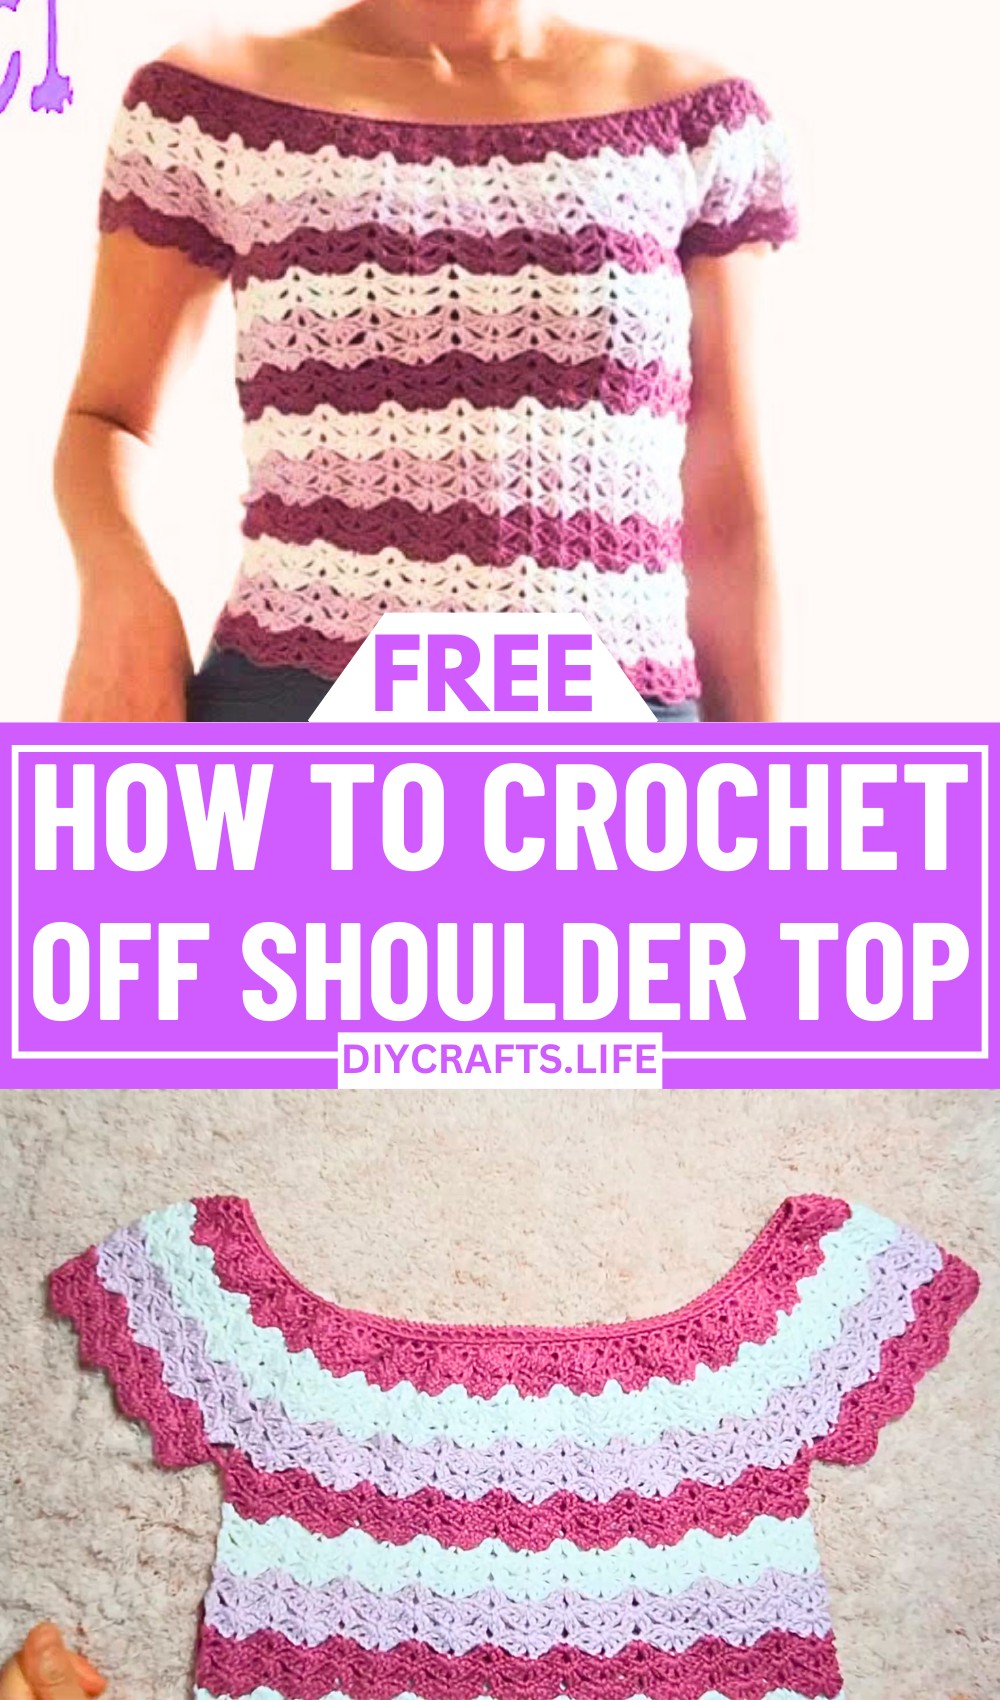
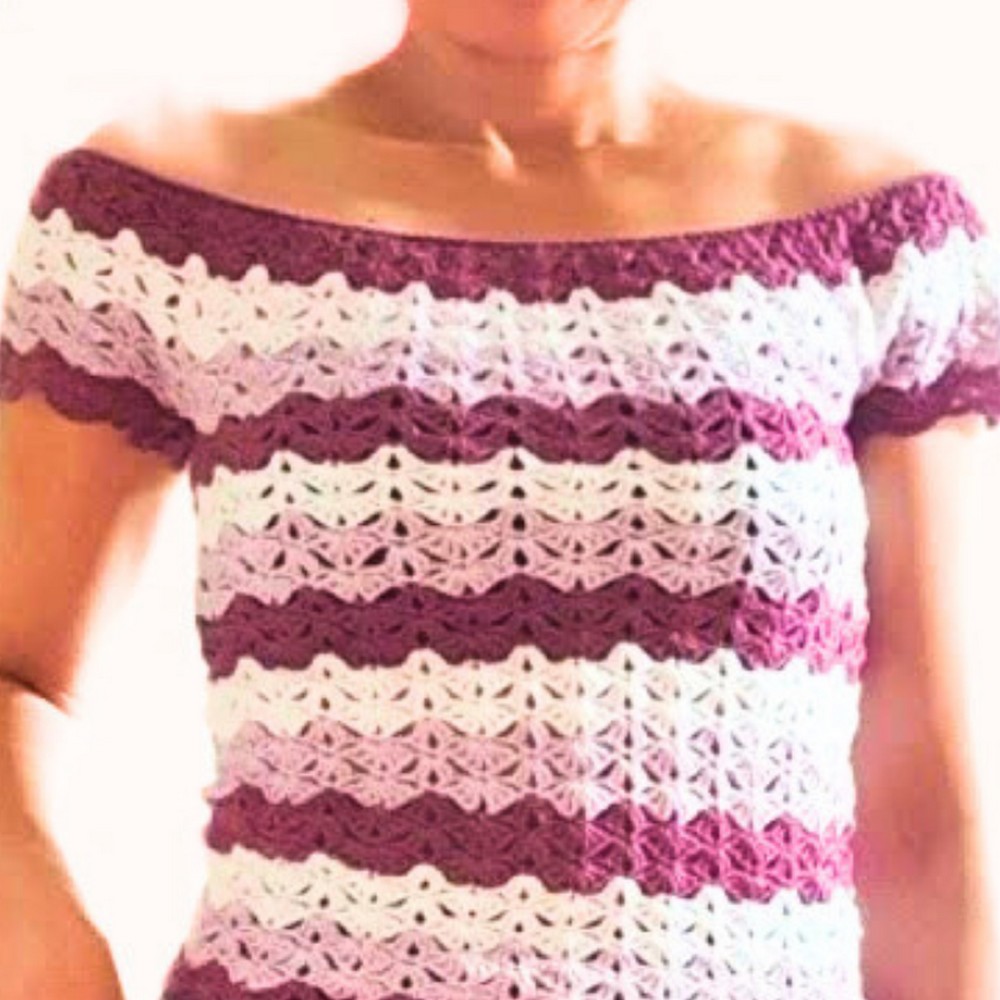
Turn heads with this stunning off-shoulder crochet top that brings elegance and charm together in one design. With its delicate texture and flowy shape, this top exudes effortless style, perfect for complementing casual outings or special occasions. Versatile in its appeal, it offers timeless beauty paired with comfort, making it an ideal wardrobe addition.
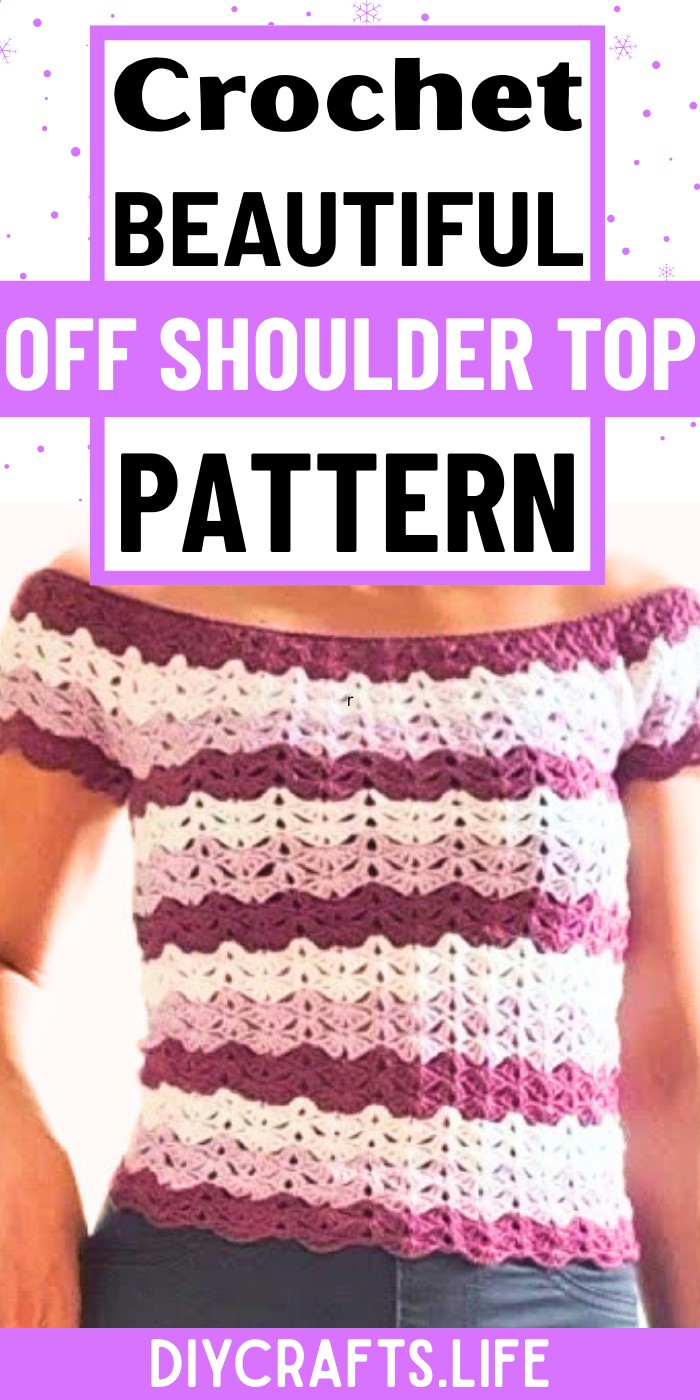
Crochet Off Shoulder Top
This off-shoulder crochet top features soft cotton yarn for a lightweight and breathable feel, making it perfect for spring and summer wear. Its unique shell-like pattern gives depth and texture to the design, while the neckline can be customized to fit perfectly and enhance the overall comfort. The creative sleeve shaping adds dimension, offering a flattering look for any body type. Whether you play with colors or stick to a single shade, this design offers you endless artistic possibilities to create your own masterpiece.
Credit KunitaHandmade
Materials & Tools Needed
To create the gorgeous off-shoulder crochet top, you will need the following:
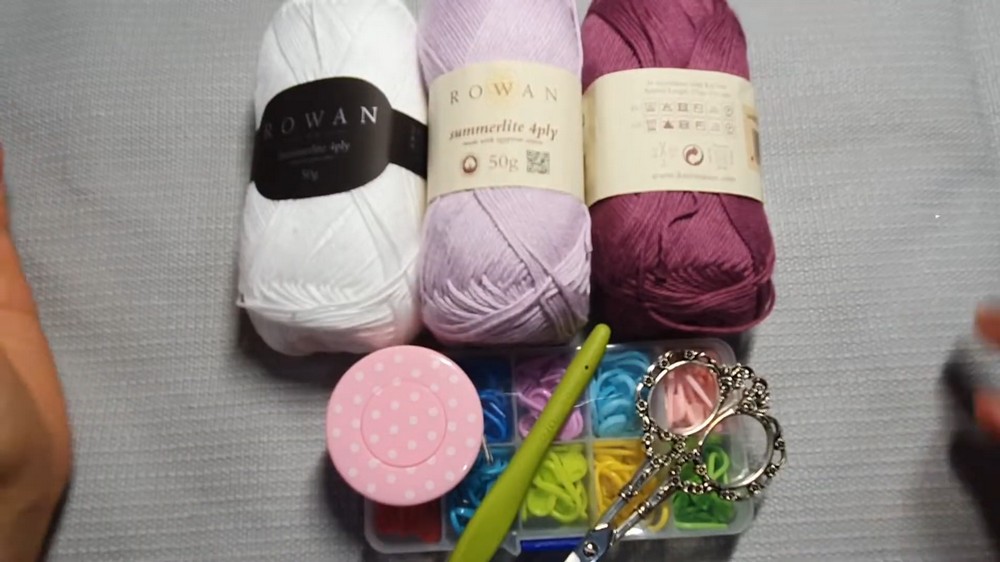
- Yarn:
- Material: 100% cotton yarn (soft and breathable, ideal for spring and summer wear).
- Yarn Weight: Medium weight, but can vary depending on customization choices.
- Tip: The tutorial utilizes leftover yarn from previous projects, making this a great stash-buster! Multiple colors can add a beautiful textured effect.
- Crochet Hook: Size 2 mm hook, used to achieve a tighter and more intricate finish.
- Additional Tools:
- Scissors: For cutting yarn ends.
- Tape Measure: To measure around your shoulders, arms, and body for custom sizing.
- Stitch Markers: Helpful for marking sleeve edges and body division points.
Finished Size & Customization Ideas
Approximate Size Information:
- The top tutorial covers a small to medium size, designed to fit approximately 30–32 inches chest circumference.
- The pattern is highly adjustable; foundation chain length and shell counts can expand or reduce the size to fit wide-ranging measurements.
Customization Tips:
- Body Size Adjustments:
- Measure your shoulder circumference in inches.
- Ensure the number of chain loops at the start is a multiple of 3, which creates evenly spaced shell motifs for the neckline.
- Tightness of Fit:
- Adjust the body measurement by adding more loops or shells.
- For a looser fit, increase the number of shell motifs in both the body and sleeves.
- Strap Modifications:
- Modify sleeve width by changing the number of shells or reducing sleeve rounds for a shorter or cap-sleeve look.
- Change Yarn Weight:
- Consider thicker yarn for a chunkier and more casual look, adjusting the hook size accordingly for proper stitch tension.
- Color Variations:
- Use multiple yarn colors to create striped rows or color-blocking effects for added texture and visual interest.
Pattern Abbreviations & Terminology
This tutorial uses US Crochet Terminology:
- ch: Chain
- sc: Single Crochet
- sl st: Slip Stitch
- dc: Double Crochet
- st(s): Stitch(es)
Step-by-Step Detailed Crochet Instructions
Component 1: Creating the Foundation Loops for the Neckline
- Foundation Row:
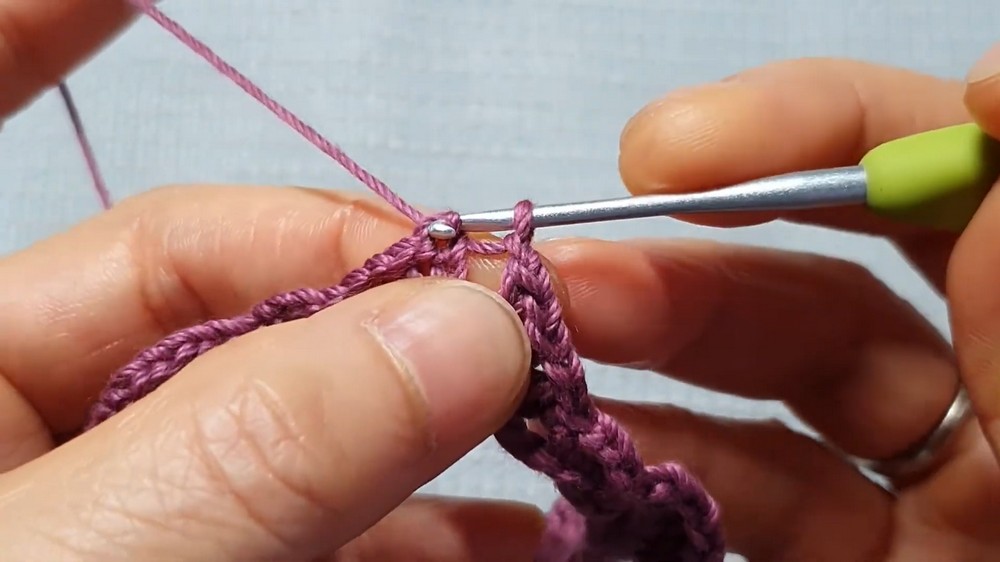
- Begin with a slip knot. Instead of starting with a chain, create chain loops with the following process:
- Chain 3, yarn over, insert your hook into the first chain, pull through, and complete a double crochet (dc).
- Repeat the process: Chain 3, insert your hook through the front 2 loops of the last stitch, yarn over, and complete a dc.
- Continue making chain loops until the chain measures the circumference of your shoulders.
- Begin with a slip knot. Instead of starting with a chain, create chain loops with the following process:
- Joining the Loops:
- Once the chain reaches your desired shoulder circumference, ensure it is not twisted before joining.
- Use a slip stitch through the last chain to connect.
Component 2: Working the Neckline Shells
- Row 1 (Shell Row):
- Start with ch 4 (counts as the first dc), then work dc + ch 1 + dc into the next loop.
- Move to the next loop; create a single crochet followed by ch 3 and single crochet into the same.
- Return to the next loop and add 6 dc, spacing them with ch 1 between each dc.
- Alternate between single crochet (sc) + chain motifs and large 6-dc shells.
- Repeat until the round ends, using a sl st to join the final shell back to the start of the row.
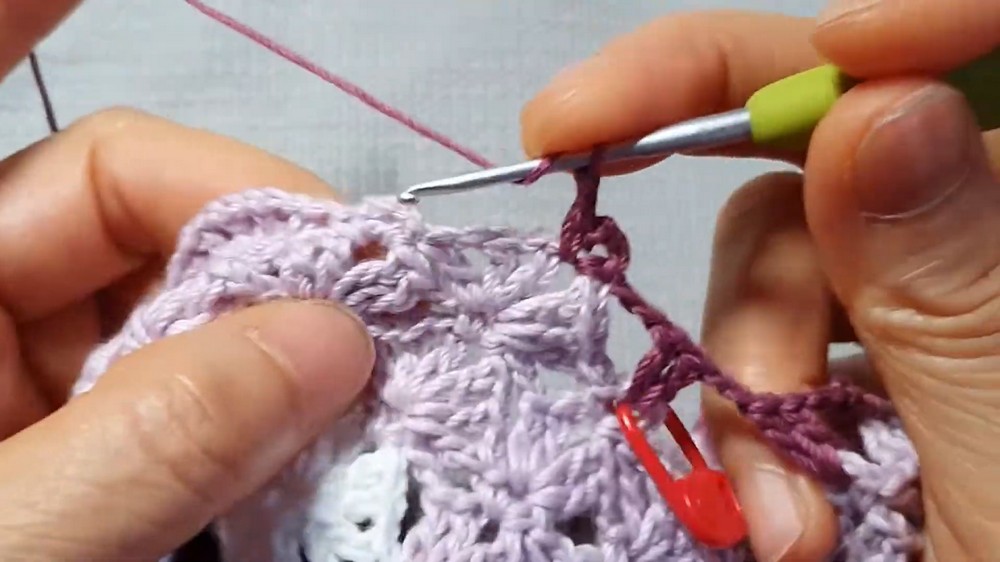
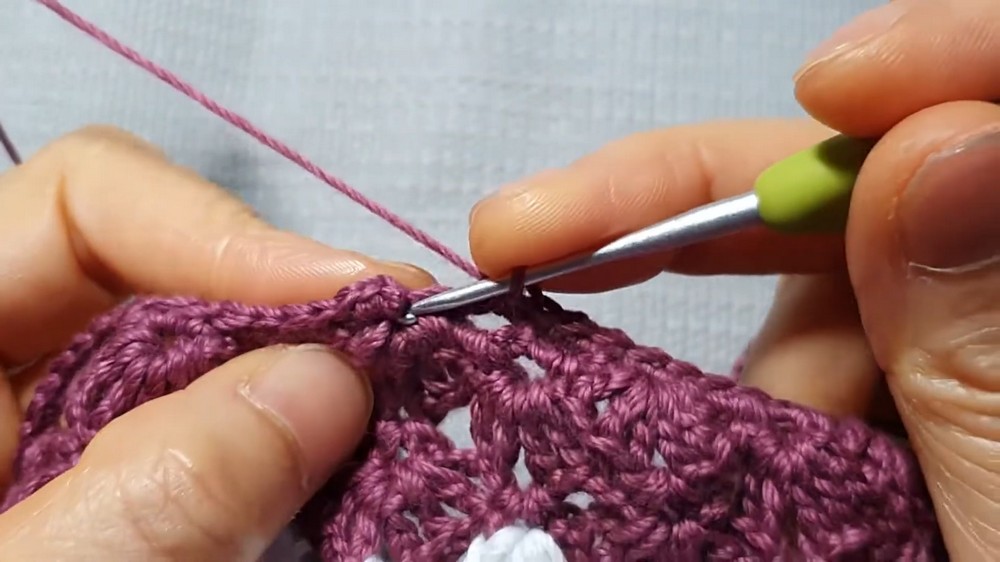
Component 3: Building the Body
- Shell Pattern Continuation:
- After the neckline row, work additional rows of the shell pattern, alternating between large shells and sc+ch decorations.
- Continue until you reach the underarm section, marking the division for sleeves.
- Dividing Sleeves and Body:
- Try the top on and measure where the sleeve division should be.
- Use a stitch marker to separate the sleeves from the rest of the body.
- For each sleeve section, ensure the number of shells fits comfortably around your arms. Adjust by adding or reducing the shell count.
- Joining for the Body:
- Begin crocheting between the markers for the body circumference:
- If more width is needed, add chains at the underarm division before continuing the shell pattern in rounds.
- Work rows of shell patterns for the body until you reach the desired length.
- Begin crocheting between the markers for the body circumference:
Component 4: Completing the Sleeves
- Rejoining Yarn for Sleeves:
- Add a slip knot and join to the marked starting point of the sleeve.
- Work the shell pattern (6 dc shells separated by sc+ch combinations) in rounds.
- Customization for Sleeve Length:
- Continue rows of shells until you reach the desired sleeve length.
- Finishing Sleeves:
- Use a single crochet edging or curve effect for a neat finish.
Component 5: Neckline Adjustments
- Adding a Single Crochet Edging:
- If the neckline feels too loose, work a row of single crochet (sc) evenly around the neckline circumference.
- Adjust tension by creating 2 sc or 3 sc in each loop, depending on how tight you want the neckline.
- Optional Hem Finish:
- Add a second row of sc stitch around the neckline for a refined finish.
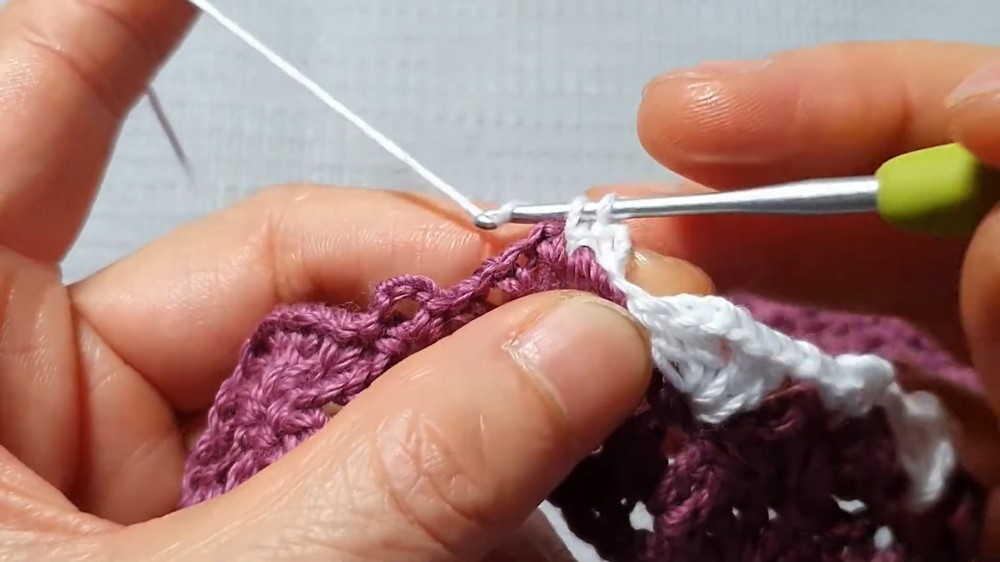
Color Changes
- Joining New Yarn Colors:
- Cut the previous yarn after finishing a row, leaving a 6-inch tail for weaving.
- Add a new color by creating a slip knot and joining at the start of a new row.
- Maintaining Color Stripes:
- Alternate colors every few rounds for horizontal stripes or blend multiple colors for unique textures and designs.
Final Touches
- Edging and Weaving Ends:
- Clean up edges with a final round of single crochet or leave the edges simple with shells.
- Weave all loose ends with a yarn needle for a polished look.
- Trial and Adjustments:
- Try on the top at this stage and tighten or loosen areas as needed.