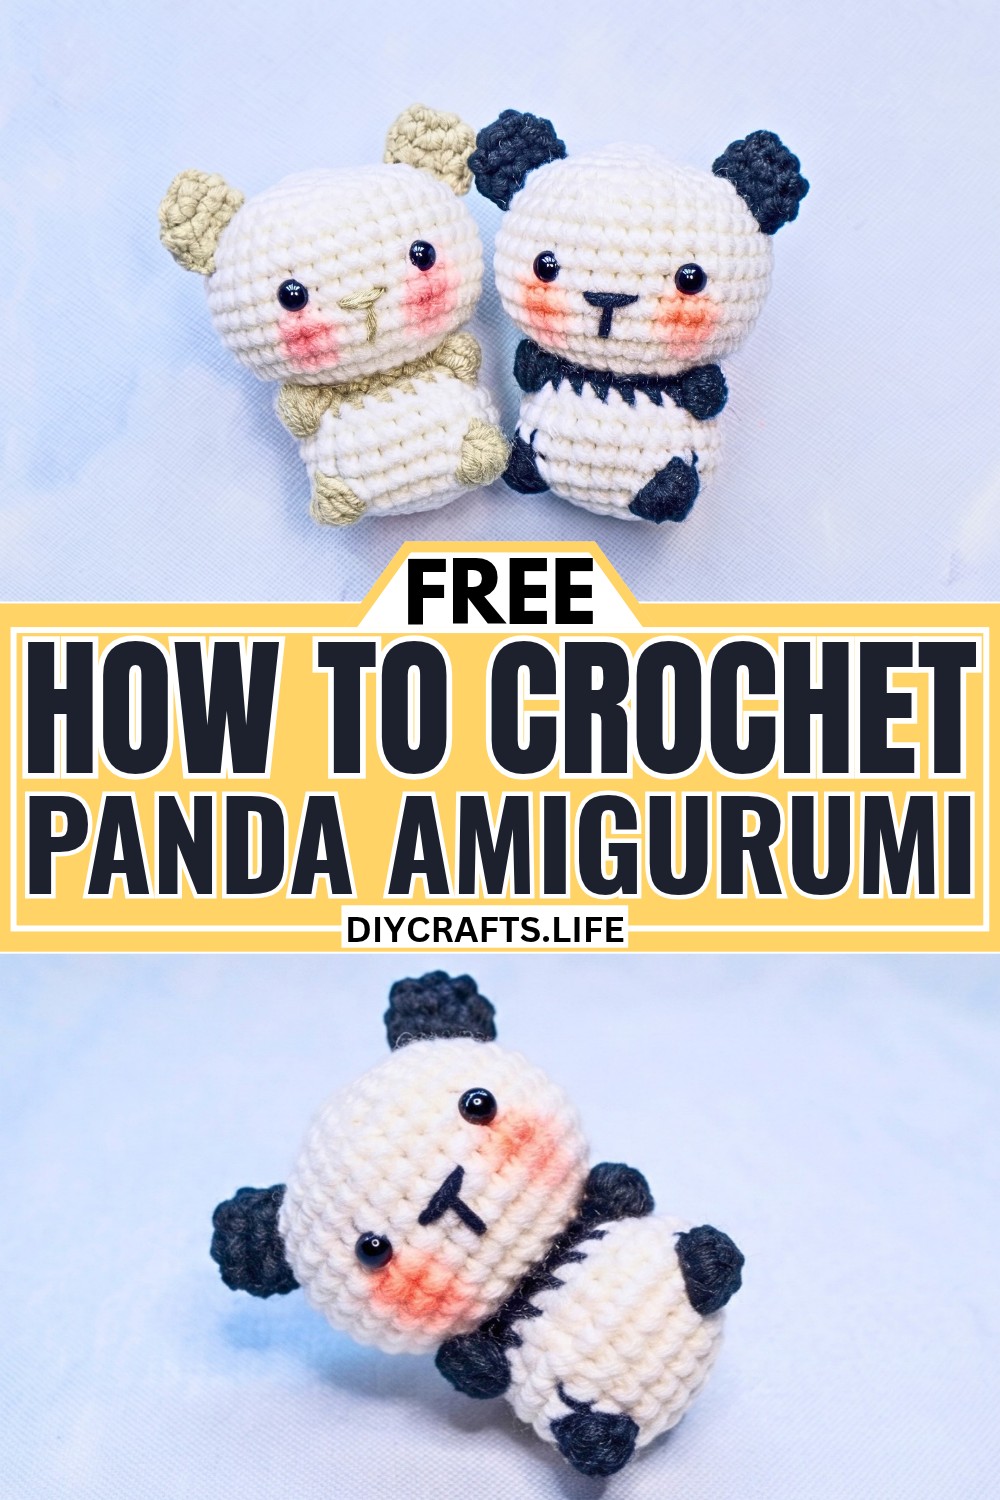

Here’s a palm-sized crochet panda with bobble-stitch arms and legs built right into the body, plus tiny ears and a sweet embroidered face.

The panda’s soft shape comes together as one main crocheted piece, with gray bobbles forming its little paws, no separate limbs to sew on later. Color changes around the body add the crochet panda details, while the simple ears and embroidered face bring the character to life.
You’ll work the crochet body and head in continuous spiral rounds, switching between White and Light Gray for the bobble details and facial markings. The tutorial also shows exactly when to place the safety eyes, when to add stuffing, and how to finish the ears and face so the small amigurumi keeps its rounded shape.
Credit Odinka Studio
Why the Bobbles Matter
The most distinctive part of this panda happens while you crochet the body. Instead of making separate arms and legs and sewing them on afterward, the tutorial uses 5-dc bobble stitches at specific points in the body.
Those bobbles create raised little paws on the amigurumi's outside. Their placement is important: work the color changes and bobbles exactly where the pattern specifies so the finished panda has the intended face and limb details.
This pattern is worked in continuous spiral rounds, so do not join at the end of each round unless the instructions specifically tell you to. Keep a stitch marker in the first stitch of each round.
Materials & Tools Needed
- Yarn: 5-ply Milk Cotton Yarn in White and Light Gray
- Crochet Hook: 3/0 (2.25 mm)
- Safety Eyes: Approximately 6 mm or 8 mm
- Polyester Fiberfill
- Tapestry or yarn needle
- Stitch marker
- Scissors
- Optional: Black embroidery thread or thin black yarn for the nose and pink blush or soft pastels for the cheeks
Finished Size & Customization
Using the specified yarn and hook, the panda should be approximately 3-4 inches tall, giving you a small, palm-sized amigurumi.
For a classic panda appearance, replace the Light Gray with Black. Reddish-Brown can turn the same design into a red-panda-inspired version. You can also add a keychain ring at the top of the head or tie a tiny ribbon around the neck.
Pattern Abbreviations
- MR = magic ring
- sc = single crochet
- inc = increase, 2 sc in the same stitch
- dec = decrease, single crochet 2 stitches together
- FLO = front loops only
- sl st = slip stitch
- bobble-5dc = 5-double-crochet bobble
- st(s) = stitch(es)
- ( … ) x N = repeat the sequence inside the parentheses N times
- [XX] = total stitch count at the end of the round

How to Work the 5-DC Bobble
For each bobble-5dc, yarn over, insert the hook into the indicated stitch and pull up a loop, yarn over and pull through 2 loops. Repeat this process 4 more times in the same stitch until 6 loops are on the hook, then yarn over and pull through all 6 loops.
The completed bobble should sit raised on the outside of the body.
Crochet the Body and Head
Start with White yarn. The lower portion begins with a small magic ring, expands to 24 stitches, and then uses bobbles and color changes to establish the panda's distinctive details.
Round 1: Make a Magic Ring, sc 6 into the MR. Pull the tail tightly to close. [6]
Round 2: inc 6 times. [12]
Round 3: (sc 1, inc in the next st) repeat 6 times total. [18]
Round 4: Change to Light Gray yarn and make 1 bobble (5 dc). Change back to White yarn, sc 1, inc. Then, (sc 2, inc) repeat 5 times total. [24]
Round 5: With White yarn, sc 9. Change to Light Gray yarn and make 1 bobble (5 dc). Change to White yarn, sc 6. Change to Light Gray yarn and make 1 bobble (5 dc). Change to White yarn, sc 7. [24]
Rounds 6–7: With White yarn, sc around for 2 rounds. [24]
Round 8: (sc 2, dec) repeat 6 times total. [18]
Round 9: Change to Light Gray yarn for the entire round. sc 6, make 1 bobble-5dc, sc 6, make 1 bobble-5dc, sc 4. [18]
Round 10: (sc 1, dec) repeat 6 times total. [12] Stuff the bottom of the body firmly here.
Expand Into the Head
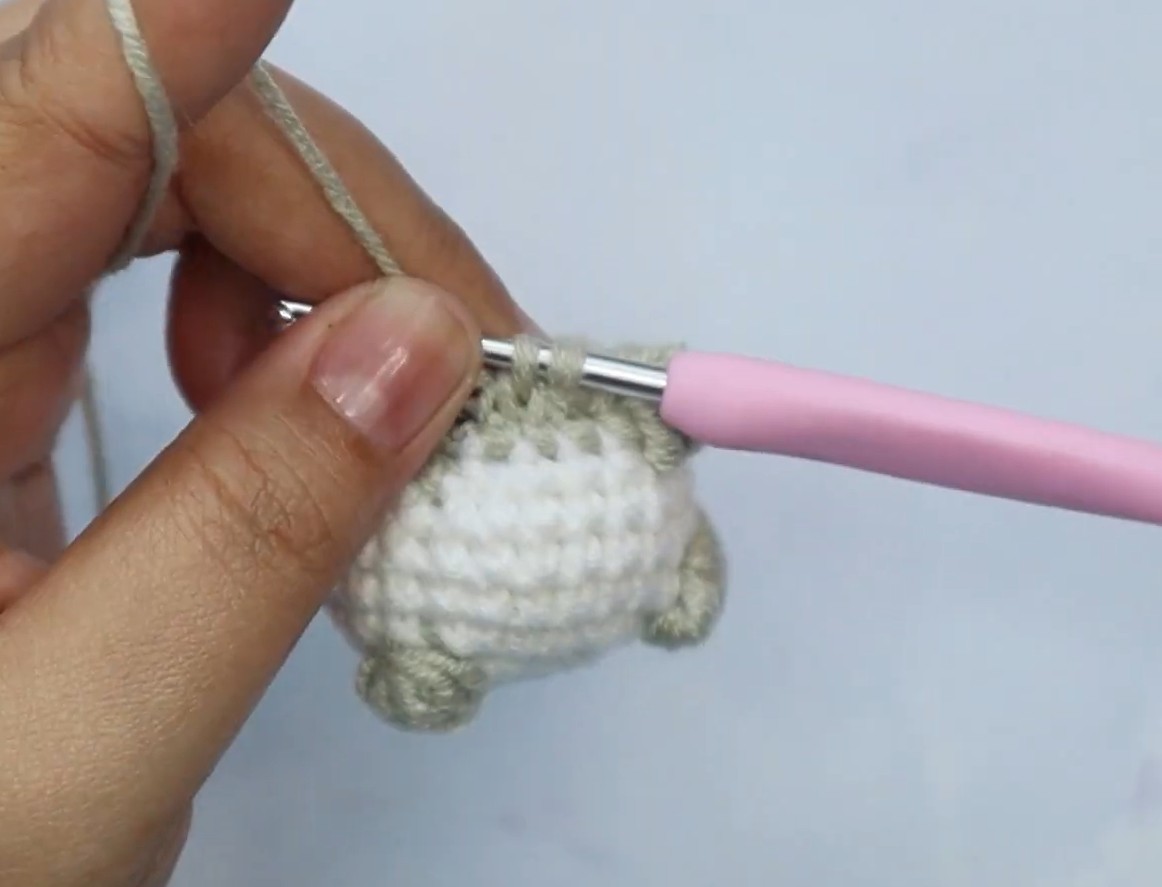
Round 11 changes the shape noticeably. Working into the front loops creates a new edge from which the larger head section can grow.
Round 11: Change to White yarn. Working in FLO, inc 12 times. [24]
Round 12: (sc 1, inc) repeat 12 times total. [36]
Rounds 13–19: sc around for 7 rounds. [36]
Place the Safety Eyes
Insert the safety eyes between Rounds 16 and 17, with 6 stitches between them.
Check their position before fully securing them, since this is much easier to adjust while the head is still open.

Round 20: (sc 4, dec) repeat 6 times total. [30]
Round 21: (sc 3, dec) repeat 6 times total. [24]
Round 22: (sc 2, dec) repeat 6 times total. [18] Stuff the head firmly now.
Round 23: (sc 1, dec) repeat 6 times total. [12]
Round 24: dec 6 times. [6]
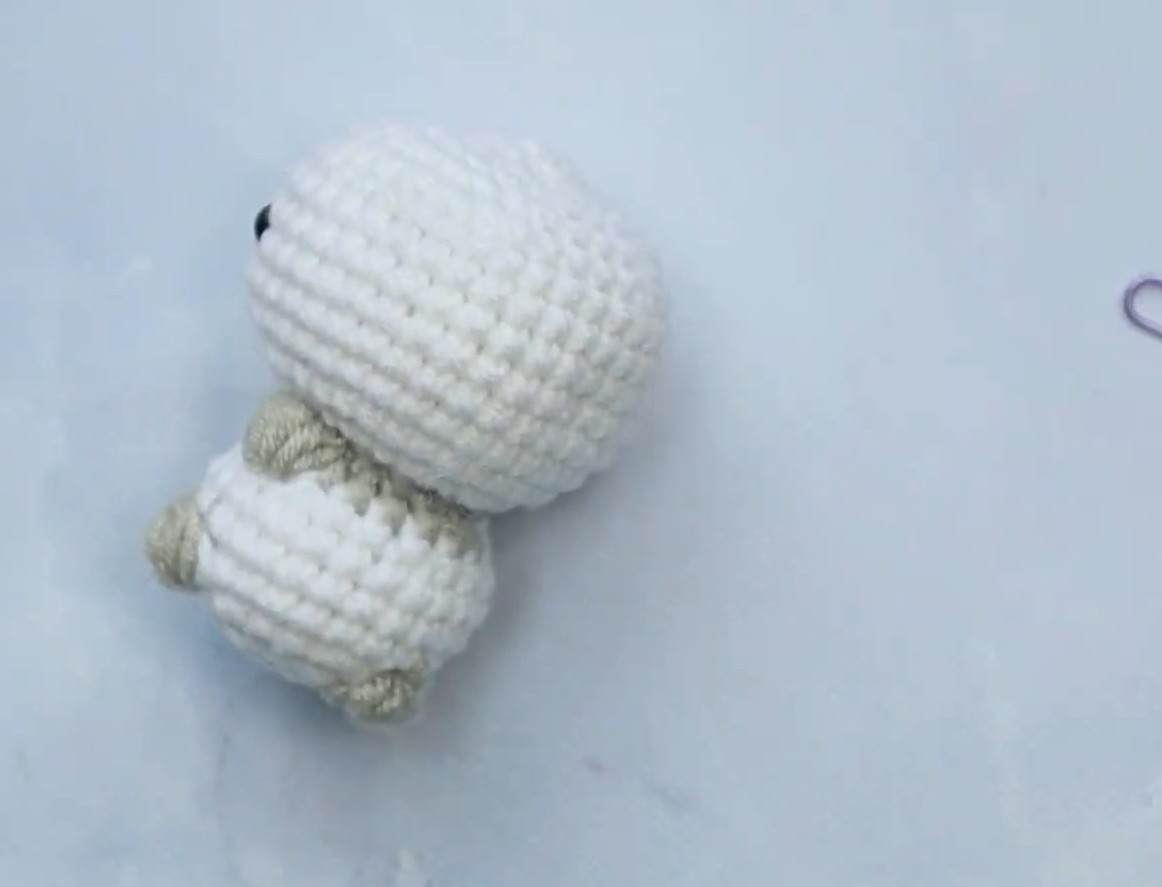
Leave a long yarn tail and cut. Thread the tail onto a tapestry needle, weave it through the front loops of the remaining 6 stitches, and pull tight to close the opening. Weave the remaining end into the head to hide it.
Make the Two Ears
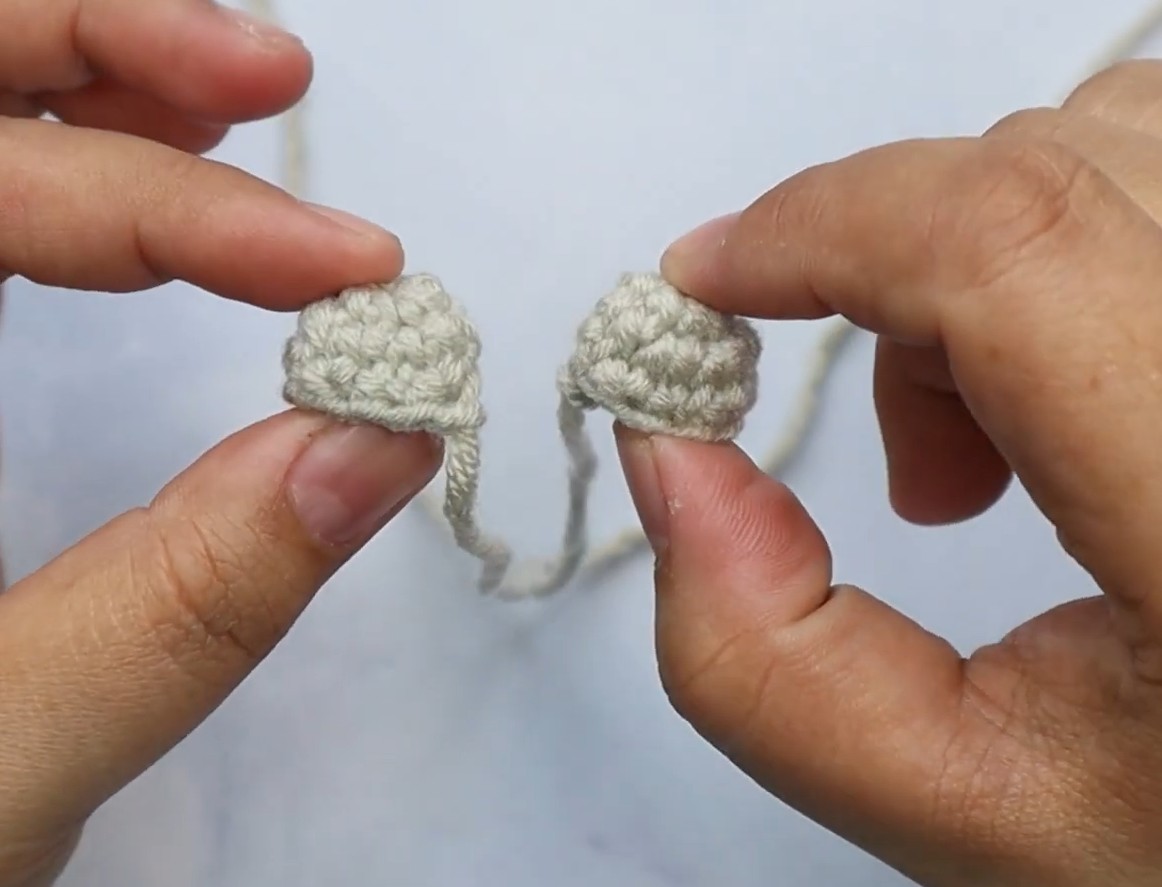
Make 2 ears using Light Gray yarn. They are small, so keep the stitches compact and leave enough tail for sewing.
Round 1: Make a Magic Ring, sc 6 into the MR. Pull tightly to close. [6]
Round 2: inc 6 times. [12]
Round 3: (sc 1, dec) repeat 4 times total. [8]
Sl st into the next stitch. Leave a long yarn tail for sewing and cut.
Give the Panda Its Face
Use the long Light Gray tails to sew the ears onto the sides of the head, positioning them between Rounds 16 and 22.
For the nose, thread black embroidery thread or thin black yarn onto your tapestry needle. Center it between the safety eyes, approximately one round below them, and embroider a small horizontal line followed by a short vertical drop to create a soft T-shaped mouth.
For an optional rosy finish, lightly dab pink cosmetic blush or soft pastel underneath the eyes.