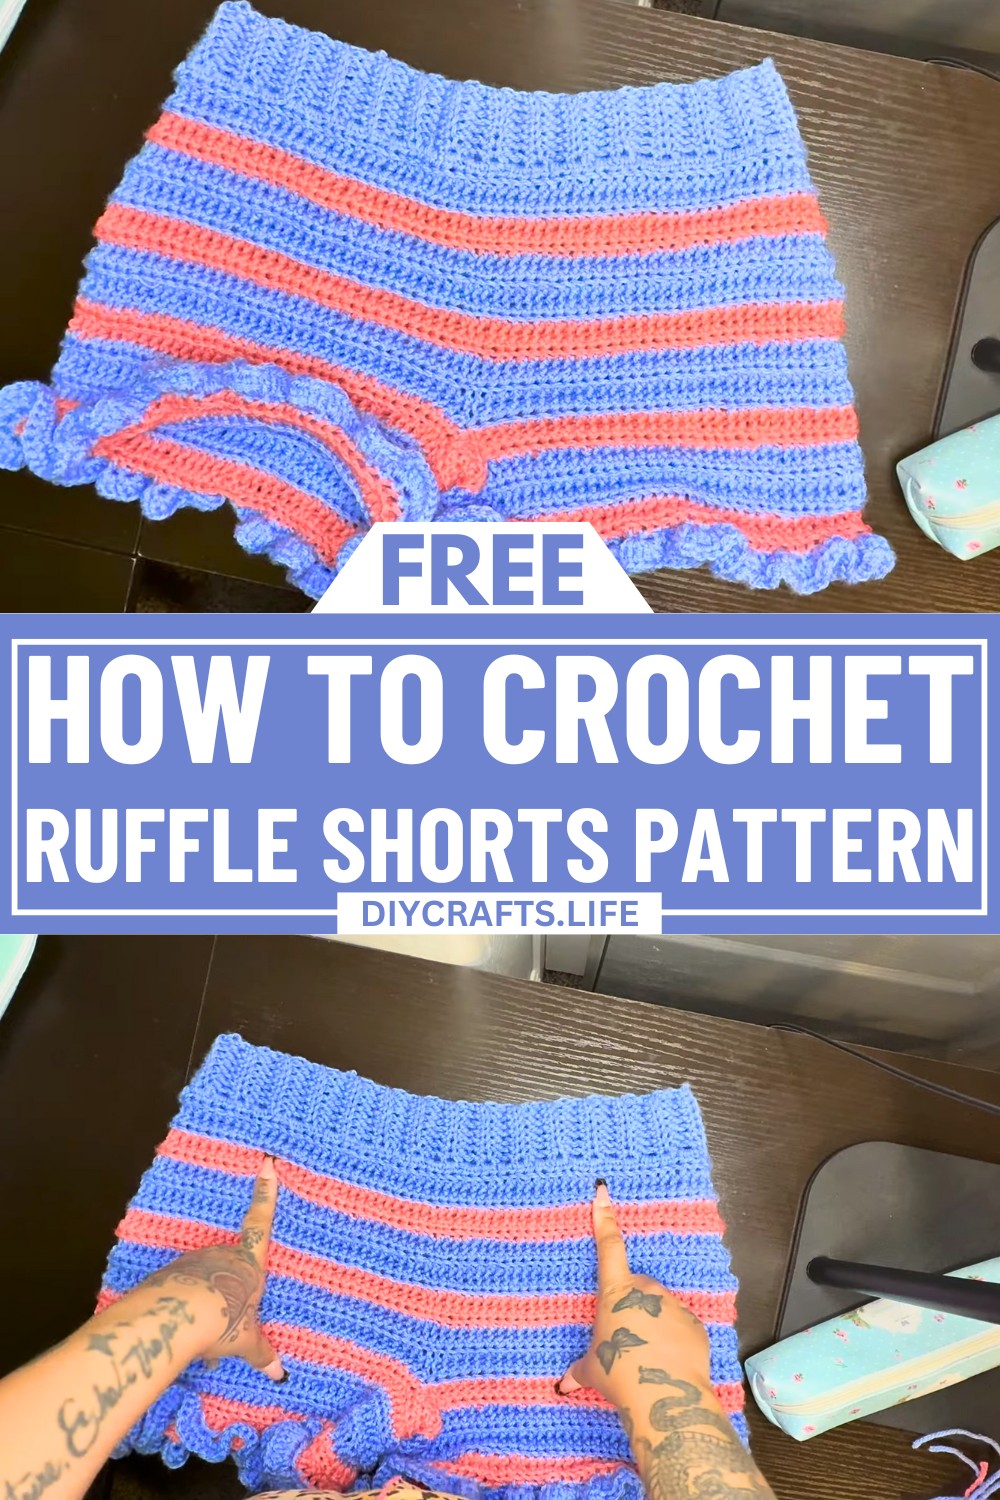
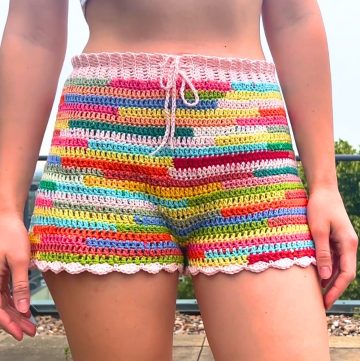
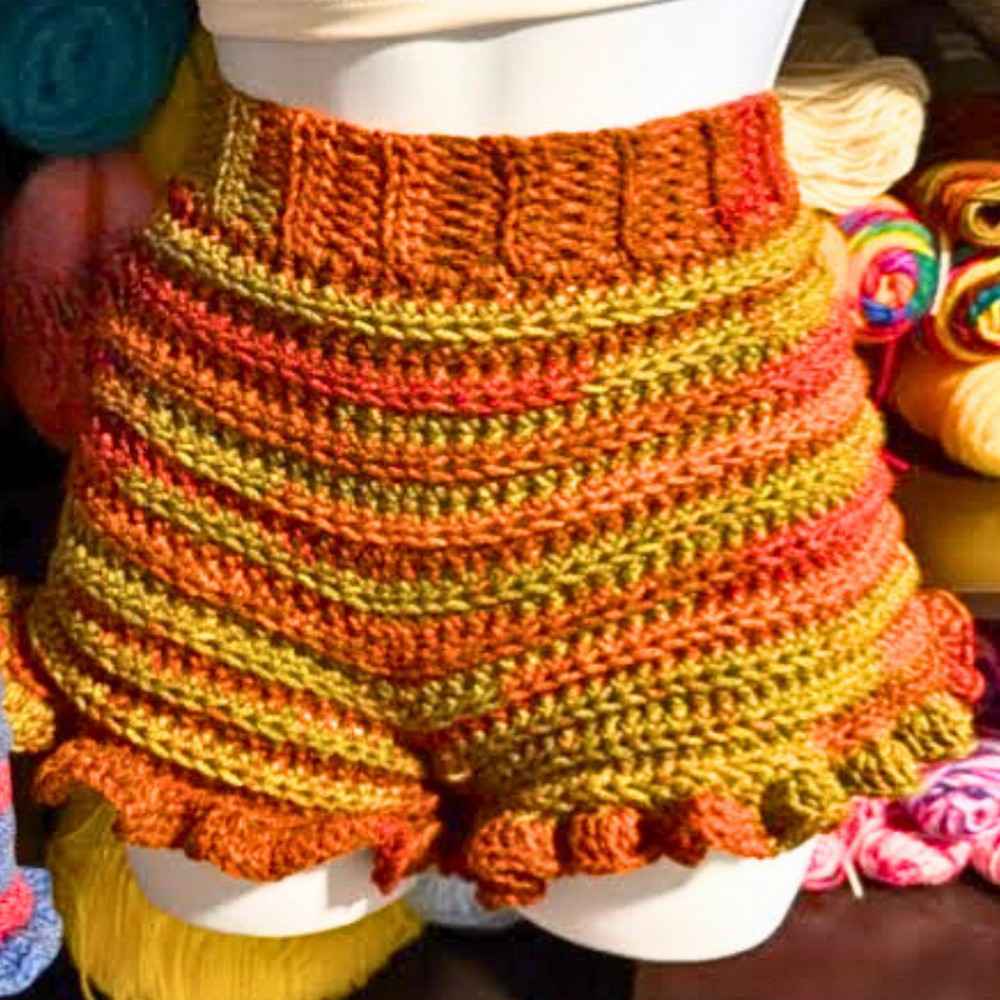
Transform your crochet into a statement with perfectly playful ruffle shorts that combine comfort and elegance. Designed to fit and flatter, these shorts bring together practicality and whimsy, making them a standout addition to your handmade wardrobe. Whether it’s a relaxed day out or a cozy at-home outfit, these ruffle shorts radiate effortless charm.
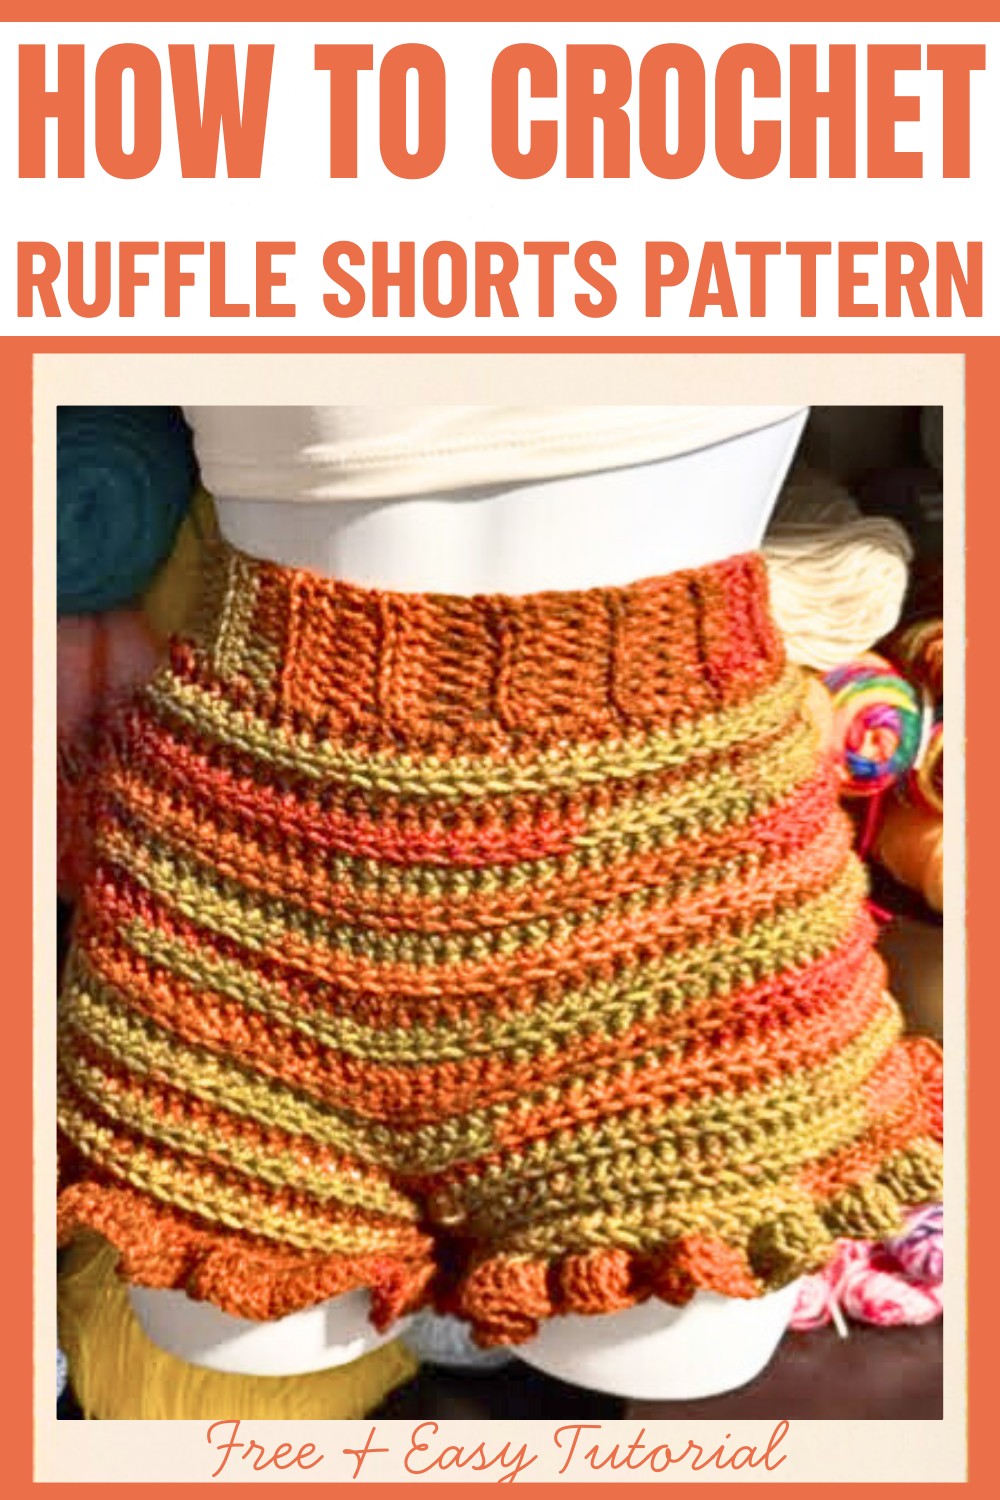
Crochet Ruffle Shorts Pattern
This pattern focuses on creative textures, using back-loop half double crochets to create a ribbed detail that complements the soft, flowing ruffles. The subtle increases ensure a seamless fit, tailored to your waist and hips for complete personalization. With endless color possibilities and customizations, these shorts become a unique expression of modern crochet artistry with a trendy yet comfortable touch.
Credit MarieMadeIt__
Materials Needed:
- Weight 4 acrylic yarn (any yarn of your choice is fine, just ensure you use the corresponding hook size).
- 5 mm crochet hook.
- Scissors.
- Measuring tape.
- Needle for weaving in ends.
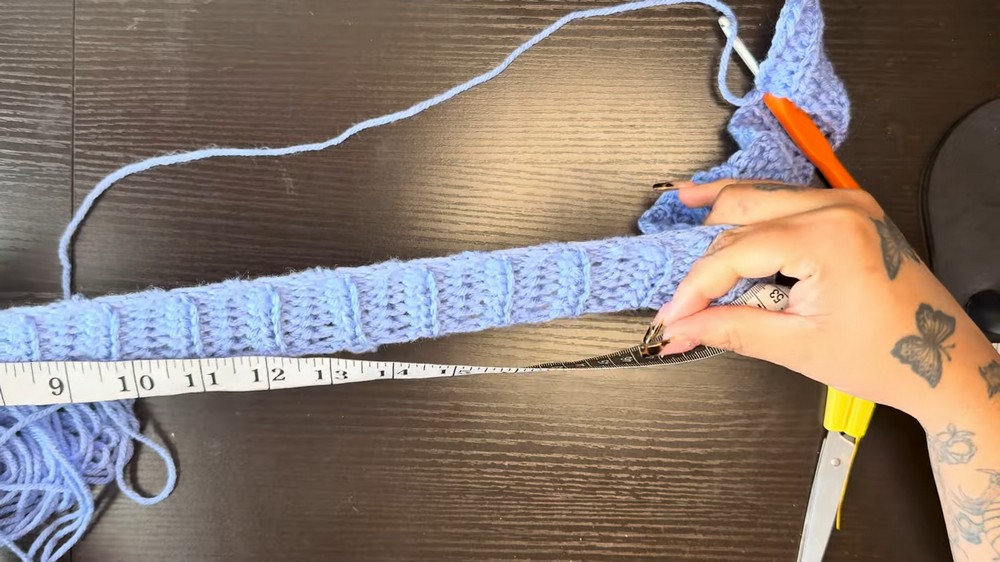
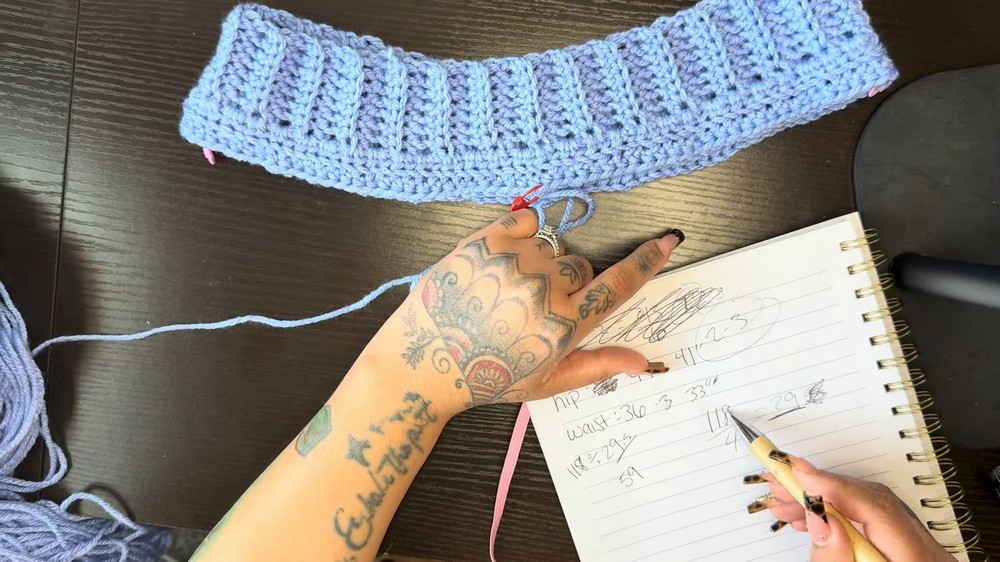
Step 1: Take Measurements
Before starting, you need to determine the following key measurements:
- Waist Measurement: Subtract 2-3 inches from your actual waist measurement if using acrylic yarn (since it stretches). For example, if your waist is 36 inches, reduce it to 33 inches.
- Hip Measurement: Similarly, subtract 2-3 inches if your yarn is stretchy.
- Crotch Depth: Measure from the waistband to the crotch area to determine the depth.
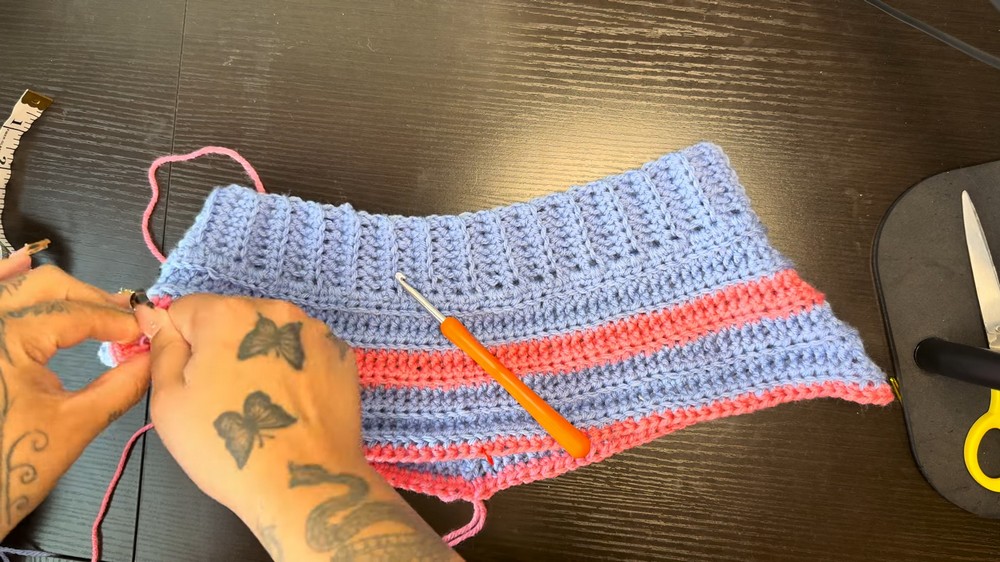
Step 2: Create the Waistband
- Create a slip knot and start with a chain for the width (thickness) of the waistband.
- For example, chain 8, then add 1 extra as the turning chain (total of 9 chains).
- Row 1: Skip the first chain, and place a half double crochet (HDC) into the second chain from the hook. Continue to HDC into each chain across (total: 8 HDCs).
- Row 2 and Beyond:
- Chain 1, turn your work.
- Work HDC into the back loops only (BLO) for each stitch across (8 HDCs total).
- Continue repeating this process (BLO HDC) until the waistband measures your modified waist measurement (e.g., 33 inches with slight stretch).
- Once completed, join the two ends of the waistband by slip stitching them together. Make sure it is not twisted before closing.
Step 3: Begin the Body of the Shorts
- Flip the waistband so the seam is on the inside. Chain 1.
- Begin working 2 HDC into each row/space around the waistband. This increases the body to create the foundation for the shorts.
- Slip stitch into the first HDC to complete the round.
Step 4: Work the Body of the Shorts
- Establish Alternating Rows:
- Odd Rows (Increase Rows): Work 3 HDC into the corner stitches (where your hips are) to achieve the desired hip measurement. Use stitch markers to mark your corners and the middle (divide the stitches into quarters and place markers as needed for increases).
- Even Rows (Regular Rows): Work 1 HDC (BLO) into each stitch around with NO increases.
- Alternate between increase rows and regular rows until you reach your hip measurement (half measurement when folded).
Step 5: Add Length for Crotch Depth
- After reaching the desired hip size, stop increasing.
- Now, work regular rows only (1 HDC in BLO around) to achieve the crotch depth measurement (e.g., 8 inches total).
Step 6: Split for the Legs
First Leg:
- Make a chain of ~10 stitches to bridge the gap between the front and back crotch.
- Make sure this chain fits comfortably when stretched (try it on if possible!).
- Turn your work and slip stitch into the middle stitch marker to secure the chain. Chain 1.
- Begin working in rounds for the leg:
- Work 1 HDC into each space of the chain.
- Continue working HDC (BLO) around the leg, following the same pattern as before.
- Add length until you reach your desired short length.
Add the Ruffle to the First Leg
- Chain 3 and work 3 double crochets (DC) into every stitch around.
- Slip stitch into the first DC to join. You can add another similar round if you want a more pronounced ruffle.
- Chain 1, fasten off, and weave in the ends.
Second Leg:
- Flip the shorts and attach yarn to the gap area on the other side (where you made the bridge).
- Repeat the exact steps for the first leg, creating the same number of rows and a matching ruffle.
Optional Drawstring
If you'd like to add a drawstring:
- Create a long chain (slightly longer than the waistband circumference) and weave it through the top of the waistband.