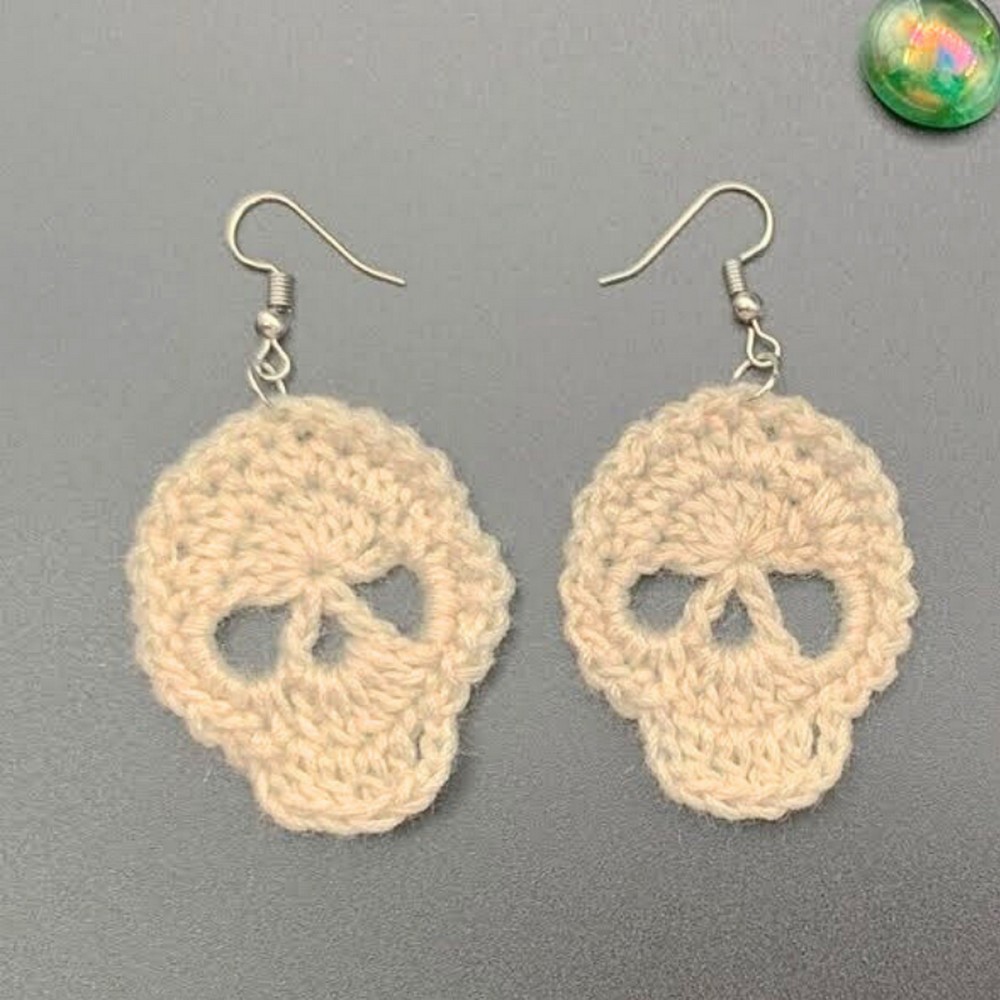
These stylish crochet skull earrings are a charming and spooky accessory perfect for Halloween or any day you feel daring. Combining beauty with functionality, this beginner-friendly design adds a handmade touch to your wardrobe. With creativity and simple materials, you can craft a unique piece that stands out.
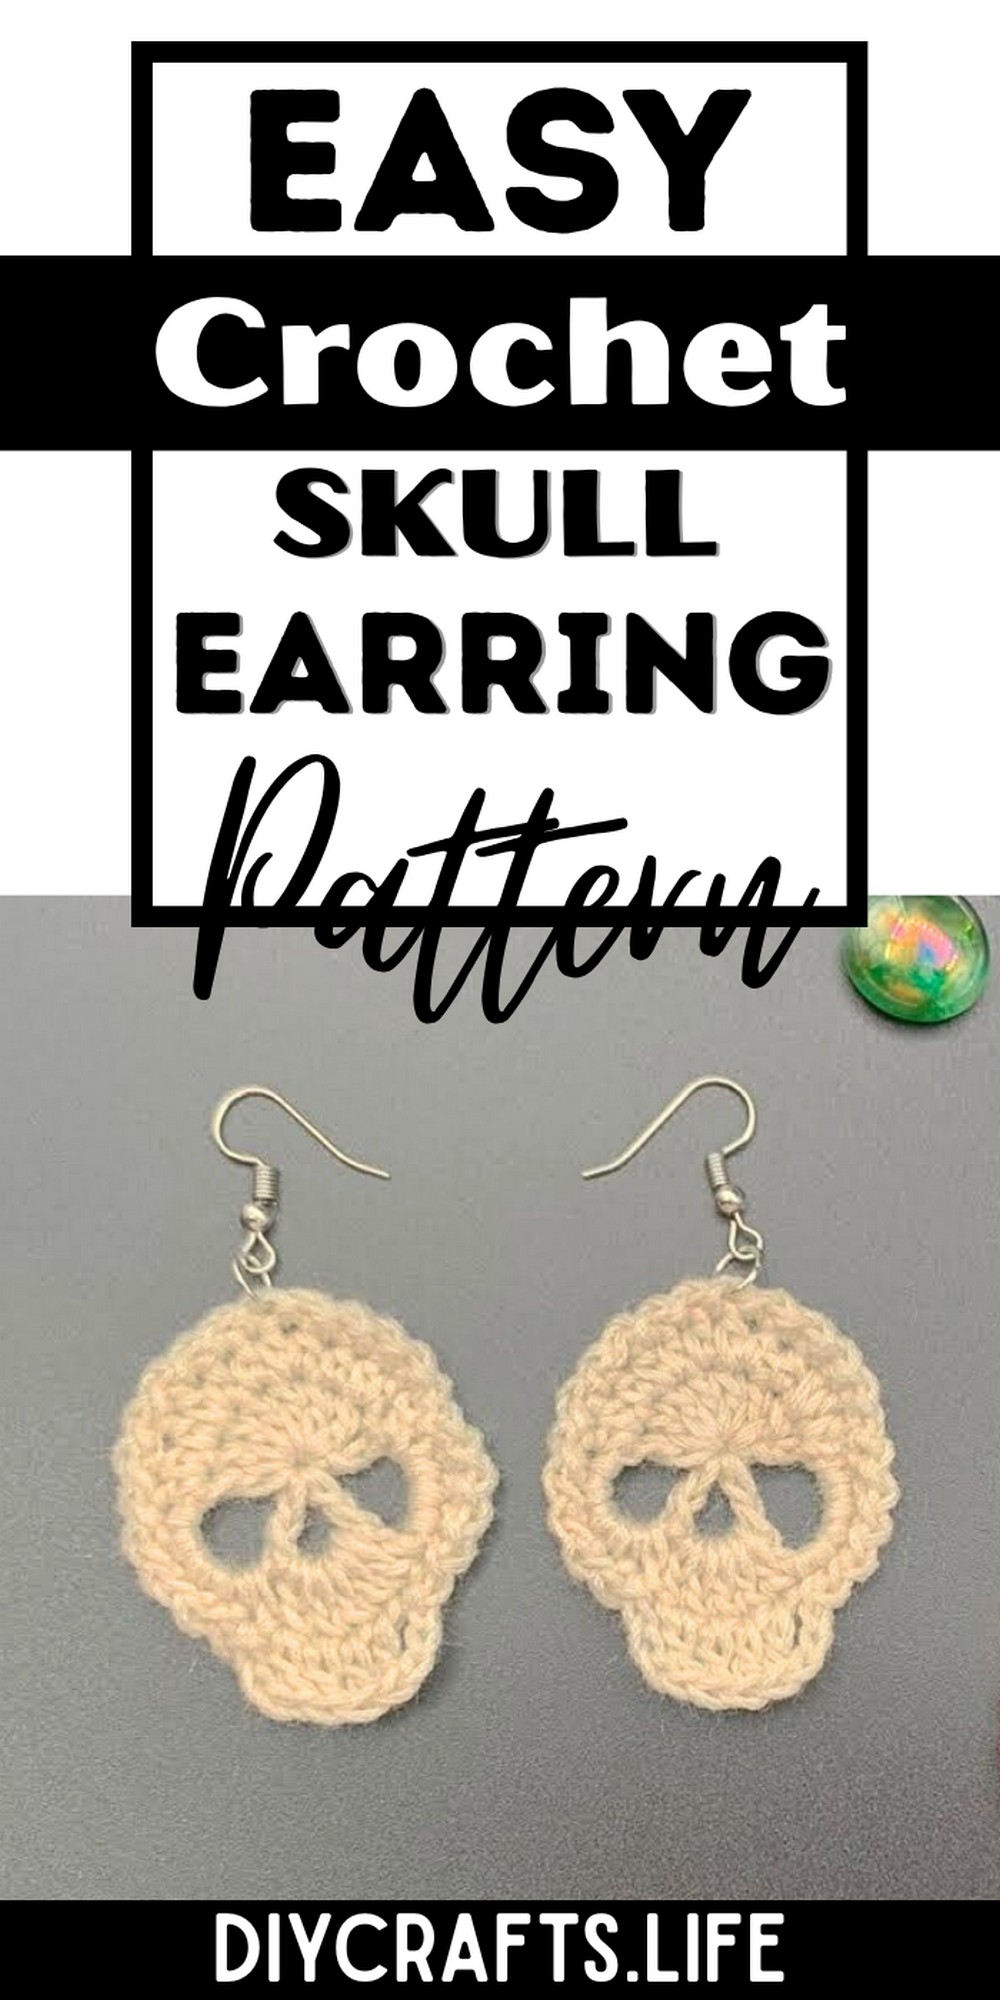
These earrings are lightweight, durable, and ideal for everyday wear or seasonal celebrations. Their intricate skull design adds artistic appeal to any outfit, while their crocheted structure ensures they’ll last. Handmade charm and versatility make them a thoughtful gift or stylish accessory.
Crochet Skull Earrings
This crochet project is suitable for all skill levels, from beginners to advanced crafters. With easy-to-follow steps, you can customize the design using your favorite colors or embellishments. Versatile and fun, crafting these skull earrings is a creative experience that encourages personal flair.
Materials and Preparation
To create these spooky yet stylish skull earrings, you’ll need:
- Yarn: Light weight yarn in the color of your choice.
- Hook: 1.5 mm steel crochet hook.
- Additional tools:
- 2 hook ear wires.
- 2 six-millimeter jump rings.
- Yarn needle.
- Scissors.
- Flat nose pliers.
Abbreviations and Notes
Abbreviations:
- MR: Magic Ring.
- CH: Chain.
- SC: Single Crochet.
- HDC: Half Double Crochet.
- DC: Double Crochet.
- SL ST: Slip Stitch.
Notes:
- This project is beginner-friendly. Work slowly and reference the video for visual guidance if needed.
- No gauge swatch is required, as earrings are a small project and dimension accuracy isn’t crucial.
Gauge, Approximate Size, and Pattern Notes
Gauge:
Gauge is not critical for this project. Ensure your stitches are even and tight to form the skull shape.
Approximate Size:
Completed skull earrings measure approximately 1.5 inches tall (excluding the hook ear wire).
Special Techniques:
- Magic Ring (MR): Used to form the foundation for the skull.
- Outline Slip Stitching: To give the skull shape its defined edges.
Step-by-Step Pattern
Round 1: Skull Base
-
Begin with a Magic Ring (MR):
Wrap the yarn around your finger twice and insert your hook into the ring. Yarn over, pull through the ring, and CH 1 to secure the ring. -
CH 3 (Counts as first DC):
Yarn over, pull through the loop three times to create three chains. -
Work 7 DC into the MR:
- Yarn over, insert the hook into the MR, yarn over and pull through.
- Yarn over, pull through two loops, then yarn over and pull through the remaining two loops.
- Repeat this process until you’ve completed seven DC stitches.
-
CH 5:
Yarn over and pull through five times to create a chain loop. -
Work 1 DC into the MR:
Follow the same DC process outlined above. -
CH 3:
Create three chains. -
Work another DC into the MR:
Follow the DC stitch process again. -
CH 5 and close the MR:
Pull the tail yarn to tighten and close the MR. -
SL ST into the 3rd CH from the start:
Insert your hook into the 3rd chain, yarn over and pull through the stitch and loop.
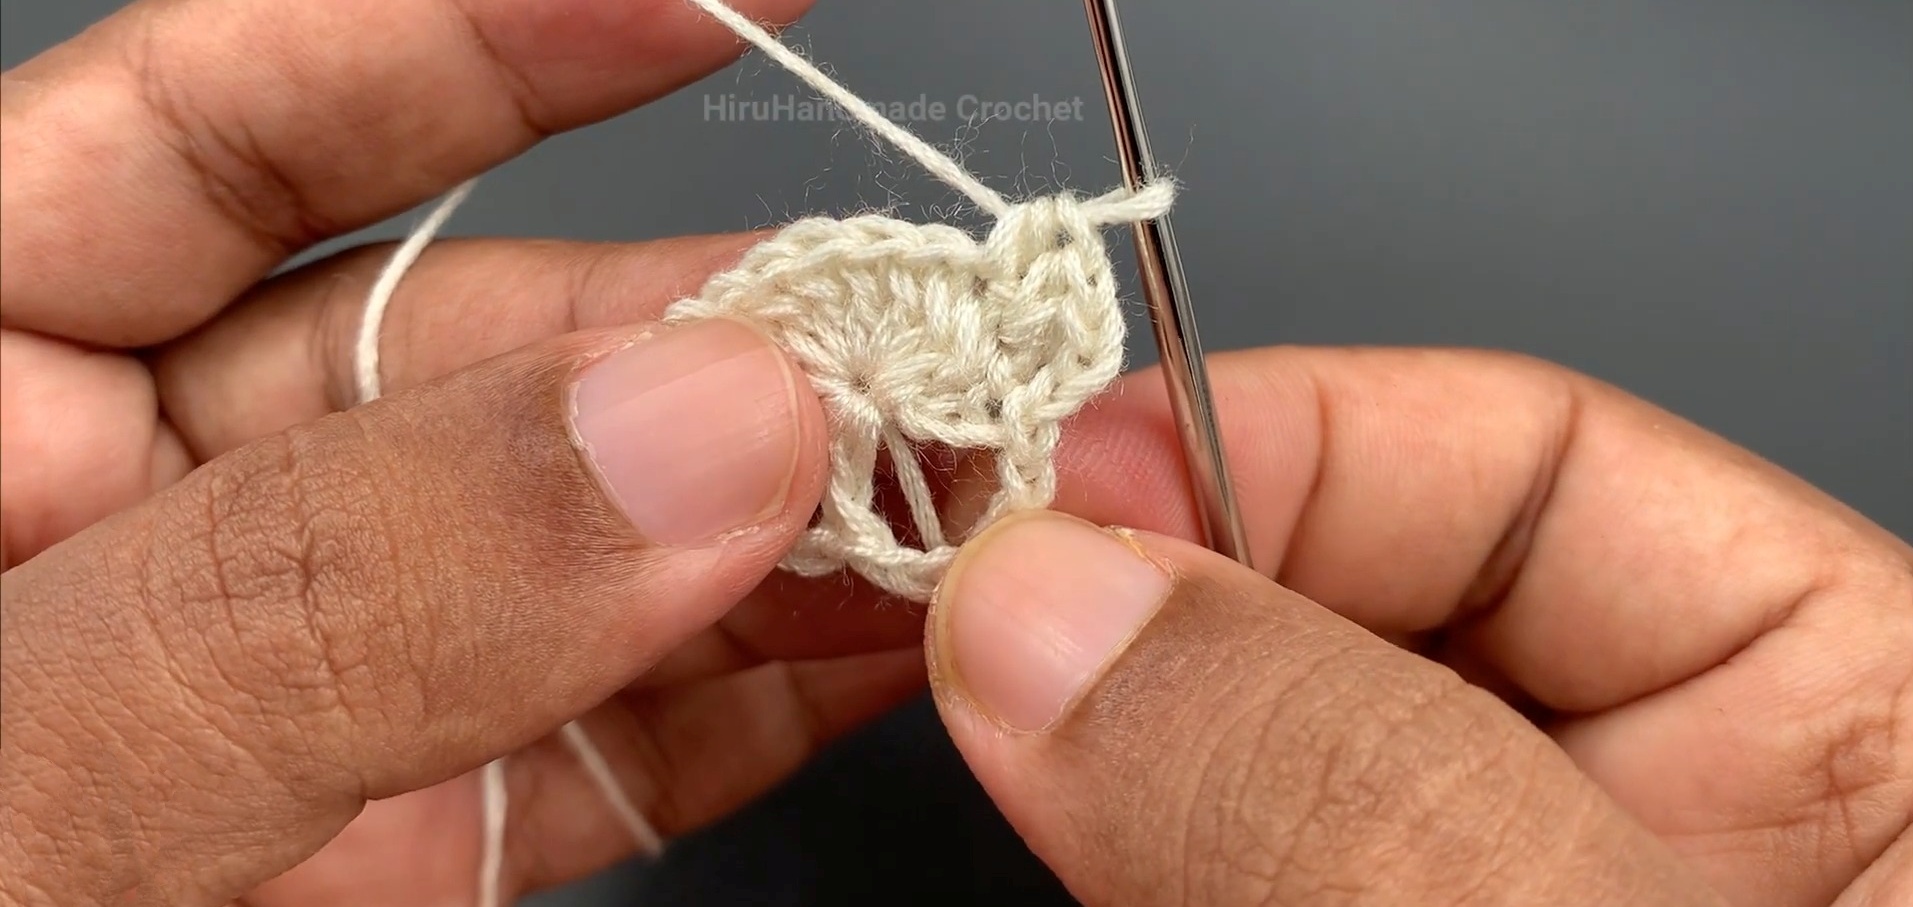
Round 2: Shape the Skull
-
CH 2:
Begin the round with two chains. -
Work an HDC increase into the next stitch:
- Yarn over, insert hook into the next stitch, yarn over, pull through (3 loops on hook).
- Yarn over, pull through all three loops.
- Repeat once more into the same stitch for an increase.
-
Work 1 HDC into the next stitch:
Complete a regular HDC as explained above. -
Alternate between HDC increases and single HDCs:
Continue adding shape to the skull by working increases and single HDC stitches as described. -
Work 5 SC into a CH 5 space:
Insert your hook into the space, yarn over, pull through, yarn over again, pull through both loops. Repeat for five SC stitches. -
Work 5 DC into a CH 3 space in the middle:
Yarn over, insert hook into the chain space, and follow the DC process to add five stitches. -
Work another 5 SC into the next CH 5 space:
Complete single crochet stitches into the next sequence of chains. -
SL ST into the 2nd CH of the round:
Join the round by slip stitching into the second chain from the start.
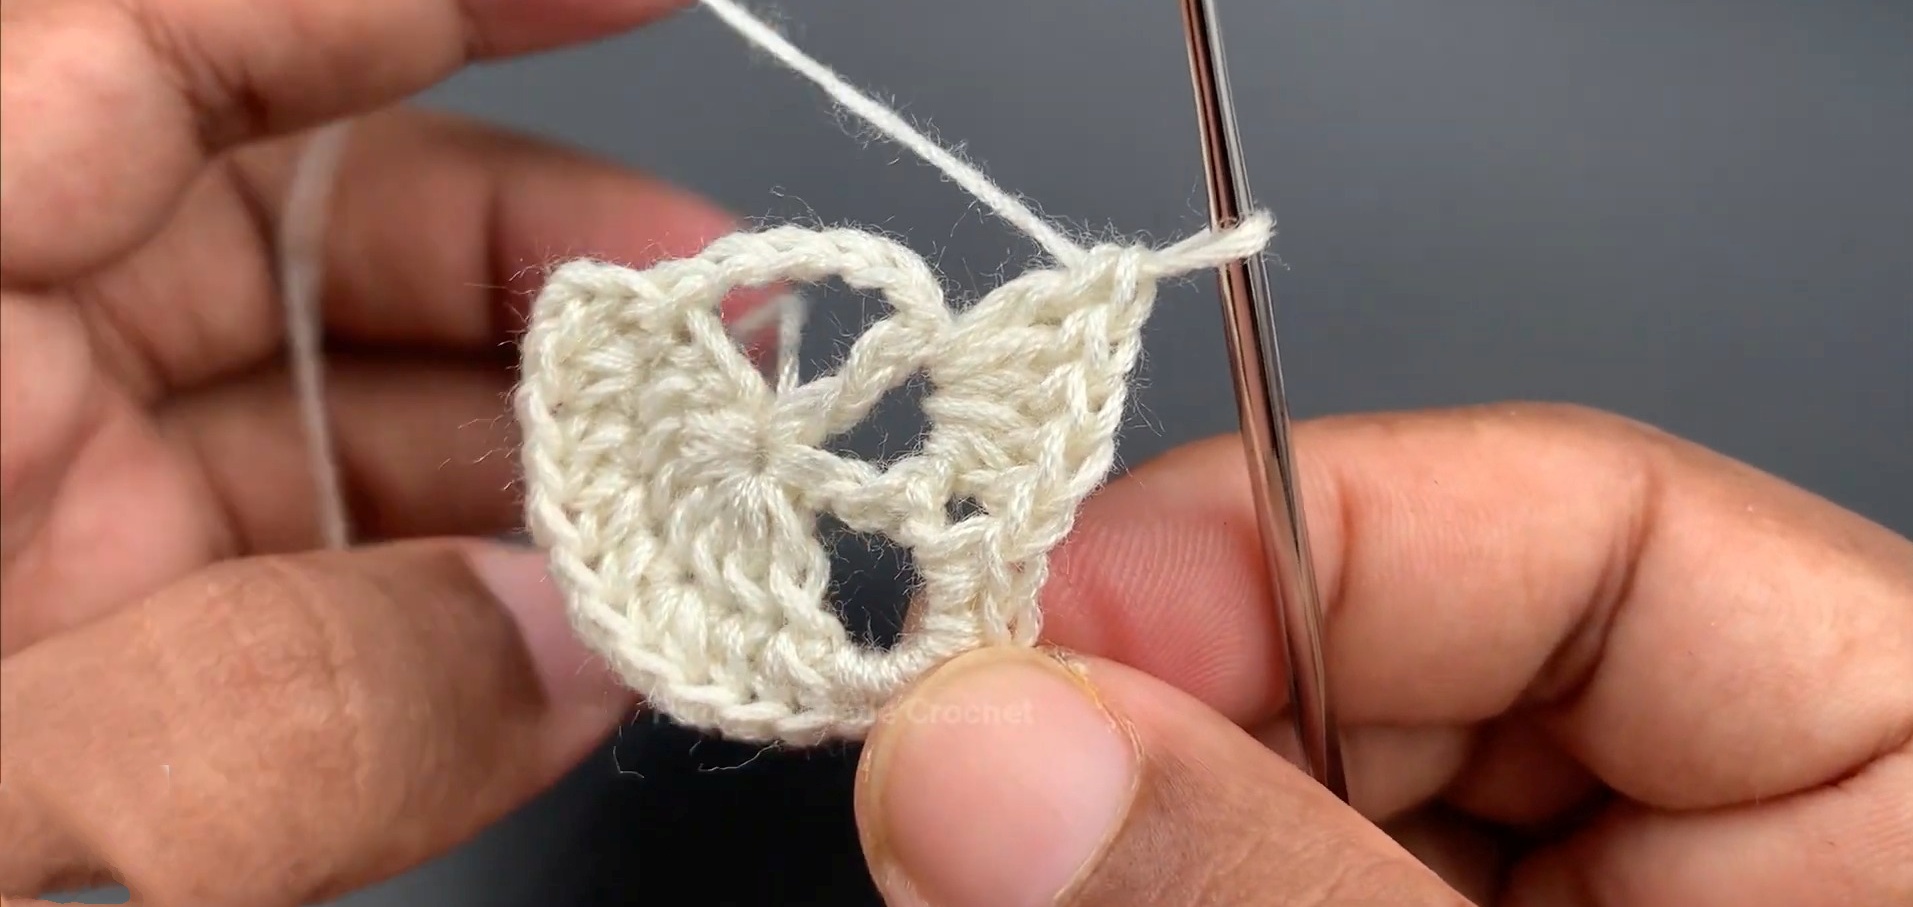
Round 3: Outline and Add Details
-
CH 1:
Create the outline by chaining one. -
Work SL ST into next stitch:
Insert the hook into the next stitch, yarn over, pull through the stitch, and the loop. -
Repeat CH 1 and SL ST:
Continue working slip stitches after chaining one for the outline. -
Create the skull’s mouth:
- CH 3.
- Work 1 DC into each of the next 4 stitches.
- CH 3 and work a SL ST into the following stitch.
-
Continue outlining:
Resume CH 1 and SL ST until you return to the starting point of the round. -
Leave a tail and fasten off:
Cut off the yarn, leaving a small tail to weave into your project with a yarn needle.
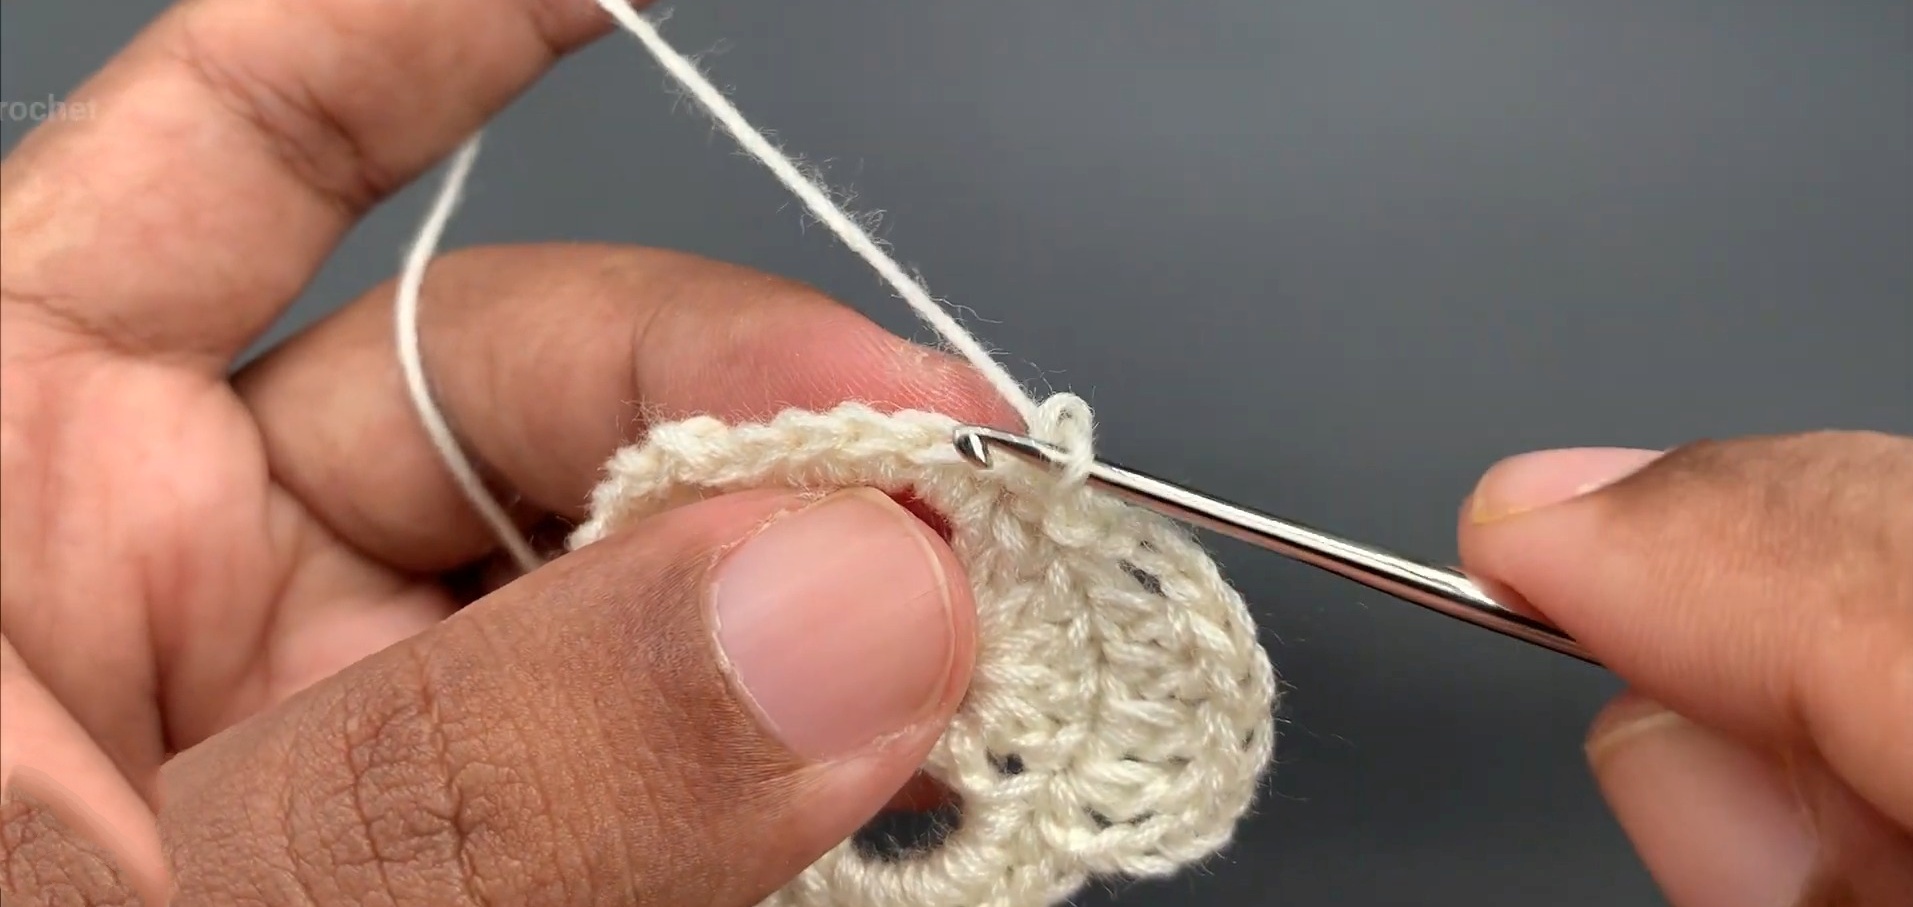
Assembly
-
Attach Jump Rings:
- Open a jump ring with pliers.
- Insert the jump ring into the stitch at the top of the skull. Add a hook ear wire into the same jump ring and close it tightly with the pliers.
-
Repeat for the second earring:
Follow the same process to create and assemble the second skull earring.
Congratulations—you’ve completed your stylish crochet skull earrings! Perfect for Halloween or any spooky occasion.

Pattern Question
Question: Can I use a different yarn or hook size for this pattern?
Answer: Yes, you can experiment with different yarns and hook sizes, but keep in mind it may affect the size and durability of the finished earrings. Lightweight yarns are recommended for a delicate look.
Conclusion
Crocheting these skull earrings is a delightful and rewarding project, offering both style and utility. Whether you're crafting for Halloween or everyday flair, this versatile pattern brings fun and creativity. Take time to enjoy making these handmade earrings for yourself or loved ones.