We've got this super cute crochet flower project for you – a Tulip and Flower Pot pattern. It's so lovely and has a really soft feel, making it a perfect addition to your crochet collection. This pattern is very easy to follow, making the whole process fun. Imagine creating your very own adorable tulip in a bright pink color that just screams "wow"!
Crochet Tulip And Flower Pot Pattern

The flower pot itself looks fantastic too; it's made with zinc-colored yarn that sparkles a bit, and it even has a cute smiling face with shining eyes. Don't forget about the green yarn for the leaves and stems, adding the perfect touch of nature. This elegant Crochet Tulip and Flower Pot pattern is simply delightful, and surely great to be a part of your home decor.
Materials
- Tulip & Flower Pot
- 3.5mm crochet hook
- Medium weight yarn: green color for stem and leaves, any color for flower pot & petals
- 6mm safety eyes
- Black embroidery thread
- Tapestry needle
- Doll stuffing
- Scissors
- Optional: Pipe Cleaner (for stem)
Abbreviations
- st(s stitch(es)
- s❘ - -slip stitch
- SC single crochet
- inc -single crochet increase
- ch- chain
- hdr half double crochet
- dr double crochet
Tulip Petals
With flower colored yarn
- 6 sc in magic ring, close ring
- ch 10, sl starting in 2nd ch from hook, sc, hdc, 4 dc, hde, sc, ch 1 and turn,
- sc in next st, hdc, 4dc, hdc, sc, sl, turn, sl in sts along the side of the petal once done, sc in 1st st in the magic ring (this completes 1 petal) repeat 5x more to create 6 petals
Leave a tail for sewing later.
Tulip Stems & Leaves
With green colored yarn
Leaves x 2:
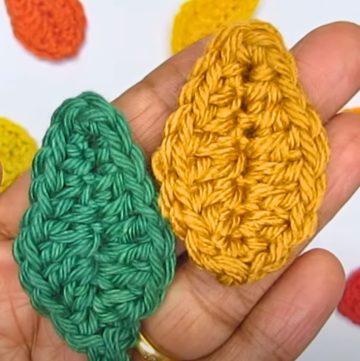
- ch 10, sl starting in 2nd ch from hook, sc, hdc, 4 de, hde, sc, ch 1 and turn, sc in next st, hdc, 4dc, hdc, sc, sl, turn, sl in sts along the side of the leaf
- leave a tail for sewing later
Stem:
- 6 sc in magic ring, close ring sc around in back loops only (6) sc around 10x (6)
- leave a tail for sewing later
Flower Pot
With any colored yarn
- 1. sc 6 in magic ring, pull ring closed (6)
- 2. 2 sc inc around (12)
- 3. sc around in back loop only (12)
- 4. 2 sc inc, sc around (18)
- 5. sc around (18)
- 6. 2 sc inc, sc around (24)
- 7-8 sc around (24)
- 9. sc around in front loops only (24) 10 sc around (24)
- fold the last two rounds down and over to create the lip of the
- Flower pot & fasten off
DIRT:
- 1. 6 sc in magic ring, pull ring closed
- 2. 2 sc inc arund (12)
- 3. 2 sc inc, sc around (18)
Leave a long tail for sewing
Assembly
Flower Pot Face:
Insert safety eyes between round 5 & 6, 2 sts apart.
With black embroidery thread, sew a line for the mouth between 2 sts, between rounds 4 & 5

Pattern designed by @riaartworld


