A DIY solar food dehydrator can be a do-it-yourself project for the handy kind of person. Their primary benefit is the low cost and inexpensive operation. Solar dehydrators can be built using found or thrown away materials, making their construction costs almost nonexistent. However, it does take some time to build your own solar food dryer, so they aren't a good choice if you have recently lost power during a storm and need a quick solution. If a storm has blown you out of power, shop our emergency food supply products, like ready-made meals, freeze-dried fruits and veggies, instant drinks, and more.
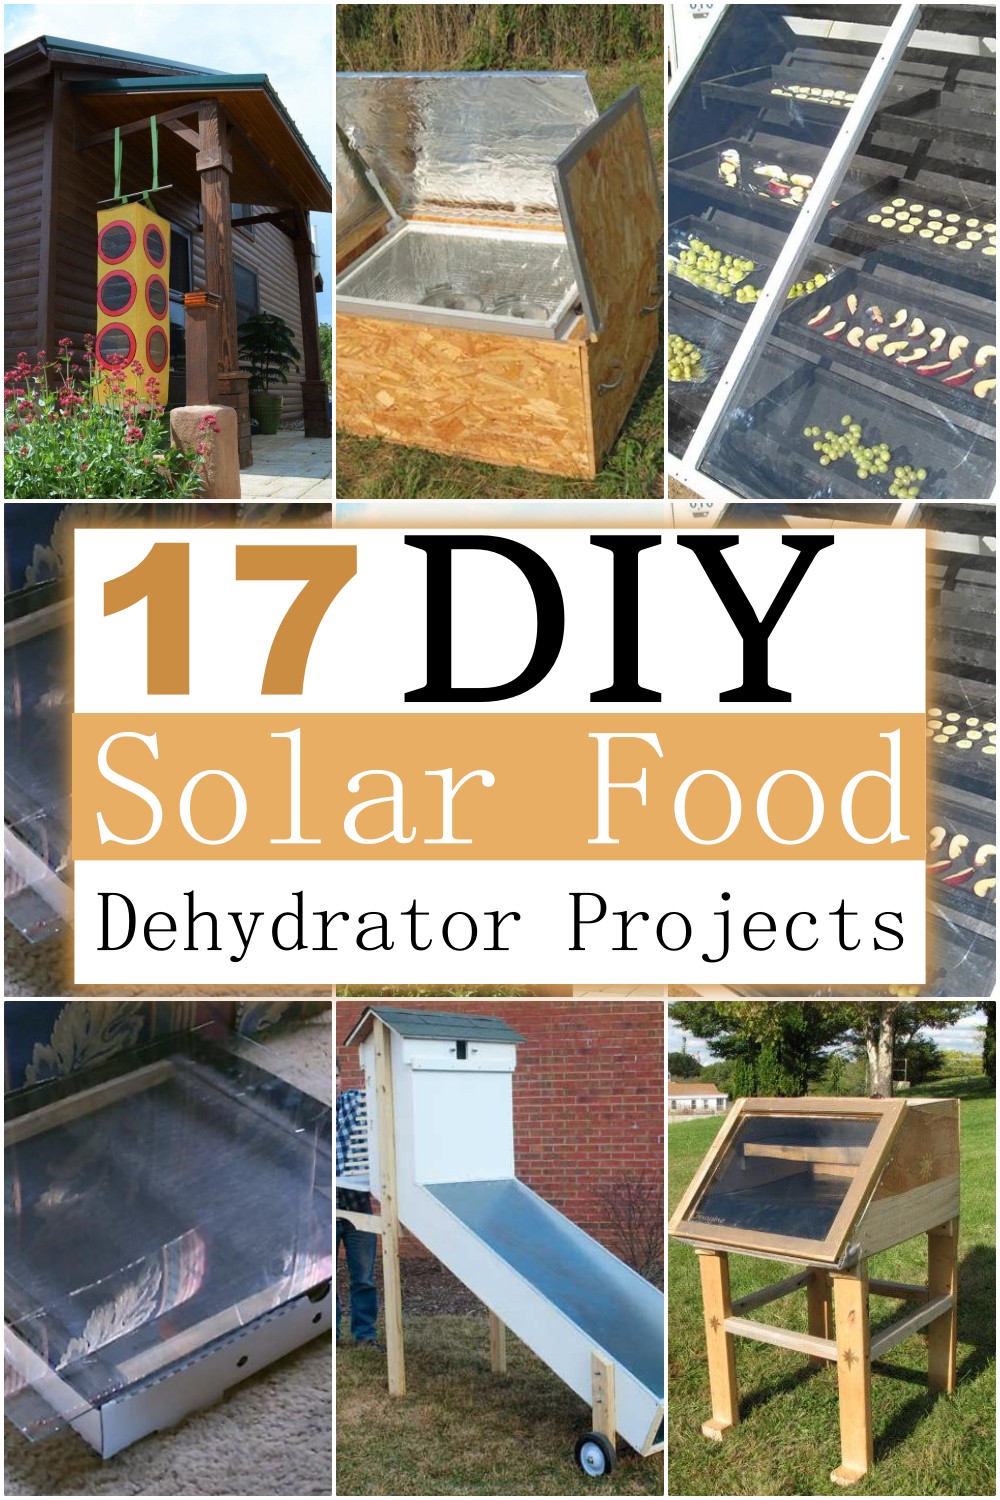
These DIY Solar Food Dehydrator Projects are a simple, effective method of preserving fruits, vegetables, nuts, and meats. Drying removes the majority of the water that is in food, making it less hospitable to bacteria and mold. Solar food dehydrators provide a convenient way to dry your fruit and veggies using the sun's energy. Simple to build, and inexpensive, solar dehydrators are a great project for kids, who can get involved in helping grow and harvest the produce as well. And when you're done drying, you'll have delicious, nutritious food for the rest of the year.
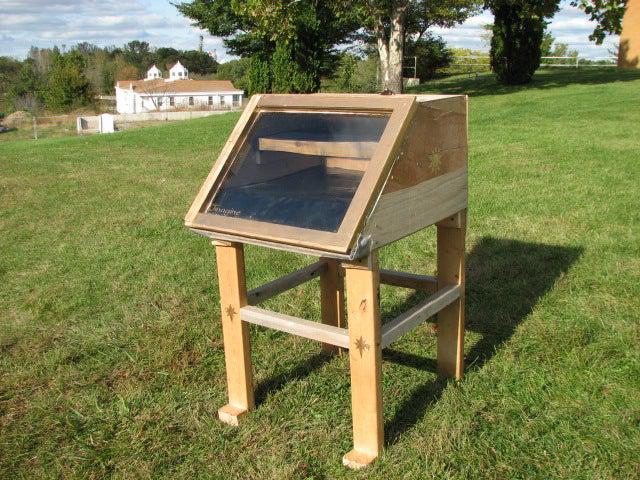
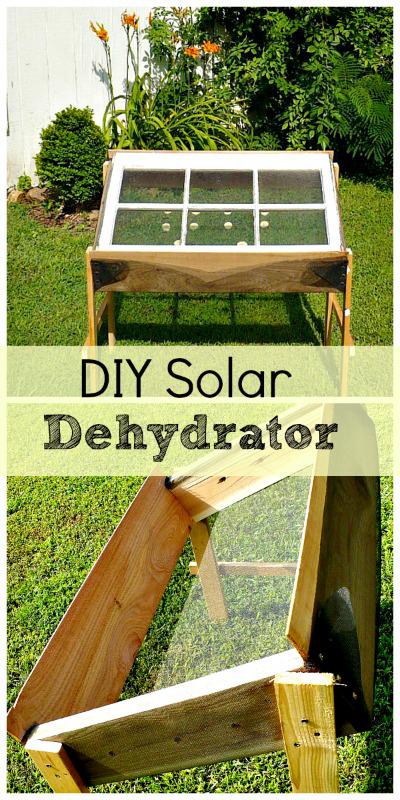
1. DIY Solar Food Dehydrator
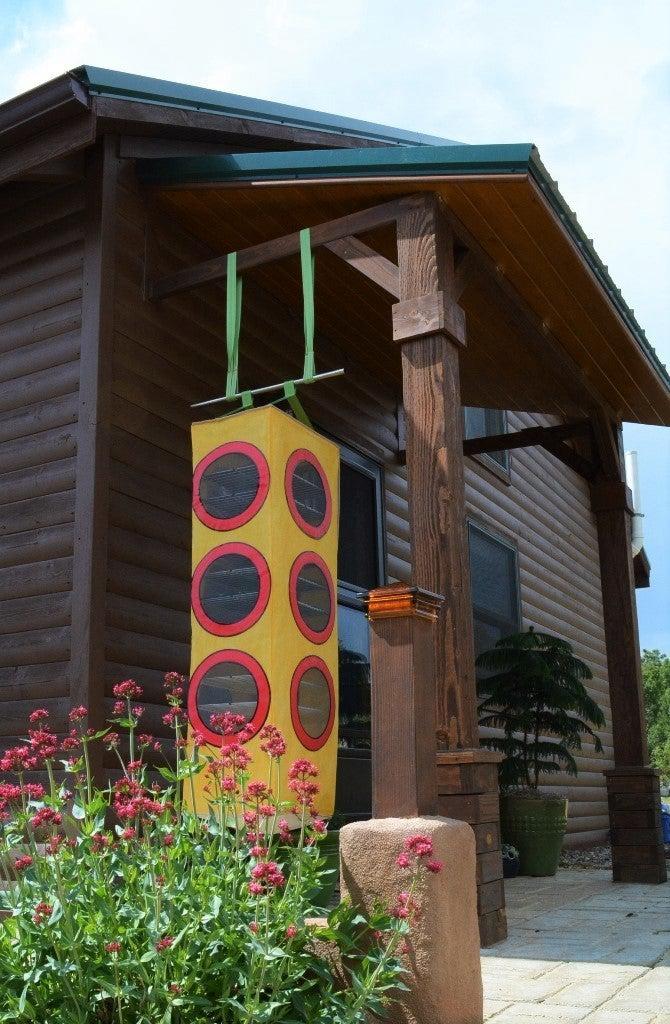
This solar food dryer is a wonderful addition to any kitchen with a garden! It is great for small families and bulk dryers. Includes 2 small screens for drying herbs, 10 large screens for fruits & vegetables, and 2 trays for drying meats. Aluminum coated mesh screens provide excellent light transmission and UV protection. It is very easy to assemble and made of high quality materials.
2. Solar Food Dehydrator DIY
You can create delicious and healthy dried fruits and vegetables quickly, easily, and safely with a little sunshine. This do-it-yourself solar food dehydrator is made entirely of recovered materials, including a recycled house window. Constructed with scrap plywood, 2x4s from an old ladder, and a house window this solar project will have your foods drying in no time!
3. How To Build A Solar Food Dehydrator

Building your own sliding solar food dehydrator can be simple and inexpensive. Start by making the base, then move to building a window assembly, attaching a door handle and latch, installing screen, adding hardware, and wiring a temperature sensor. You can save time and money by using reclaimed materials from a lumber yard or from other projects. To build this project, you will need some experience with wood construction and wood working tools.
4. Simple Solar Food Dehydrator
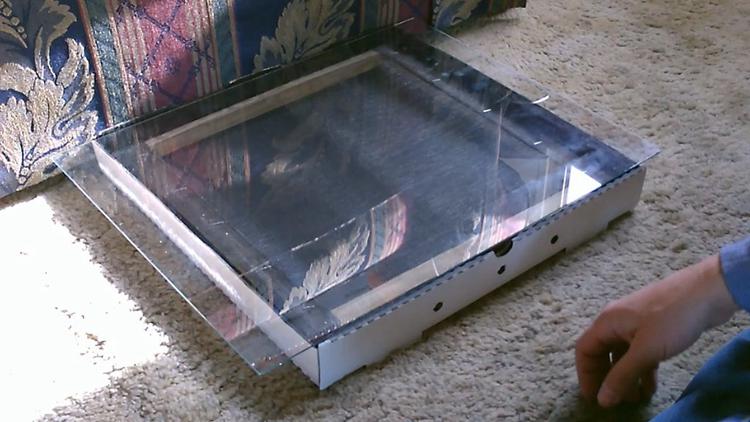
Are you interested in making a homemade solar food dehydrator but not really sure how to start? It is actually quite easy to build your own dehydrator much like the larger commercial units. To find the supplies (pizza box, glass, screen, etc) needed for this homemade dehydrator, you will probably be shopping at several stores so you may want to make a list of all the items that you will need and divide them up between locations before you get started.
5. Homemade Solar Food Dehydrator
Dont lose any of your extra harvest to spoilage and storage problems. This versatile solar food dehydrator can dry everything from fruits and vegetables to mushrooms and herbs so you have delicious food to enjoy all year long. A great way to naturally preserve foods, it is 100% electric free with a built-in thermostat that ensures ideal drying temperatures.
6. How To Build An Infrared Solar Dryer
An efficient way to preserve your garden harvests is by dehydrating foods. In a true survival scenario, the luxury of electricity may not be available so that still leads us back to this. If you long for something both snazzy and practical, then this is definitely for you! It is simple to construct and takes advantage of the free energy of the sun.
7. Solar Food Dryer DIY
Making your own solar food dehydrator is an inexpensive way to save your garden produce for year-round use. It is important to make as much food as possible in your home, therefore a food dryer is necessary. Using polycarbonate sheets, you can also make this food dryer that can last for ages.
8. Simple Solar Dehydrator
This video shows how to make a simple solar food dehydrator. It costs almost nothing to make and can be made using offcuts and scraps. In the heat of the sun, it dries and preserves many types of foods (meats, vegetables , fruits , herbs , nuts, and more) and dries food quickly. slice food thinly and lay on screen. place the screen in the dehydrator. place in the sun.
9. How To Build A Solar Dehydrator
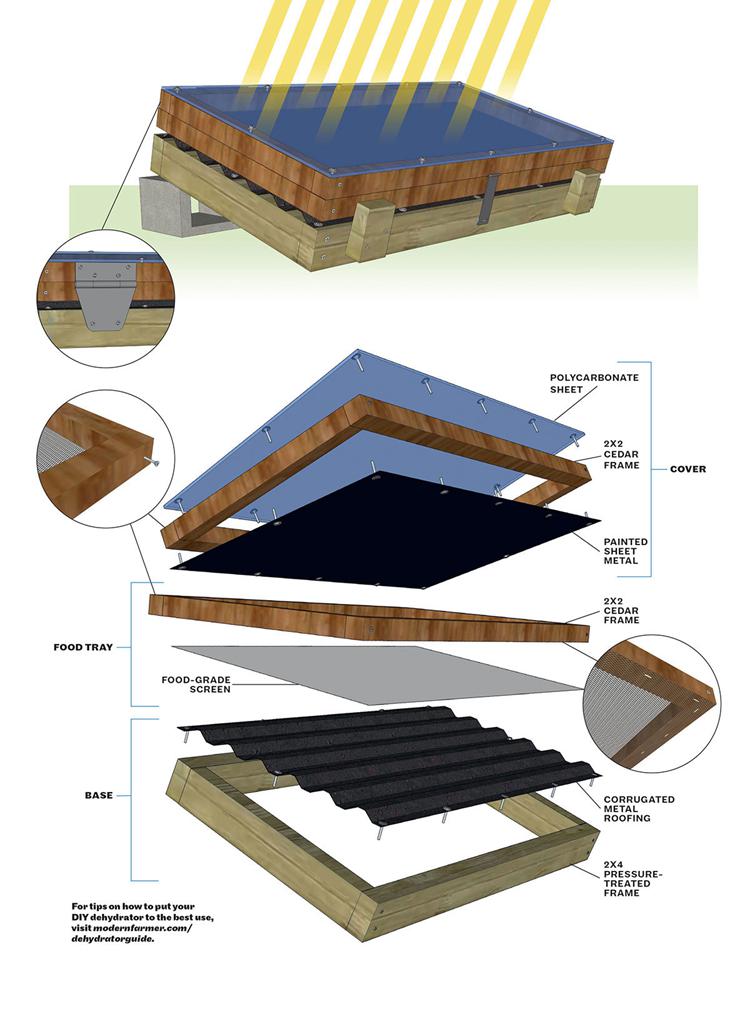
To make this Radiant Super Dryer, the design has been simplified to fit standard materials, so anyone with basic carpentry skills can construct this DIY dehydrator in a single weekend. Firstly after getting your materials, build frames for the cover, food tray, and base, make the cover, make the food tray, make the base, and then assemble the dehydrator.
10. How To Make A Solar Powered Food Dehydrator
Materials needed to make this dehydrator include plywood, screws, a screen to keep insects (and other critters) out of the box and to allow air to flow through, and a plexiglass cover. Handles and swivel wheels were added to this dehydrator to make the unit easier to move around. It's a great idea, as this looks like it could get pretty heavy.
Be sure to let the dehydrator sit empty in the sun for a few days before placing food inside it to give the paint fumes time to dissipate.
11. DIY Solar Dehydrator For Food
This is a very simple design using scrap lumber and upcycled objects. It’s basically a cedar box on a stand with insect mesh stapled on the bottom. There are 3 holes drilled into the sides for ventilation that have insect mesh stapled over them.
You can repurpose an old window and make use of that.
This dehydrator is very lightweight so it’s easy to move in and out of the sun. You can add a thermometer to the inside if you’d like to make sure that you have the recommended temps for dehydration which are between 95-145 F.
12. Solar Food Dehydrator DIY
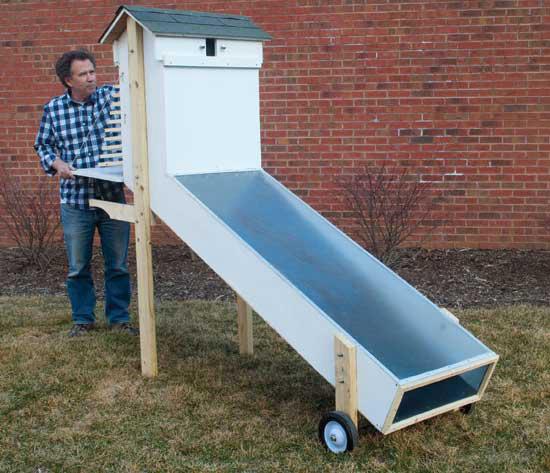
You can construct this solar dehydrator using locally available materials like exterior-grade plywood, FRP glazing, metal screening or lath, and miscellaneous parts.
The sun’s radiation passes through the plastic top of the collector box to the absorber screens, which retain heat.
Air entering through the intake is warmed as it passes over the absorber screens, and then flows into the drying chamber. There, the heated air draws out the food’s moisture before exiting through vents just below the roof.
The rising warm air creates negative pressure at the bottom of the collector box, which draws in more outside air to replace the air that left through the top vents. Air will continue to heat and rise, passing through the collector box and into the drying chamber, as long as the sun is shining or the dryer has access to another source of heat.
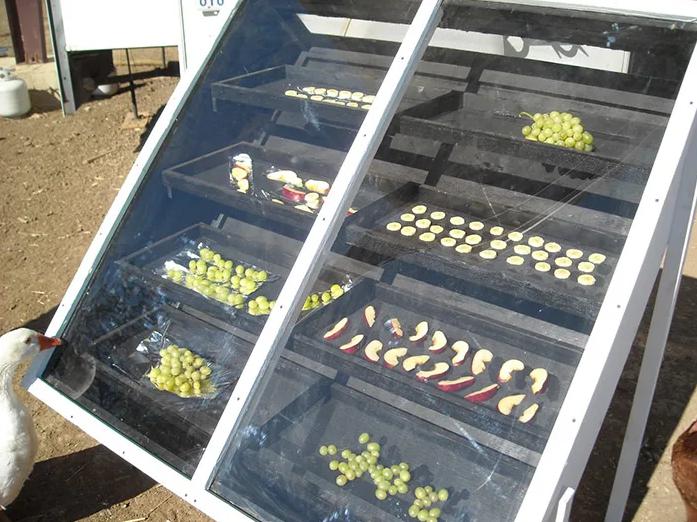
13. Solar Food Dehydrator
Hot summers are the perfect time to try dehydrating foods outside. Solar food dehydrator makes it possible to air dry produce. This video shows you how to sun dry your tomato with ease. You have to begin by slicing your tomatoes and carefully place them on the screen.
Take the screen to your wooden insulated solar dehydrator and place it inside. Close the dehydrator and allow the vegetable to dry.
14. Portable Food Dehydrator
Allow this video to walk you through how to make this portable solar food dehydrator. This design is made to enable easy carrying when in use and when not in use. It is made so because this has to be placed on a rooftop and can't possibly maintain the rooftop location.
15. Solar Dehydrator
Drying is an excellent way to preserve produce, but exposing fruits and vegetables to direct light can cause vitamin loss. This design relies on indirect solar power, meaning the drying food is not exposed to the sun but instead to solar-heated air.
Our dryer takes advantage of the natural process of rising hot air to operate efficiently without any electric fans.
16. Building A Solar Food Dehydrator
The following video describes the process that I used for building my solar food dehydrator. I used a solar food dryer to make dried fruit and beef jerky. If you have a keen interest in developing your own food dryer, I advise you to be patient with this video and carefully follow the steps. Conventional food drying requires a lot of time, patience and care but the payoff is well worth the effort.
17. DIY Solar Oven
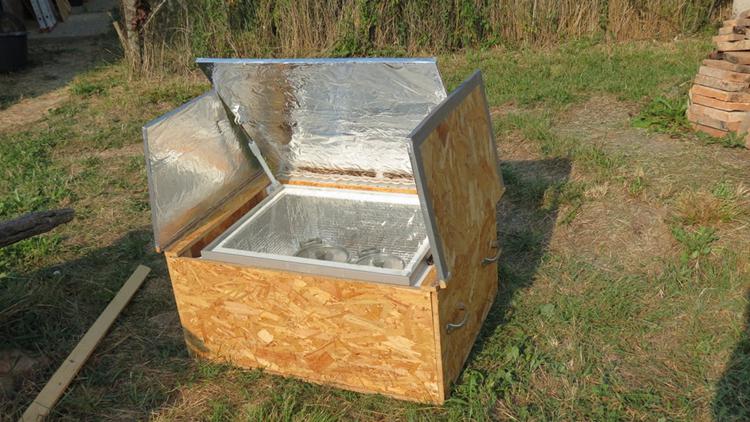
Solar ovens are an easy, fun and effective way to cook food and make water safe for drinking. This solar oven is made out of materials that are very easily available and not very expensive either. Most materials used to build this one were scrap materials. Temperatures are usually 30-35 degrees Celsius, but for some food, it will also work with lower temperatures.
Cook all kinds of food with only the power of the sun. This solar cooker is capable of preparing a wide range of delicious food, including pasta, rice, pasta sauce, soup, sausages, chicken, vegetables and muffins. Enjoy the convenience and versatility of this product today!