This Dragonfly Filet Crochet Bandana is a wearable piece that's as stylish as it is versatile. Featuring a charming dragonfly-inspired design, this crochet bandana is perfect for adding a touch of creativity to any outfit. Its lightweight and textured look make it a wonderful accessory for everyday use or even as a thoughtful handmade gift for friends and family.
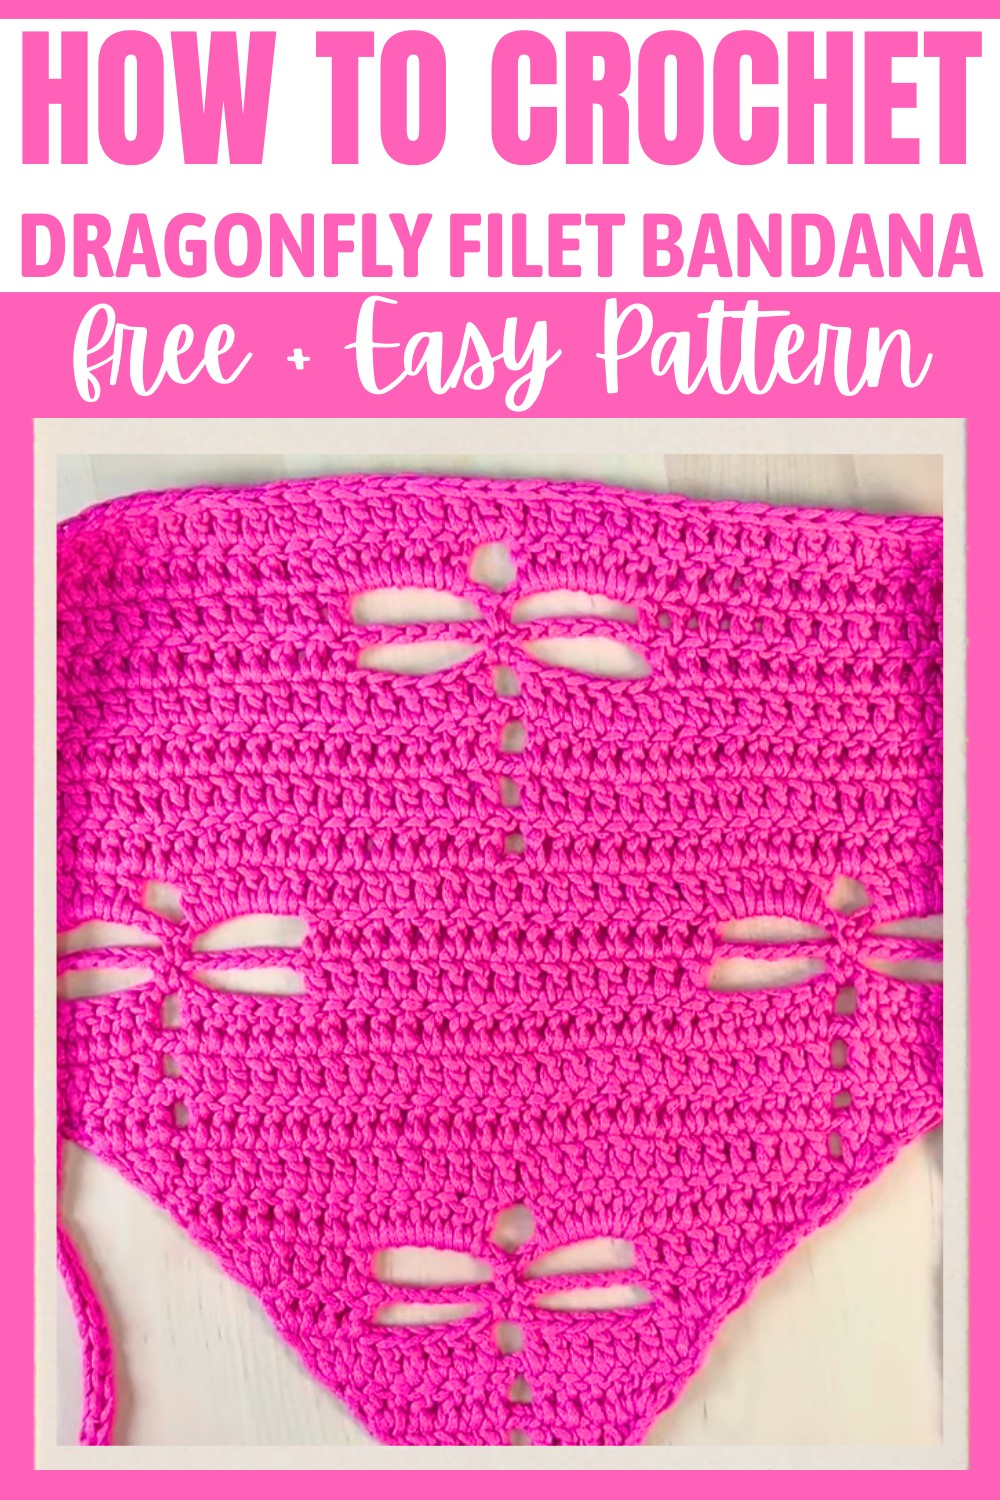
This crochet bandana is made using simple stitches and techniques, making it beginner-friendly while still producing an eye-catching design. The dragonfly motif adds a delicate, unique touch that stands out. You can customize the size or color to match your personal style, and it’s easy to wear for outdoor activities or just as a stylish detail for your day-to-day look.
Let your crochet hook bring this stunning design to life. The process is engaging yet simple, focusing on repeating rows to form the pattern. With patience, you'll have a bandana that's unique, practical, and truly beautiful!
Credit Crochê da Miranda
Materials & Tools Needed
- Yarn: Opaque pink textured polyamide yarn (or a similar lightweight yarn). Recommended for 2.5 mm to 4 mm hooks.
- Crochet Hook: 3 mm crochet hook.
- Stitch Marker: Optional, for tracking dragonfly sections.
- Lighter or Fray Stop Glue: To finish the edges of polyamide yarn.
- Scissors: To trim excess yarn.
Finished Size & Customization Ideas
- Finished Size: Approximately 50 cm from end to end.
- Customization Ideas:
- Larger Size: Add more rows to increase the width of the bandana. Use the “dragonfly motif” pattern to maintain consistency.
- Color Variations: Change the yarn color midway or use gradient yarn for a distinctive look.
- Tie Length Customization: Increase or decrease the number of chains for the ties.
Step-by-Step Crochet Instructions
The bandana is worked from a point upward, gradually expanding to create the triangular shape, while incorporating dragonfly motifs. Follow these steps carefully:
Base Foundation
- Start by creating a slip knot and tightening it on your hook.
- Chain (ch) 4, then yarn over and make 2 double crochets (dc) into the 1st chain stitch. This forms the triangle's first row.
Build the Triangle with Expansion
Each row expands on the sides to create the triangular shape.
Rows 2 to 5:
- Row 2:
- Chain 3 (counts as a dc), turn the work.
- Make 2 double crochets in the first stitch for an increase.
- At the end of the row, work 3 double crochets into the last stitch for another increase.
- Row 3:
- Chain 3, turn.
- Increase in the first stitch by working 2 more double crochets into it.
- Make a double crochet into each middle stitch.
- At the end, work another increase (3 dc in the last stitch).
Repeat rows in this pattern until you reach Row 5, always increasing at the beginning and end of each row.

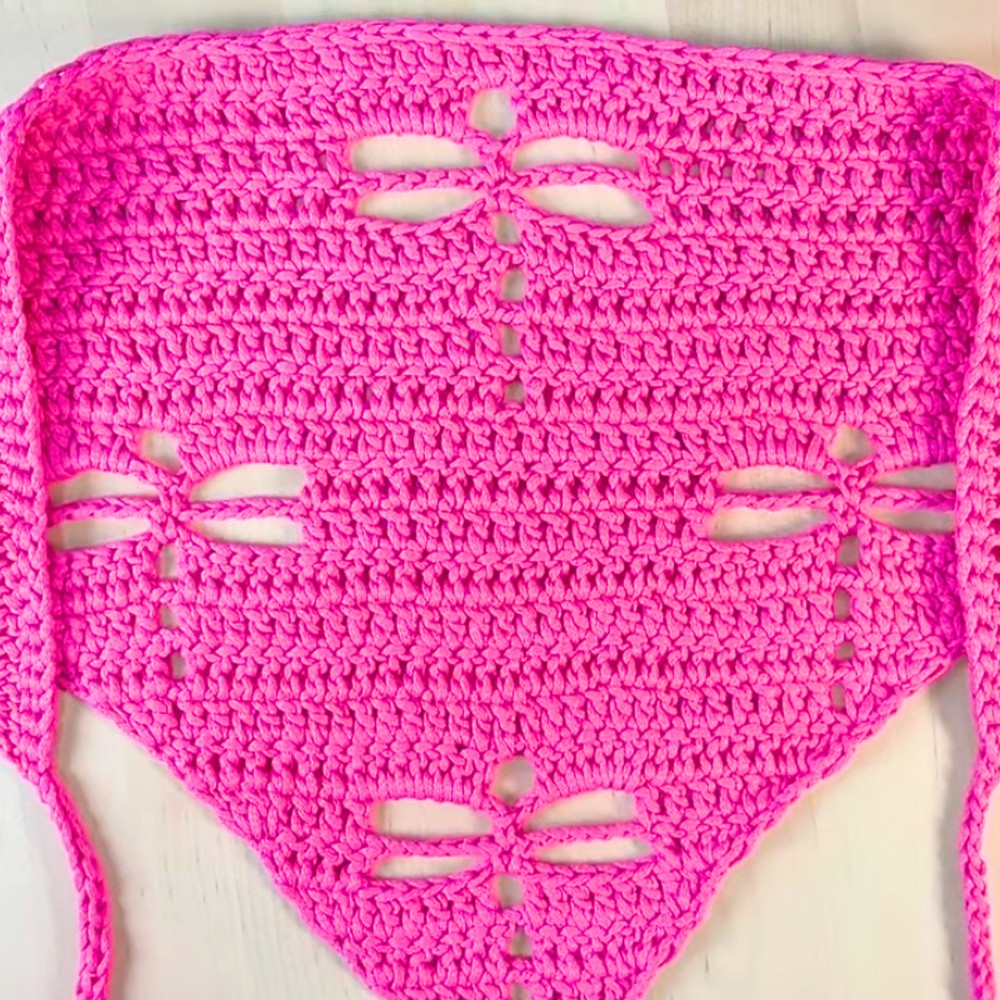
Creating the Dragonfly Motif
You will now incorporate the dragonfly design. The dragonfly motif involves creating spaces ("wings") using chains and filling them with single crochets or double crochets later.
Row 6 (First Set of Wings):
- Start with your usual increase: Chain 3, turn, make 2 double crochets in the same stitch.
- Work 5 double crochets across the row until the middle section.
- Create the dragonfly’s first wing:
- Chain 6, then skip 6 stitches, and attach with a single crochet (sc) in the middle.
- Chain 6, skip 6 more stitches, then continue with a set of double crochets.
- End the row with the usual increase: 3 double crochets in the last stitch.
Row 7 (Completing the Wings):
- Chain 3, turn, and make 2 double crochets in the first stitch.
- Crochet 6 double crochets into each set of chains from the previous row (this fills the dragonfly's wings).
- At the same time, work double crochet (dc) over dc for the body, creating a solid row structure.
- Repeat this process for all dragonflies you’ve added across the row.

Adding More Dragonflies
From Row 8 onward, build on the triangular increase pattern while incorporating additional dragonflies:
- For each new dragonfly, add spacing:
- Separating Chains: Use 2 separating chains between bodies and wings.
- Adjust spacing so dragonflies are aligned in rows, with separation between them.
- To form additional dragonflies:
- Repeat the same chain 6 / skip 6 stitches logic for each dragonfly wing.
- Continue adding stitches and rows following the triangle structure.
The pattern structure flows as follows: Start with dragonflies on Row 6, and expand them across rows 8, 9, and beyond, keeping dragonflies evenly spaced.
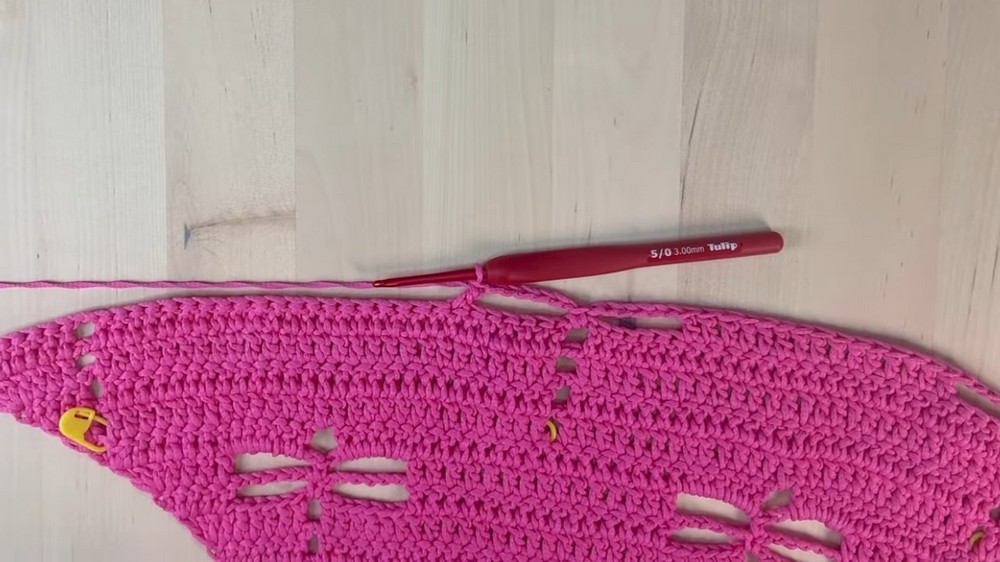
Finishing Touches
- Final Rows:
- Add 50 chains at the end of each triangle side for the ties.
- Work slip stitches (sl st) across the length of these chains and along the edge of the headband to create a neat finish.
- Securing the Yarn:
- If using polyamide yarn, burn the end lightly with a lighter or use fray stop glue to keep the yarn from unraveling.
- Weave in the loose ends securely with your hook or needle.
- Blocking:
- Stretch the bandana gently into shape, as polyamide yarn may stretch slightly due to its elasticity.
Additional Notes
- Row Logic Simplified:
- At the beginning and end of every row, work increases (3 dc in first and last stitch).
- Repeat dragonfly motifs as many times as needed, spacing consistently.
- Adjustments:
- For a wider bandana, add rows and dragonflies.
- Maintain symmetry by spreading dragonflies evenly along the row.