A crochet cardigan is the perfect handmade clothing to keep you cozy while looking stylish. It’s soft, lightweight, and versatile, making it a great addition to your wardrobe. Whether you wear it to stay warm on chilly days or as a fashionable layer over your outfit, creating one is both rewarding and fun. This cardigan can also be gifted to a loved one. Making something by hand truly adds an extra touch of care.

Crochet Cardigan Tutorial
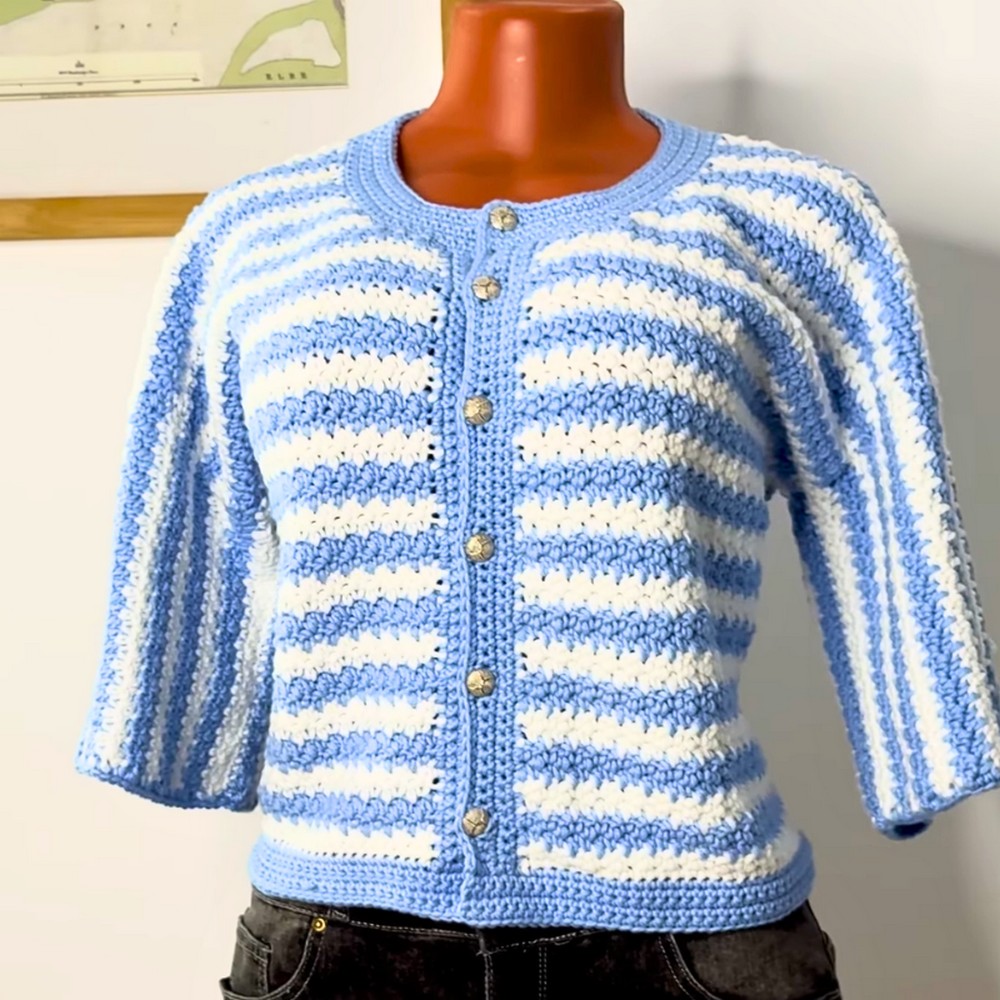
This cardigan uses a colorful pattern that alternates between rows of two shades, giving it a bold yet elegant look. The design is beginner-friendly, made using simple stitches that form neat panels—the back, two front sides, and sleeves stitch together seamlessly to complete the full cardigan. You can use any yarn that feels soft and comfortable, choosing colors that match your style. Add small details like buttons or leave it open for a casual feel. It’s all about designing something you’ll enjoy wearing.
Credit FTK Crochet
Materials & Tools Needed
- Yarn:
- Milk Cotton Yarn (White)
- Zara Plus (or another yarn of choice for contrast)
- Feel free to choose yarn brands/styles you’re comfortable using.
- Crochet Hook: 4.5 mm
- Others:
- Stitch Markers
- Measuring Tape
- Tapestry Needle
- Scissors
Pattern Abbreviations & Terminology
- Ch = Chain
- Sc = Single Crochet
- Dc = Double Crochet
- Slst = Slip Stitch
- Dec = Decrease
- St(s) = Stitch(es)
- Rep = Repeat
- Terminology: Pattern uses US crochet terms.
Step-by-Step Crochet Instructions
Important Measurements Needed
- Bust measurement (to divide panels appropriately).
- Desired length of the cardigan.
- Arm circumference.
Step 1: Break Down of Panels
The cardigan is worked in three main panels:
- 1 Back Panel
- 2 Front Panels (right and left)
- 2 Sleeves
Each is made separately and joined together.
Front Panel Instructions
A) Create the Foundation Chain
- Divide your bust measurement by 2 for the back panel. Divide this number into two again for the front panels.
Example: A 38-inch bust results in:- Back Panel: 19 inches wide
- Each Front Panel: 9.5 inches wide
- Using the 4.5 mm hook, make a foundation chain that measures the width of your front panel (e.g., 9.5 inches).
- For reference, the creator used 40 chains for 9.5 inches. Ensure your chain count is an odd number for the lemon peel stitch.

B) Row 1
- Sc into the 2nd ch from the hook and each ch across.
- Chain 1, turn your work.
- Total row count: 40 stitches.
C) Row 2: Begin Lemon Peel Stitch
- Alternate Single Crochet (Sc) and Double Crochet (Dc):
- First stitch: Sc.
- Next stitch: Dc.
- Continue alternating Sc and Dc until the end.
- Turn your work at the end of the row.
Tip: Always ensure an Sc falls on the previous row's Dc, and vice versa, to maintain the texture of the lemon peel pattern.
D) Color Changes
- Follow the stripe pattern:
- 2 rows in white yarn.
- 2 rows in blue yarn (or your secondary color).
- Continue alternating colors every 2 rows.
- When changing color:
- On the last yarn over of the final stitch of the row, switch to the new color.

E) Front Panel Decreases (To Shape Neckline)
- Leave out 15 rows for the neckline shaping. Begin decreases after working the rest of the panel.
- Measure how many rows remain (e.g., 39 rows). Stop at Row 40 to begin neckline shaping.
Neck Shaping:
- Mark 5 stitches from the edge for the neckline.
- Continue in lemon peel stitch, decreasing stitches on the edge every row until 8 rows of decreases are completed.
F) Complete Front Panel
Once the decrease rows are complete, finish the rest of the rows without decreasing until you reach the desired length.
Back Panel Instructions
- The back panel is a full, rectangular piece.
- Create a foundation chain measuring the full width of both the front panels combined (e.g., 80 chains for 19 inches).
- Work in the same lemon peel stitch pattern as the front panels, but without decreases.
- Continue until the back panel matches the length of the front panels.

Sleeve Panels
A) Create Foundation Chain
- Calculate desired sleeve length (e.g., 7 inches for a short sleeve).
- Chain the width of the sleeve (e.g., 30 chains for 7 inches).
B) Work in Lemon Peel Stitch
- Alternate Sc and Dc across every chain.
- Use the same stripe pattern as the main body panels.
- Match the length of the sleeve to your desired measurement (e.g., 7 inches).

Joining the Panels
A) Seaming the Shoulders
- Use a tapestry needle to join the front panels to the back panel at the shoulders.
- Place the panels together (right sides facing each other).
- Use the mattress stitch or your preferred seaming method.
B) Seaming the Sides
- Identify the armhole by measuring and marking it with stitch markers (e.g., the tutorial used 16 inches for the armhole). Mark 8 inches for the front and 8 inches for the back of the armhole.
- Use a tapestry needle or single crochet to seam from the bottom edge up to the armhole markers for both sides.
Joining the Sleeves
- Fold each sleeve panel into a tube and seam along the edge using a tapestry needle or slip stitch.
- Attach each sleeve to the cardigan body:
- Align the sleeve seam toward the bottom of the armhole opening.
- Use the white yarn for white sections and blue yarn for blue sections to blend seams seamlessly.
Finishing Touches
A) Add Ribbing to Sleeves
- Join a yarn to the sleeve edge.
- Work 5 rows of sc around the edge, or fewer rows if a shorter sleeve cuff is desired.
B) Add Ribbing to the Hem and Front Borders
- Add 5 rows of single crochet for the hem (bottom of cardigan).
- Along the front edges, work even single crochets (1 sc per stitch) to frame and stabilize the edges.
C) Add Buttonholes (Optional)
- On the final row of single crochets for the front edge, chain 5 at desired intervals to create buttonholes.
- Continue with sc following the pattern.

Final Notes
Once completed, weave in all tails with your tapestry needle, ensuring a clean finish. Steam block or lightly damp block to shape the cardigan as needed.
Congratulations, your cardigan is complete!


