Transform your summer wardrobe with this charming crochet top that radiates effortless beauty and ease! Designed to be both beginner-friendly and endlessly customizable, this pattern is a delightful blend of simplicity and elegance, perfect for those seeking a project that creates a statement piece without overwhelming complexity. With its breezy silhouette and feminine details, this top feels as dreamy as a garden in full bloom.

Easy Crochet Summer Top Tutorial
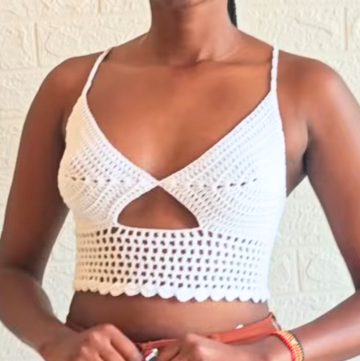
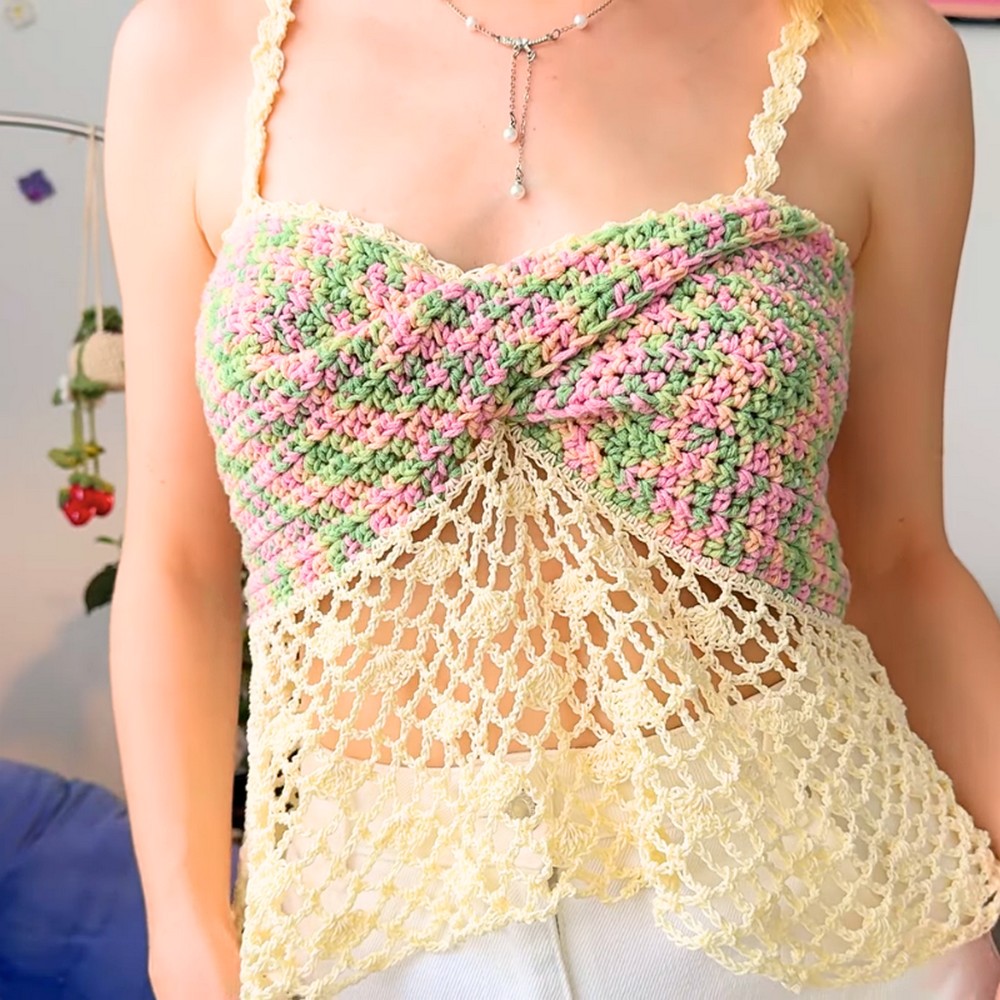
This summer's top design combines the softness of airy yarn with intricate yet approachable stitchwork. Its standout feature is the subtle twist at the center, adding character and shape to the minimalist base. The multicolored yarn used in the main section offers a vibrant, eye-catching effect, while the delicate cotton edging enhances the design's refinement. The adjustable length and optional accents make it truly versatile—whether styled casually for beach days or dressed up for summer evenings, it effortlessly becomes yours.
Credit WONDER NETTING
Materials & Tools Needed
- Yarn:
- Top Section: Approx. 1.5 skeins of multicolored milk cotton or acrylic yarn. If unavailable, use a hand-dyed cotton or acrylic yarn in similar shades.
- Bottom Lace Section: Fine cotton yarn (size 0.5-0.8mm recommended).
- Hooks:
- 4.5mm hook for the milk cotton/acrylic yarn.
- 3-3.5mm hook for thin cotton yarn.
- Additional Tools:
- Scissors.
- Stitch markers (optional, for marking edges and rows).
- Needle (to sew ends and straps).
Pattern Abbreviations & Terminology
- ch: Chain.
- sc: Single Crochet.
- hdc: Half Double Crochet.
- dc: Double Crochet.
- sl st: Slip Stitch.
- ch-space: Chain Space.
- rep: Repeat.
Note: This pattern uses US crochet terminology.
Step-by-Step Instructions
Part 1: Making the Top Section
- Foundation Chain:
- Create a chain of 100 stitches (adjust the length as needed so it fits snugly around your bust, but not too tight or loose).
- Add one extra chain (101 chains total).
- Row Setup:
- Insert hook into the 2nd chain from the hook and work 1 sc.
- In the front loop of this sc, make another sc. This creates the steady edge for each row.
- Place a stitch marker at the start of the row for easier tracking.
- Rows 2–18:
- Continue with hdc across the row:
- Yarn over, insert hook into next loop, pull yarn through, and work 3 loops together.
- Repeat hdc across the chain until the end.
- At the end of each row, turn work, and begin the next row with 1 sc followed by 1 sc into the front loop, then continue with hdc across.
- When finished, the rectangle should measure 74cm x 17cm (or adjusted to your size).
- Continue with hdc across the row:
- Join the Edges (Twist Method):
- Create a twist in the rectangle by rotating one end.
- Align edges and join them using sc:
- Insert hook into each row’s edge, pull yarn through, and make 1 sc per row.
- Finish with sl st, cut the yarn, and hide the ends.
- Securing the Twist:
- Lay the twisted rectangle flat with the twist in the center front.
- Use a needle and yarn to sew and secure the twist from the inside.

Part 2: Bottom Lace Section
- Preparing the Bottom Edge:
- Flip the top upside down, so the foundation chain is now at the bottom.
- Using fine cotton yarn and the smaller hook (3-3.5mm), attach yarn with a slip knot.
- Insert hook into the foundation stitches and make 2 sc into each stitch.
- Continue around until all stitches are filled.
- Adjust Stitch Count:
- To create a lace pattern, the total number of stitches must be divisible by 12.
- Count stitches, and if necessary, add extra stitches (make 3 sc into some stitches) to reach a number divisible by 12. For example, adjust from 186 stitches to 192 stitches.
Lace Pattern
- Row 1 (Foundation Arches):
- Join the row with a sl st into the first sc.
- ch 5, skip 3 stitches, sc into the next stitch. Repeat around.
- Ensure consistency: the row should end with ch 5 before joining with sl st.
- Row 2:
- Turn the work.
- Sl st into the first 3 chains of the previous row to reach the middle of the first arch.
- ch 1, sc into the arch, ch 5, sc into the next arch. Rep around.
- Row 3 (Adding Shells):
- Begin as in Row 2, sl st to the middle of the first arch.
- ch 1, sc into the first arch, ch 5, sc into the next arch.
- For the 3rd arch, work 5 dc into the sc stitch from the previous row, then continue with:
- ch 5, sc in the next two arches.
- Repeat the shell pattern every 3 arches.

- Rows 4–5 (Arches Only):
- Work sc in each arch and ch 5 between arches.
- Maintain consistency of pattern.
- Row 6 (Shell Row):
- Repeat Row 3 directions.
- Additional Rows:
- Continue alternating 2 rows of arches with 1 shell row until the lace section reaches your desired length.
- Typically, this means 5 shell rows for full coverage.
Part 3: Upper Edging & Straps
- Top Edging:
- Using fine yarn, attach with sl st and work 1 sc into each stitch along the top edge.
- For the twist section, fold the fabric and crochet through both layers for a clean look.
- Join with sl st, ch 1, sc, dc, sc in the same stitch, skip one stitch. Repeat this edging until finished.
- Straps:
- Determine strap placement using stitch markers.
- Attach yarn to the marked stitch with sl st, ch 3, work 4 dc into the same stitch (total of 5 dc).
- Turn work, sl st to the 3rd dc, ch 3, work 4 dc. Repeat until strap is long enough.
- Using a needle, sew straps to the back of the top.

Finishing Touches
- Secure all loose ends with the needle.
- Block the top if necessary to even out edges.
- Wear your romantic lace summer top and enjoy!