
Create a breezy crochet mesh hat with delicate bead accents, using gradually expanding chain loops to shape an airy accessory that feels light enough for warm-weather wear.
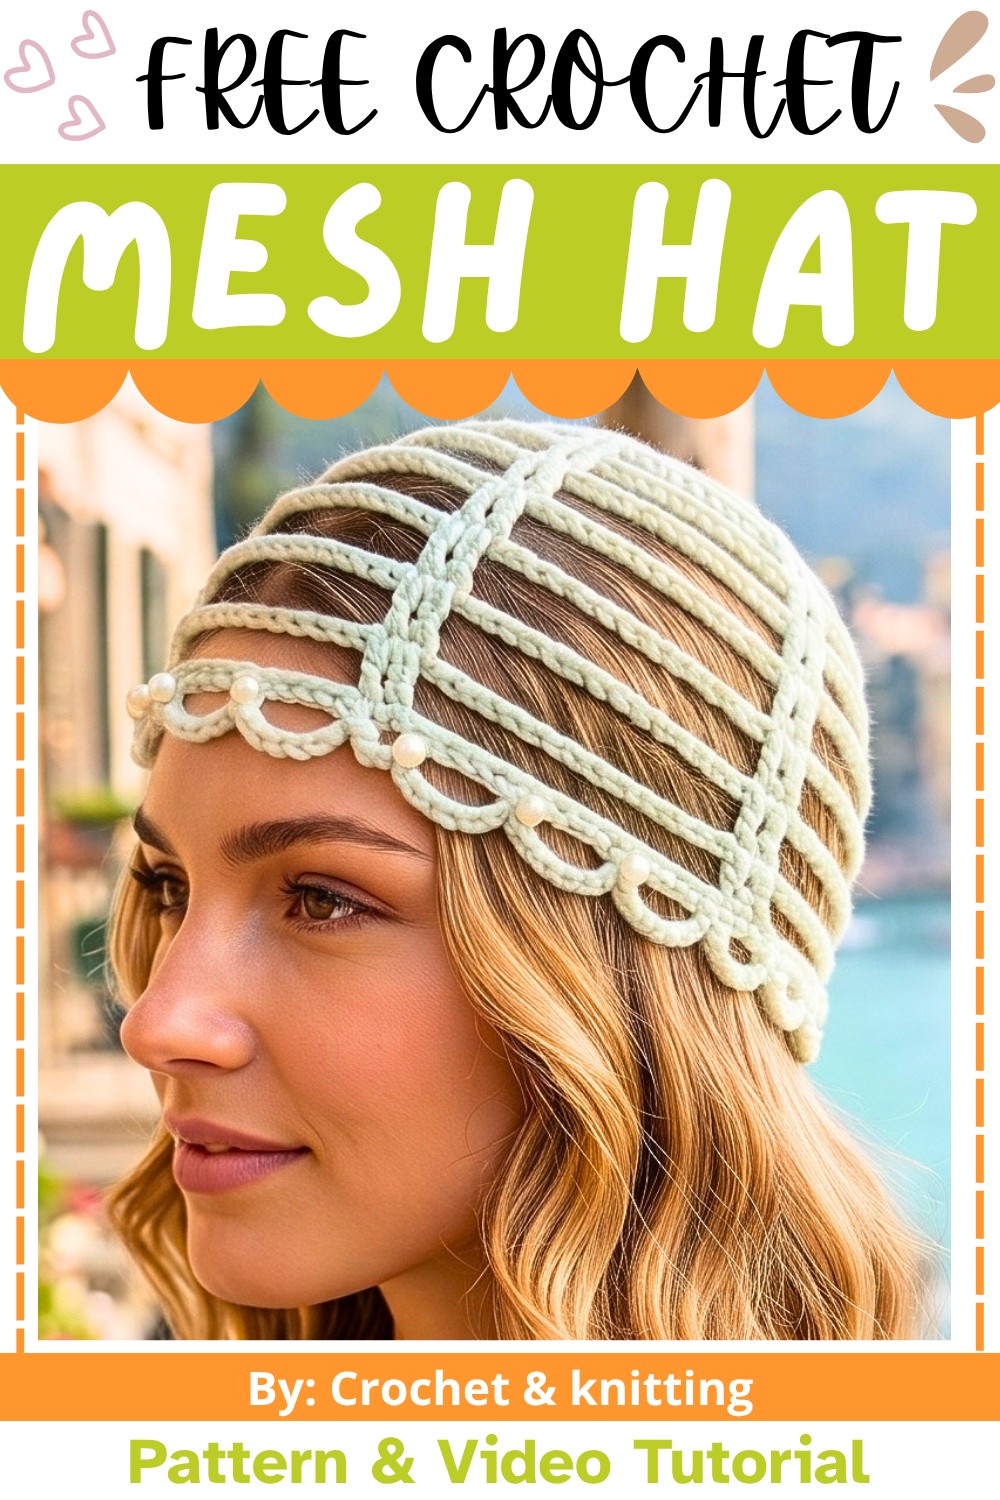
A lightweight mesh hat can be surprisingly simple to crochet, especially when you create open spaces with progressively longer chain loops. This crochet design adds beads along the finishing edge, giving the airy fabric subtle decorative detail without weighing the hat down. The result is a soft, wearable accessory with plenty of visual interest.
The part worth planning before you begin is the beadwork. Since you need to thread the beads onto the yarn before you start crocheting, it is much easier to prepare them first than to disturb the pattern later. As the mesh grows, the chain spaces also widen, so keeping the rounds in order helps the hat develop its intended shape.
Credit Crochet & knitting
Materials & Tools Needed
- Yarn: About 20g of lightweight yarn, crochet thread, or fine yarn suitable for the scale of the hat
- Crochet Hook: 2mm or smaller
- Beads: Approximately 20–30 beads
- Tapestry Needle: For weaving in ends and securing the crown
- Scissors
Finished Size & Customization Ideas
- Finished Size: A lightweight mesh-style hat with an airy fit; the final dimensions will vary according to yarn, hook size, and tension.
- Bead Placement: Use fewer beads for a simpler edge or add more for a more noticeable decorative finish.
- Brim Length: Adjust the number of repeated brim rounds if you want a shorter or fuller lower edge.
- Yarn Choice: A finer yarn will produce a lighter, more delicate mesh, while a slightly thicker yarn will create larger and more visible loops.
Pattern Abbreviations & Terminology
- ch: Chain
- sc: Single Crochet
- dc: Double Crochet
- sl st: Slip Stitch
- yo: Yarn Over
This pattern uses U.S. crochet terminology.
Before You Begin: Prepare the Beads
Thread approximately 20–30 beads onto the working yarn before making the magic ring. This small step is important because the beads will be brought forward from the yarn as you reach the decorative round.
Reader Check: Make sure all the beads can slide along the yarn easily. If they are difficult to move, check the yarn and bead-hole size before beginning the hat.

Step-by-Step Crochet Instructions
Foundation Ring
- Thread the beads onto your working yarn as described above.
- Create a magic ring.
- Chain 3, which counts as the first double crochet.
- Work 11 dc directly into the magic ring.
- You should now have 12 stitches, counting the starting chain-3.
- Pull the magic ring closed and join with a sl st into the top of the first dc.

Round 1: Mesh Foundation
- Chain 3.
- Work 1 dc in the same stitch.
- Chain 2, skip 1 stitch, and work 2 dc in the next stitch.
- Continue repeating ch 2, skip 1 stitch, 2 dc in the next stitch around.
- Finish with the required chain space and join with a sl st at the beginning of the round.
Teaching Note: Keep the chain spaces relaxed rather than pulling them tight. These spaces form the foundation of the open mesh, so consistent tension will help the later rounds expand evenly.

Round 2: Mesh Expansion
- Chain 3.
- Work 1 dc on top of the next dc.
- Chain 5.
- Work **2 dc on top of the next pair of dc stitches from the previous round.
- Continue the same sequence around the hat, using ch 5 between each pair of stitch groups.
- Join with a sl st to complete the round.

Round 3: Larger Mesh Loops
- Chain 8.
- Work a dc over the appropriate dc stitch from the previous round.
- Continue around, separating the stitch sections with ch-8 loops.
- Join with a sl st when the round is complete.

Round 4: Continue Opening the Mesh
- Chain 11.
- Work across the previous round's stitches and chain spaces while maintaining the larger mesh pattern.
- Continue around the hat.
- Join with a sl st.

Round 5: Establish the Hat Width
- Chain 16.
- Continue working around the hat using the established mesh arrangement.
- Keep the chain loops consistent so the lower portion remains even.
At this stage, the mesh has opened considerably compared with the first round. If your loops look noticeably tighter or looser than one another, check your tension before continuing to the brim.

Brim: Repeat the 16-Chain Mesh
- Continue using 16-chain loops around the hat.
- Work 3 consecutive rounds without increasing the chain length.
- Join each round with a sl st.
Keeping the chain length unchanged here creates a more consistent lower edge rather than continuing to flare outward.

Beaded Decorative Trim
Before beginning the bead round, turn or invert the hat so the beads will sit clearly on the outside of the finished edge.
- Chain 8.
- Move 1 bead along the working yarn until it rests close to the hook.
- Work 1 sc into the 5th stitch as indicated by the pattern.
- Chain 8 again.
- Continue bringing one bead forward as needed while repeating the decorative loop sequence around the edge.
- Maintain the same spacing between the loops so the beaded border develops evenly.
- Continue around until the trim is complete.
- Fasten off and weave in the remaining yarn ends.
Finishing Check: Before fastening off, gently spread the edge of the hat and check that the bead loops are distributed evenly. If one section looks crowded, it is easier to correct it before securing the final end.

Finishing the Crown
Use the tapestry needle to secure the starting yarn tail around the center of the crown.
- Pull the tail firmly enough to close the center.
- Weave the end through nearby stitches on the inside.
- Secure it and trim the excess yarn.
- Weave in any remaining loose ends neatly on the inside of the hat.
Final Result
Your crochet mesh hat is ready with its airy openwork and delicate beaded edge. The gradually expanding chain loops give the hat its light, breathable appearance, while the beads add a small detail that catches the eye without overwhelming the mesh.