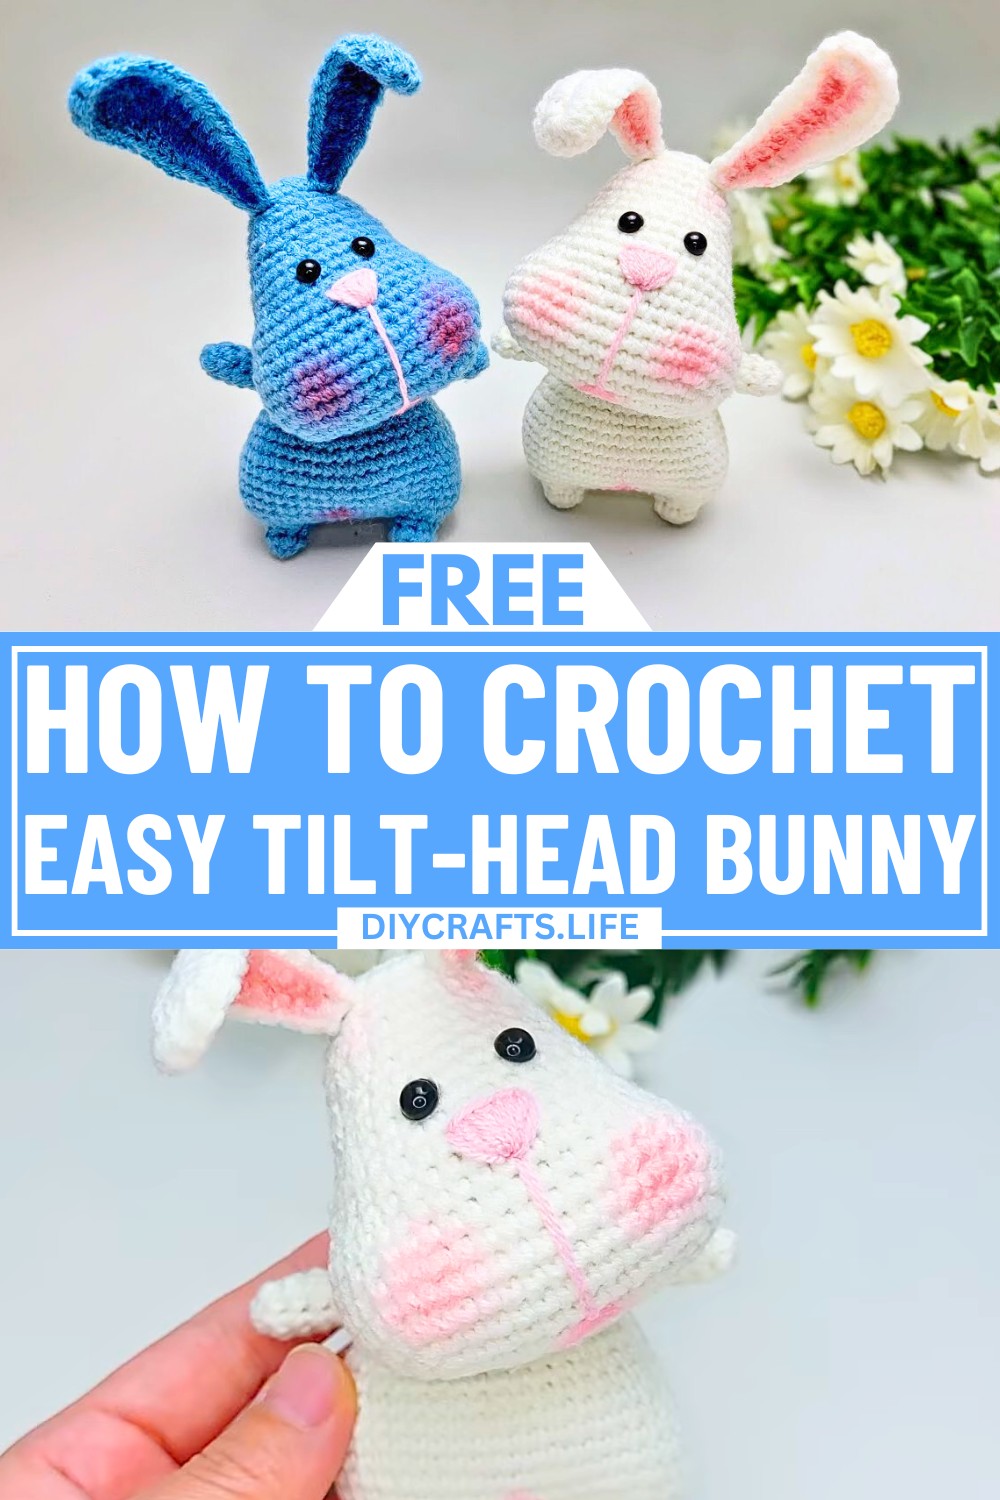
Bring a burst of charm to your crochet collection with this adorable tilt-head bunny. This playful yet timeless design sparks joy with its irresistible slanted head posture, giving it a personality all its own. Whether you’re a crochet enthusiast or looking to make a personal keepsake, this crochet bunny captures hearts effortlessly.
How to Crochet a Cute Tilt-Head Bunny
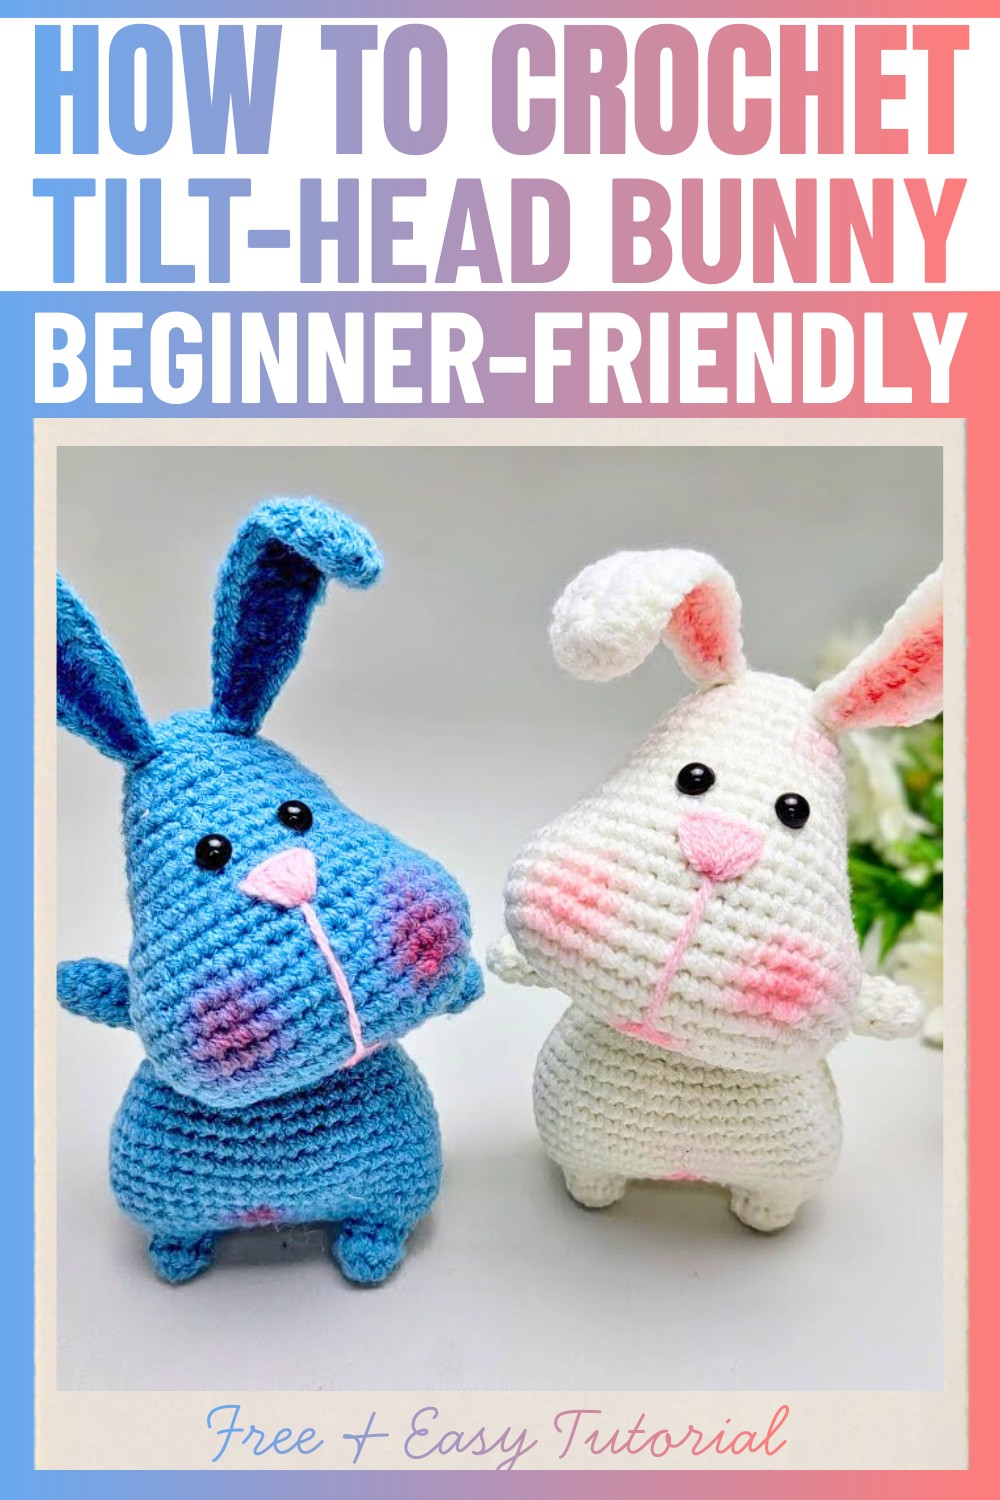
This crochet pattern stands out with its clever shaping techniques and attention to detail. The tilted head adds a whimsical touch, while the simple yet refined texture creates elegant charm. It’s perfect for customizing with your favorite colors or adding embellishments to make it uniquely yours. Ideal for gifts, nursery décor, or personal collectibles, this design beautifully balances simplicity and creativity.
Credit Crochet By Hui
Materials & Tools Needed
- Milk Cotton Yarn (4 strands)
- Choose any color for the body, head, ears, and other features.
- Crochet Hook: 2.0 mm
- Iron Wire:
- Approximately 42 cm for the body.
- 16 cm for each ear.
- Polyfill Stuffing
- Needle: For sewing the parts together.
- Scissors
Finished Size & Customization Ideas
- Approximate Finished Size: Varies based on your yarn weight and tension, but typically the bunny should be around 5–7 inches tall when using the instructions as provided.
Customization Ideas:
- Color Variations:
- Use pastel colors for a cute, soft bunny look.
- Create stripes with different yarn colors for additional personality.
- Accessories:
- Add a small bow, scarf, or a flower to enhance its charm.
- Details:
- Embroider eyes, a nose, or add safety eyes for a more expressive bunny face.

Step-by-Step Detailed Crochet Instructions
This section walks through each part of the bunny, broken into Head, Hands, Legs & Body, Ears, and Assembly.
Key Abbreviations:
- st = Stitch
- sl st = Slip Stitch
- sc = Single Crochet
- inc = Increase (2 sc in the same st)
- dec = Decrease (combine 2 sc into 1)
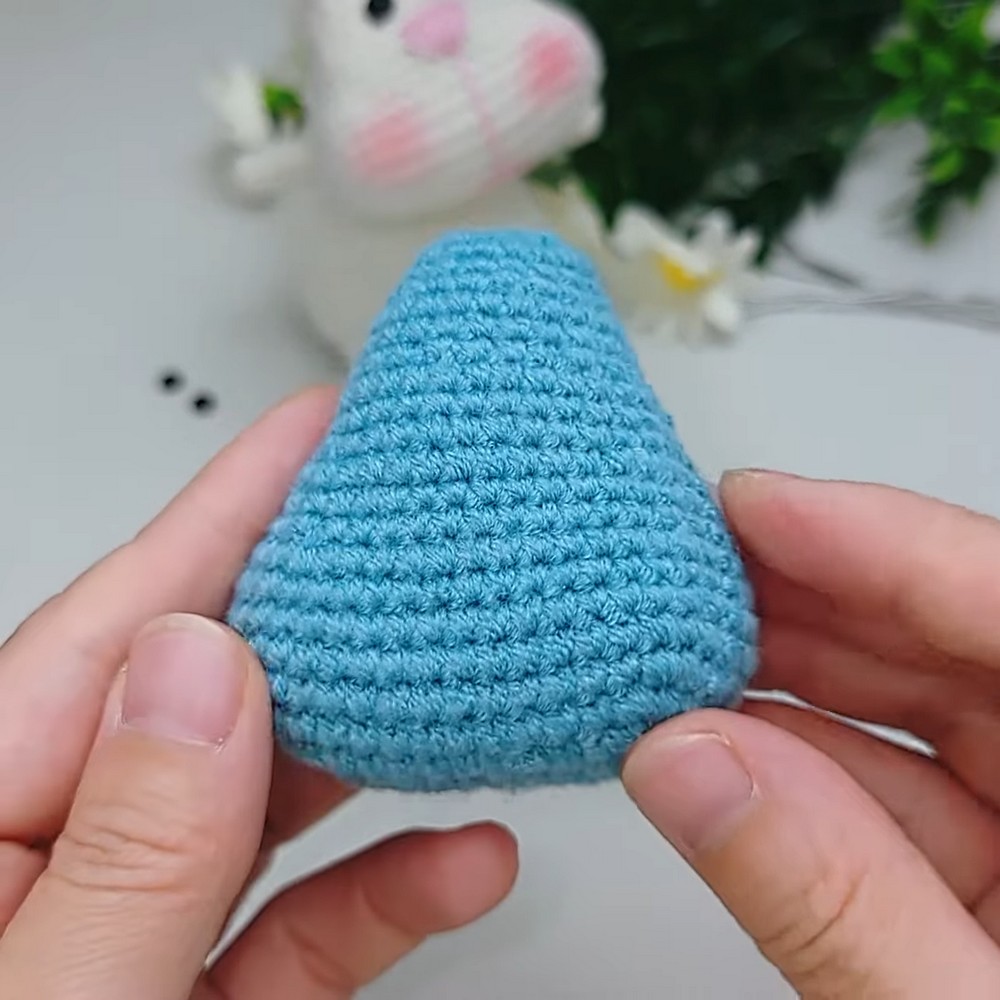
1. Head
The bunny's head is worked in rounds with increases and decreases to form a sphere.
Rounds:
- Round 1:
- Make a magic ring, crochet 12 sc inside the ring. (Total: 12 sts)
- Round 2:
- ch 1, 1 sc in next st, inc in next st, repeat 6 times. (Total: 18 sts)
- Round 3:
- ch 1, 2 sc in next st, inc in next st, repeat 6 times. (Total: 24 sts)
- Round 4:
- ch 1, 3 sc, inc, repeat 6 times. (Total: 30 sts)
- Rounds 5 to 8:
- sc in every stitch. (Total: 30 sts per round)
- Round 9:
- ch 1, 3 sc, dec, repeat 6 times. (Total: 24 sts)
- Round 10:
- ch 1, 2 sc, dec, repeat 6 times. (Total: 18 sts)
- Round 11:
- ch 1, 1 sc, dec, repeat 6 times. (Total: 12 sts)
- Round 12:
- sc 6 dec. (Total: 6 sts)
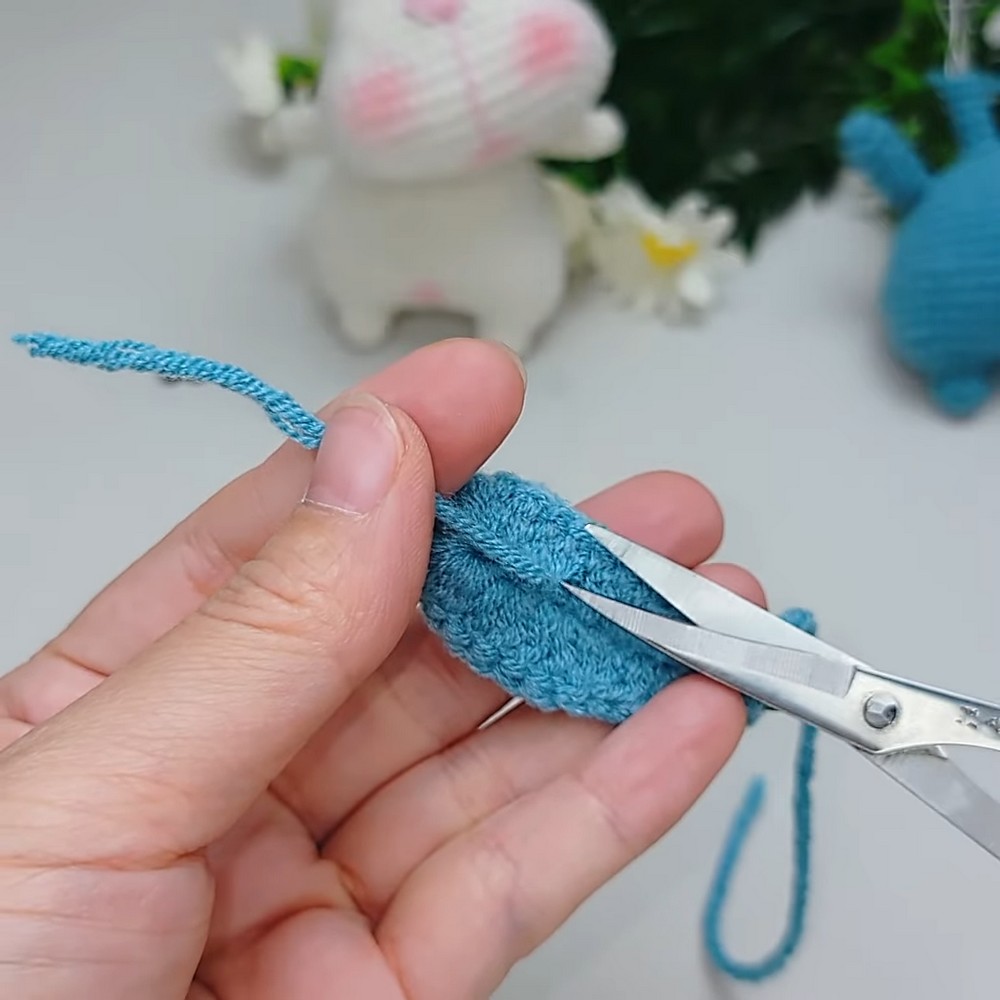
- Stuff the head with fiberfill. Fasten off and secure the end.
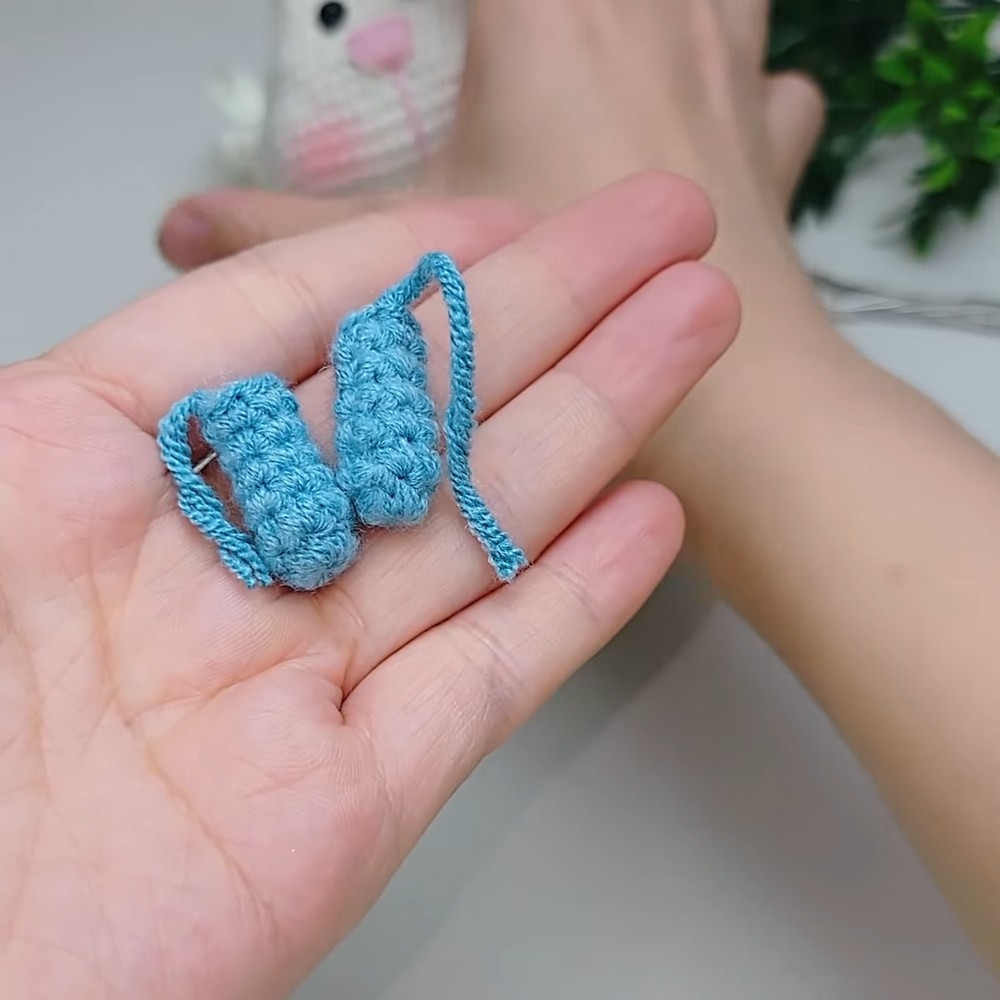
2. Hands
Each hand is made using the following pattern.
Rounds:
- Round 1:
- sc 6 into a magic ring. (Total: 6 sts)
- Rounds 2–6:
- sc in every stitch. (Total: 6 sts per round)
- Make two hands and leave a long tail for sewing.
3. Legs and Body
Start by making the two legs, one of which remains connected for the body.
Legs:
- Round 1:
- sc 6 into a magic ring. (Total: 6 sts)
- Rounds 2–3:
- sc in every stitch. (Total: 6 sts per round)
Repeat the steps for 2 identical legs, leaving one attached for the body.
Body:
- Round 4:
- Start with the attached leg, ch 6, and connect the second leg.
- sc around both legs and across the chains created. (Total: 36 sts)
- Round 5:
- 5 sc, inc, repeat 6 times. (Total: 42 sts)
- Rounds 6–11:
- sc in every stitch. (Total: 42 sts per round)
- Round 12:
- 3 sc, dec, repeat 6 times. (Total: 36 sts)
- Round 13:
- sc in every stitch. (Total: 36 sts)
- Round 14:
- 5 sc, dec, repeat 6 times. (Total: 30 sts)
- Round 15:
- sc in every stitch. (Total: 30 sts)
- Round 16:
- 2 sc, dec, repeat 6 times. (Total: 24 sts)
- Round 17:
- Attach arms by placing fabric together for 3 stitches, sc across to secure arms in position. (Total: 30 sts including arms)
- Round 18:
- 3 sc, dec, repeat 6 times. (Total: 24 sts)
- Round 19:
- sc, dec, repeat around. (Total: 12 sts)
- Stuff the body and attach to the head.
4. Ears
The ears are shaped with wire inside for flexibility.
- ch 13.
- Work the following across both sides of the chain:
- 3 sc, 3 hdc, 5 dc on one side.
- At the bottom, hdc 8 sts, then repeat as above across the other side.
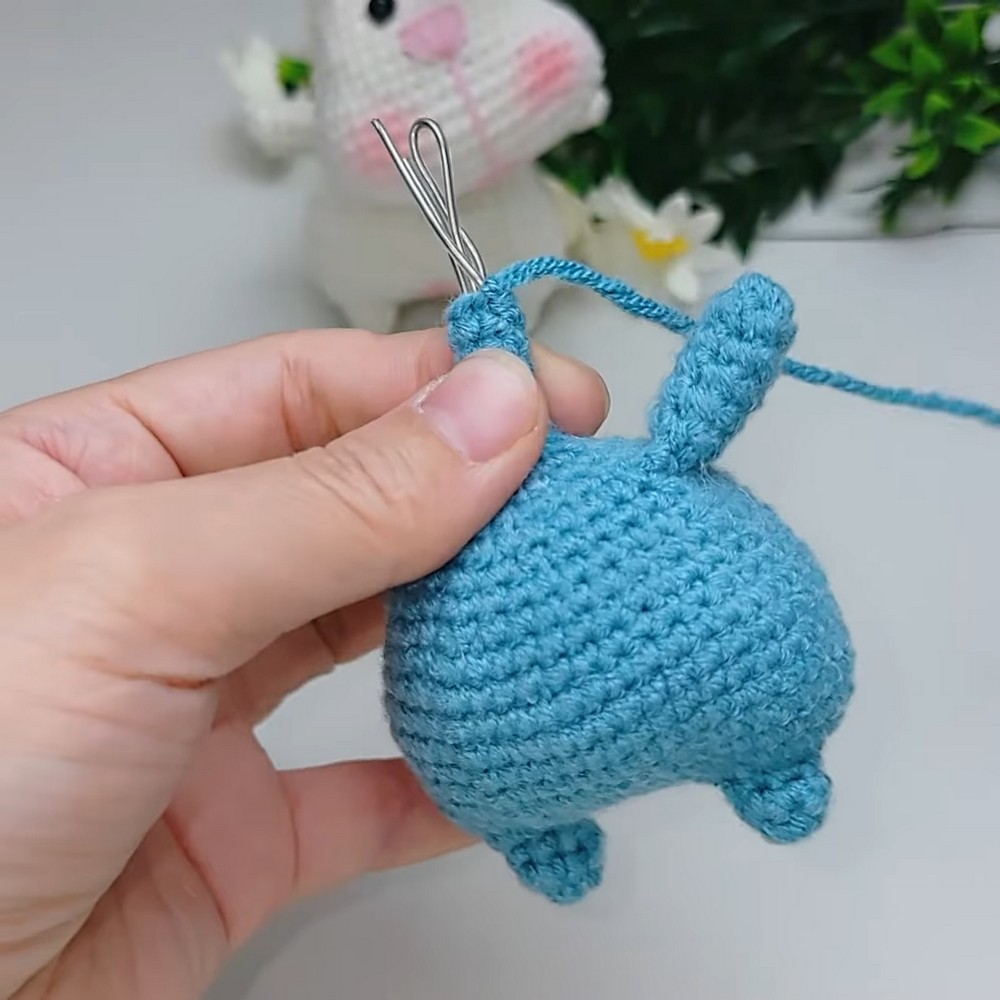
- Insert wire into the ear and make any adjustments.
- Fasten off and sew. Repeat for 2 ears.
5. Assembly
- Attach the head to the body and adjust the stuffing.
- Sew the ears to the top sides of the head at a tilt for a playful expression.
- Add embroidered eyes, nose, or mouth to finalize your bunny's face.
- Pose the ears and head using the wire to customize your bunny's look.