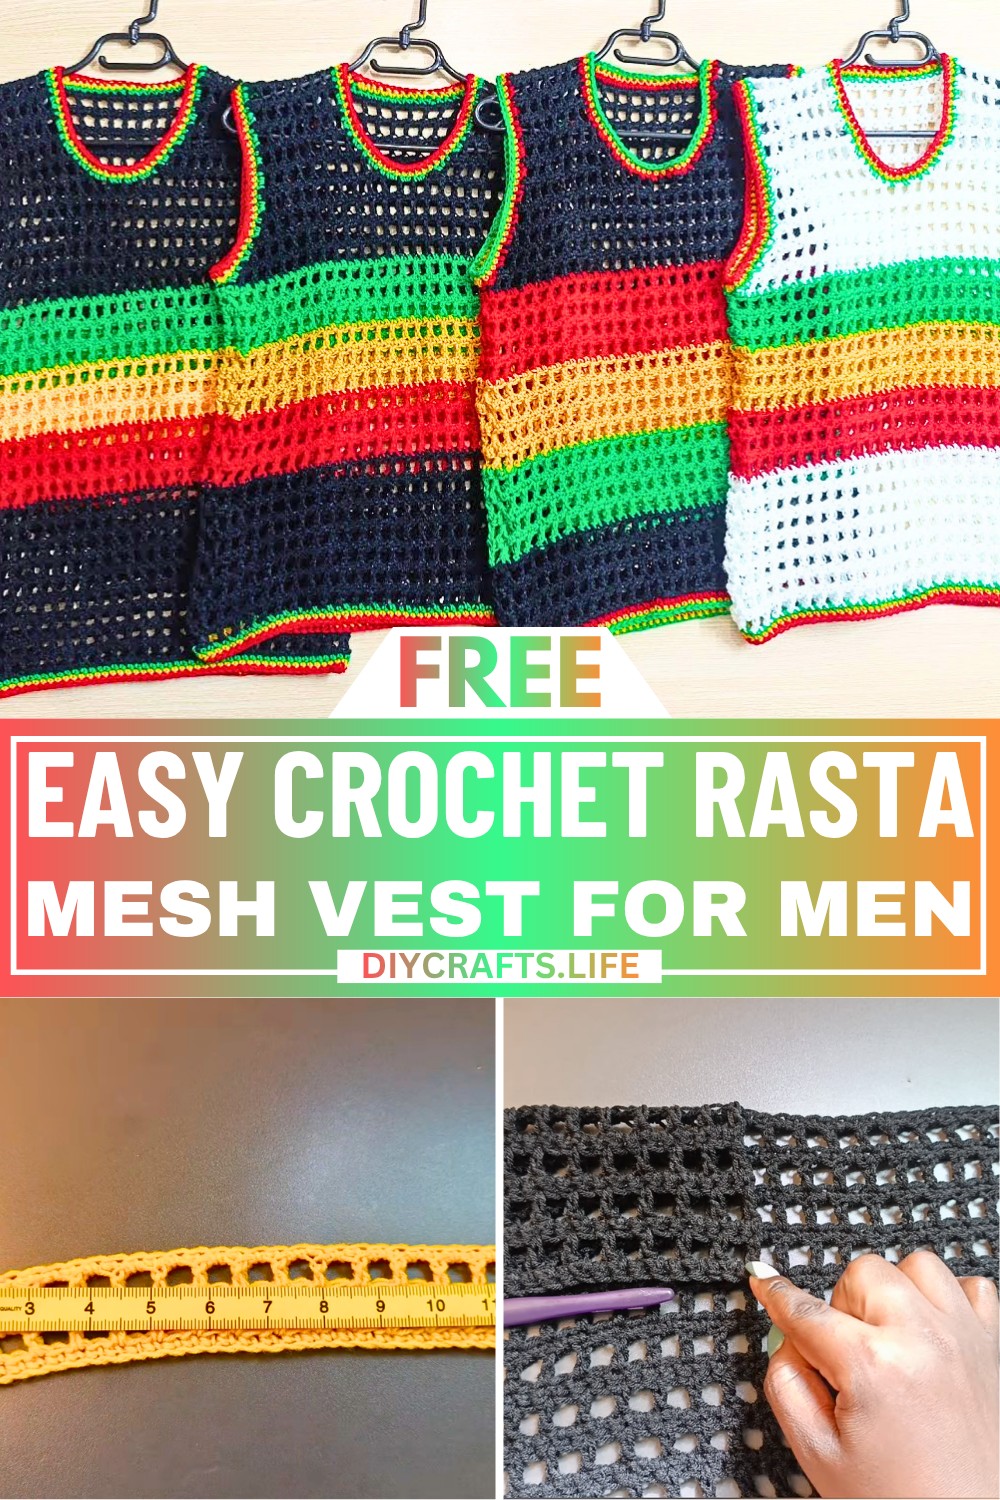
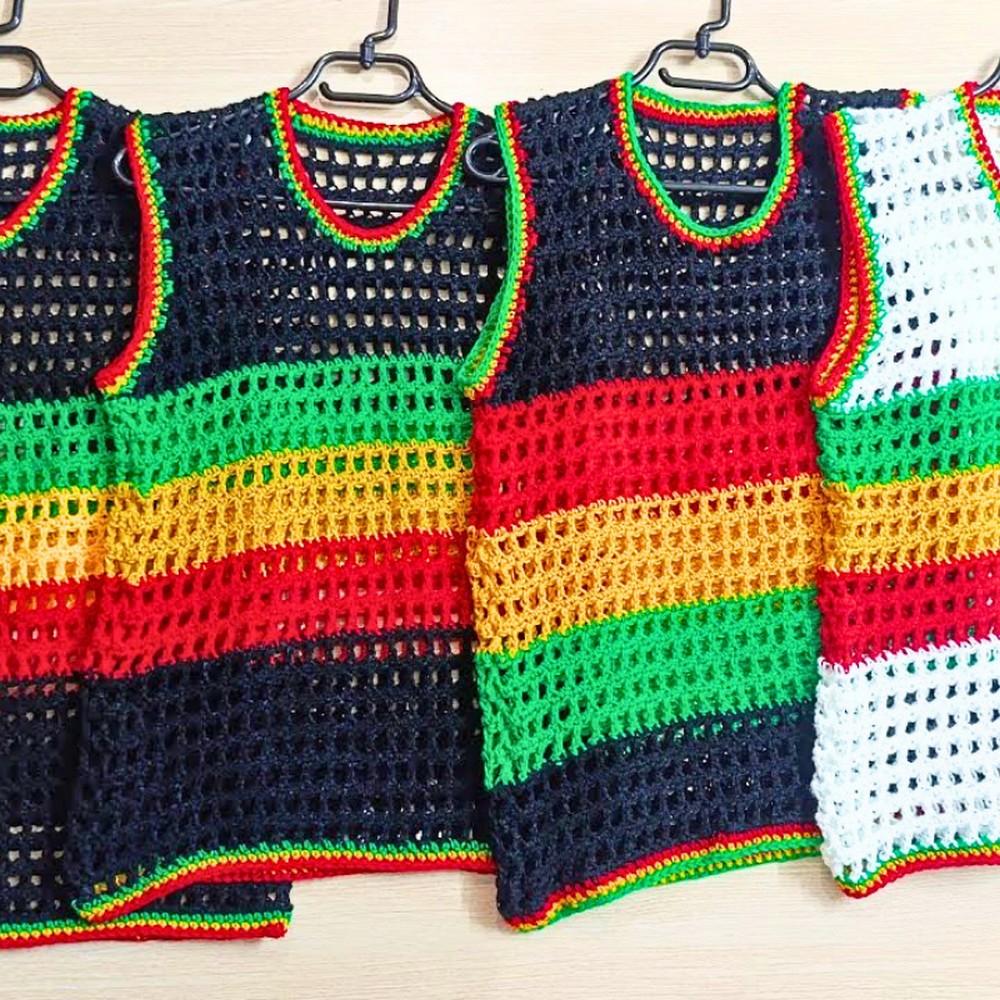
A Rasta Mesh Vest is not just a piece of clothing; it’s a bold and stylish way to express personality and individuality. Made with an open, breathable design, this Crochet vest perfectly combines comfort with flair. The beautiful mesh pattern and vibrant colors inspired by Rasta culture make it special, giving it a lively and cultural touch. It’s perfect for wearing on warm days, adding a unique accent to casual outfits, or layering over a solid-color shirt for a cool, relaxed look.
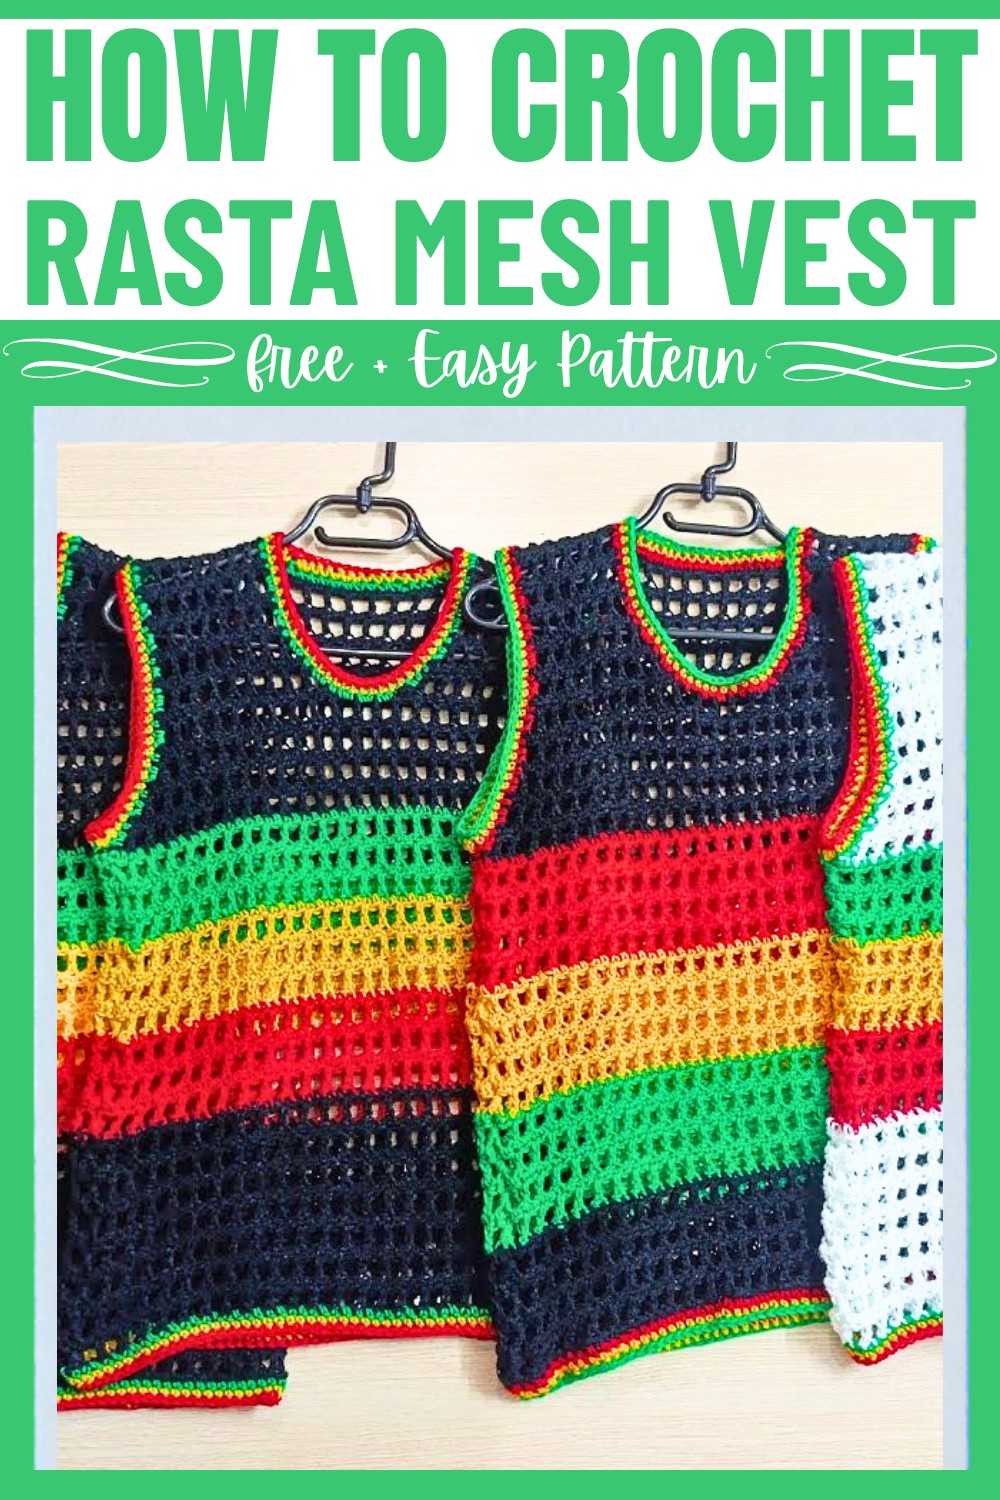
Creating this Mesh Vest is easier than it might seem! You’ll use simple crochet techniques to make the lightweight mesh design, ideal for both beginners and experienced crocheters. While the tutorial focuses on specific steps, the process opens up the chance to customize the size, colors, or details to make it truly your own. The end result is practical and stylish, whether you're heading to the beach, hanging out with friends, or enjoying a festival.
Credit FTK Crochet
Materials and Tools Needed:
- Yarn: 100% acrylic medium-weight yarn in black, green, yellow, and red (or any yarn weights/colors you prefer).
- Hook: 5 mm crochet hook.
- Other Tools:
- Stitch markers.
- Darning needle.
- Scissors.
- Measuring tape.
Finished Size & Customization Ideas:
The vest is made to fit your measurements:
- Shoulder-to-Shoulder: Subtract 3 inches from your total shoulder width. Example: If your measurement is 20 inches, subtract 3 to start with a 17-inch base.
- Chest/Waist Measurement: Take the larger of the two measurements, then divide it by 2. Example: A chest measurement of 46 inches becomes 23 inches for one panel.
- Armhole Length: Standard adult size is approximately 9 inches. In the tutorial, 12 inches was used for a looser fit.
- Total Length: Customize the vest to your desired length; the tutorial uses 27 inches (26 inches for the main length plus a 1-inch bottom border).
Pattern Abbreviations & Terminology:
- CH: Chain.
- SC: Single Crochet.
- DC: Double Crochet.
- SL ST: Slip Stitch.
- YO: Yarn Over.
Terminology: Pattern uses U.S. crochet terminology.
Step-by-Step Crochet Instructions:
Back Panel
The vest begins with the back panel, worked from the top down.
Step 1: Shoulder Width Starting Chain
- Measure your shoulder-to-shoulder width (subtract 3 inches). Example: For 20 inches, start with 17 inches.
- Create a slip knot and chain a multiple of even numbers. Example: Chain 50, ensuring it measures close to 17 inches when slightly stretched.
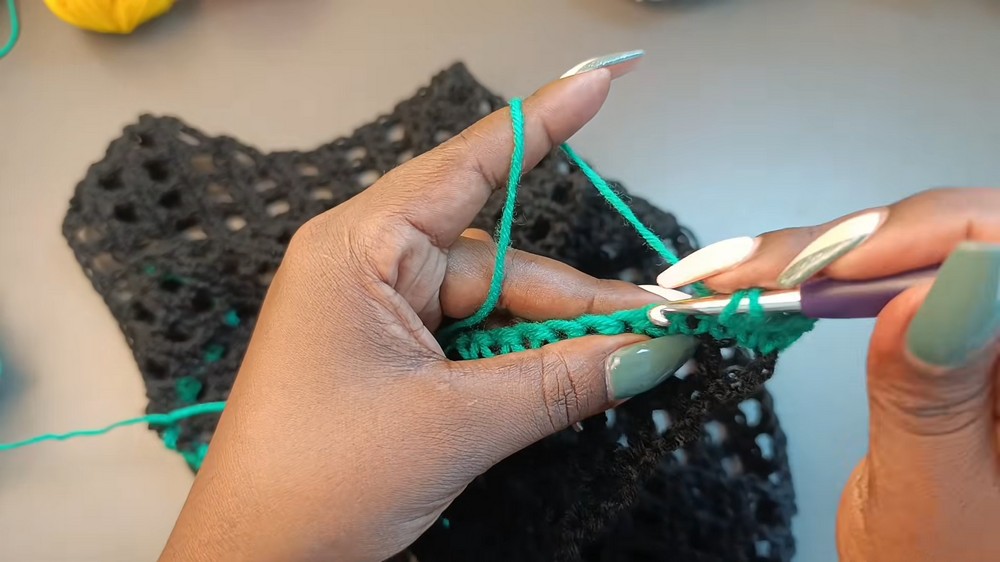
- Row 1: SC in the second chain from the hook and across. At the end of this row, you’ll have 49 SC.
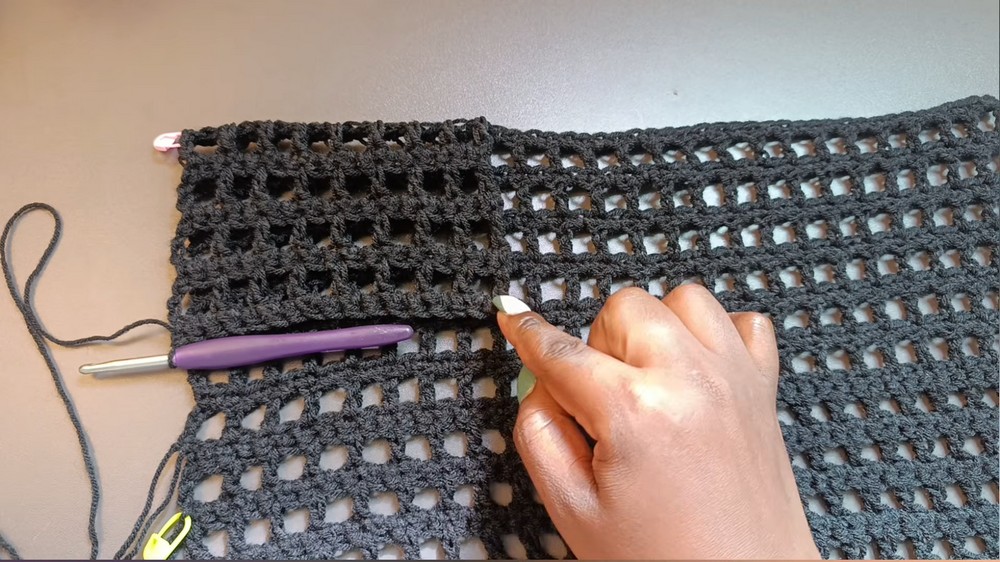
Step 2: Mesh Pattern & Increases for Armhole Section
- Row 2: Chain 4 (counts as DC + CH 1). Turn. YO, skip 2 stitches, DC in the next stitch. Repeat: CH 1, skip 1 stitch, DC. At the end, DC into the last stitch.
- Row 3: Chain 1. Turn. SC into first stitch, SC into each chain space and DC across. At the end, SC into the CH-3 from the previous row.
Step 3: Increasing for Armhole
- Mark the row where increases begin (for reference). Start increasing in every mesh row—place an extra DC + CH 1 in the first and last stitch.
- Alternate between mesh rows and SC rows until the width equals half of your chest measurement. Example: Stop when this section measures 23 inches for a chest width of 46 inches.
- Chain 1 and cut the yarn.
Step 4: Extension for Armholes
- Join yarn again at the top corner of your panel and work 12 mesh rows straight—no increasing. Alternate mesh and SC rows.
Front Panel
Step 5: Creating the Neckline Divisions
- Divide the front panel into thirds. Count gaps evenly across the top width; each side will form a shoulder section, with the middle being the neckline.
- Rejoin yarn at one shoulder edge and work 8 rows straight (alternating mesh and SC rows).
Step 6: Shaping the Neckline
- Starting from Row 9, begin increasing only on the inner edge (next to the neckline) for 2 rows. Place an additional DC + CH 1 in the first stitch during mesh rows.
Step 7: Completing the Front Panel
- Repeat the instructions for the second shoulder section.
- Once individual shoulder sections are complete, chain to connect the two halves at the neckline. Ensure stitch counts align with the back panel measurements.
Side Seams
Step 8: Joining the Panels
- Place the back and front panels together. Use SC or a darning needle to seam them along the sides from the bottom edge to the armhole. Match both panels evenly.
- For a seamless look, switch yarn colors to match each section during joining (e.g., use red yarn to join the red sections).
Borders
Step 9: Armhole Borders
- Attach green yarn to the armhole edge. Work 1 SC in each stitch and 2 SC in each DC row.
- Slip stitch, chain 1, then switch to yellow yarn. Work another SC row around. Repeat this process with red for a total of 3 border rows around the armhole.
Step 10: Neckline Borders
- Begin at the back neckline and attach green yarn. Work SC evenly across.
- Repeat the same process with yellow and red yarn, creating three rows total.
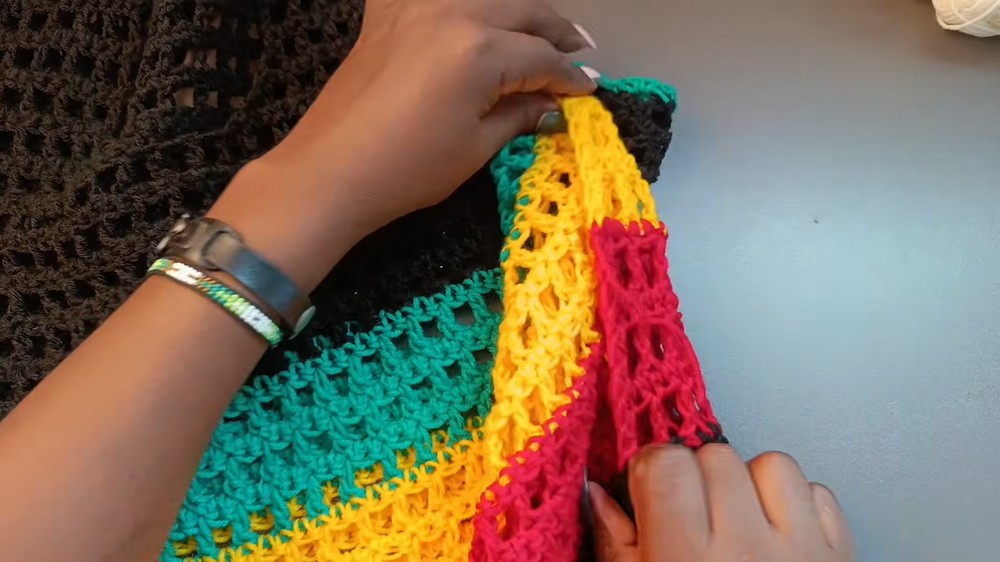
Step 11: Bottom Border
- Work along the bottom edge in rows of SC, starting with green, followed by yellow, and then red. Use 1 SC per stitch.
Finishing Touches
- Weave in all ends using a darning needle. Trim excess yarn.
- Turn the vest to the right side, and block if necessary to shape.
Customization Ideas
- Adjust the colors according to your preference (e.g., use a solid color instead of Rastafarian colors).
- Modify the armhole depth or bottom length to suit individual preferences.