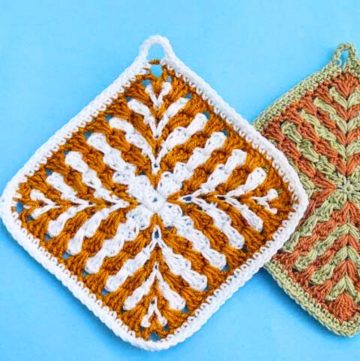
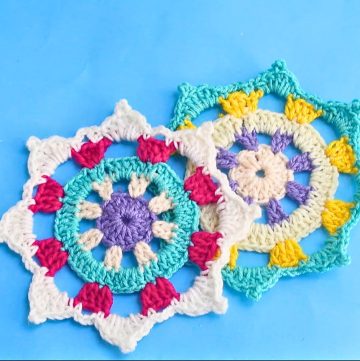
Design an elegant crochet doily that balances beauty and functionality. Its intricate pattern enhances any space, making it a perfect decorative piece or a thoughtful handmade gift. Add a touch of charm to your home with this timeless craft.
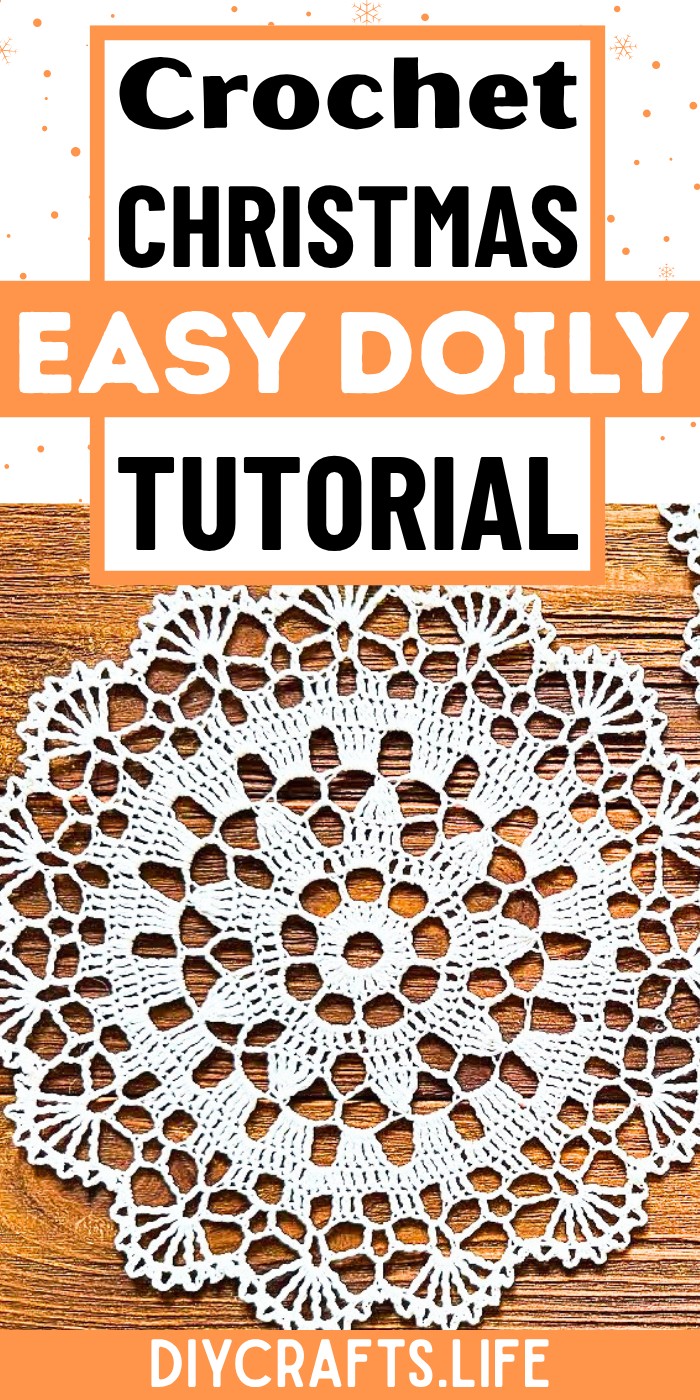
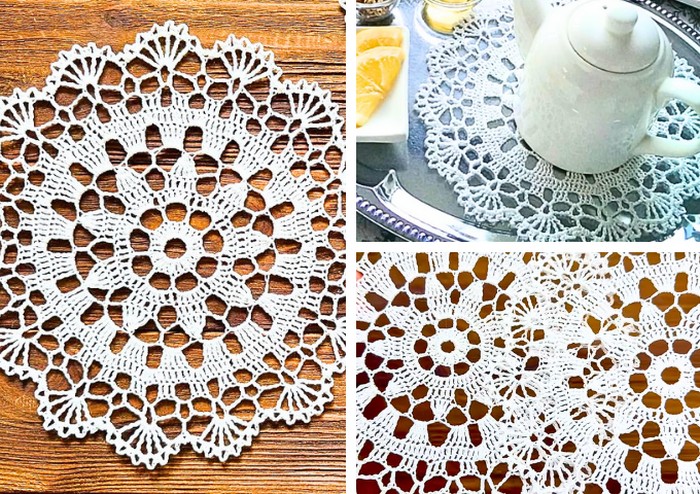
This crochet doily adds timeless beauty to table settings, ideal for serving desserts or decorating surfaces. Its sturdy cotton yarn ensures durability, while its lightweight structure makes it easy to handle and maintain. You can customize it to match your style and use it for countless purposes.
Crochet A Stunning Doily
Crocheting this doily is fun and achievable for all skill levels. Using a simple pattern and accessible materials, this project welcomes creativity to modify size or color. Whether you're starting out or experienced, it’s a wonderful way to craft something stunning and personal.
Credit Irina Tsokalo
Materials and Preparation
To create this charming crochet doily, you’ll need the following materials:
- Yarn: Cotton yarn, Vita Coco (50g/240m).
- Crochet hook: Size 2.1mm.
- Optional: A light starch solution for stiffening (for finishing touches), pins for shaping/drying.
- Other tools: Scissors and a yarn needle for weaving in ends.
Yarn Weight: Lightweight cotton thread recommended for crocheted lace designs.
Abbreviations and Notes
Here are the crochet abbreviations used in this pattern:
- Ch: Chain.
- Sl st: Slip stitch.
- Sc: Single crochet.
- Dc: Double crochet.
- Tr: Treble crochet.
- Dtr: Double treble crochet.
- Together: Performing stitches together, usually to decrease.

Pattern Notes
- The gauge is not critical for this doily pattern, but ensure all stitches are worked evenly to achieve the desired results.
- This pattern uses increases/decreases, cluster stitches, and chaining techniques for lace-like motifs.
- Soaking the final product in a light starch solution and pinning it to dry will enhance firmness. Alternatively, you can simply rinse and shape it while wet.
Gauge, Approximate Size, and Pattern Notes
Gauge: Not required. However, ensure the stitches are tight enough to maintain the structure and flow of the doily.
Finished Size: Approximately 24cm / 9.5 inches in diameter.
Special Techniques: This involves several advanced stitches like treble crochet clusters and double treble crochet. It’s great for intermediate crocheters looking for a fun, decorative project.
Step-by-Step Pattern
Follow this detailed pattern to create your beautiful doily:
Foundation Ring:
- Ch 12 and form a circle by joining the ends with a sl st.
Round 1:
- Work 27 dc into the circle.
- Join the round with a sl st into the third loop.
Round 2:
- (1 dc, ch 5, skip 2 stitches) Repeat around, then sl st into the third loop.
Round 3:
- (1 dc, 5 dc) Repeat around, then sl st into the third loop.
Round 4:
- (5 dc, ch 5, skip 1 stitch) Repeat until the end of the round and sl st into the third loop.
Round 5:
- (5 tr together, ch 5, 1 dc, ch 5) Repeat. Join with a sl st into the top of the previous round's cluster.
Partial Final Rounds:
- Ch 3, then sl st into the fourth loop.
- (5 dc, 3 dc) Repeat for five sets.
- Sl st into the third loop.
Final Round:
- (1 dc, ch 3, skip 2 stitches) Repeat. Finish the round with a sl st.
- (1 dc, ch 3, 1 dc), ch 3) Repeat the motif to build the edge.
Edging:
- (1 dtr, [ch 1, 1 dtr] x5, ch 2, 1 dc, ch 2) Repeat for desired lacy effect.
- Join with sl st into the fifth loop.
- (2 sc, ch 3, sl st into the 1st ch) for finishing edge details.
Finishing Touches:
- Ch 1 to fasten off the yarn.
- Soak the doily in a light starch solution for firmness and pin to dry in the desired shape.
- Alternatively, rinse gently and shape the doily as demonstrated in the video.
Pattern Question:
Question: How can I make the doily sturdier after completing it?
Answer: You can soak the finished doily in a light starch solution, then pin it to dry in the desired shape. Alternatively, rinse it and shape it directly as shown in the video.
Conclusion
Crocheting this doily is a delightful, creative experience that brings beauty and practicality into your life. Perfect for beginners or advanced crafters, it’s a rewarding project that adds charm to any setting and makes every moment feel special.