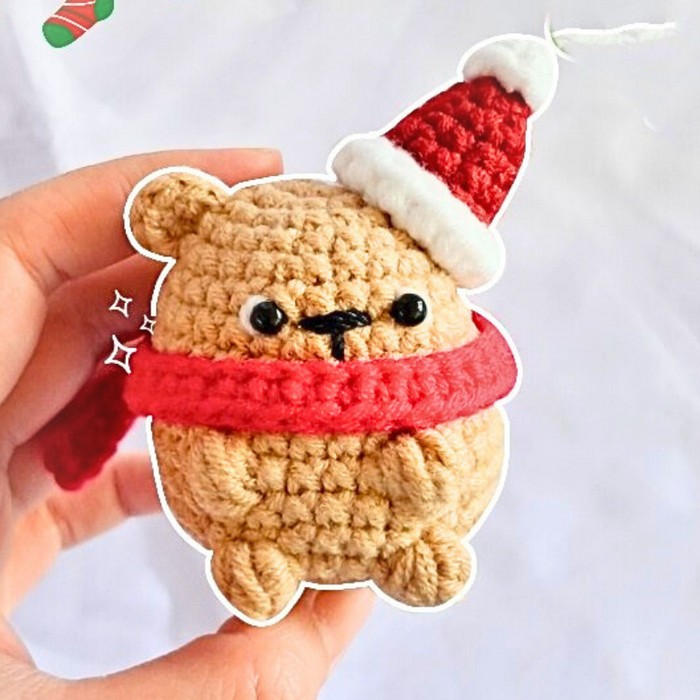
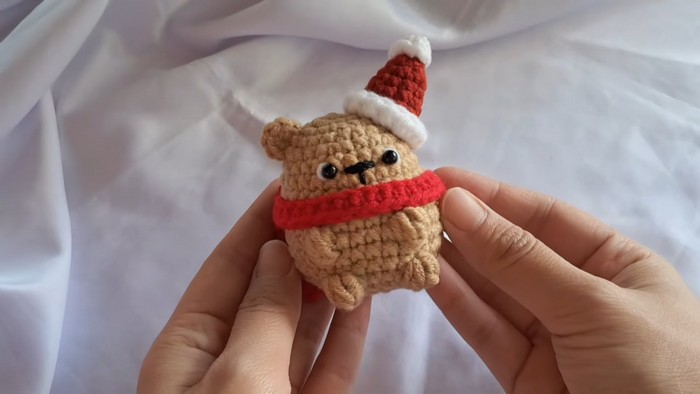
Craft a festive and adorable Crochet Christmas Bear that’s perfect for seasonal decoration or gifting. This project combines charm with functionality, letting you create a durable yet cuddly keepsake. Switch colors and details to customize this timeless design to suit your holiday theme.
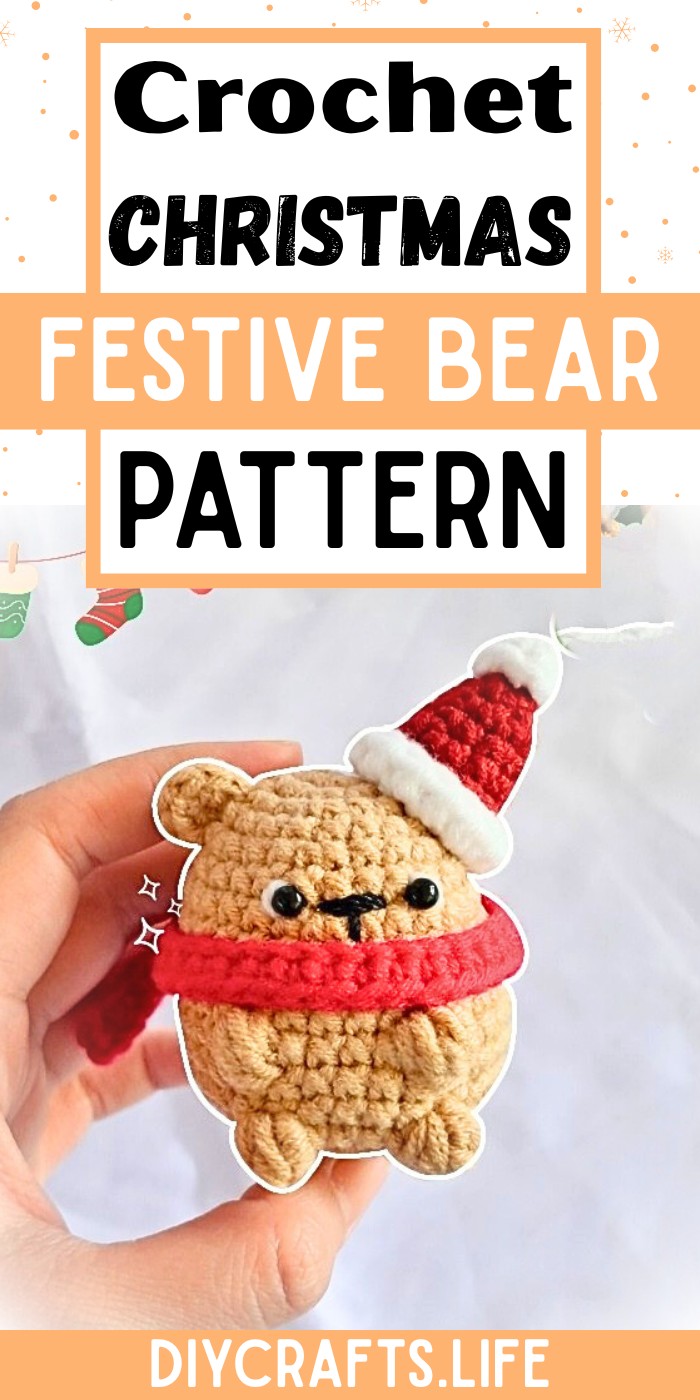
The Crochet Christmas Bear is both beautiful and practical. Its sturdy stitching ensures long-lasting durability, while its cute design adds warmth to holiday decor. From gifting to creating magical Christmas vibes at home, this bear is the perfect combination of usability, style, and craftsmanship.
Crochet Christmas Bear
This joyful project is suitable for all skill levels, providing room to customize colors, details, and accessories. With its simple yet creative pattern, you’ll awaken your artistic side while crafting a unique Christmas keepsake that’s meaningful and fun to make.
Credit from littlespot
Materials and Preparation
To create your Crochet Christmas Bear, gather the following materials:
- Yarn:
- Brown yarn (for the bear’s body)
- White yarn (for the hat and additional details)
- Red yarn (for the Santa hat and scarf)
- Black yarn (for embroidery, such as the nose)
- Crochet Hook: 3.5mm or size appropriate for your chosen yarn
- Stuffing: Polyester fiberfill or preferred stuffing material for the bear's body
- Safety Eyes: Size 5 mm (1 pair)
- Scissors
- Tapestry Needle: For sewing details and weaving in ends
- Stitch Marker: To mark the start of each round
Yarn Weight Recommendations: Medium weight yarn (Category 4). Adjust materials according to your desired bear size.
Abbreviations and Notes
Abbreviations (US terminology):
- MR: Magic Ring
- SC: Single Crochet
- Inc: Increase (2 SC into the same stitch)
- Dec: Decrease (insert hook into the front loop of two stitches, yarn over, pull through, thread through remaining two loops)
- BLO: Back Loop Only
- HDC: Half Double Crochet
- St/Sts: Stitch/Stitches
- Sl St: Slip Stitch
Pattern Notes:
- This pattern is worked in continuous rounds unless noted otherwise. A stitch marker will be helpful to track the first stitch of each round.
- Always pull the MR tight after completing the first round to close the center.
- Adjust stuffing as you go to ensure each part of the bear maintains its shape.
Gauge, Approximate Size, and Pattern Notes
Gauge:
Gauge is not crucial for this project, but if you want to ensure proper sizing, aim for 8 single crochets and 9 rows per 2 inches.
Approximate Size:
The finished bear is small and measures approximately 4-5 inches tall, depending on the yarn and hook used.
Pattern Techniques:
- Mastery of Magic Ring is essential for this project and forms the base of most components.
- No gauge swatch is needed, as this is an amigurumi project, though you can adjust the hook or yarn for size changes.
Step-by-Step Crochet Pattern
Bear’s Head:
- Round 1: Start with a Magic Ring (MR) and work 6 SC into the ring (6).
- Round 2: Inc in every stitch around (12).
- Round 3: SC, Inc around (18).
- Round 4: SC into each stitch (18).
- Round 5: 2 SC, Inc around (24).
- Round 6: SC into each stitch (24).
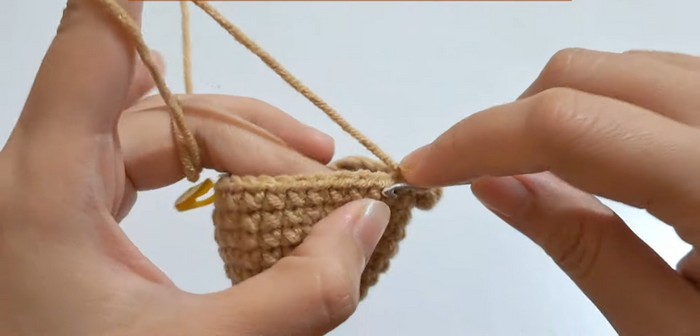
Bear’s Body:
- Round 7: 3 SC, Inc around (30).
- Rounds 8-10: SC into each stitch (30).
- Round 11: Make 12 SC, then a popcorn/bobble stitch (see below), 4 SC, another bobble stitch, finish the round with 12 SC (30).
- Bobble Stitch: Yarn over, insert hook into stitch, pull yarn through, yarn over again, pull through first two loops; repeat 4x in same stitch, leaving five loops on the hook. Yarn over, pull through all loops.
- Attach safety eyes between Rounds 6 and 7.
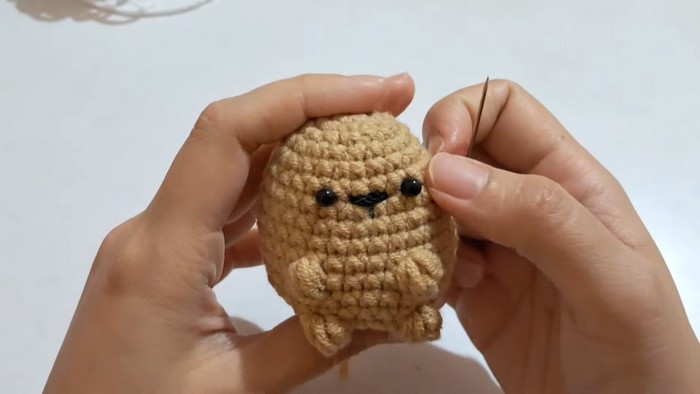
Shaping the Body:
- Rounds 12-13: SC in each stitch (30).
- Round 14: 13 SC, bobble stitch, 4 SC, bobble stitch, 11 SC (30).
- Round 15: 3 SC, Dec around (24).
- Round 16: 2 SC, Dec around (18). Stuff firmly as you work.
- Round 17: SC, Dec around (12).
- Round 18: Dec around (6). Fasten off and close.
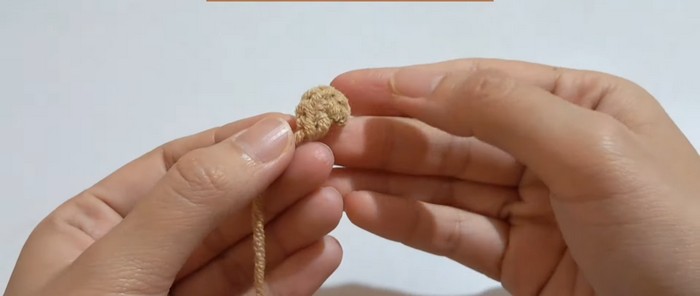
Ears:
- Create a Magic Ring (MR) and work 6 SC into the ring (6). Pull tightly.
- (Optional) Make only 1 ear if the other will be partially hidden by the hat.
- Sew the completed ear(s) onto the head.
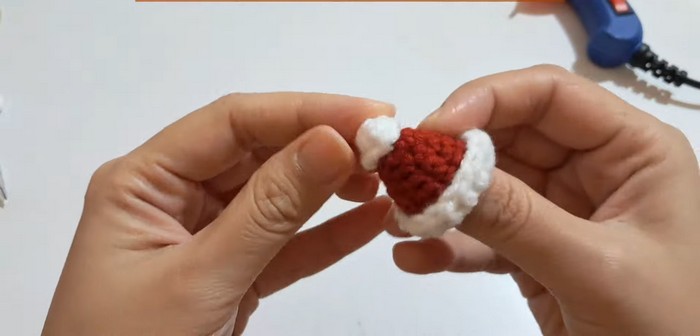
Santa Hat:
- Base (White Yarn):
- Round 1: Create a Magic Ring (MR). Work 4 SC into the ring (4).
- Round 2: SC, Inc twice (6).
- Hat Shape (Red Yarn):
- From Rounds 3-6, alternate SC, Inc patterns:
- Rnd 3: 2 SC, Inc twice (8).
- Rnd 4: 3 SC, Inc twice (10).
- Rnd 5: 4 SC, Inc twice (12).
- Switch to White Yarn and finish with 1 round of SC. (Optional: Add slip stitches or HDC for texture.)
- From Rounds 3-6, alternate SC, Inc patterns:
- Fold the bottom of the hat for a "Santa" style, glue, or attach a pompom on the tip.
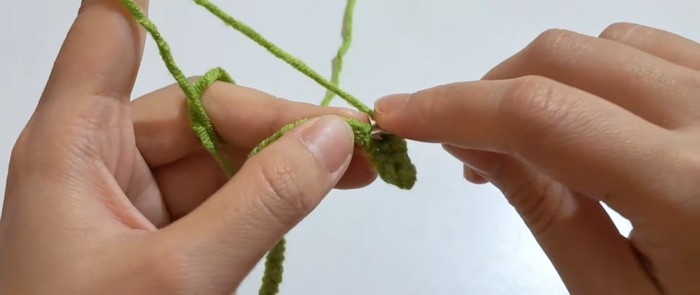
Scarf:
- With Red Yarn, create a slip knot and chain 50 (or adjust length to preference).
- Skip the first chain, SC to the end. Fasten off.
Final Assembly:
- Attach the Santa hat securely to the bear's head using glue or sewing.
- Wrap the scarf around the bear’s neck.
- Embroider the nose with black yarn.
Finishing Touches:
- Weave in all ends and use a tapestry needle for a clean finish.
- Adjust any stuffing if the bear feels uneven.
Pattern Question:
Question: How do I adjust the pattern for a larger or smaller bear?
Answer: You can increase or decrease the round counts and blanket stitch repetitions to modify the size. Adjust yarn thickness and hook size for proportion.
Conclusion:
Creating the Crochet Christmas Bear is the perfect way to embrace holiday spirit while crafting something meaningful and lasting. Its timeless, customizable design makes it an enjoyable and worthwhile project for anyone who loves crochet or handmade gifts.


