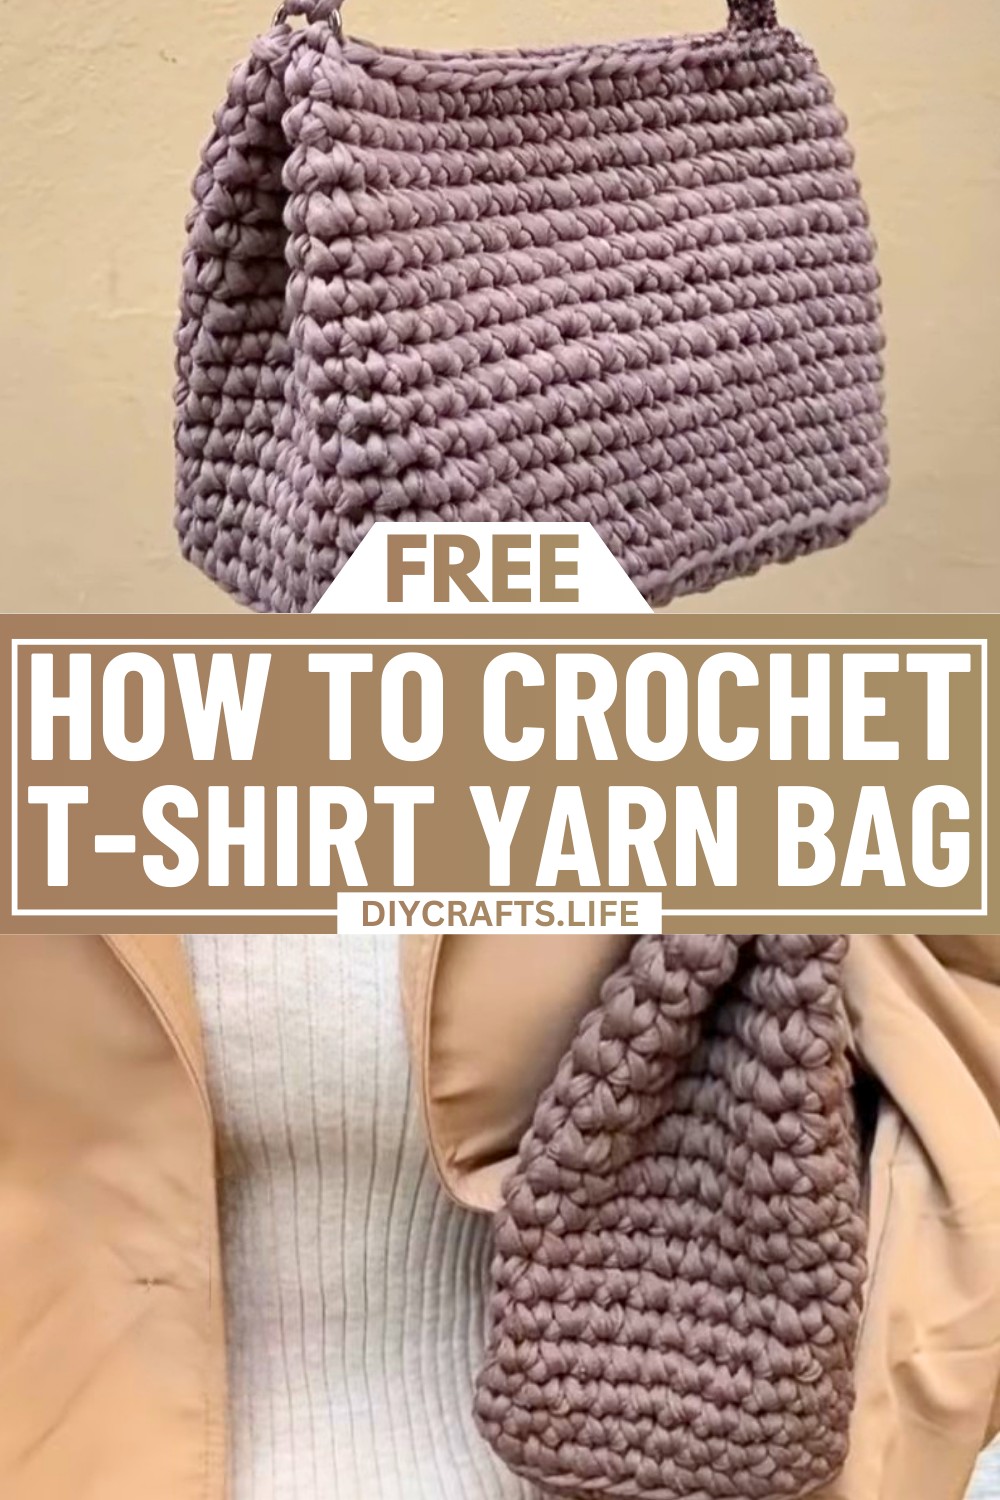
Turn everyday functionality into a personal fashion statement with this chic and sturdy crochet T-shirt yarn bag! Whether you're looking for an eco-friendly accessory or a stylish carry-all, this design will inspire creativity and give your wardrobe a fresh handmade touch. Get ready to add a pop of texture and personality to your daily look.

This bag is crafted entirely from soft yet durable T-shirt yarn, making it both lightweight and incredibly strong. Its bold texture and modern construction stand out among ordinary bags, while the pattern allows room for customization in color and size. From casual outings to running errands, this bag blends practicality with style, making it a unique, handmade item that speaks your style language.
Credit madebymara
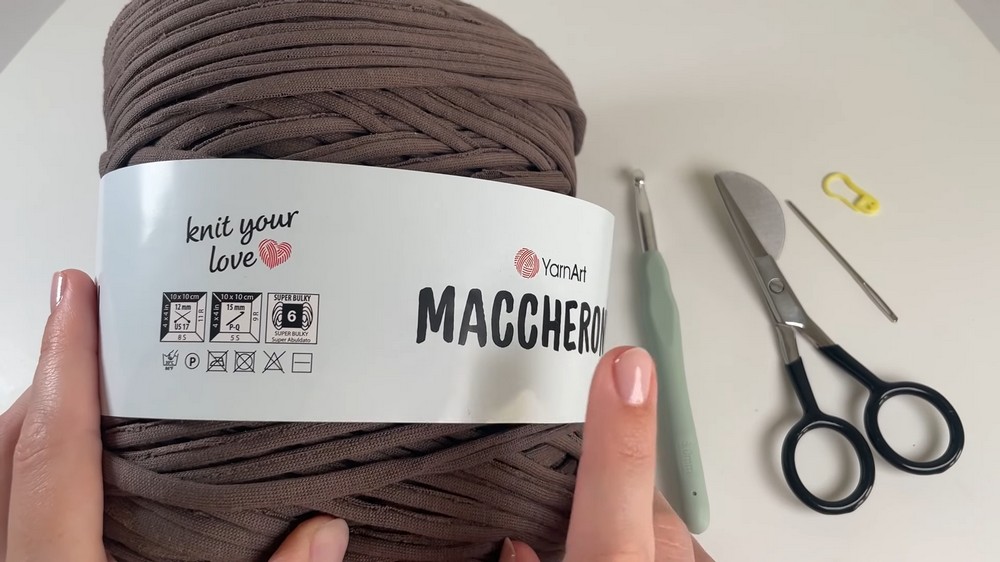
Required Materials
- T-Shirt Yarn: Example used was chunky size 6 t-shirt yarn (Brand: Yarn Art).
- You can use other types of yarn, but make sure to adjust your hook size accordingly.
- Crochet Hook: Size 6mm hook (adjust based on yarn size).
- Stitch Markers: For identifying the start of each row.
- Yarn Needle: To weave in the ends.
- Scissors: For cutting the yarn.
- Clips or Rings: For assembling and attaching the bag’s strap.
Important Notes
- Maintain a light tension while crocheting, especially during chains, to make it easier to work into stitches later.
- Mark the first stitch of each row with a stitch marker to avoid errors in stitch count.
- Count your stitches at the end of each row or side to ensure consistency.
- You can adjust the width, length, and height of the bag as per your preference by increasing or decreasing chains or rows.
- Work single crochets in back loops when starting the bag’s body to create a neat ridge at the base.
Detailed Step-by-Step Instructions
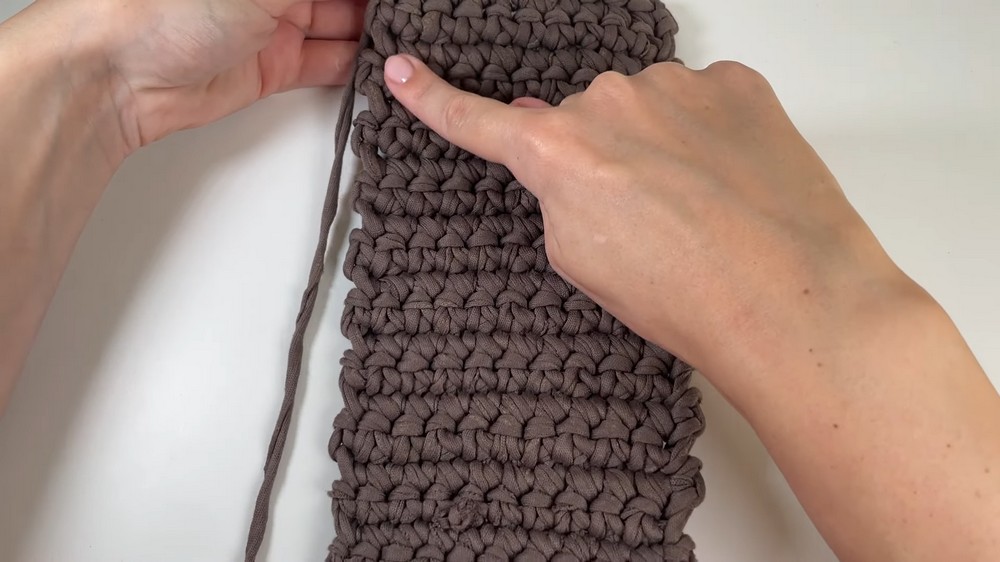
1. Start the Bag Base
- Create a slip knot and attach it to your crochet hook.
- Chain the base width (e.g., 10 chains, or your desired width) and create 1 additional chain for turning.
- For Row 1, skip the first chain from the hook, work single crochets into each chain until the end of the row.
- Remember, the total number of single crochets will match the original chain count (excluding the turning chain).
- After completing each row, chain 1, flip your work, and crochet single stitches into each stitch across. Continue this for the desired base length.
- Example here: 10 stitches wide × 21 rows (~23 cm by 12 cm).
- To finish the base, crochet all the way around the edges (placing single crochets into rows and chains on all four sides of the rectangle).
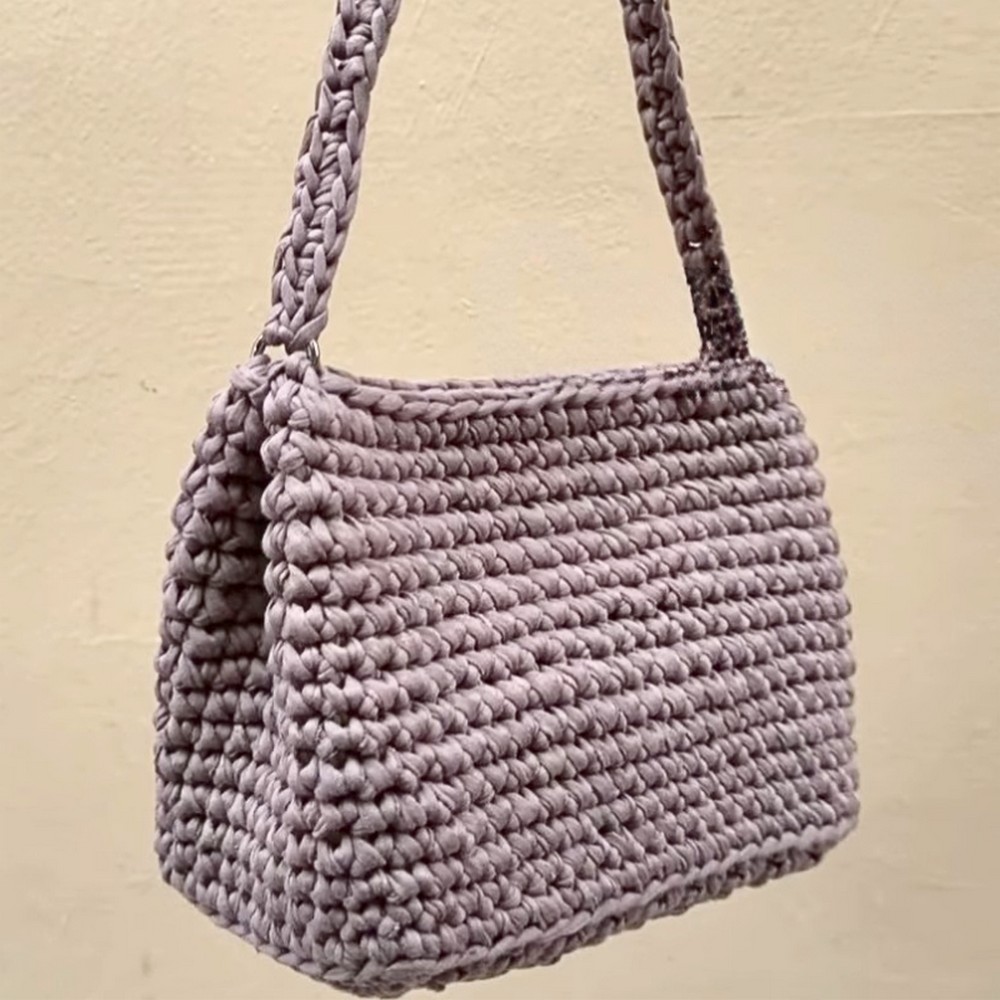
2. Build the Bag Height
- Start working in the round:
- Once you’ve completed the outer edge of the base, connect corners with a slip stitch.
- For the first row of the body: Use back loop only single crochets around the edge. This creates a distinct ridge that makes the base stand out.
- From the second row onward: Start each row with a single crochet in the full stitch. Continue single crochets in the full V of each stitch, and always use a stitch marker to mark the start of a new row.
- Repeat for the desired height: Crochet in a continuous round for the height of your bag.
- Example: 62 stitches per round for 15 rows.
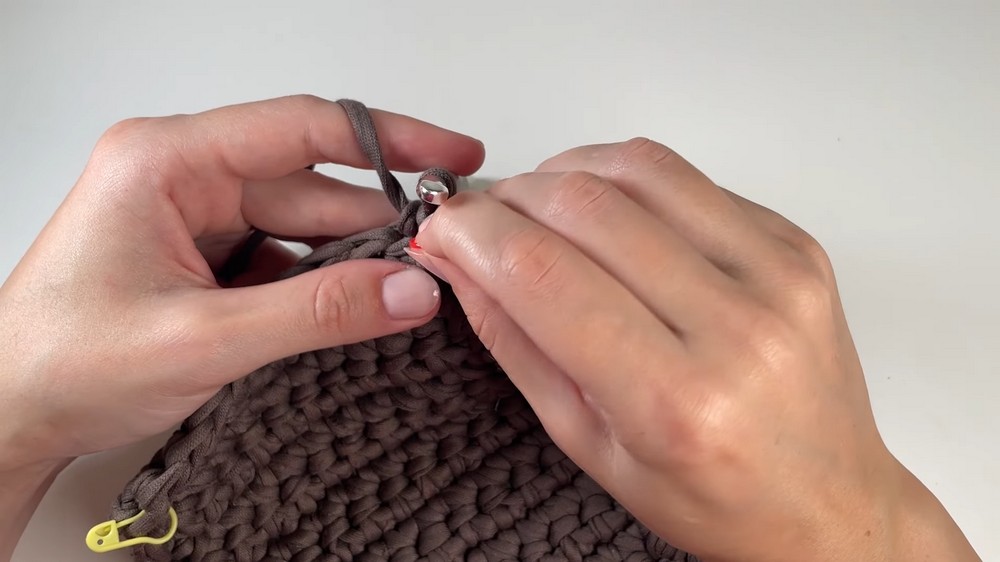
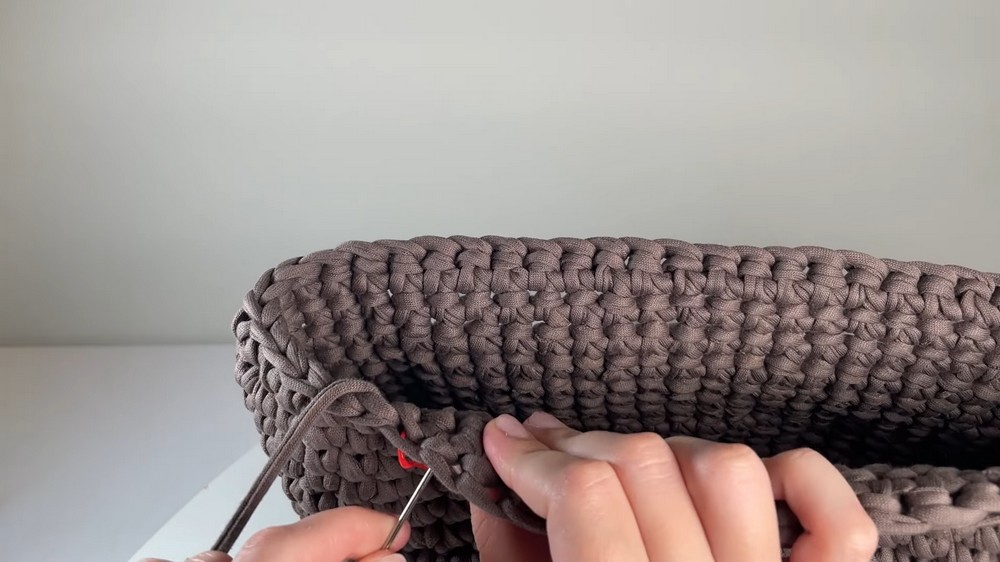
- Once finished, cut the yarn, leave a tail, and weave the yarn through the last stitches. Use an invisible stitch to finish for a polished look.
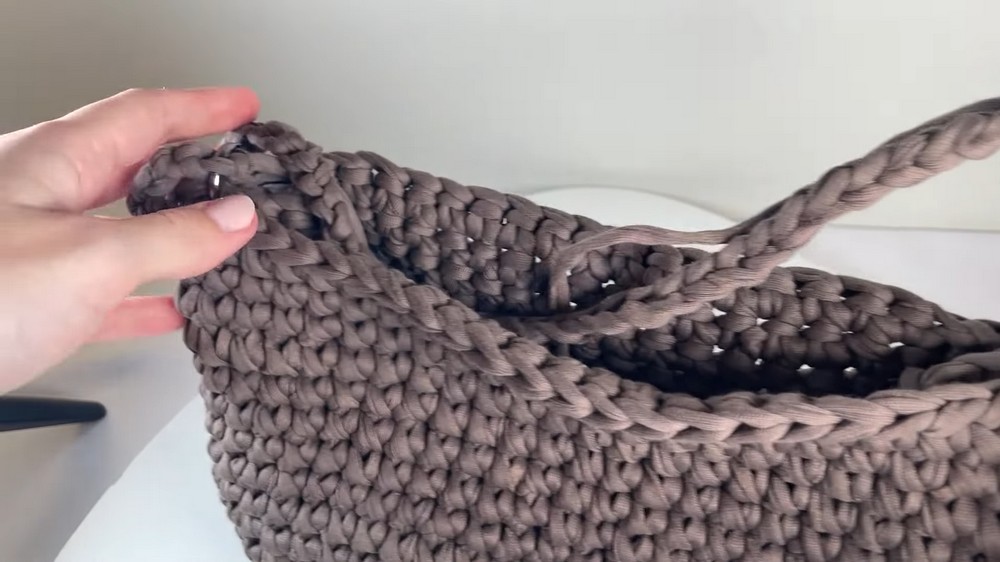
3. Attach Rings
- Divide your bag into even halves to determine the placement of the side rings or clips for the strap.
- Example shared: Bag has a total of 62 stitches, evenly dividing into two sides of 31 stitches each.
- Attach rings at the marked center points on either side of the bag.
4. Make and Attach the Strap
- Create the strap:
- Start with a slip knot, attach the hook, and chain the desired length for the strap.
- Example: 50 chains for the strap length.
- Attach the chain to the ring on the other side with a basic chain stitch that loops through the ring.
- Start with a slip knot, attach the hook, and chain the desired length for the strap.
- Reinforce the strap: Work single crochets back across the bumps of the chain to thicken the strap.
- Work by inserting your hook into the bumps at the back of the chain, not the V stitches on the front.
- Once you reach the other side, slip stitch to the ring to secure the strap.
- Finish the ends: Cut off excess yarn, pull through, and weave in the tails using a yarn needle for a clean finish.
Final Touch
- Ensure all tails are woven securely to prevent unraveling.
- Your finished crochet T-shirt yarn bag includes a sturdy strap and a polished look, perfect for practical use or gifting.