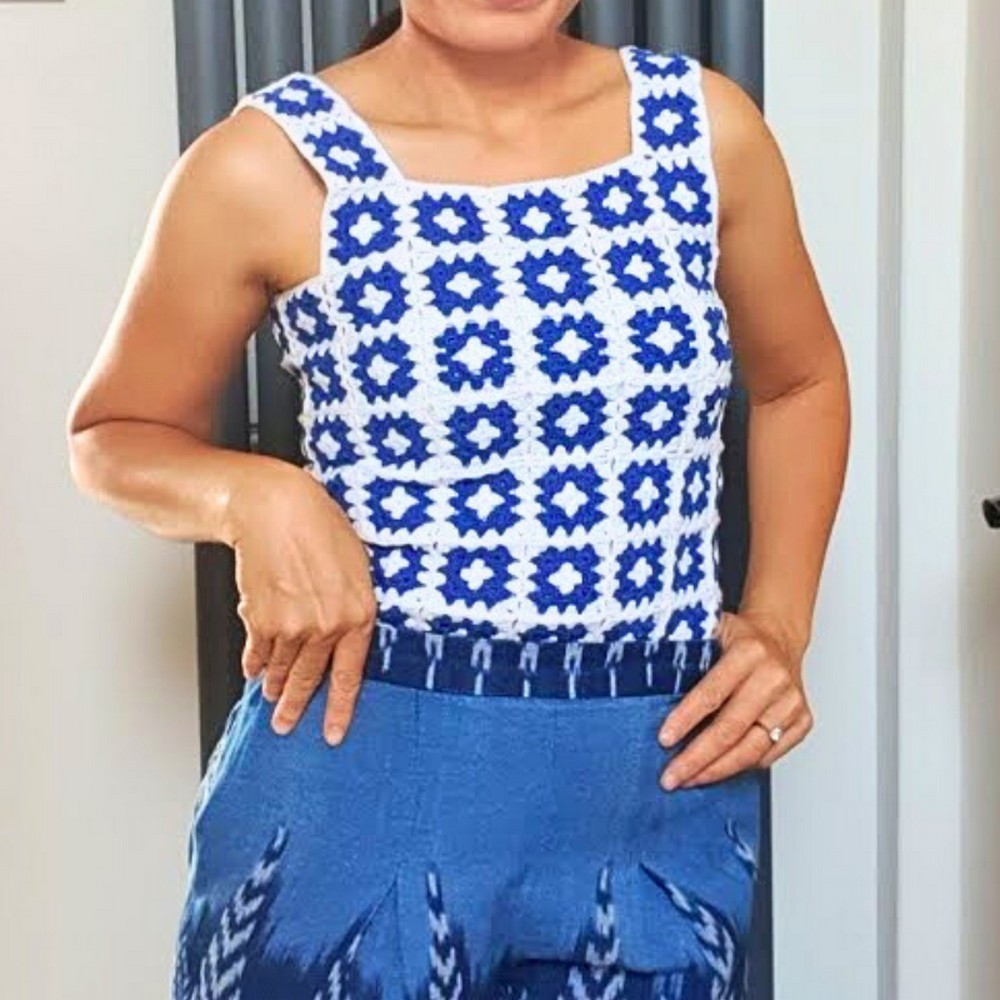
Transform timeless granny squares into a stylish and modern top that’s perfect for every season. Fun, colorful, and endlessly versatile, this crochet design brings together classic techniques with a fresh twist. Whether you keep it vibrant and bold or pick soft, neutral shades, this top is a playful way to add artistic flair to your wardrobe.
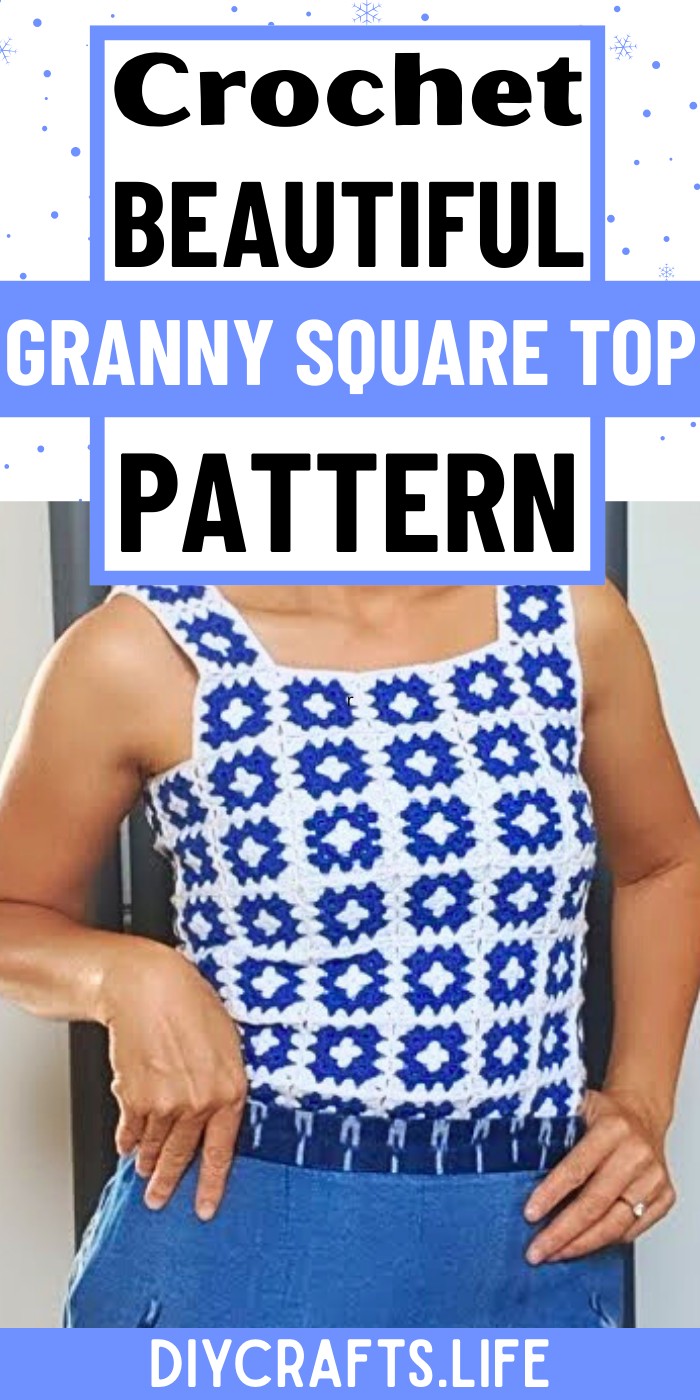
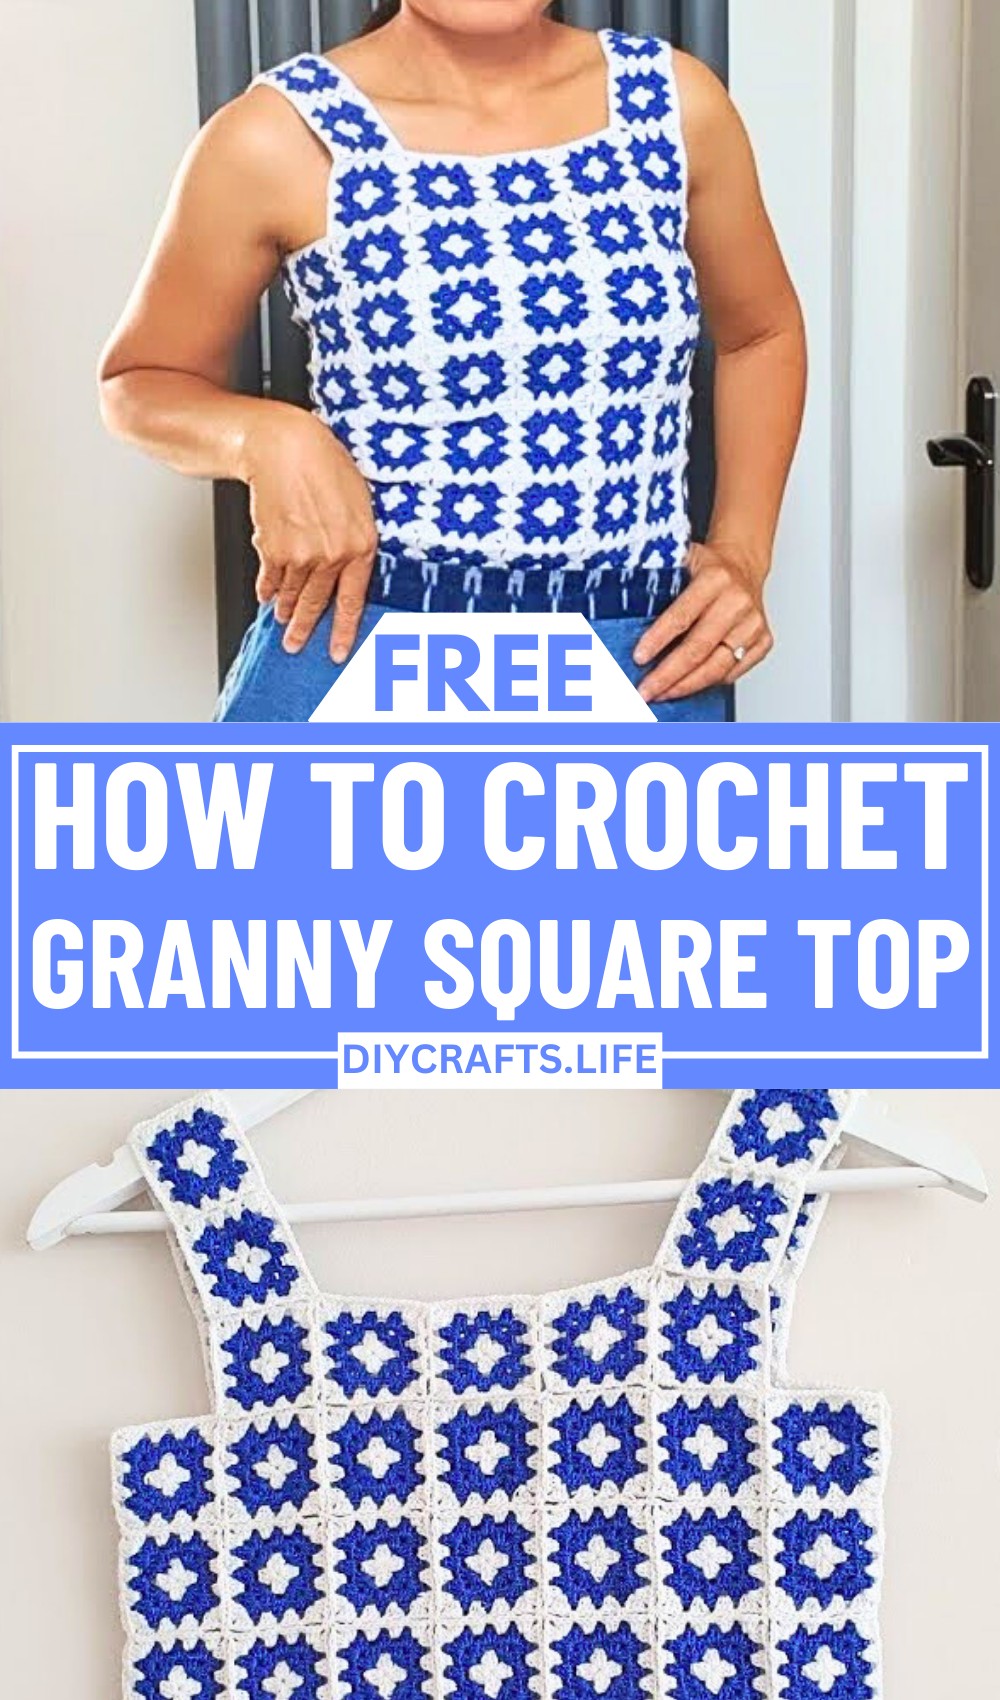
Modern Crochet Granny Square Top
What makes this granny square top special is how it combines tradition with trend-setting style. Each square is detailed with symmetrical patterns, giving the top a textured and eye-catching finish. Perfectly pieced together to create a flattering fit, this design is ideal for layering or wearing as a standalone statement. From casual outings to creative festivals, this unique crochet pattern is the ultimate mix of fashion and self-expression.
Materials & Tools Needed
- Yarn:
- 100% Cotton yarn is recommended for a breathable and comfortable summer top.
- Quantity: Approximately 200g per color (depending on size).
- Colors: The tutorial uses two colors, but feel free to use as many as you like for a fun, vibrant top.
- Crochet Hook:
- Recommended size: 1.5 mm, best suited for lightweight cotton yarn. Adjust the hook size based on your yarn weight.
- Scissors:
- A sharp pair for trimming yarn ends.
- Tapestry Needle:
- For weaving in ends and finishing joins neatly.
- Stitch Markers (Optional):
- To help mark corners or sections during assembly.
Finished Size & Customization Ideas
Finished Size:
- The top is customizable to your size by using the number of granny squares required to fit your chest circumference.
- Example from the tutorial: For a 32-inch chest measurement (size small), the creator made 14 granny squares (7 squares for the front and 7 for the back).
- Each granny square is approximately 2.2 inches in size.
Customization Suggestions:
- Size Adjustments:
- To adjust for larger or smaller sizes:
- Increase or decrease the number of granny squares (odd numbers make division uneven, so aim for even numbers).
- Adjust the size of each granny square by adding more rounds or using a larger hook.
- To adjust for larger or smaller sizes:
- Style Adjustments:
- Longer Top: Add additional rows to your granny squares. Alternatively, add stacked rows at the bottom for extra length.
- Back Height Variation: Create lower back panels for a silhouette similar to the tutorial's design.
- Alternate Yarn: Use acrylic or blended yarns for a unique texture or all-season wear.
- Colors:
- Experiment with bold color schemes, pastels, or variegated yarn for a dynamic look.
- Or keep it subtle with a minimalist solid-color palette.
Pattern Abbreviations & Terminology
Crochet terms used (US terminology):
- Ch = Chain
- SC = Single Crochet
- HDC = Half Double Crochet
- DC = Double Crochet
- Sl st = Slip Stitch
- YO = Yarn Over
- Rep = Repeat
- St(s) = Stitch(es)
Step-by-Step Detailed Crochet Instructions
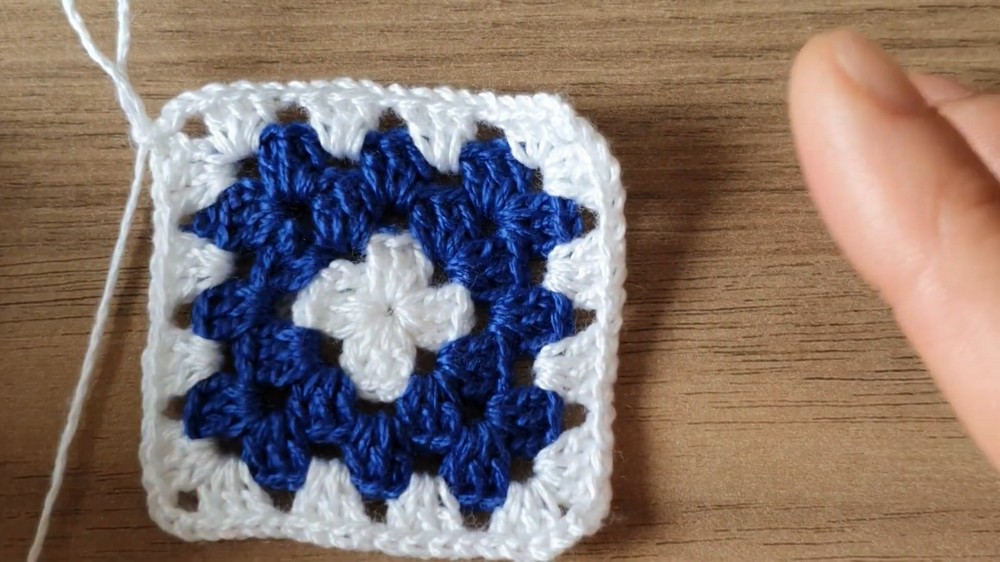
1. Creating a Granny Square
- Foundation Ring:
- Create a slip knot and chain 5.
- Join into the first chain with a slip stitch to form a ring.
- Round 1:
- Chain 3 (counts as a DC). Work 2 DC into the ring.
- Chain 3, then work 3 DC into the ring. Repeat this step 3 more times for a total of 4 sets (clusters) of 3 DC, separated by chain-3 corners.
- Slip stitch into the top of the starting chain-3 to join.
- Fasten off (if switching colors).
- Round 2 (Add Second Color):
- Attach the second color to any chain-3 space with a slip stitch.
- Chain 3 (counts as DC), work 2 more DC into the same chain-3 space. Chain 1.
- In the next chain-3 space: Work 3 DC, chain 3, 3 DC. Chain 1.
- Repeat this pattern around, maintaining the corners by working (3 DC, chain 3, 3 DC) into each chain-3 space.
- Join the round with a slip stitch and fasten off.
- Round 3 and Beyond:
- Attach a new color (if switching); repeat the same pattern—3 DC in chain-1 spaces and (3 DC, chain 3, 3 DC) in the corners.
- Continue until your granny square reaches your desired size (typically about 2.2 inches for this project).
- Make all the granny squares needed for your project (e.g., 14 for size small). Ensure the total number is even to simplify assembly.
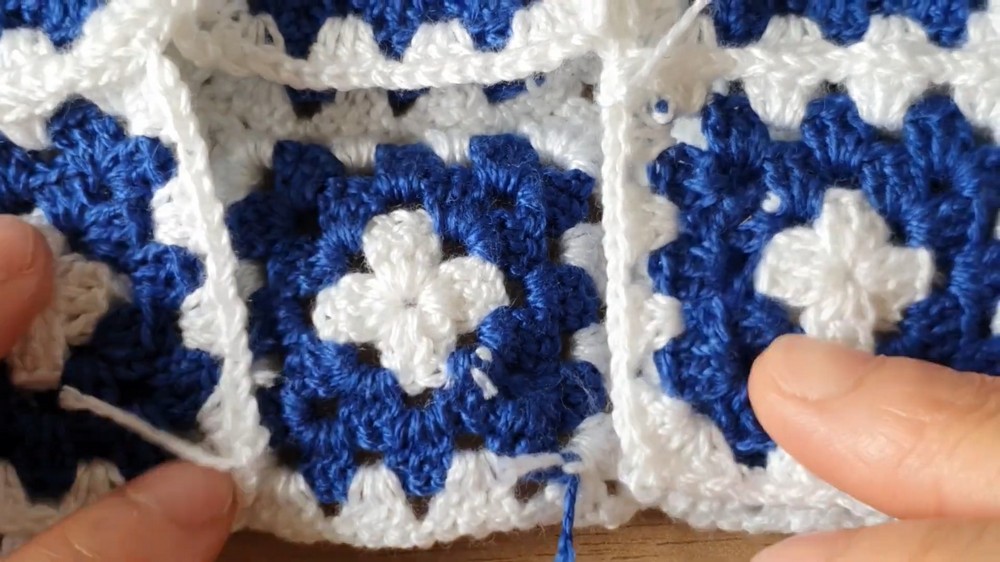
2. Joining the Granny Squares
- Arrange Squares:
- Lay your granny squares flat in 2 groups (front and back) based on your size (e.g., 7 squares for the front, 7 for the back).
- Joining Method:
- Place two squares wrong sides together.
- Use single crochet (SC) or a slip stitch to attach the squares along one edge. Ensure the stitches are tight but not overly tense to prevent puckering.
- Continue Joining:
- Join all squares row by row (horizontally), and then join the rows together (vertically).
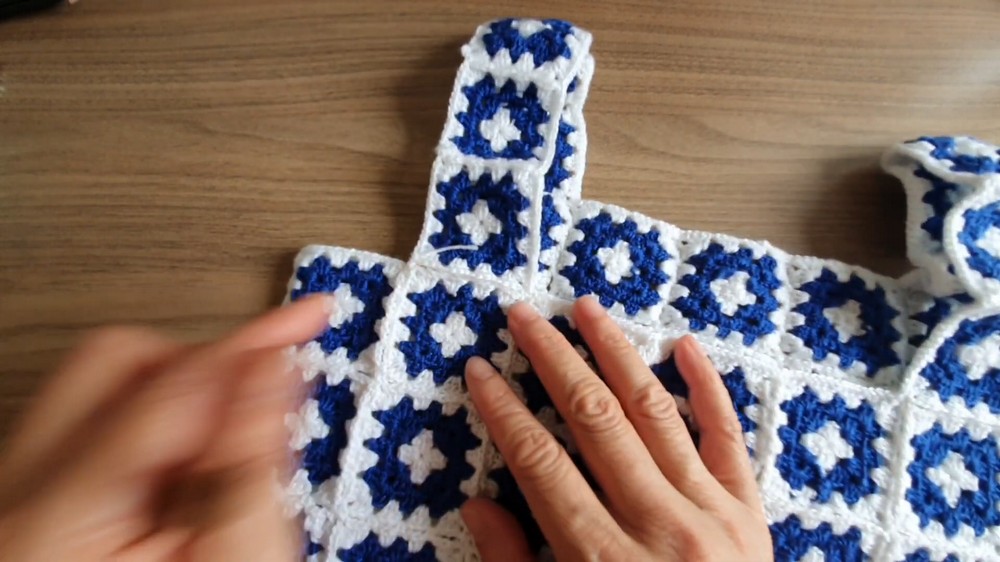
- Join Front and Back Panels:
- Once both the front and back panels are complete, lay them together and join along the sides, leaving space for the armholes.
- Join the top edge (shoulder area) with sl st or SC, leaving an open neckline.
3. Adding Shoulder Straps
- Granny Square Straps:
- The tutorial uses mini granny squares for the straps (width of about 1 square per strap).
- Add straps to the front and, optionally, connect to the back, ensuring the fit is comfortable.
- Alternative Strap Ideas:
- Create simple chain straps reinforced with SCs.
- Use decorative stitches like shell or picot for a unique touch.
4. Finishing Touches
- Edging the Top and Armholes:
- Attach yarn to any edge and work single crochet (SC) evenly along the neckline, hemline, and armholes.
- For a polished look, add a reverse SC (crab stitch) or a picot border.
- Weave in Ends:
- Use a tapestry needle to tidy up and hide all loose yarn tails.
- Block the Top:
- Block the finished top to relax the stitches, especially if using cotton yarn, for a professional look.
Additional Notes
- Fit Tip: Measure as you go! Adjust the number and placement of squares to fit your measurements.
- Customization: The neckline and back can be altered (higher front/lower back or vice versa) by modifying the number of granny squares used in these sections.
- Finishing Options: Add tassels, fringe, or embroidery for more flair.
Enjoy creating your elegant Crochet Granny Square Top! The classic granny square design allows infinite possibilities for customization.
Video Tutorial