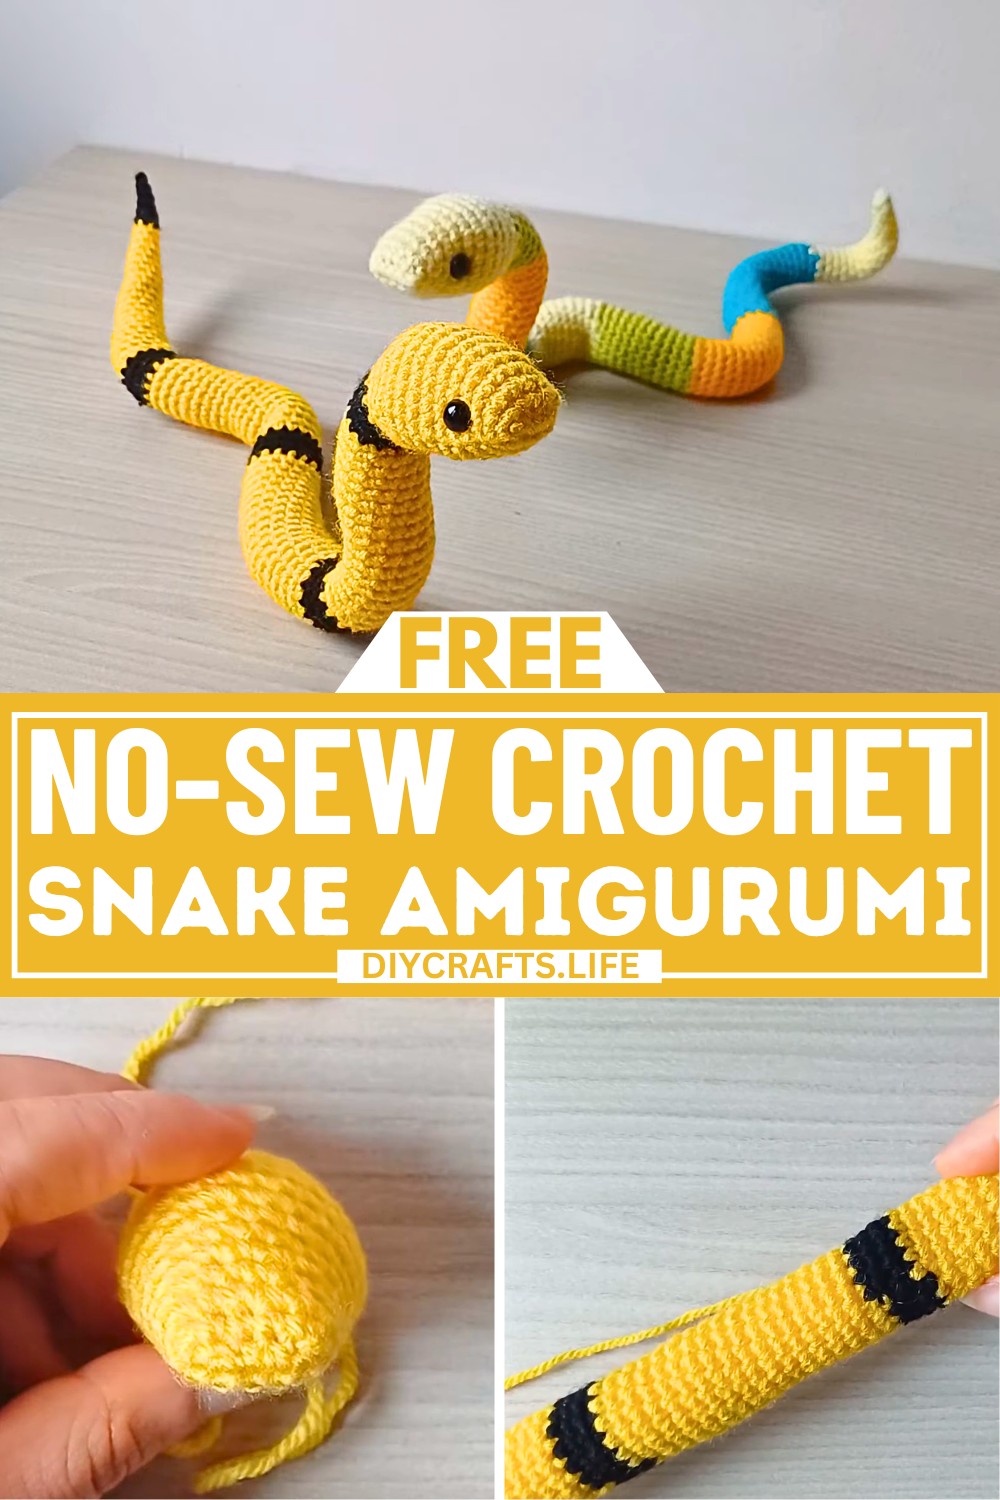
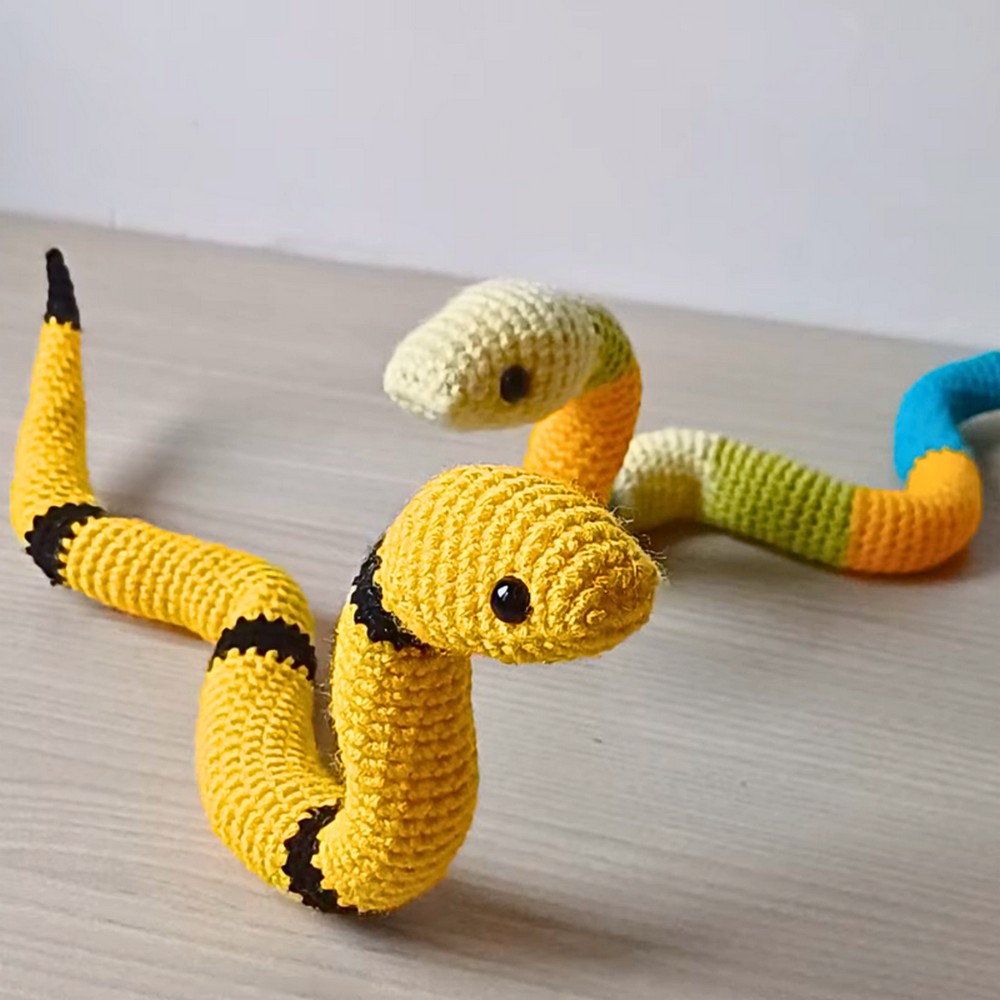
Crochet snakes are a playful and unique creation that can bring joy to anyone, young or old! Whether you use them as a toy, fun room décor, or even as a quirky gift, they are eye-catching and easily customizable to match your favorite colors. The soft texture and bendable shape allow them to curve and twist just like real snakes, adding a lively touch to any surface.
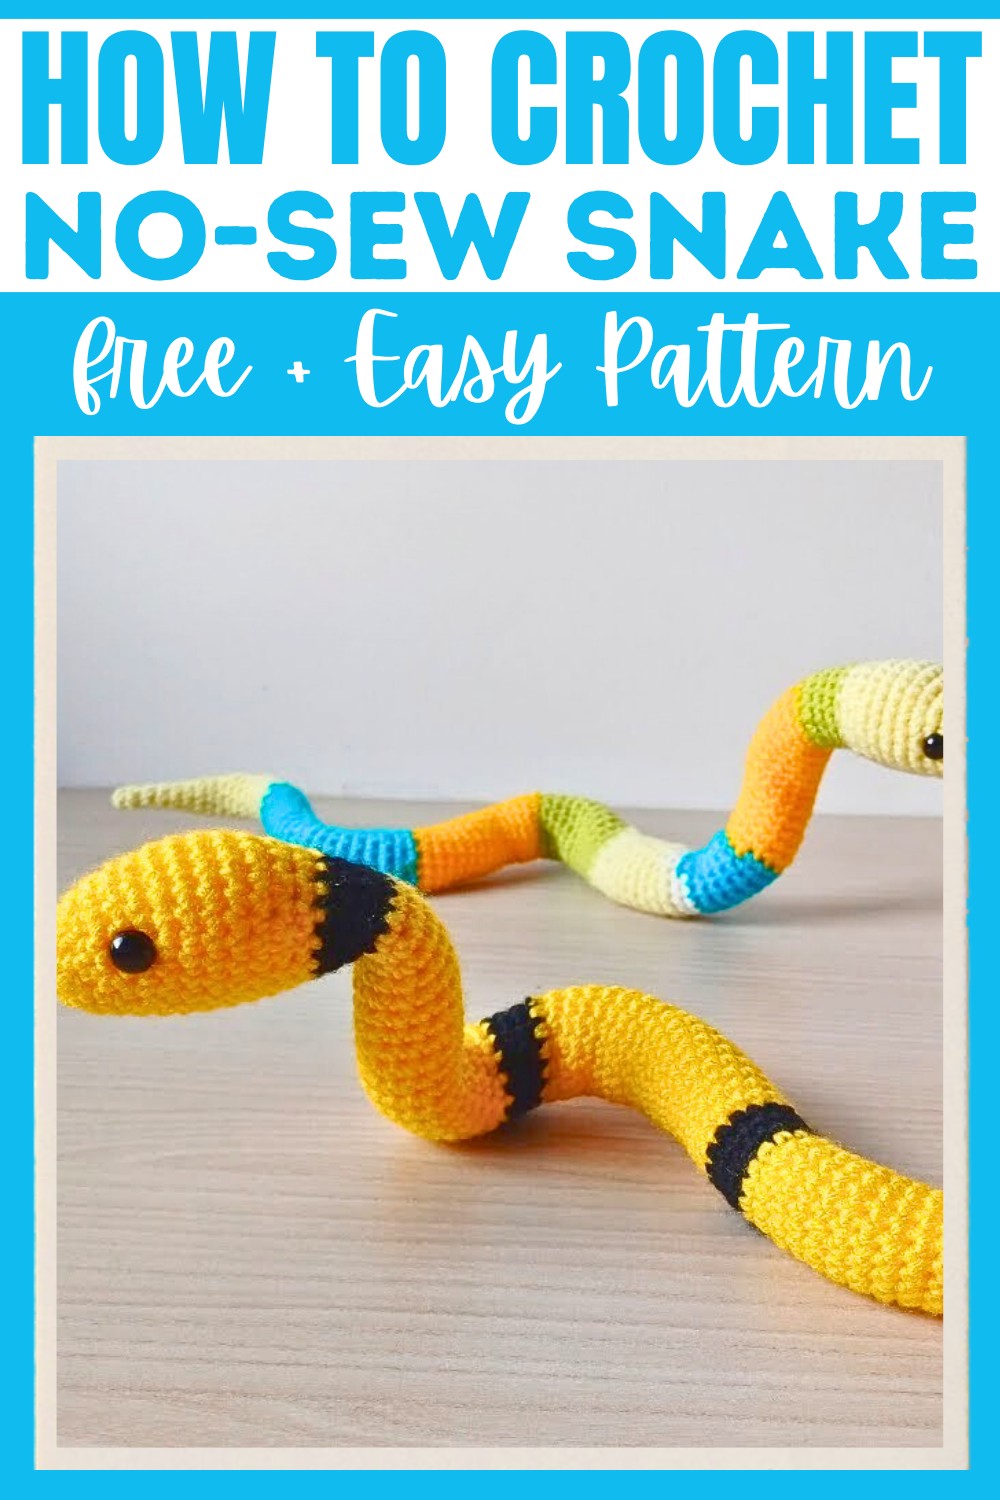
The best part? The pattern is beginner-friendly and requires no sewing. You can use yarn in any colors you like and even add details like safety eyes or embroidered features for a personal touch. While the process may take some time, this adorable snake grows with simple stitches and allows options for stripes and textures. Add stuffing as you work, and, if you want extra flexibility, you can place a wire inside for subtle movement and posing. This makes the crochet snake even more special and adaptable.
Credit Ambros Crochet
Materials & Tools Needed
- Yarn: Any colors you prefer; the project is customizable, and you can use as many or as few colors as you'd like.
- Crochet Hook: 3mm hook (or a size that works well with your chosen yarn).
- Scissors: For cutting yarn.
- Toy Stuffing: To fill the snake’s body and head.
- Safety Eyes: 8mm or 10mm are suggested (optional; you can embroider eyes instead if you don’t have safety eyes).
- Tapestry Needle: For weaving in ends.
- Wire: If you want to add flexibility to the snake (optional).
Finished Size & Customization Ideas
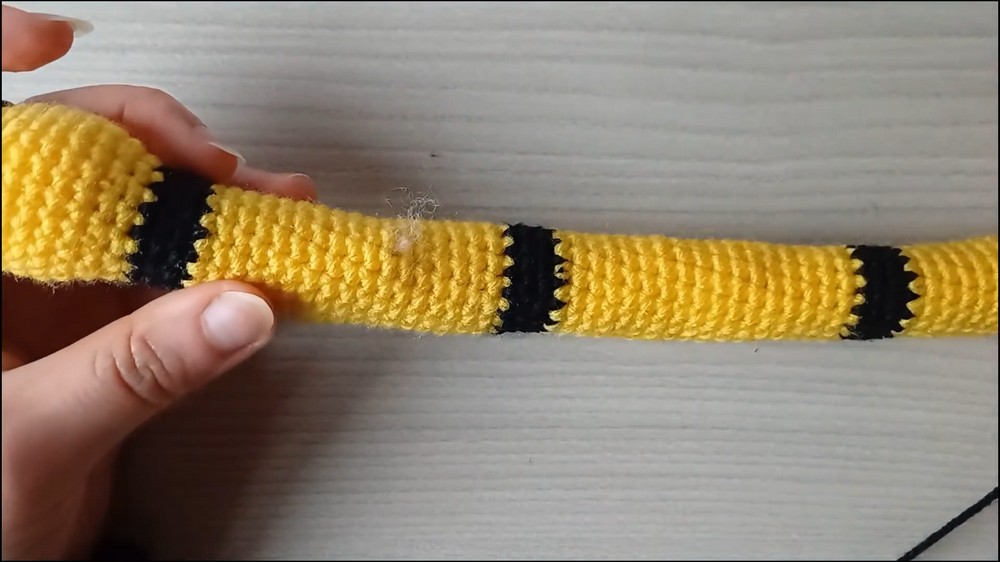
- Size depends on how many rounds you complete for the body section. In the example snake, the body has 60 rounds (14-73), but you can shorten or lengthen it based on personal preference.
- Customizations:
- Use a single solid color or mix-and-match stripes.
- Experiment with variations like variegated yarn or textured stitches for added design elements.
Pattern Abbreviations & Terminology
- MR - Magic Ring
- ch - Chain
- sc - Single Crochet
- inc - Increase (2 sc in one stitch)
- dec - Decrease (single crochet two stitches together)
- sl st - Slip Stitch
Step-by-Step Detailed Crochet Instructions
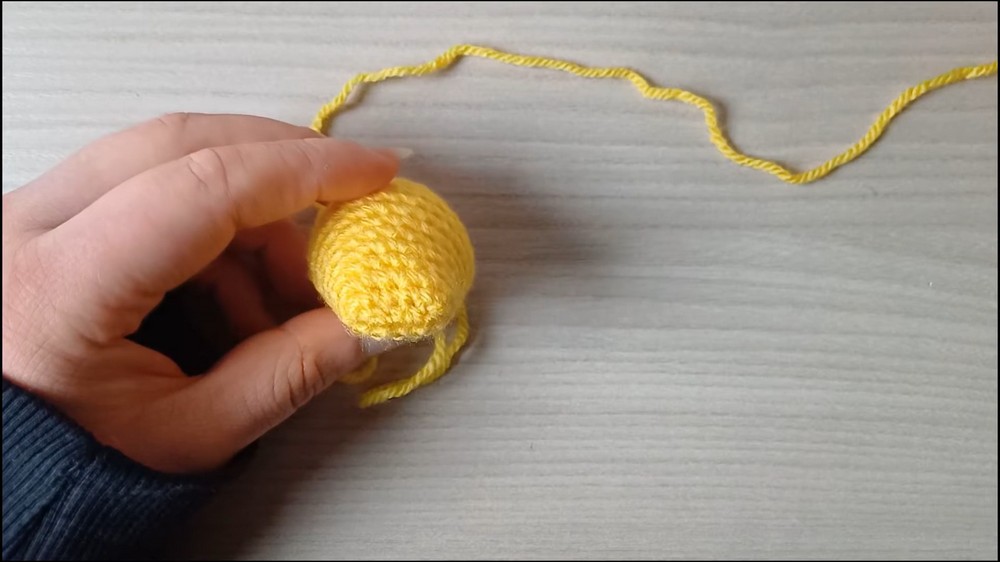
Head Section
Round 1:
- Start with a Magic Ring (MR).
- Work 6 sc into the magic ring. (Total: 6 stitches)
Round 2:
- 1 sc, inc; repeat 3 times. (Total: 9 stitches)
- Then, sc in the last 6 stitches. (This shapes the head into a curve, with increases only on one side of the round.)
Round 3:
- 1 sc in each stitch around. (Total: 15 stitches)
Round 4:
- 2 sc, inc; repeat 3 times. (Total: 18 stitches)
- Then, 1 sc in the remaining 6 stitches.
Round 5:
- 1 sc in each stitch around. (Total: 18 stitches)
Round 6:
- 3 sc, inc; repeat 3 times. (Total: 21 stitches)
- Then, 1 sc in the remaining 6 stitches.
Round 7:
- 4 sc, inc; repeat 3 times. (Total: 24 stitches)
- Then, 1 sc in the remaining 6 stitches.
Rounds 8-11:
- 1 sc in each stitch around for 4 rounds. (Total: 24 stitches at the end of Round 11)
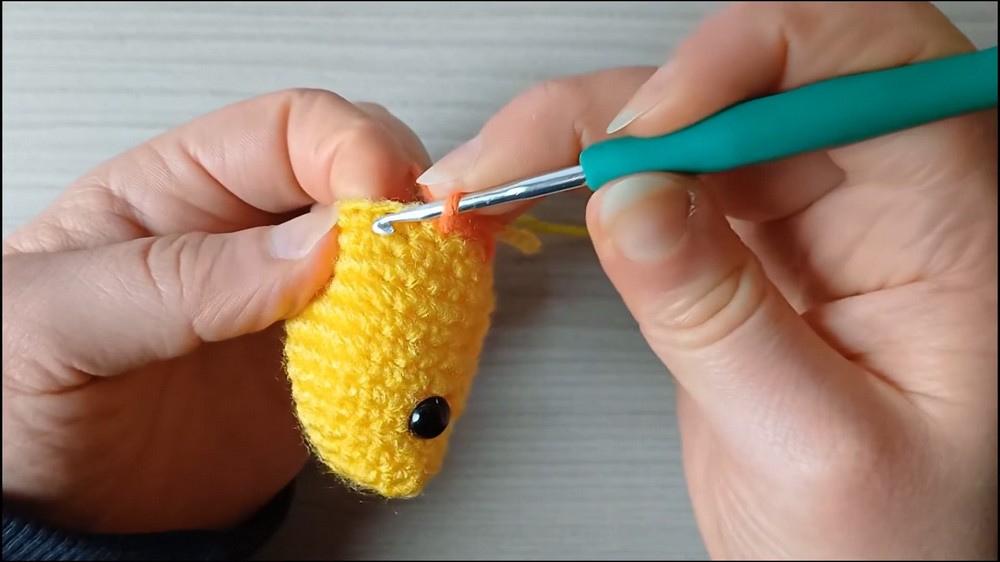
Eye Placement
- Place safety eyes between rounds 5 and 6.
- Ensure they're approximately 6 stitches apart (measure and adjust spacing as desired).
Note: If the eye alignment appears off due to stitch placement, adjust placement slightly to improve symmetry.
Body Section
Rounds 12-13:
- Round 12: 1 sc, dec; repeat 6 times, sc 3. (Total: 18 stitches)
- Round 13: 4 sc, dec; repeat 3 times. (Total: 15 stitches)
Rounds 14-73:
- Work 1 sc into each stitch around for a total of 15 stitches per round. Continue for 60 rounds or adjust according to your desired snake length.
- Add stuffing as you go to avoid struggling to stuff the snake later.
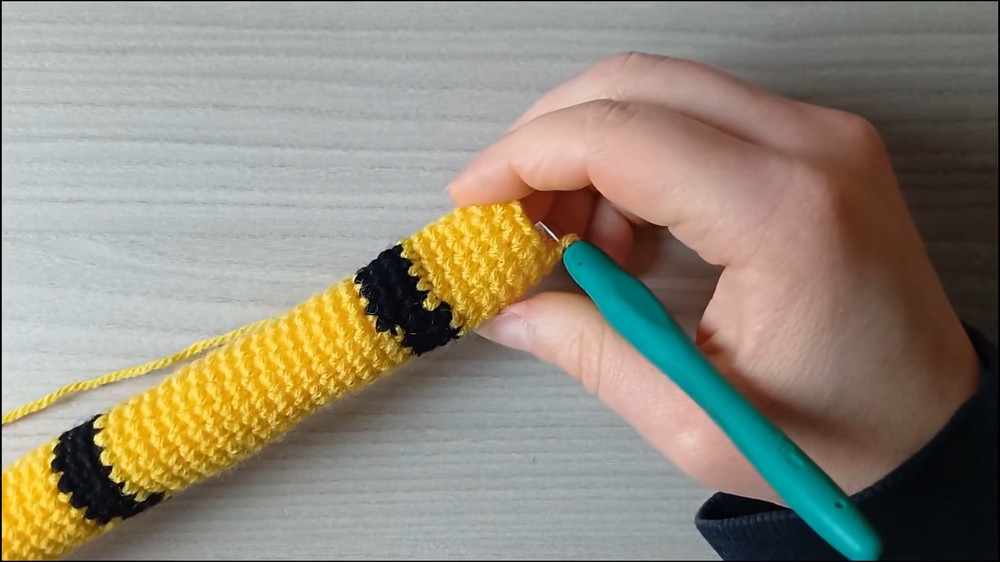
Optional: Create stripes using color changes every few rounds. Change colors when working on the flat part of the snake (the bottom) to hide color transitions.
Tail Section
Round 74:
- 1 dec, 13 sc (Total: 14 stitches)
Rounds 75-76:
- 1 sc in each stitch around. (Total: 14 stitches)
Round 77:
- 1 dec, 12 sc (Total: 13 stitches)
Rounds 78-79:
- 1 sc in each stitch around. (Total: 13 stitches)
Round 80:
- 1 dec, 11 sc (Total: 12 stitches)
Rounds 81-82:
- 1 sc in each stitch around. (Total: 12 stitches)
Round 83:
- 1 dec, 10 sc (Total: 11 stitches)
Rounds 84-85:
- 1 sc in each stitch around. (Total: 11 stitches)
Round 86:
- 1 dec, 9 sc (Total: 10 stitches)
Rounds 87-88:
- 1 sc in each stitch around. (Total: 10 stitches)
Round 89:
- 1 dec, 8 sc (Total: 9 stitches)
Rounds 90-91:
- 1 sc in each stitch around. (Total: 9 stitches)
Round 92:
- 1 dec, 7 sc (Total: 8 stitches)
Rounds 93-94:
- 1 sc in each stitch around. (Total: 8 stitches)
Round 95:
- 1 dec, 6 sc (Total: 7 stitches)
Round 96:
- 1 sc in each stitch around. (Total: 7 stitches)
Round 97:
- 1 dec, 5 sc (Total: 6 stitches)
Round 98:
- 1 sc in each stitch around. (Total: 6 stitches)
Round 99:
- 1 dec, 4 sc (Total: 5 stitches)
Round 100:
- 1 sc in each stitch around. (Total: 5 stitches)
Round 101:
- Make a few decreases or slip stitches to close off the tail, then fasten off. Use the tapestry needle to weave in the tail of the yarn.
Optional Wire Insertion
- Cut a piece of wire slightly longer than the snake’s body.
- Curl the ends of the wire with pliers to form small loops (this prevents it from poking through the crochet work).
- Insert the wire from the opening at the snake's tail and push through with gentle adjustments.
- Ensure the wire is straight inside the body. Continue moving the stuffing along the sides to secure it.
Finishing Steps
- Shape the snake’s head and tail as needed.
- Adjust and evenly distribute stuffing.
- If desired, embroider details such as eyes or a tongue.
Customization Notes
- Change stripe patterns or make color transitions visible.
- Add texture by using alternative stitches (e.g., back-loop-only stitches for some rounds).
- To make a shorter or chunkier snake, adjust the number of body/rounds or increase/decrease rounds.