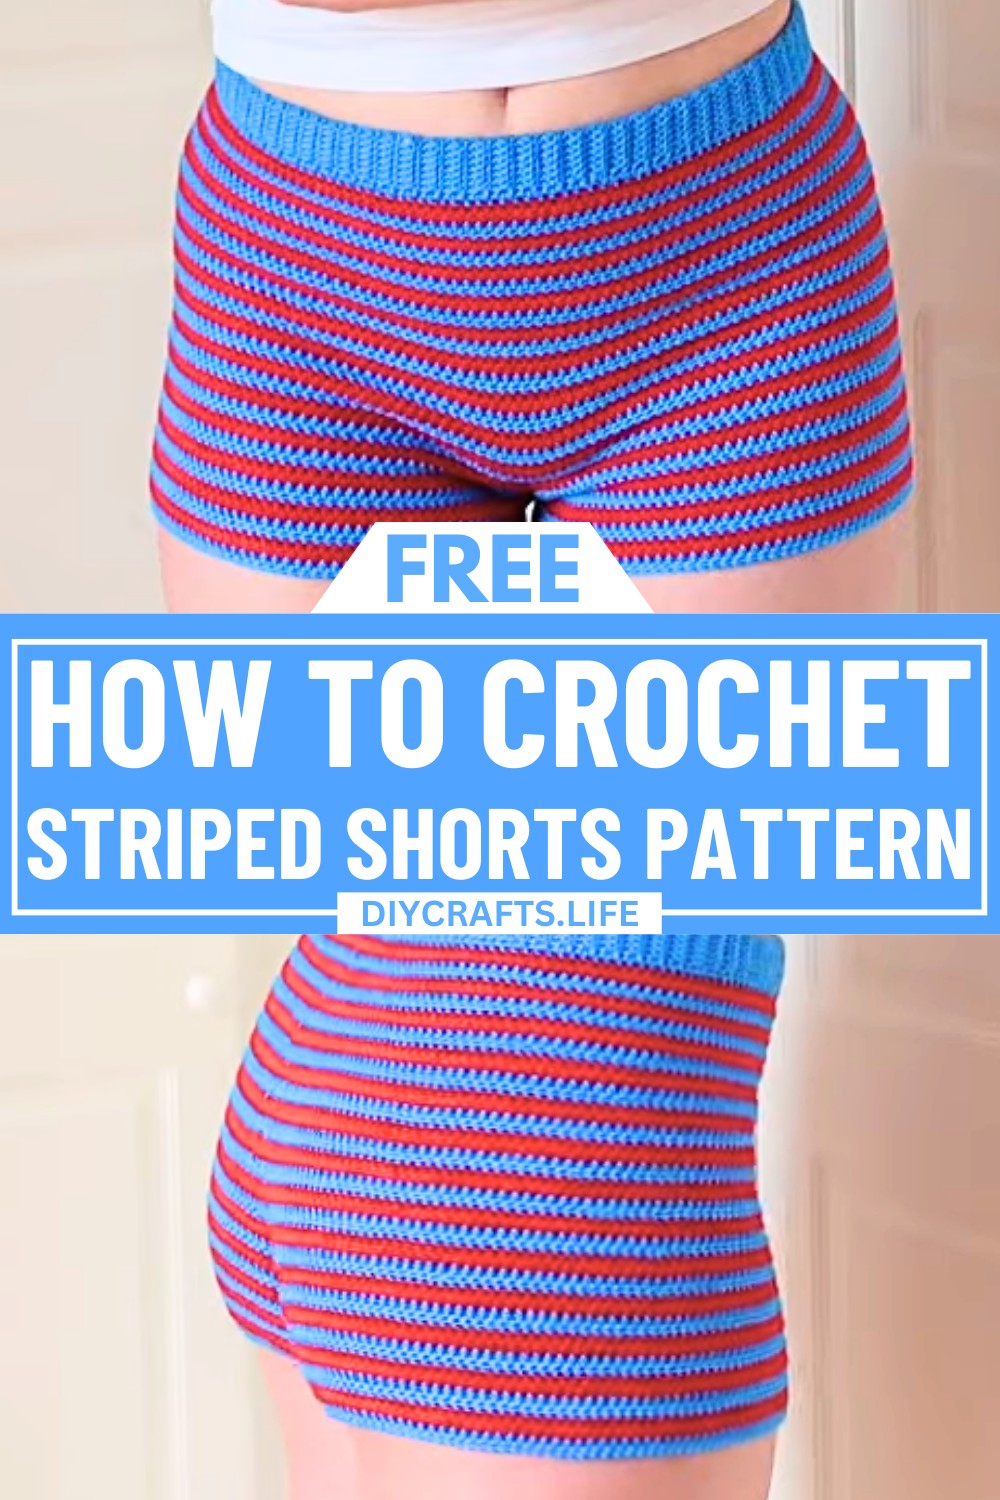
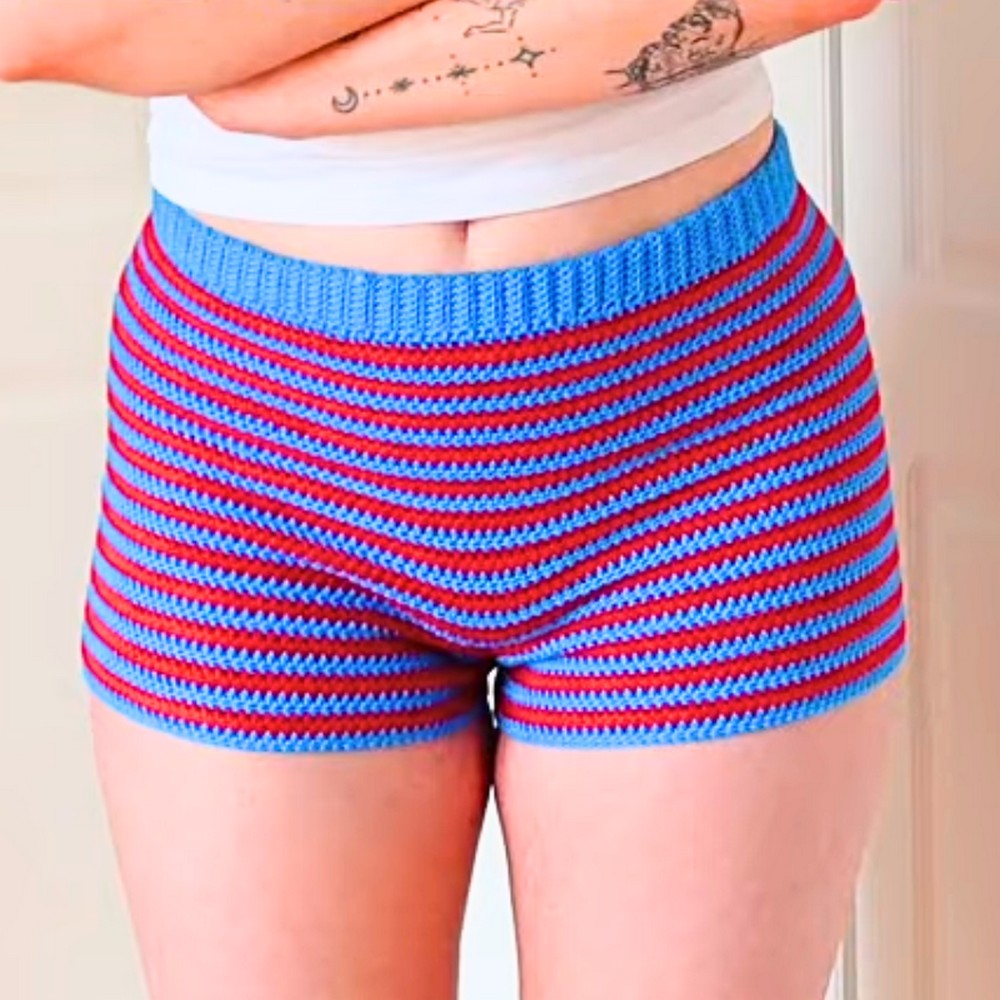
Get ready to create a pair of shorts that blend effortless comfort with bold individuality! These striped crochet shorts are lightweight, airy, and ideal for warm days. Whether you're lounging at home or adding a funky flare to your summer wardrobe, this pattern lets you craft a piece that’s both practical and bursting with personality.
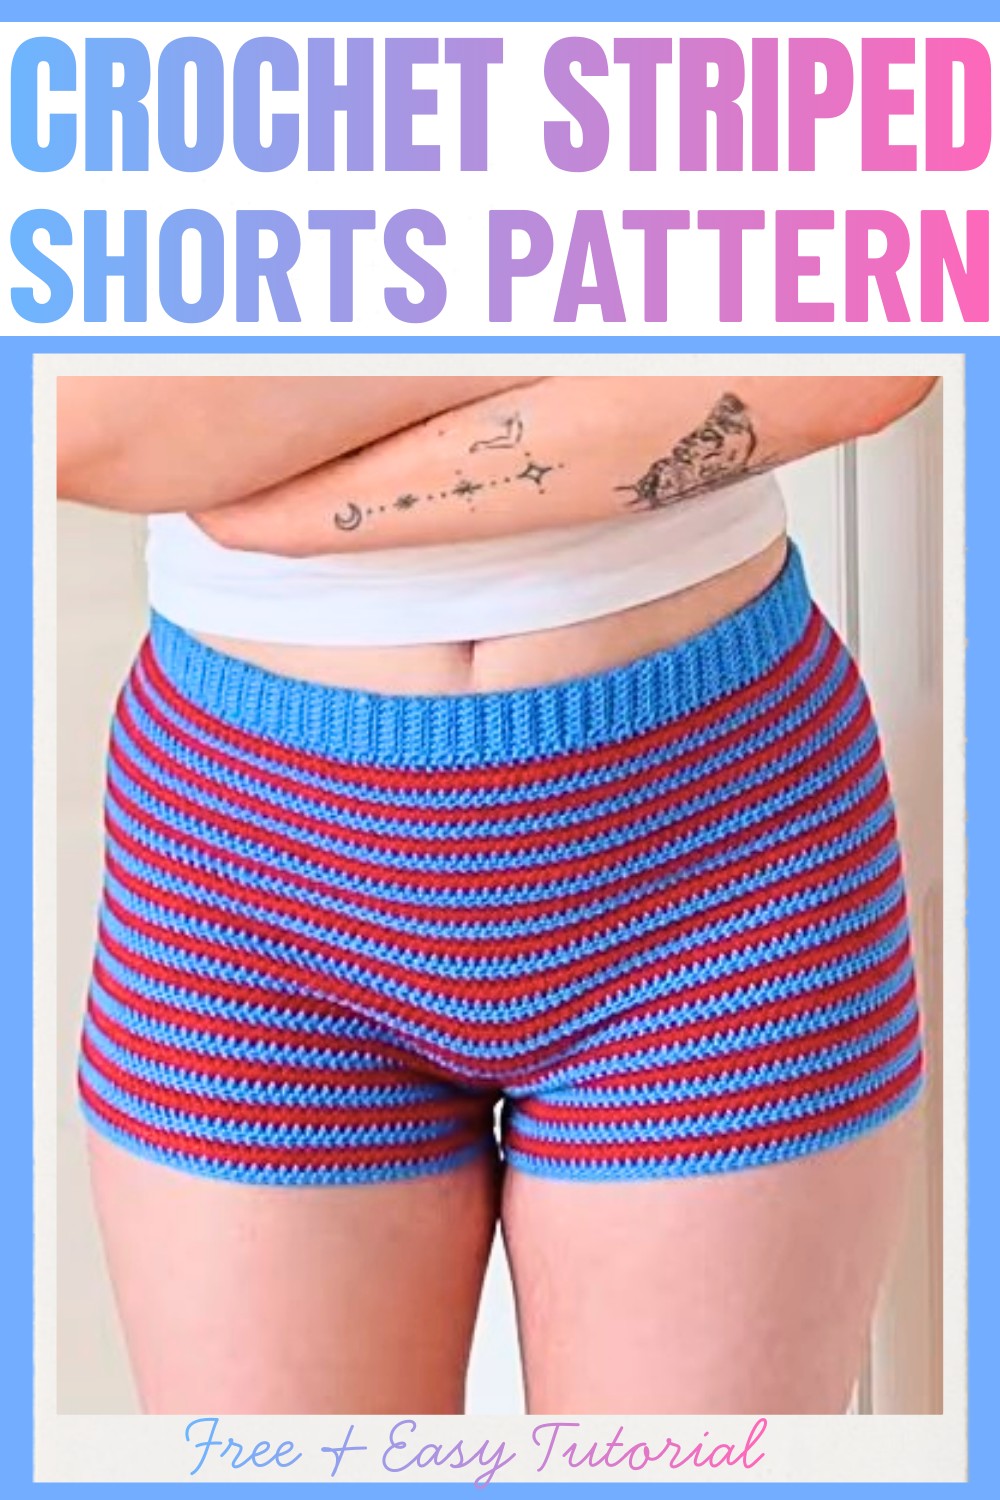
Striped Crochet Shorts Pattern
What sets this design apart is its endless adaptability. From custom waistbands to perfect fits, adjustable rises to playful stripe combinations, every detail is yours to refine. Designed with breathable cotton yarn, these shorts offer a harmonious balance between fashion and comfort. With the ability to tweak lengths, color schemes, and finishes, this pattern celebrates your creative expression while ensuring your crochet project is as unique as you are.
Credit Katie Joslin
Supplies Needed
- Yarn: Lightweight cotton yarn is recommended (2-3 balls of each color for stripes, more for the waistband color).
- Crochet Hook: 3mm crochet hook.
- Elastic: Length equal to your waist measurement, slightly stretched.
- Stitch Markers: Optional for crotch placement.
- Scissors.
- Tapestry Needle: For weaving in ends.
Preparation
- Measurements: Take the following measurements:
- Largest part of the lower body: For waistband sizing.
- Waist to crotch: For determining the rise (high or low-waist).
- Length from crotch to where you want the shorts to end.
- Choose Yarn: Use lightweight yarn for a breathable, comfortable finish. Cotton is recommended. If using thicker yarn, adjust stitches for proper fit.
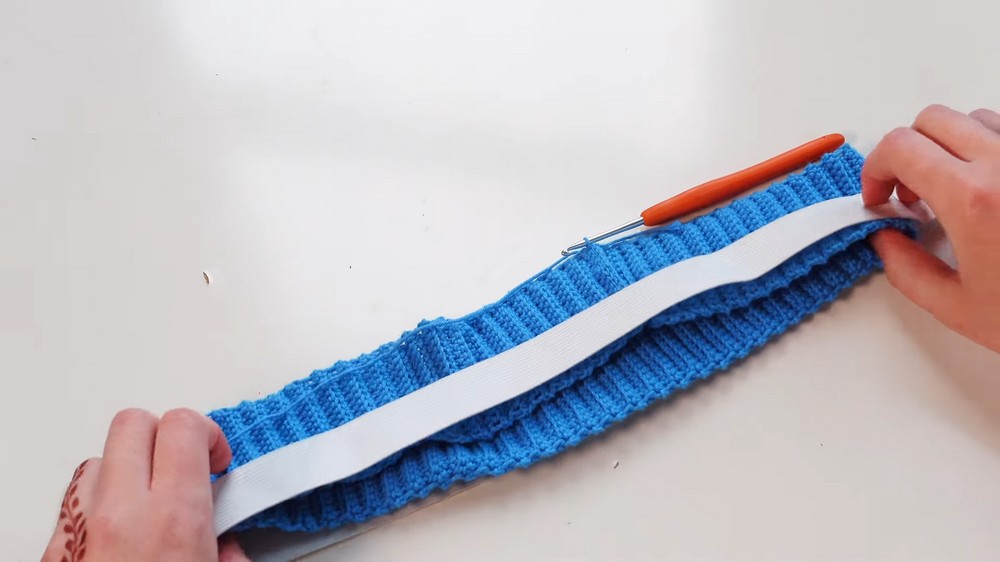
Step 1: Waistband
- Create the Waistband:
- Start with a foundation chain of at least 17 chains (this will create a 16-half ribbed waistband when folded). Adjust for preferred width.
- Row 1: Single crochet across. Once at the end, chain 1 and turn.
- Row 2 (Ribbed Stitch):
- First stitch: Single crochet through both loops.
- Remaining stitches: Single crochet into the back loop only for a ribbed texture.
- Last stitch: Single crochet through both loops.
- Chain 1, turn.
- Repeat until the waistband reaches the measurement of the largest part of your lower body (not just your waist, so the shorts can be pulled up).
- Join the Band:
- Slip stitch the first row of the waistband to the last row to create a loop.
- Insert Elastic:
- Cut elastic to your waist measurement (slightly stretched).
- Stitch the ends of the elastic together to form a loop.
- Fold the waistband over the elastic and single crochet to encase it fully.
Step 2: Main Body of the Shorts
- Attach Yarn:
- For stripes, attach your first color to the waistband loop using a slip knot.
- Secure firmly.
- First Round: Half double crochet (HDC) into each row of ribbing around the waistband. Use stitch counts relative to your ribbing rows. Slip stitch to close the round, chain (1 or 2), and turn.
- Subsequent Rounds:
- Continue with two rows of each color for stripes (or single color if desired).
- Each round: Half double crochet, slip stitch to complete, chain up, and turn.
- Optional Increases for the Hips:
- Add increases where needed for shaping (e.g., 2 HDCs in one stitch for the back side once every two rows).
- Stop increasing as soon as the shorts fit comfortably, maintaining the overall circumference.
- Continue Adding Rounds until you reach the crotch length. Measure and adjust by trying on frequently.
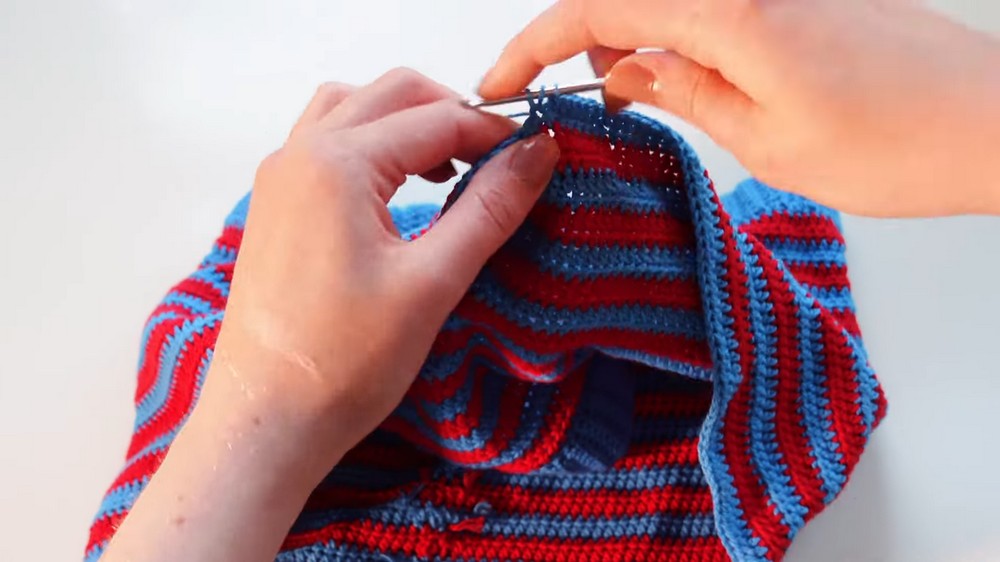
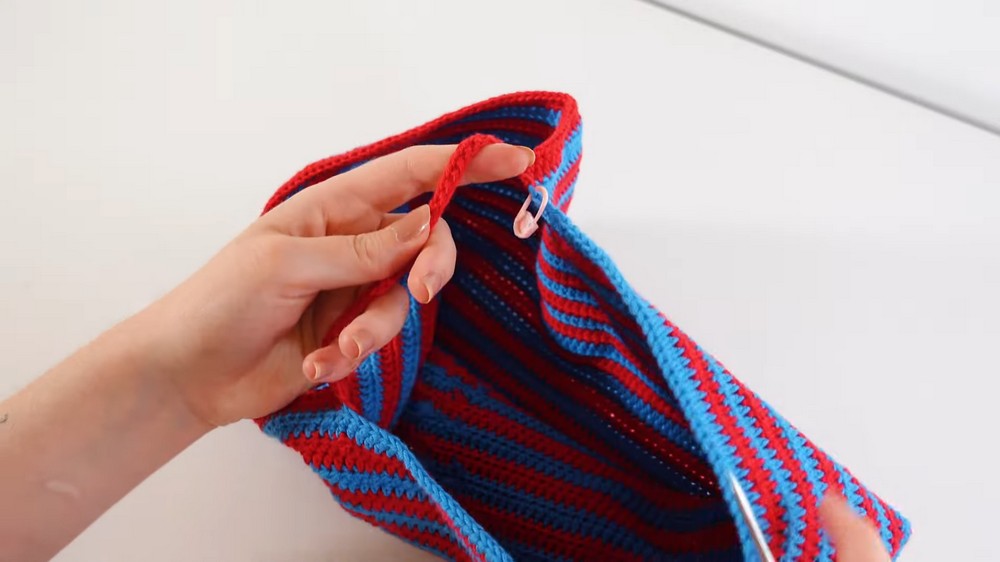
Step 3: Crotch
- Divide for Two Legs:
- Place a stitch marker halfway around the shorts (opposite the back seam).
- Half double crochet from the back seam to the marker.
- Create the Crotch Bridge:
- At the marker, chain 25-45 stitches based on your measured crotch length or fit preference (28 is a good reference).
- Slip stitch the chain to the stitch at the back seam to form the bridge.
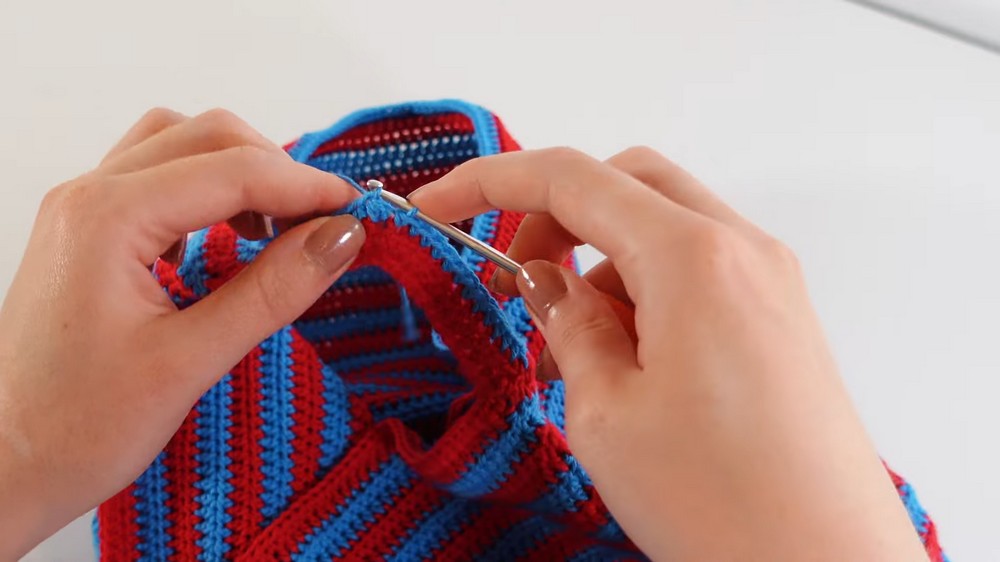
- Crocheting Down the Crotch Chain:
- Turn the shorts, and half double crochet along the chain stitches. Verify stitch count.
- Continue HDC along the body until you return to the starting point.
- Finish the round as normal (slip stitch, chain, turn).
- Repeat for the Second Leg Hole:
- Attach yarn to the unworked half (opposite side).
- Crochet similar rows, ensuring stitches match evenly.
- Proceed until you’ve created a similar crotch bridge with no gaps.
Step 4: Leg Holes
- Create the Legs:
- Attach yarn (preferably in the middle of the crotch for neater seams).
- Half double crochet around the leg hole.
- Use the same striped color pattern (two rows per color or single block color).
- Adjust Length:
- Add as many rounds as needed for your preferred leg length (shorter or longer).
- Optional Adjustments:
- For flared shorts: Add increases as needed while crocheting the leg holes.
- For cinched shorts: Use decreases around the leg area.
- Repeat for the second leg.
Step 5: Finishing Touches
- Fasten Off:
- When finished with the shorts, cut the yarn on each leg and pull through to secure.
- Weave in Loose Ends:
- Use a tapestry needle to weave in all remaining yarn ends neatly.
Notes:
- Customization:
- Adjust rise, leg length, and waist width for any look you prefer.
- For high rise, add more rows to the body before separating for legs.
- Experiment with color combinations and stripe thickness.
- Fit Checks: Try on the shorts frequently during creation to ensure the perfect fit.