Bring a fresh burst of summer vibes to your wardrobe with a crochet top that's equal parts fun and stylish. Imagine a piece that's not just clothing but a reflection of sunny beach days and tropical charm. Perfect for warm weather, this handmade design blends a sense of lightheartedness with an effortlessly chic look, offering a standout addition to your seasonal collection.

Crochet Summer Top Pattern
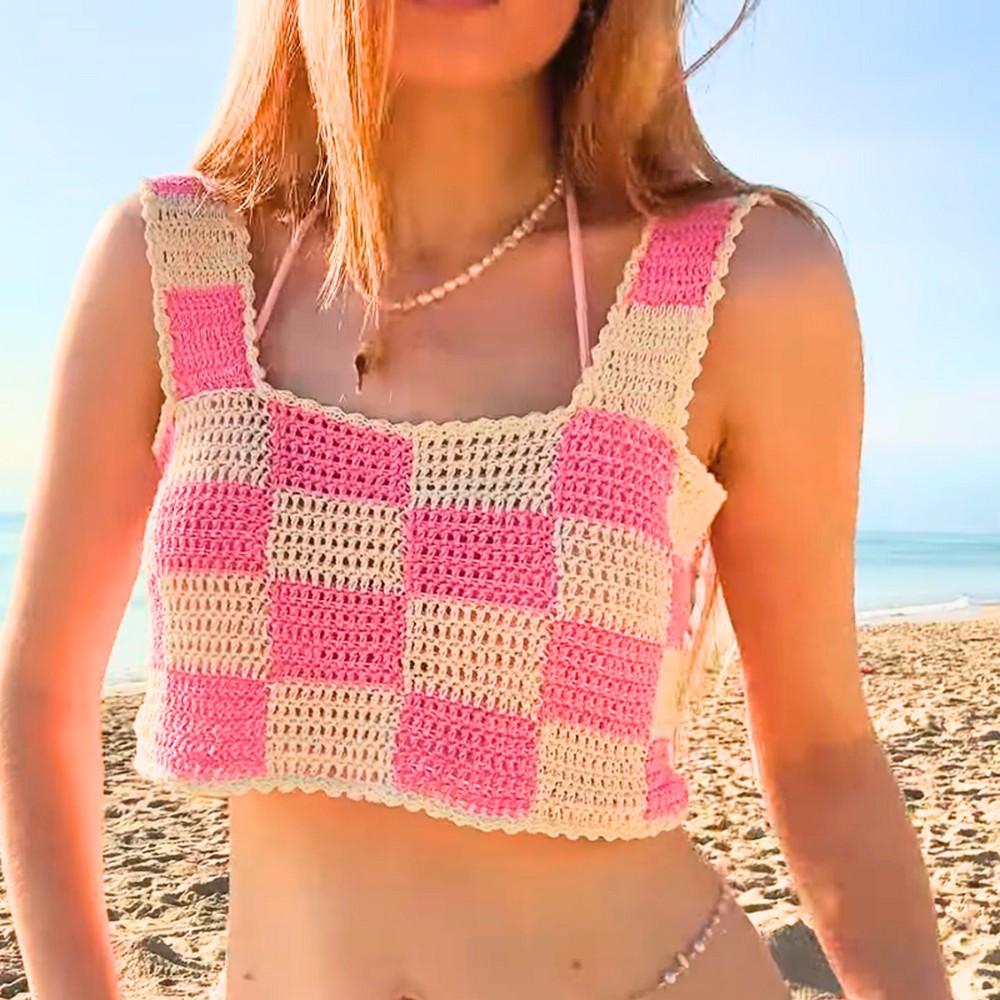
This checker-pattern crochet top is crafted with a mix of soft pink and creamy yellow shades, making it both eye-catching and timeless. Its adaptability allows you to customize the size, ensuring a comfortable and flattering fit for anyone. The alternating color blocks and simple-to-follow construction make it beginner-friendly, yet it produces a polished, fashionable result. Pair this piece with your favorite shorts or a breezy skirt, and step into summer with a handmade creation that’s brimming with personality.
Credit WONDER NETTING
Materials & Tools Needed
- Yarn: ~135 g of 100% fine cotton yarn
- ~65 g pink
- ~70 g yellow (a creamy shade)
- Crochet hook: 2.5 mm
- Other tools:
- Scissors
- Sewing needle
Pattern Abbreviations & Terminology
- st(s): Stitch(es)
- ch: Chain
- sl st: Slip stitch
- dc: Double crochet
- beg ch-3: Beginning chain of 3 (counts as 1 double crochet)
Terminology: US Crochet Terms
Step-by-Step Instructions
Foundation: Create the Base
- Determine the number of starting chains:
- For size XS/S with 12 squares (bust circumference: ~83–84 cm), start with 144 chains.
- If making a larger top, add more squares.
- For each additional square, add 12 stitches (e.g., 12 squares = 144, 14 squares = 168, and so on).
- The starting chain length should evenly wrap around the chest with a loose fit.
- Start the chain:
- Create a slip knot and crochet 144 chain stitches (or the required multiple of 12 for your size).
- Ensure the chain is not twisted, then join it into a round using a sl st into the first chain stitch.

Round 1: Create Checkerboard Base
- Starting the first dc group:
- Ch 3 (counts as the first dc). Crochet 11 dc into the next 11 chains (total = 12 dc for the first "square").
- Color change for the next square:
- For the 12th dc of the first square, leave two loops on the hook and pull through with the new color.
- Crochet the next color section:
- Using the new color (e.g., pink), work 12 dc into the next 12 chain stitches.
- Carry the previous color yarn loosely along the back of your work to crochet over it (this will avoid cutting and reattaching yarn).
- Repeat alternating squares:
- Continue alternating colors every 12 dc stitches (e.g., yellow, pink, yellow, pink, etc.) until you’ve finished one round.
- Make sure to maintain an even tension between the carried yarns to avoid puckering.
- Join the round:
- After completing the last (12th) square, finish the last dc with the starting color and join to the 3rd chain of the beg ch-3 using a sl st.

Rounds 2–5: Build the First Layer of Squares
- Ch 3 (counts as the first dc of the new round).
- Work 11 dc of the current square in the same color, carrying the second color along the back of your work.
- At the 12th dc, change to the other color (follow the same color-changing steps as in Round 1).
- Repeat the alternation of colors every 12 stitches for the entire round.
- At the end of each round, join to the beg ch-3 with a sl st.
Tip: Each square is 5 rows tall, so crochet 5 total rounds in the same color order.
Rounds 6–20: Switch the Color Order
- After completing 5 rows, switch the placement of the squares. For example:
- Yellow squares will now be on top of pink ones, and pink squares will be on top of yellow ones.
- To switch:
- At the end of the 5th row, do not switch colors at the final dc. Instead, finish with the same color and continue the next round.
- Begin Row 6 with this new color order.
- Continue alternating color placement every 5 rounds and work until the tube is 20 rows tall (4 squares in height).
- Once done, fasten off the yarn after the last round.

Adding Straps
- Determine strap placement:
- Measure and mark two squares under each armhole, leaving them unworked (these will serve as the armholes).
- Straps will be attached at the front and back over appropriate squares.
- Start the first strap:
- Attach the pink yarn at the top corner of a square at the front.
- Ch 3 (counts as the first dc), then work 11 dc in the same square (12 dc total).
- Build the strap:
- Ch 3, turn your work, and start from the 2nd dc. Work 12 dc across the row.
- Repeat until the strap is 5 rows tall, then switch to yellow yarn for the next square.
- Alternate square colors:
- Follow the same 5-row pattern for each square on the strap, changing colors as before.
- Make as many squares as needed to reach your desired length.
- Attach the strap:
- Skip two squares on the back and sew the strap securely to the edge of the corresponding square.
- Weave in all loose ends.
- Repeat for the second strap:
- Work the second strap in the same manner, ensuring symmetry.

Finishing Touches: Add Edging
- Start the edging at the back:
- Attach yellow yarn to the edge of one strap.
- Edging pattern:
- Insert the hook into the center of the next stitch. Work the following combo:
- Single crochet (sc), double crochet (dc), sc (all into the same space).
- Skip the next stitch and repeat the combo (sc, dc, sc) in the following stitch.
- Insert the hook into the center of the next stitch. Work the following combo:
- Continue edging:
- Use the same pattern along the edges of the straps, neckline, back, and bottom of the top.
- For the straps, work the combo into the middle of each row.
- Finishing off:
- Once the edging is complete, join to the starting stitch with a sl st, fasten off, and weave in all loose ends.
Final Notes
- The finished top will have a relaxed, handmade feel, perfect for summer wear.
- Adjust the number of starting squares or strap length to customize for different sizes.