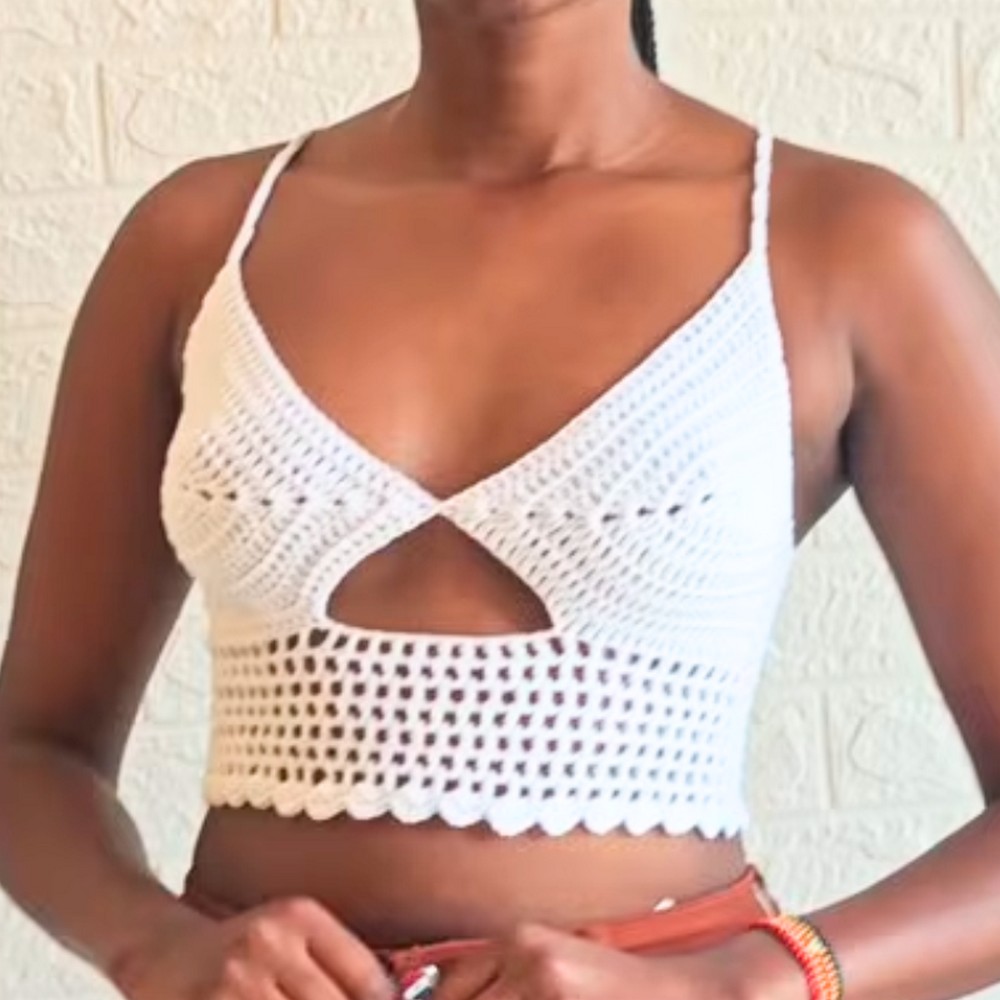
Transform your wardrobe with a stunning crochet mesh bralette that blends intricate design with effortless charm. This pattern isn’t just clothing—it’s a piece of wearable art. Whether it’s layered for casual outings or styled for festivals, this design is sure to turn heads. Perfect for those who crave a balance of comfort and creativity, this bralette is the ultimate expression of individuality.

Crochet Mesh Bralette
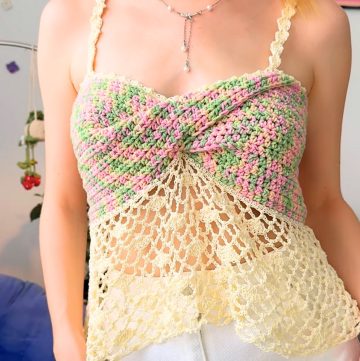
The crochet mesh bralette stands out through its airy texture and elegant structure. Designed with breathable, lightweight panels, it provides both style and comfort. The open mesh design showcases modern sophistication, while the pattern’s versatility allows you to experiment with various colors and yarns to create a piece that matches your personality. Blending timeless crochet techniques with a fresh aesthetic, this bralette is ideal for summer days, special occasions, or adding a touch of flair to any outfit.
Credit Shyler crochets
Materials & Tools Needed
- Yarn: Flores 6-ply yarn, 50g (approximately 150 yards). Use 1 ball for small sizes or 2 balls for larger sizes.
- Hook: 3.5 mm crochet hook.
- Other tools:
- Scissors
- Measuring tape
- Stitch markers (optional)
Pattern Abbreviations & Terminology
- ch: Chain
- dc: Double crochet
- ch-sp: Chain space
- sl st: Slip stitch
- sc: Single crochet
- rnd: Round
- st: Stitch
- rep: Repeat
- RS: Right Side
- WS: Wrong Side
Key Notes
- This pattern uses US crochet terminology.
- Adjust the starting chain length, rows, and measurements for a custom fit.
- Always weave in ends securely on the wrong side for a clean finish.
- Measurements for different sizes (e.g., number of rows and skipped stitches) are provided in the pattern recommendations.
Step-by-Step Instructions
Bra Cups
- Start with a Slip Knot:
- Create a slip knot and insert the hook.
- Foundation Chain:
- Make a chain long enough to cover the distance between the center of your chest to the center of your breast. (For size small, work 16 chains.)
- For other sizes, please refer to the measurements from the video.
- Row 1:
- Skip the first 3 ch (counts as first dc).
- Work 1 dc into the 4th chain from the hook.
- Continue placing 1 dc into each chain until you have one chain left.
- In the last chain, work:
- 3 dc, ch 2, and 3 dc (creates the center point of the cup).
- Begin working on the opposite side of the foundation chain:
- Place 1 dc in each chain, weaving in the yarn tail as you go.
- Ensure to work 1 dc into the top of the starting chain (chain-3) at the end of the row.
- Total stitches: varies with size (16 chains for size small).
- Row 2-8 (repeat for more coverage or bigger cup sizes):
- Ch 3, turn (counts as first dc).
- Work 1 dc in each stitch until you reach the chain-2 space (center of the U-shaped cup).
- In the chain-2 space, work:
- 2 dc, ch 2, 2 dc.
- Continue placing 1 dc in each stitch until the end of the row.
- Repeat this row until you have 8 rows (for size small).
- Adjust row counts based on your personal fit and desired coverage.
- Final Notes for the Cups:
- Lay the cups over your chest to ensure they cover the bust adequately.
- Larger sizes may require more rows or chain stitches for the foundation.

Mesh Panel for Side Extensions
- Horizontal Measurement:
- Measure your full bust circumference (e.g., 32 inches for a size small).
- Subtract 4 inches for stretch adjustment (e.g., 32 - 4 = 28 inches).
- Divide by 2 (e.g., 28 ÷ 2 = 14 inches).
- Measure the current width of the cup (e.g., 8 inches).
- Subtract the cup width from the halved circumference (e.g., 14 - 8 = 6 inches).
- This 6-inch difference determines the width of the side panel.
- Begin the Mesh Extension:
- Ch 4 (counts as dc + ch-1).
- Work 1 dc in the space between the rows on the side edge of the cup.
- Ch 1, skip the next row edge, and dc in the next space.
- Repeat this across the side of the cup until you reach the center of the cup back edge.
- Ch 4, turn your work, and repeat.
- Continue the Mesh Pattern:
- Repeat the mesh row until the panel reaches your calculated width (e.g., 6 inches).
- End with a total of 12 rows of mesh (or adjust according to your size).
- Fasten Off:
- After completing the side, ch 1, cut yarn, and weave in the ends.
- Repeat for the Second Cup:
- Create a second identical bra cup with mesh panel.

Joining the Cups
- Align the Cups:
- Place the two cups flat, ensuring the pointed edges are touching at the center.
- Use stitch markers to pin them into place.
- Secure the Center:
- Take a small strand of yarn and double-knot the chain-2 spaces of both cups together at their pointed edges.
- Weave in the ends for a clean finish.
Create a Flat Base Using a Chain
- Skip Stitches on the Cups:
- Using stitch markers, skip 12 stitches on each side of the cup's bottom edge (adjust for larger sizes).
- Attach the Chain:
- Join yarn into the stitch immediately following the skipped section.
- Make 20 chains (or adjust based on size).
- Slip stitch into the skipped stitch on the opposite cup’s edge to create a flat base.
- Fasten Off:
- Ch 1, cut yarn, and weave in the ends.

Adding Mesh Back Band
- Attach Yarn to One Corner:
- Starting at the bottom corner of one cup, attach yarn and start the mesh pattern:
- Ch 4, dc in the next dc, ch 1, repeat.
- Continue the mesh pattern across the bottom of the cups and the flat chain connecting them.
- Starting at the bottom corner of one cup, attach yarn and start the mesh pattern:
- Repeat Mesh Rows:
- Repeat the mesh pattern for approximately 7 rows (adjust for desired length).
Scallop Edging
- Attach Yarn:
- In the first ch-sp, attach yarn with a slip stitch.
- Create Scallop:
- Work 1 sc, ch 3, 3 dc in the same ch-sp.
- Skip the next ch-sp and repeat stitching into the following space.
- Continue Around:
- Add scallops along the bottom edge of the top.
- Fasten off and weave in ends.

Straps
- Attach Yarn:
- Attach yarn to the top of a bra cup.
- Create Strap:
- Work a chain long enough to comfortably tie at the back neck (e.g., 50 chains).
- Repeat Steps:
- Repeat for both cups.
Finishing
- Lace-Up Back:
- Thread the straps through the mesh sections along the back to achieve an X-lace pattern.
- Final Touches:
- Adjust, tighten, and tie at the back for a secure fit.