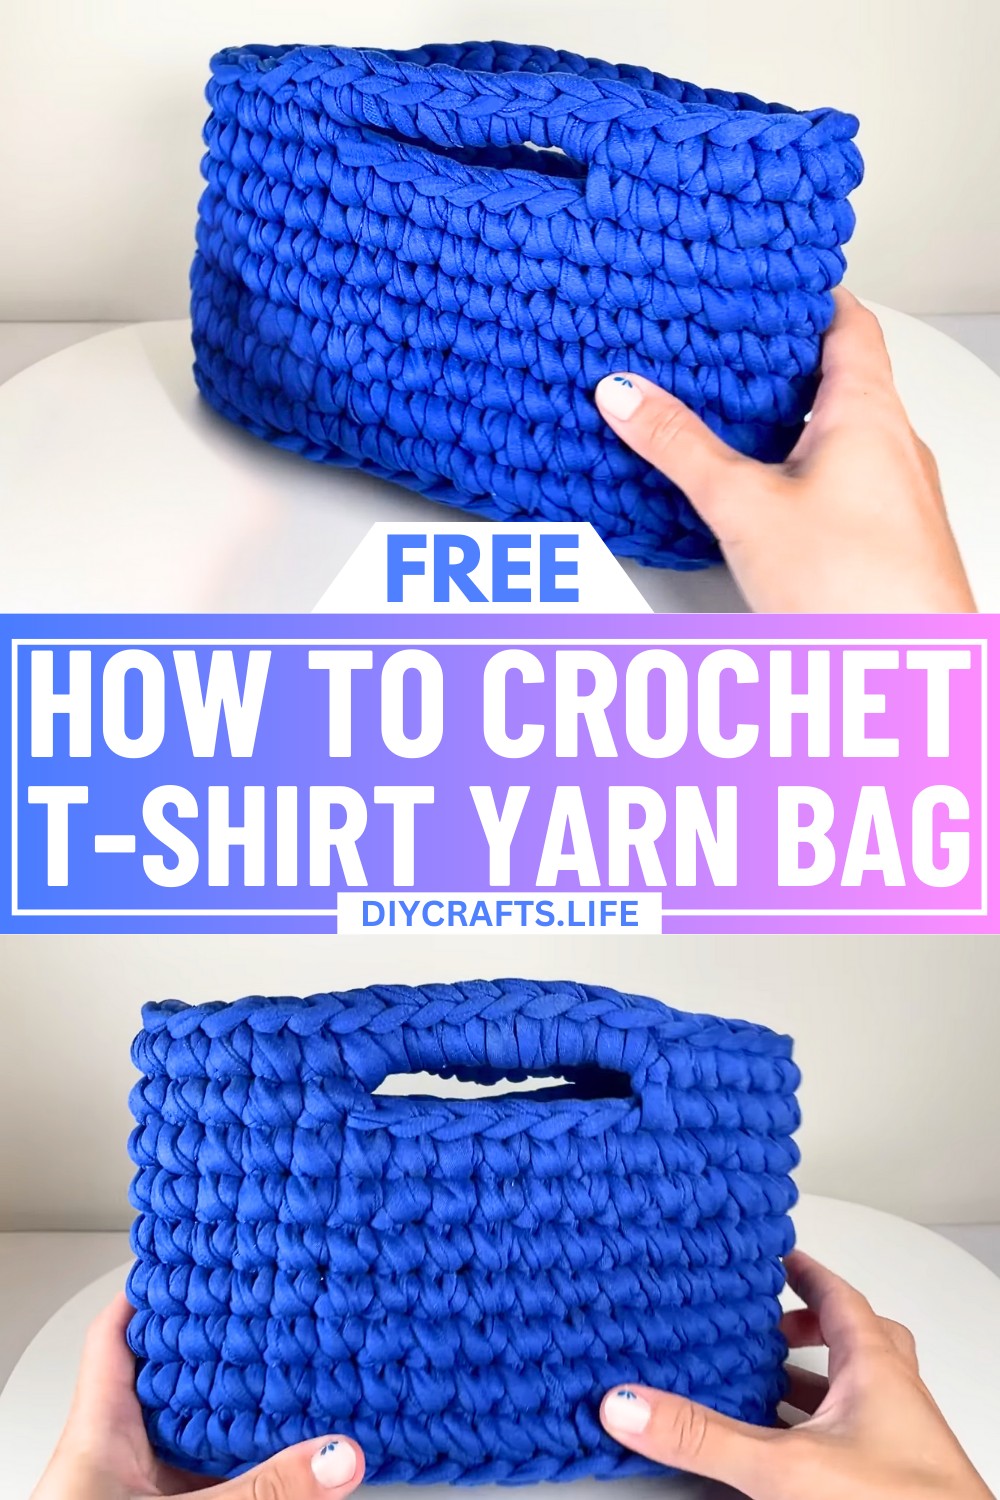
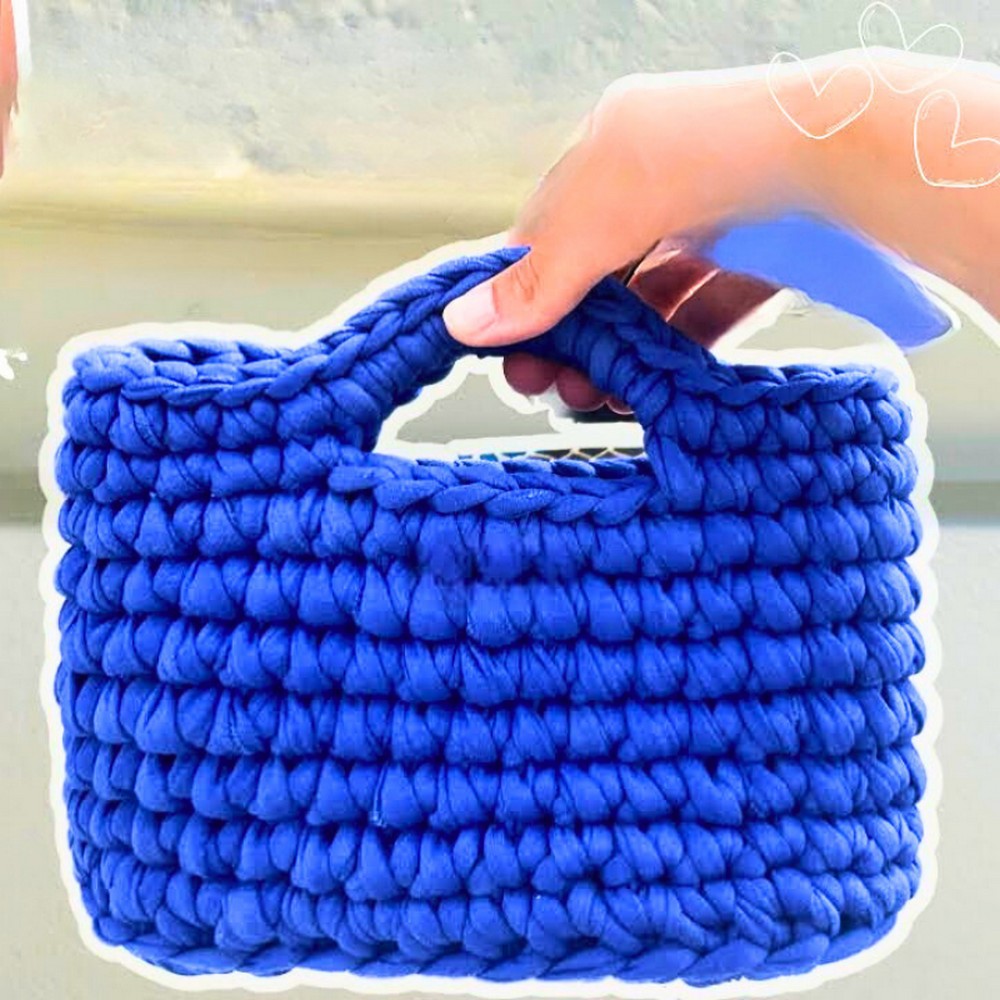
Transform simple T-shirt yarn into a stunning crochet bag that blends functionality and charm. With every stitch, you’ll create more than just a bag; you’ll craft a stylish and personal statement piece that turns heads wherever you go. Whether for casual outings or adding flair to your everyday look, this design redefines what it means to carry your essentials.
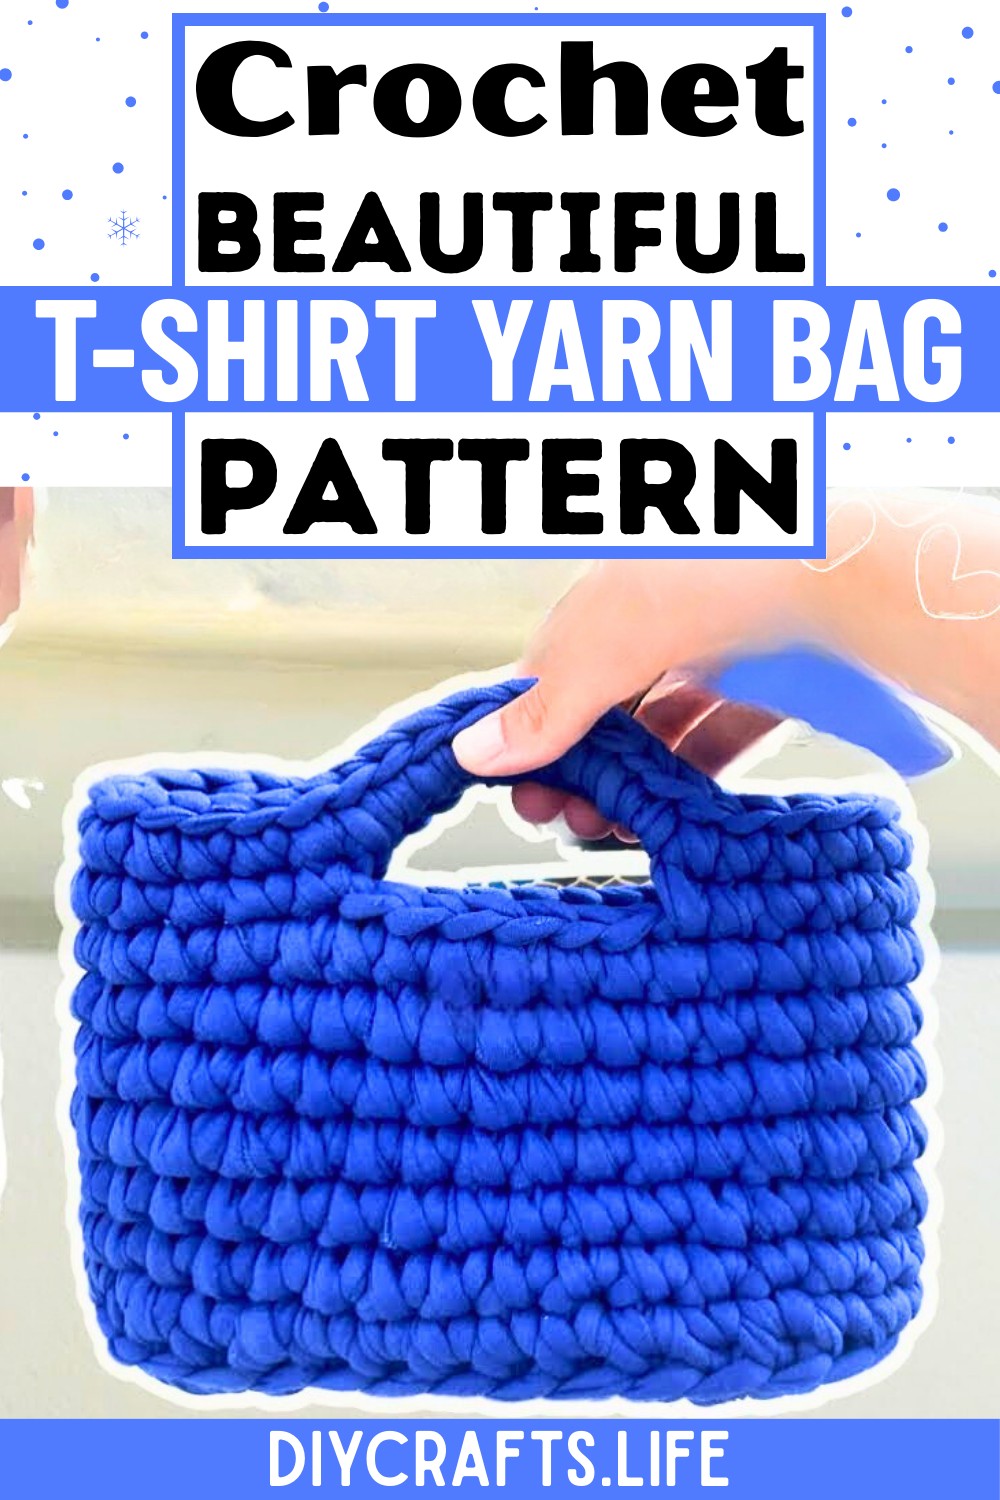
This crochet bag pattern stands out with its modern yet timeless design made using T-shirt yarn. Its sturdy texture and soft finish make it durable and stylish. The structured design allows for creative adjustments, such as adding bold colors, playful handles, or accents to match your personal style. Perfect for beginners or seasoned crafters, it’s a simple yet impactful project that combines art and functionality seamlessly.
Credit madebymara
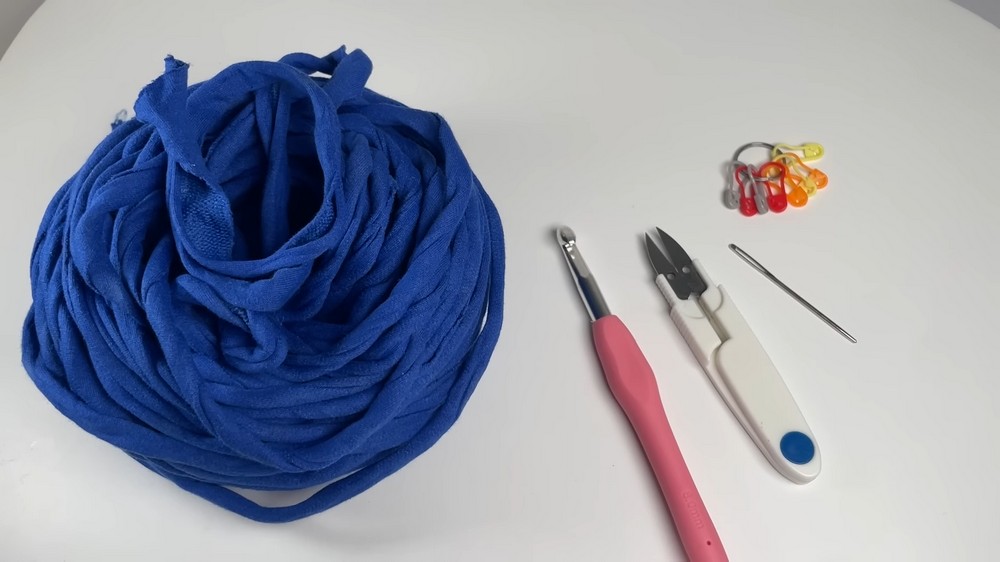
Required Materials
- T-shirt Yarn: The thickness of the yarn affects the bag size. In the video, a yarn approximately 3 cm wide was used, but you can choose based on the style and size you desire.
- Crochet Hook: A size 8 mm hook is recommended. Larger hooks can create a bigger and looser stitch.
- Scissors: To cut the yarn as needed.
- Yarn Needle: Essential for weaving in ends and stitching closures at the end of the project.
- Stitch Markers: Important for marking critical stitches during increases and pattern tracking.
Important Notes
- Yarn Size and Hook Relationship: The yarn's thickness and the crochet hook size will impact the bag's size and the tightness of the stitches.
- Crochet Tension: Maintain a light hand when chaining and working stitches. Tight stitches can make working subsequent rows difficult.
- Continuous Rounds: The bag is constructed by crocheting in continuous rounds without slip stitches for seamless stitching.
- Customization: The size of the base, height, and handle length is customizable. You can make adjustments to achieve your desired bag size.
- Mark Your Stitches: Always mark critical stitches during increases and when starting new rows to avoid losing count.
Detailed Step-by-Step Instructions
Base of the Bag
- Start with Chains:
- Create a slip knot on your hook.
- Chain 11 stitches (or more for a longer base width, depending on your desired bag size).
- Ensure the chains are loose enough to work into them easily.
- First Row:
- Flip the chain to reveal the back bumps.
- Start single crocheting into the second bump from the hook.
- Place 3 single crochets (SC) in the first stitch for a smooth curve, marking the first and third stitches with stitch markers.
- Single crochet into the next bumps until the last bump.
- At the last bump, place 3 single crochets, marking the first and last of these 3 stitches for later oval shaping.
- Work Around the Base:
- Continue placing single crochets into the opposite side of the foundation chain (forming an oval base).
- Connect the round using a slip stitch and chain 1 to start the next row.
Increasing the Oval Base
- Increase Rounds:
- For every new row, add stitches in oval ends to increase the base size:
- Row 2: Place 2 single crochets into each stitch in the oval corner (marked stitches), with single crochets along the sides.
- Row 3: Use the pattern 2 SC, 1 SC, 2 SC, 1 SC in oval ends.
- For higher rounds, continue this increasing pattern, adding more single crochets between the increases in oval corners.
- For every new row, add stitches in oval ends to increase the base size:
- Finish Increasing:
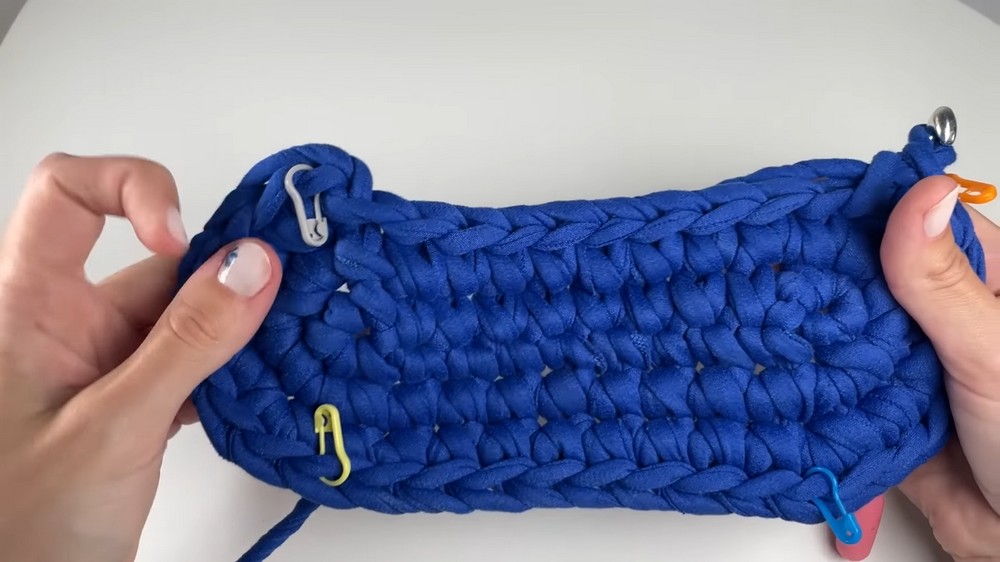
- For the tutorial bag, the base row achieved 34 total stitches.
- Once the base is complete and the desired size is achieved, stop increasing.
Creating the Bag's Height
- Start Working Upwards:
- Switch to working in the back loops only for the first row after completing the base. This gives a clean edge to the base.
- Continue crocheting one SC in each stitch, without increasing, to build the bag's height.
- Work in continuous rounds (no slip stitch joins) for a seamless finish.
- Place a stitch marker at the first stitch of every round to keep track.
- Rows:
- Crochet several rows (e.g., 7 rows were made in the tutorial).
- Adjust the height based on your preference.
Adding the Handles
- Mark Handle Placement:
- Divide the finished row into segments to place handles:
- Example: 6 stitches for each handle and 11 stitches between handles (adjust based on total stitches and bag size).
- Use stitch markers to mark starting and ending points for handle openings.
- Divide the finished row into segments to place handles:
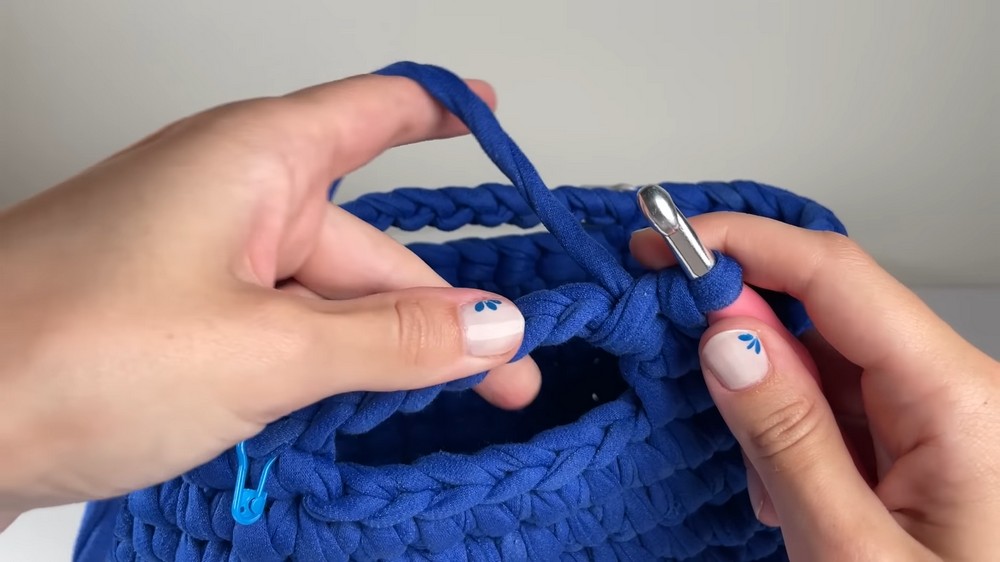
- Chain for Handles:
- At each marked handle section, chain the number of stitches required (e.g., 8 chains for the tutorial).
- Skip the corresponding stitches in between and rejoin the chain to the next marked stitch with a SC.
- Finish Handles:
- On the next round, crochet single crochets into each chain of the handles to secure them.
- Continue until the round is complete.
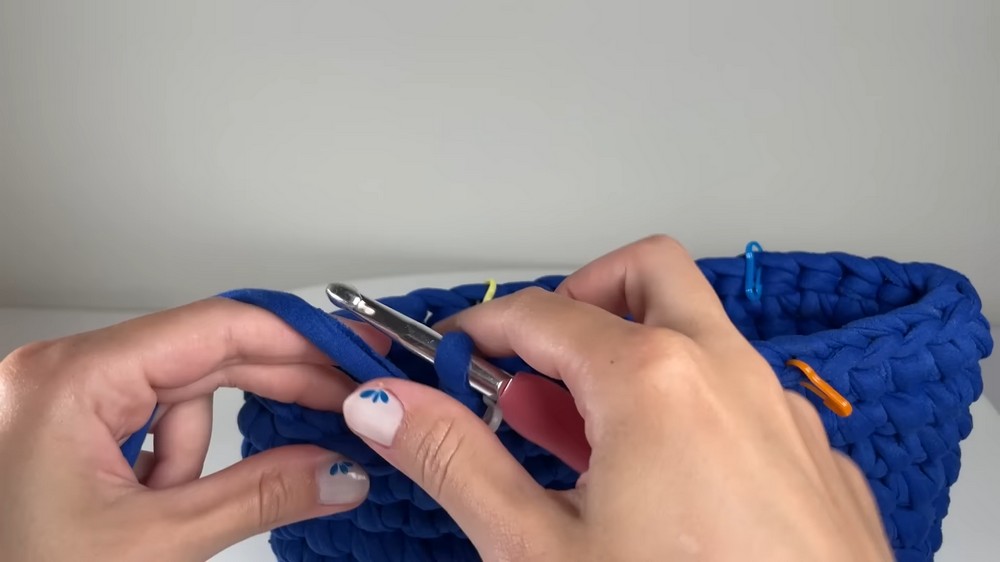
Finishing Touches
- Invisible Seam:
- After completing the last round, cut the yarn, leaving a tail.
- Use the invisible seam method to join the last stitch to the first stitch seamlessly. Pull the tail through the second stitch and back into the previous stitch's "V."
- Secure it tightly.
- Weave in Ends:
- Use a yarn needle to weave in any loose tails along the back of the work for a clean finish.
- Measurements:
- The finished bag in the video measures approximately 15 cm x 25 cm, but your size may vary based on your yarn, hook size, and tension.
Customization and Tips
- Adjust the number of chains in the base row for a wider or narrower bag.
- Increase or decrease the number of rows for bag height.
- Create longer or shorter handles by changing the number of chains.
- Experiment with different yarn colors or materials for unique designs.