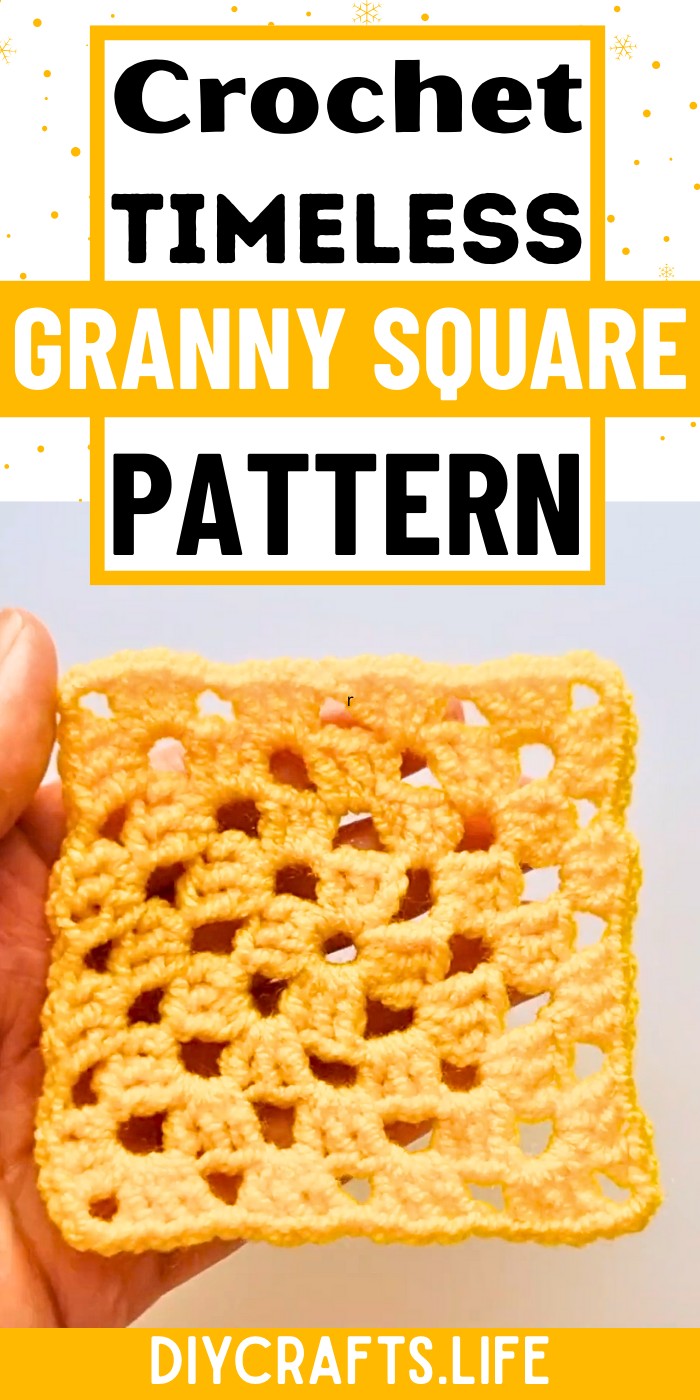
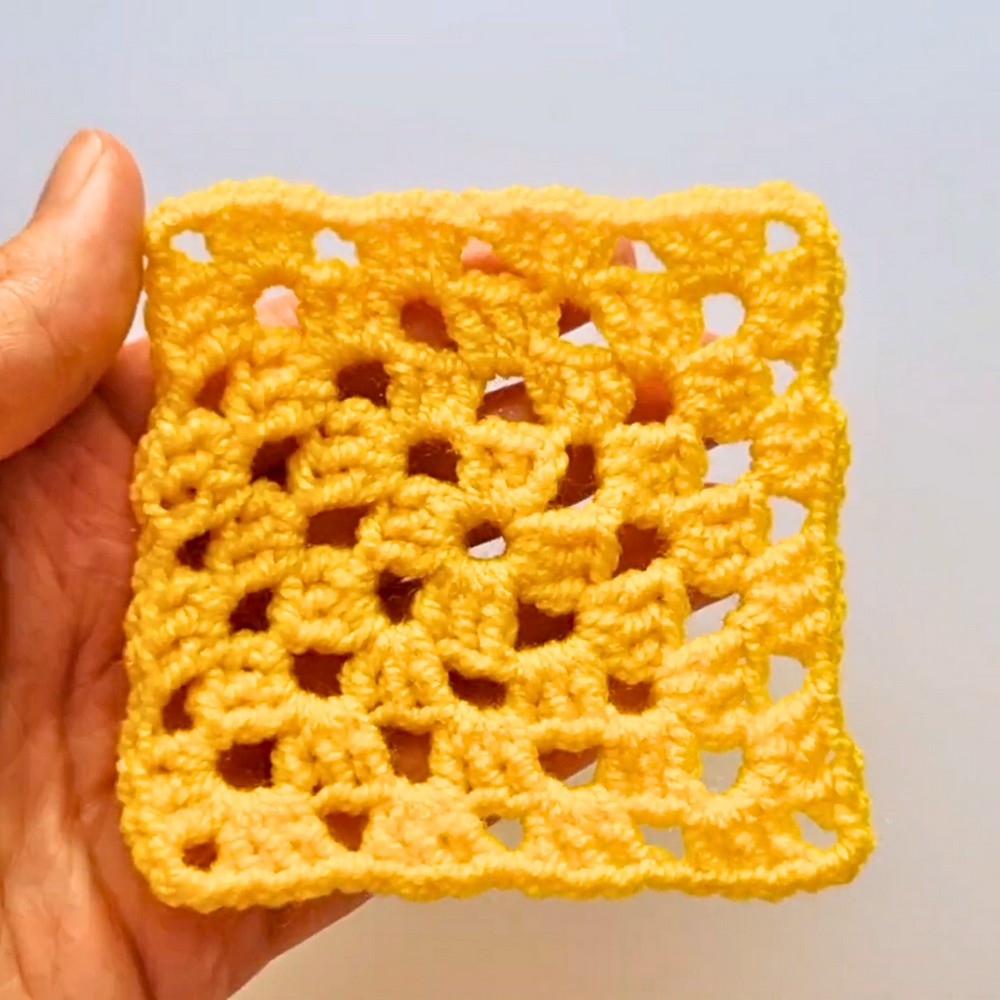
Transform a simple square into something extraordinary with this timeless crochet granny square design. Effortlessly blending simplicity and style, the granny square is a classic piece loved for its versatility and creative possibilities. Whether you're crafting a blanket, a bag, or a cozy throw, this easy-to-follow pattern creates endless opportunities for personal expression while adding handmade charm to your projects.
Crochet Granny Square
This granny square pattern stands out for its balanced structure and textured layering, achieved through neatly calculated stitches. With its timeless appeal, it serves as a foundation for both beginners and seasoned creators looking to experiment with colors and patterns. The adaptability of this design allows you to craft bold statement pieces or create soothing neutral tones, making it perfect for projects ranging from modern to classic. Build your vision square by square and create something meaningful.
Credit Furry Yarn
Materials & Tools Needed
- Yarn
- Medium-weight yarn (Worsted Weight #4) is ideal for beginners and works well for granny squares.
- You can use one solid color or multiple colors to create a more vibrant, layered design.
- Hook
- Use a 5.0 mm crochet hook for worsted-weight yarn. Adjust the hook size depending on your yarn weight and desired tension (e.g., smaller hooks for finer yarn or tighter stitches).
- Other Tools
- Scissors for cutting yarn.
- Tapestry needle for weaving ends neatly and securing finished rows.
Finished Size & Customization Ideas
- Approximate Finished Size:
- Each granny square is roughly 4–5 inches across, depending on the yarn and the number of rows completed.
- Customization Ideas:
- Adjusting Size:
- Add more rows to make larger squares for a blanket, pillow cover, or tapestry.
- Use finer yarn (e.g., fingering weight) and smaller hooks (e.g., 3.0 mm) for more delicate squares, or bulkier yarn for oversized results.
- Color Variations:
- Change colors at the start of each row for a colorful granny square. Alternate between light and dark shades for contrast or use gradient/ombre yarn for seamless transitions.
- Style Options:
- Use these squares for blankets, scarves, bags, or even clothing by sewing/joining them into larger pieces.
- Adjusting Size:
Pattern Abbreviations & Terminology
(Based on US Terminology)
- sl st = Slip stitch
- ch = Chain
- dc = Double crochet
- YO = Yarn over
- st(s) = Stitch(es)
- sp = Space
Step-by-Step Detailed Crochet Instructions
Foundation Round
- Start with a slip knot on your hook.
- Chain 6.
- Insert your hook into the first chain to form a ring and make a sl st.
Round 1
- Chain 3 (this counts as the first double crochet).
- Work 2 dc into the ring.
- Chain 3 (this forms your first corner).
- Work 3 dc into the ring.
- Chain 3.
- Repeat (3 dc → chain 3) twice more (a total of 4 clusters and 4 corners).
- Close the round by making a sl st into the top of the first chain-3.
- Fasten off if changing colors, or continue to Round 2 with the same yarn.
Round 2
- Attach new yarn if changing colors or continue with the existing yarn. Make a sl st into any corner chain space.
- Chain 3 to start.
- Work 2 dc into the same corner space.
- Chain 3 for the corner.
- In the same corner space, work 3 dc.
- Move to the next corner space:
- Work 3 dc → chain 3 → 3 dc.
- Repeat (3 dc → chain 3 → 3 dc) in each remaining corner space.
- At the end of the round, join with a sl st into the top of the first chain-3.
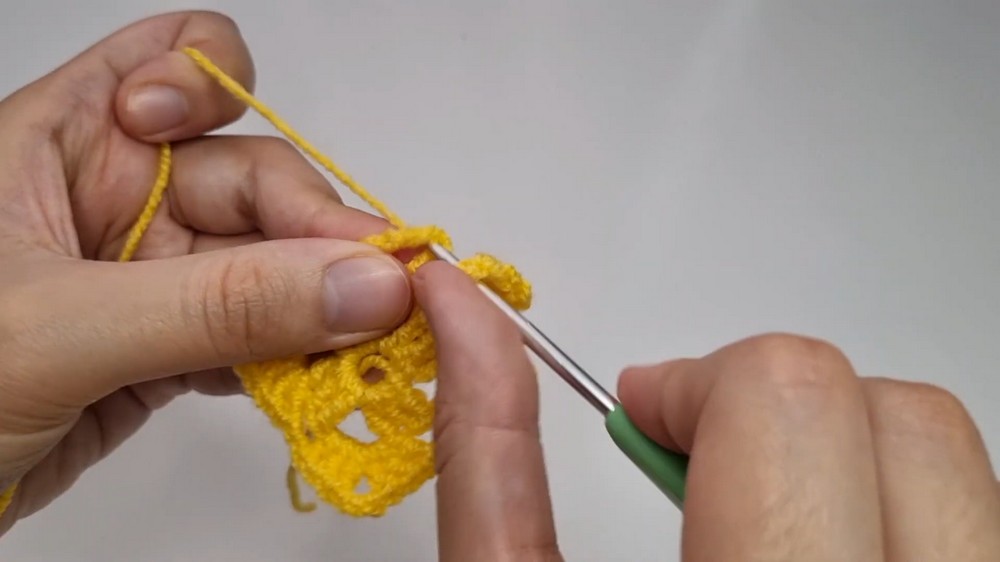
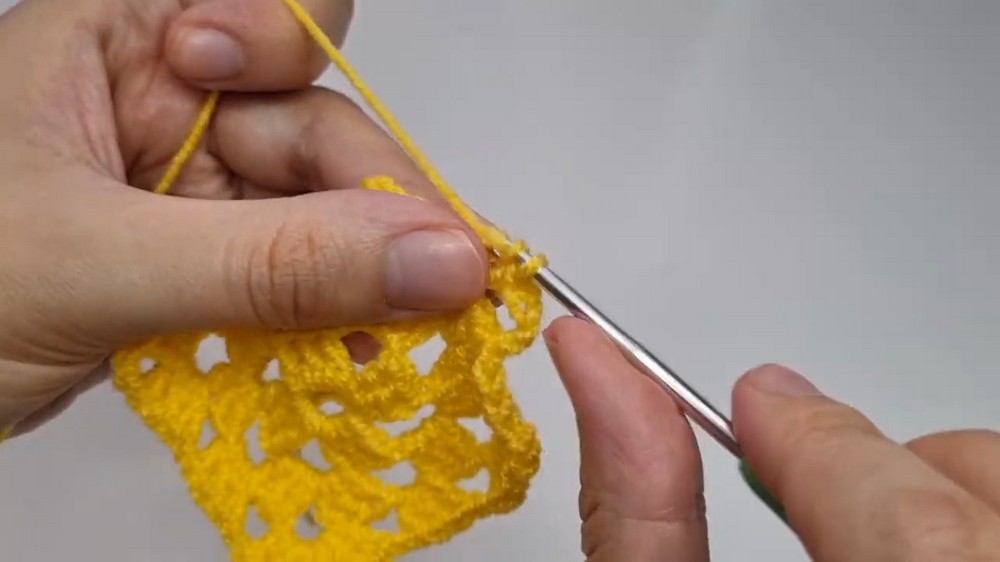
Round 3 (and Additional Rounds)
- Begin in any corner chain space with a sl st and chain 3 (counts as the first dc).
- Work 2 dc → chain 3 → 3 dc into the corner space.
- Work along the sides:
- In each space along the edge (between groups of dc), work 3 dc.
- Continue until you reach the next corner space.
- At each corner:
- Work 3 dc → chain 3 → 3 dc into the corner chain space.
- Continue following this pattern for each corner and side spaces around the square.
- At the end of the round, join with a sl st at the top of the first chain-3.
- Add More Rounds: Follow the same structure to enlarge the granny square. Build rows by repeating 3 dc clusters in spaces along the edges and corner increases with 3 dc → chain 3 → 3 dc.
- Finish and Fasten Off:
- Once the square reaches your desired size, cut the yarn, leaving a 6-inch tail. Pull the tail through the last loop and tighten to secure.
Finishing Techniques
- Weave in Loose Ends:
- Use a tapestry needle to weave yarn tails neatly into the back of the stitches. Trim excess yarn.
- Blocking:
- If your granny square is curling or uneven, lightly block by pinning it onto a foam board and steaming or dampening the yarn. Allow it to dry fully.
Additional Notes
- Joining Squares:
- If making a blanket or larger project, connect granny squares using slip stitches, single crochet, or whipstitch techniques for a seamless look.
- Experiment with Edges:
- Add decorative edges to your square for standalone projects such as potholders or wall art.
This granny square pattern is perfect for beginners and versatile for any project! Create one or combine many to design stunning handmade items. 🌸


