Create a beautiful, functional, and versatile Sunburst, also known as a Sunflower Granny Square. This crochet project adds a touch of charm and whimsy to any afghan, pillow, or home decor piece, making it a perfect addition to your crochet repertoire.
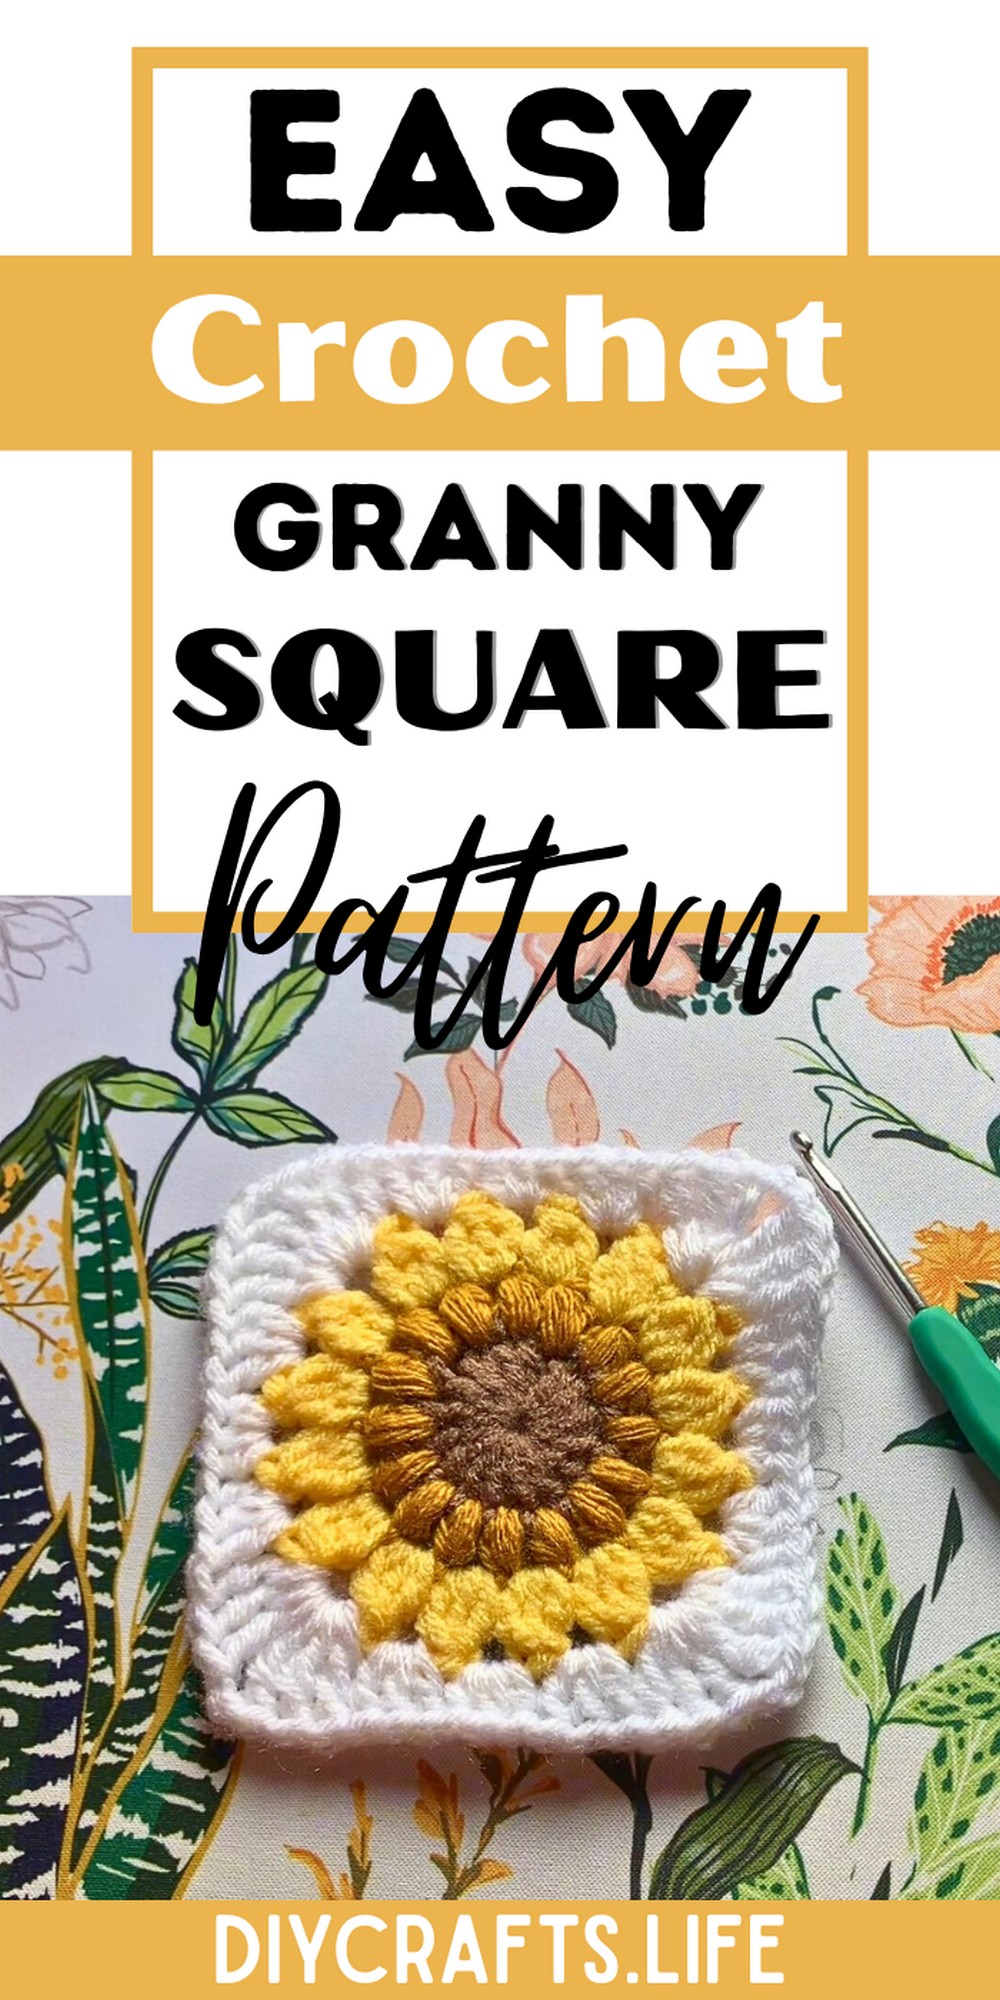
This granny square is not only eye-catching but also durable and versatile. Use it as a patch in blankets, throw pillows, or even as wall art. Its sturdy construction ensures long-lasting appeal while its vibrant design makes any project stand out.
Crochet Granny Square Pattern
Whether you’re a beginner or an experienced crocheter, crafting this Sunburst Granny Square is a fulfilling project. With easy-to-follow steps and customizability, it opens the door to endless creative possibilities, allowing you to experiment with colors and textures to make it uniquely yours.
Materials and Preparation
Required Materials:
- Yarn Types:
- Loops & Threads Yarn – Color Coffee
- Big Twist Yarn – Color Mustard
- Loops & Threads Yarn – Color Butter
- Red Heart Super Saver – Color White
- Hook Size: 4.5 mm crochet hook
- Additional Tools:
- Scissors (for cutting off your work)
- Yarn needle (optional, for weaving in ends)
Yarn Weight Recommendation:
- Medium-weight yarn (recommended for optimal results, but you can use any yarn size with the corresponding hook).
Abbreviations and Notes
Abbreviations Used in the Pattern:
- CH: Chain
- DC: Double Crochet
- HDC: Half Double Crochet
- TR: Triple (Treble) Crochet
- SL ST: Slip Stitch
- YO: Yarn Over
Tips Before Starting:
- Magic Ring Method: The tutorial uses a magic ring to start, which allows the center of your square to tighten as you work. If preferred, you can make a slip knot and chain 4-5, then join with a slip stitch to form a ring. This creates a slightly larger center.
- Changing Colors: This pattern uses multiple color changes, but you can simplify it by using a single color for all rounds.
- Keep Loose Tension: Especially when working puff and cluster stitches with multiple loops on the hook, loosen your tension to prevent difficulty.
- Pull Tight Between Rows: To keep the center of the square tight, occasionally pull the tail of the magic ring in between rows.
Gauge, Approximate Size, and Pattern Notes
Gauge:
- Exact gauge is not critical for this project. You can customize the square size by choosing different yarn weights and hook sizes.
Finished Dimensions:
- Approximately 5-6 inches square, depending on your tension and yarn type.
Special Techniques:
- Magic Ring: Used for a cleaner, adjustable center.
- Puff Stitch: Creates texture for the sunflower-like petals.
- Cluster Stitch: Used for added detail around the petals.

Step-by-Step Pattern
Round 1: Create the Center
- Start with a magic ring:
- Hold your yarn between your thumb and middle finger, wrap it around to create an "X," then pull the working yarn through to form a loop.
- CH 3: This acts as the first DC.
- Work 15 DC into the center of the ring:
- YO, insert hook into the ring, pull up a loop (3 loops on hook). YO, pull through 2 loops. YO, pull through the remaining 2 loops.
- Pull the tail of the magic ring tightly: This creates a smaller center circle.
- SL ST into the top of the CH 3 to join the round.

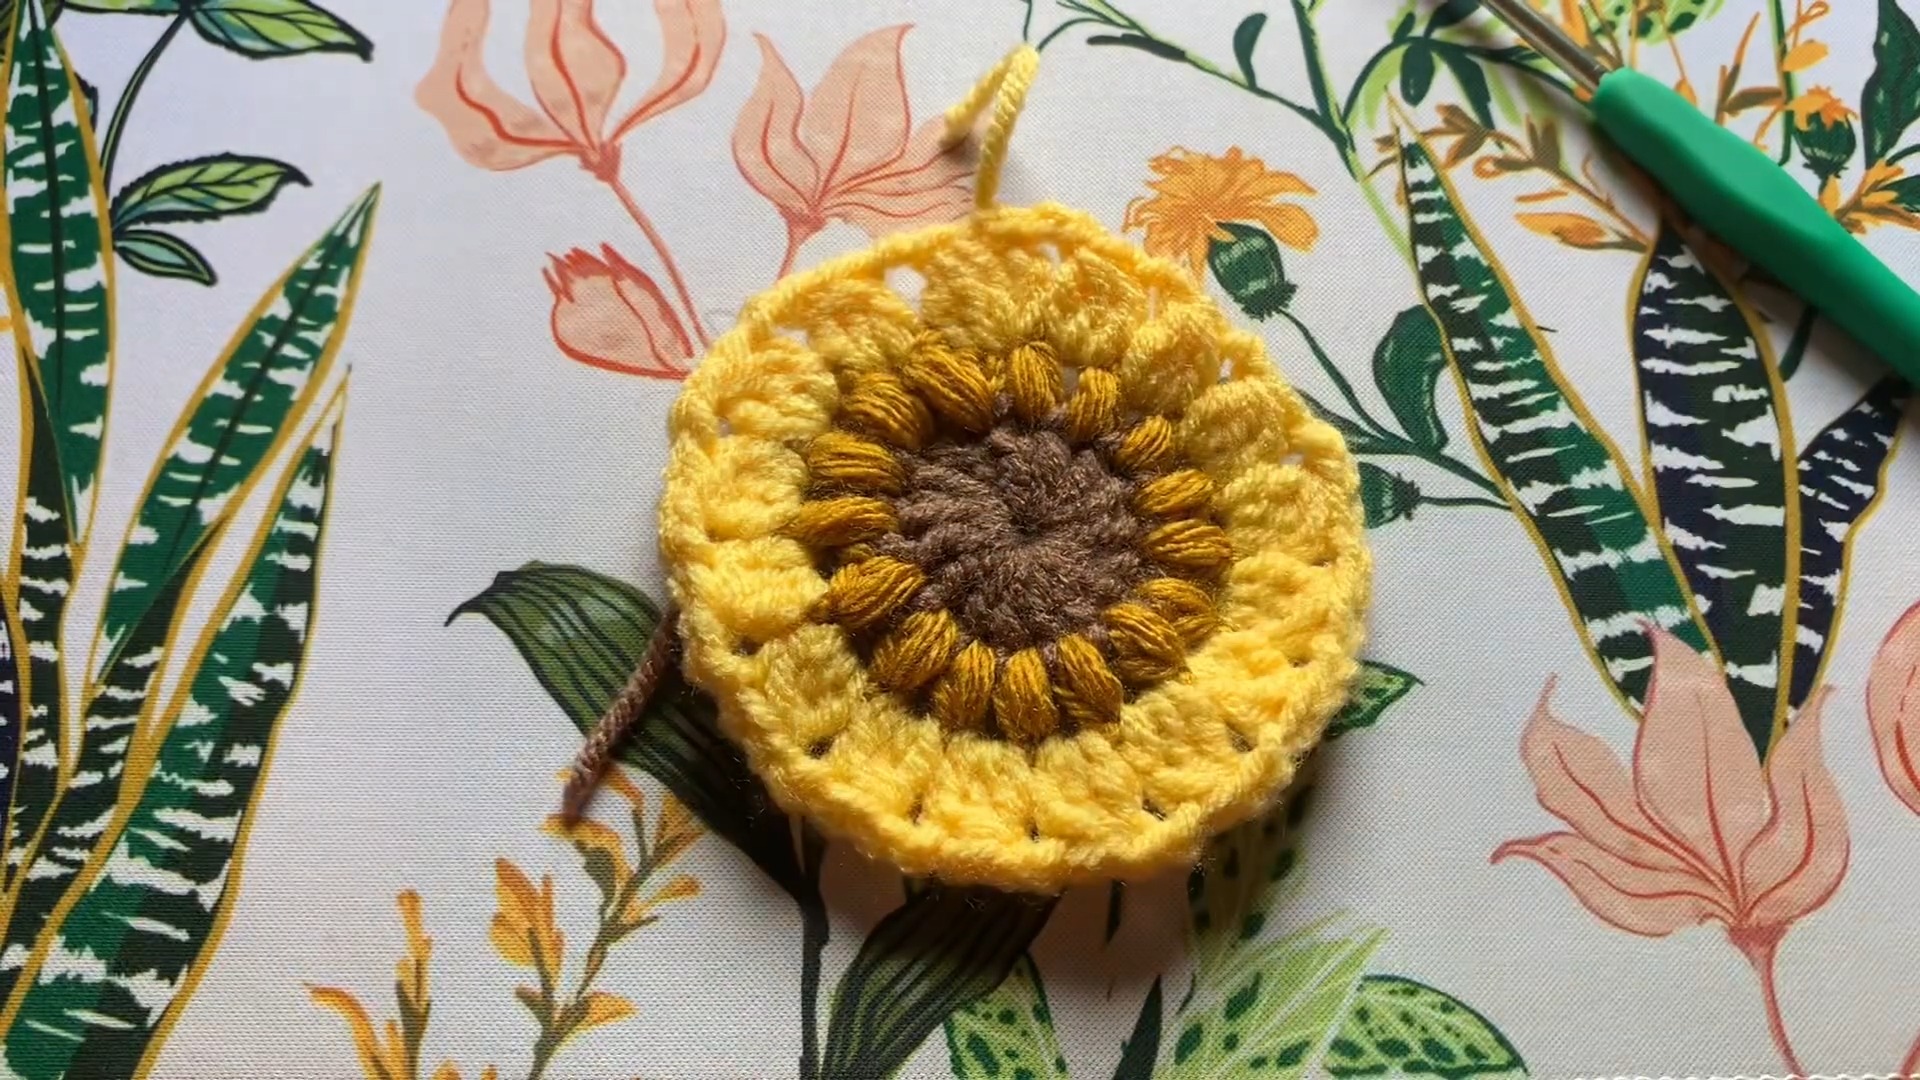
Round 2: The Puff Stitch Petals
- Attach new yarn color (if changing colors): Insert your hook into any DC below.
- Begin with a CH 2, then work 16 puff stitches into each DC.
- Puff Stitch:
- YO, insert hook into the stitch, pull up a loop (3 loops on hook).
- YO, insert hook, pull up another loop (5 loops on hook).
- YO, insert hook, pull up another loop (7 loops on hook).
- YO, pull through all 7 loops and CH 1 to close the puff.
- Puff Stitch:
- At the end of the round, SL ST into the top of the first puff stitch.
Round 3: The Cluster Stitches
- Attach a new yarn color (optional) in any space between puff stitches.
- CH 2, then work 16 cluster stitches between puff stitches:
- Cluster Stitch:
- YO, insert hook, pull up a loop (3 loops on hook). YO, pull through 2 loops.
- Repeat 2 more times (5 loops on hook total).
- YO, pull through all remaining loops.
- CH 2 to close the stitch.
- Cluster Stitch:
- SL ST into the first cluster stitch to finish the round.
Round 4: The Background (Square Formation)
- Attach your background color (optional) with a slip knot. CH 4 (counts as first TR).
- Work 2 TR into the same space, followed by 3 double crochets (DC) in the next space.
- Work 3 half double crochet (HDC) in the center/top space, then 3 DC in the next space.
- For corners, work 3 TR, CH 2, and 3 TR into the same space.
- Repeat the sequence around, ensuring corners are made with TR and CH 2.

Finishing Touches
- After completing the final round, Slip Stitch into the top of the first CH 4, then fasten off.
- Weave in all ends securely using a yarn needle:
- Make sure to tighten the magic ring tail for a clean center finish.
- If desired, block your square to straighten edges.
Optional Modifications
- Use fewer color changes for a simpler design.
- Create multiple squares and join them to form a blanket, cushion cover, or other projects.

Pattern Question
Question: Can I use different yarn sizes or hook sizes for this project?
Answer: Absolutely! While the tutorial uses medium weight yarn and a 4.5 mm crochet hook, you can experiment with different yarn weights and corresponding hook sizes for varied textures and sizes in your granny square.
Conclusion
Crocheting the Sunburst Granny Square is a delightful and rewarding project, perfect for adding a vibrant touch to your crochet creations. Its combination of beauty, functionality, and creative flexibility makes it a must-try for any crochet enthusiast.


