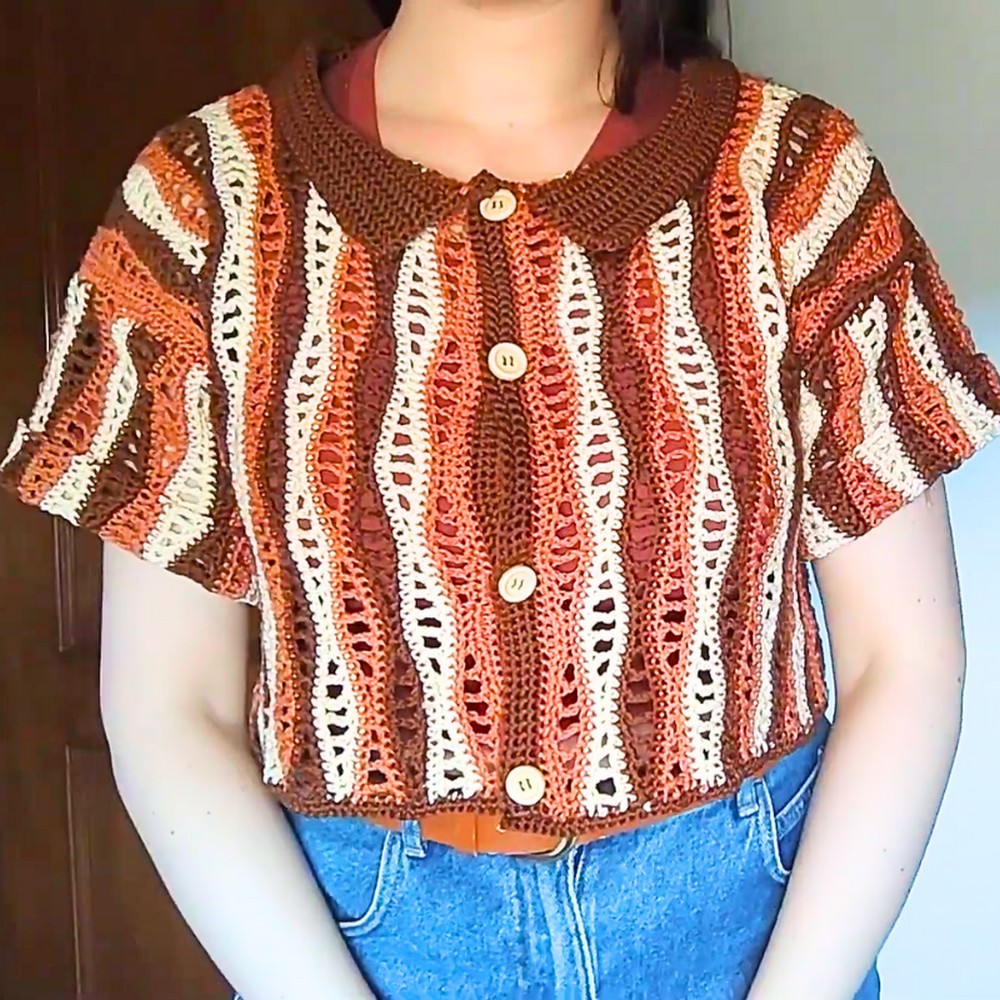
The Vertical Bricks Crochet Top is a stylish and easy-to-wear garment that brings elegance and charm to your wardrobe. Its unique design, inspired by a modern brick-like pattern, makes it stand out while still being versatile enough for daily use. Ideal for sunny days, casual outings, or layering, this crochet top is both lightweight and practical.
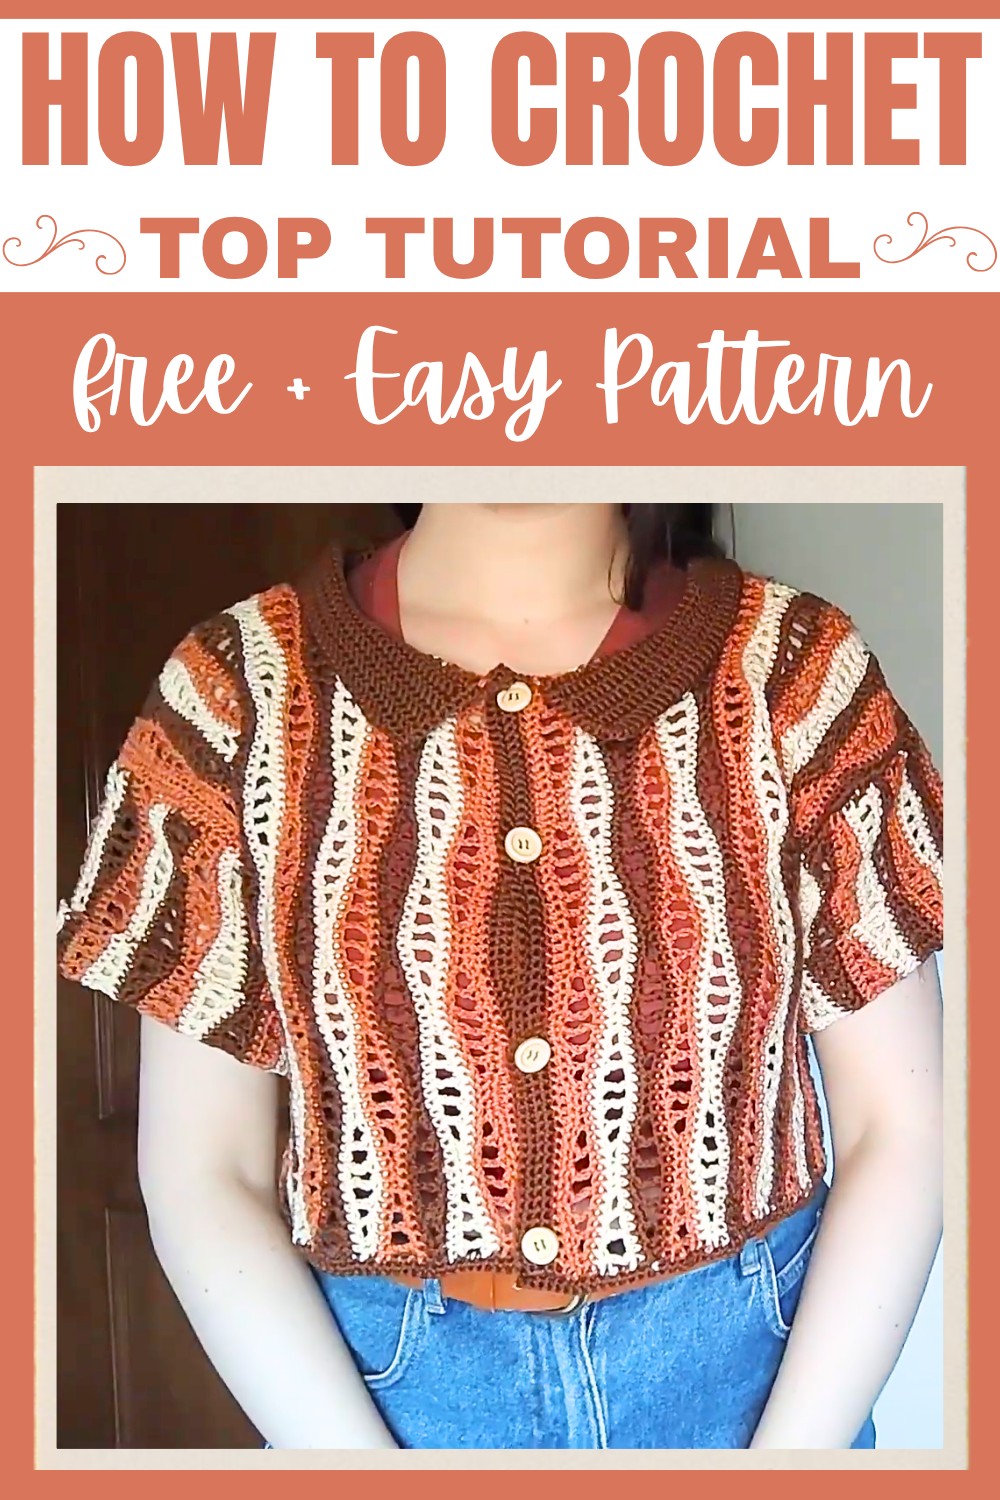
With its clean texture and clever visual appeal, this crochet top showcases creativity. It’s simple to make while leaving plenty of room for personal touches, like colors or yarn choices. Watching the tutorial will show how you can turn basic stitches into a stunning wearable piece that’s perfect for all ages.
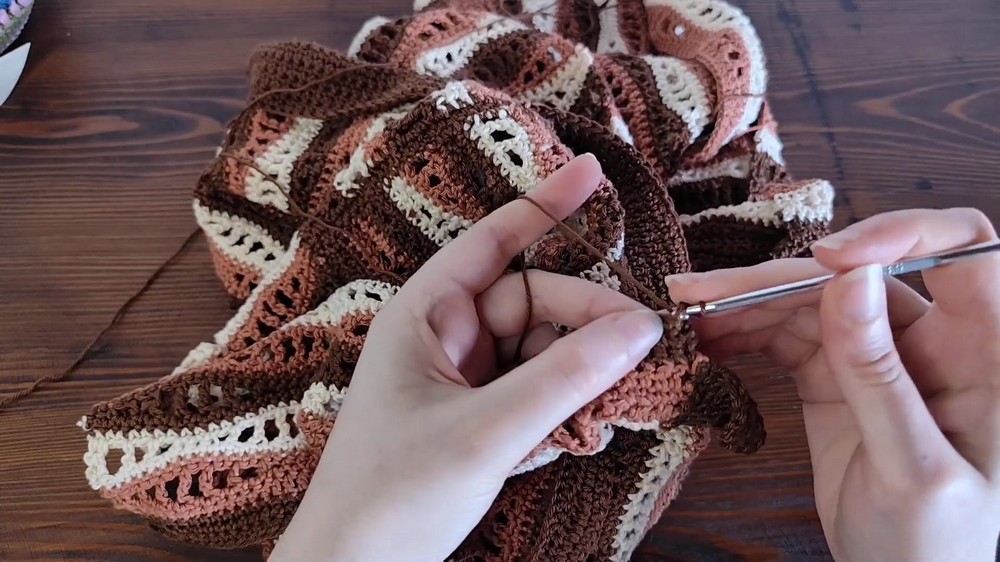
Credit Veroknitcrochet
Materials & Tools Needed
- Yarn: Fine-weight 100% cotton yarn, 50 g each/125 m.
- 3 colors used: 2 balls of each color + 1 additional ball for collar and borders.
- Hook: 3.5 mm crochet hook.
- Additional Tools:
- Measuring tape
- Scissors
- Tapestry needle (for weaving in ends)
- Sewing needle and thread (for buttons)
- Buttons (x4)
Finished Size & Customization Ideas
- Size: Tutorial-made shirt is medium-sized with a cropped length.
- Finished Measurement of the garment: Check the description of the video tutorial.
- Customization Ideas:
- Length: Add more chains when starting the back to make the shirt longer.
- Width: Adjust the number of waves (based on multiples of 16 + 2) for different sizes.
- Color: Use any color-combination of your preference.
- Button Placement: Adjust the spacing based on the size of your buttons.
Pattern Abbreviations & Terminology
- US Terminology is used in this pattern:
- CH: Chain
- SC: Single Crochet
- HDC: Half Double Crochet
- DC: Double Crochet
- TR: Treble Crochet
- SK: Skip
- REP: Repeat
- ST(S): Stitch(es)
Step-by-Step Crochet Instructions
This project consists of 5 separate pieces:
- Back Panel
- Two Front Panels
- Two Sleeves
Back Panel
- Start the foundation chain:
- Using your first color, make a slip knot.
- Chain a multiple of 16 + 2. For the tutorial size, chain 82 (5 × 16 + 2) for the length of the shirt.
- Row 1 (SC Row):
- SK the first CH from the hook.
- Make 1 SC in each CH across.
- Turn your work.
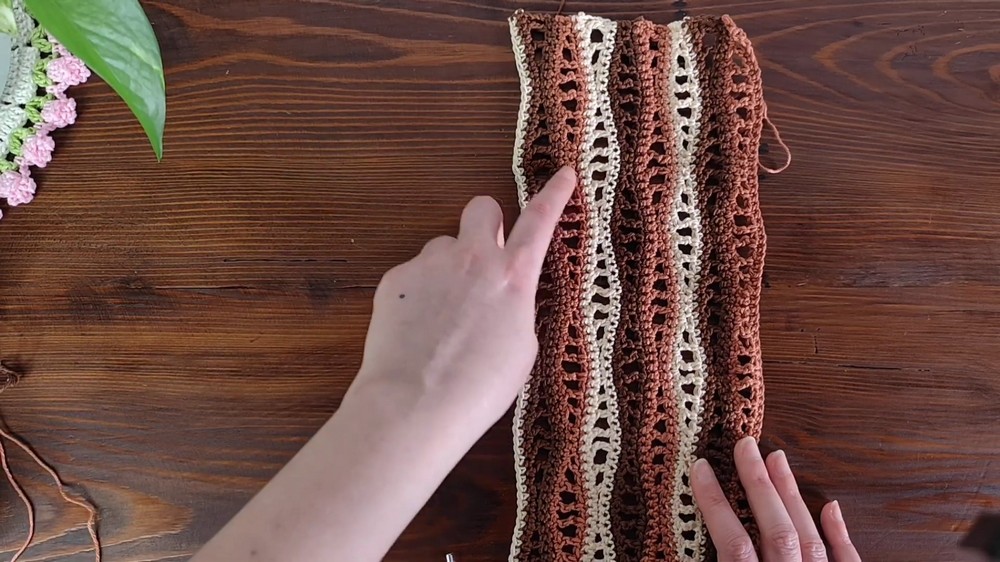
- Row 2 (Open Wave Stitch – Row 1 of Pattern Repeat):
- CH 1 (does not count as a ST), SC in the first 2 STS.
- Begin the repeat:
- CH 1, SK 1 ST, HDC in the next ST.
- CH 1, SK 1 ST, DC in the next ST.
- CH 1, SK 1 ST, TR in the next ST.
- CH 1, SK 1 ST, TR in the next ST (this forms the top of the wave).
- CH 1, SK 1 ST, DC in the next ST.
- CH 1, SK 1 ST, HDC in the next ST.
- CH 1, SK 1 ST, SC in the next 3 STS.
- Repeat the steps above until the last stitch of the row.
- End with 2 SC in the last 2 STS.
- Turn your work.
- Row 3 (SC Row):
- CH 1 (does not count as a ST), SC in each ST and CH space across.
- At the end, change yarn color, leaving the previous yarn unworked. Cut and secure the ends.
- Turn your work.
- Row 4 (SC Row in New Color):
- CH 1 (does not count as a ST), SC in each ST across, working over yarn tails to hide them.
- Turn your work.
- Row 5 (Open Wave Stitch – Row 2 of Pattern Repeat):
- CH 4 (counts as TR). TR in the next ST.
- Begin the repeat:
- CH 1, SK 1 ST, DC in the next ST.
- CH 1, SK 1 ST, HDC in the next ST.
- CH 1, SK 1 ST, SC in the next 3 STS.
- CH 1, SK 1 ST, HDC in the next ST.
- CH 1, SK 1 ST, DC in the next ST.
- CH 1, SK 1 ST, TR in the next ST.
- CH 1, TR in the next ST.
- Continue repeating until the last stitch.
- Turn your work.
- Rows 6 and 7:
- Row 6 is a full row of SC, where you change your yarn color at the end of the row as before.
- Row 7 is a full row of SC in the new color.
- Repeat Rows 2–7:
- Continue repeating the pattern (Rows 2–7) while changing the yarn color every 3 rows.
- Final Measurement for Back Panel:
- Crochet until you reach the desired width or the number of waves. For the example, the back panel consists of 27 waves.
- Straighten the Edges:
- Add 1 row at each end of the back panel to straighten the edges:
- CH 3 (counts as DC), DC in the next ST.
- HDC in the next 4 STS.
- SC in the next 4 STS.
- Continue with 4 HDC, 4 SC, and so on until the row is straight.
- Repeat this for the other edge.
- Add 1 row at each end of the back panel to straighten the edges:

Front Panels
- The two front panels are each 13 waves wide (half the back panel) and worked the same way.
- For the neckline shaping:
- Work 8 waves straight (shoulder width).
- On the next row, decrease at the neckline by skipping the last wave repeat.
Sleeves
- Foundation Chain:
- CH 34 (2 × 16 + 2) for a sleeve length of 16 cm.
- Follow the same pattern repeat as the back panel.
- Create 21 waves for each sleeve.
Joining Pieces
- Add rows of SC along the edges of each piece (shoulders, sleeves, etc.) to make joining easier.
- Position the pieces wrong side out.
- Use SC joining for:
- Shoulders (front panels to back panel).
- Sleeves (center of sleeve matched to shoulder seam).
- Side seams (underarm down to bottom of shirt).
Finishing Touches
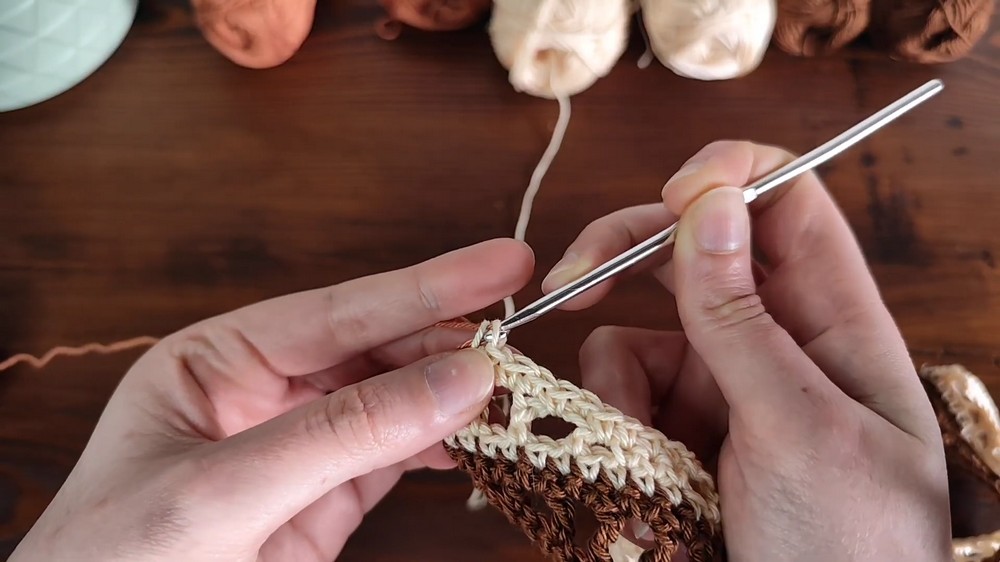
- Collar:
- Add rows of SC along the neckline, working 1 SC in each ST.
- At corners, make SC3tog to shape the neckline.
- Work 10 rows or until the collar is foldable.
- Button Bands:
- Right side (with button holes): Work 4 rows of SC and evenly space 4 buttonholes.
- Left side: Work 4 rows of SC to match the right band.
- Optional Borders:
- Add SC rows across the bottom and sleeves if desired.
- Adding Buttons:
- Sew buttons matching the buttonholes with sewing needle and thread.