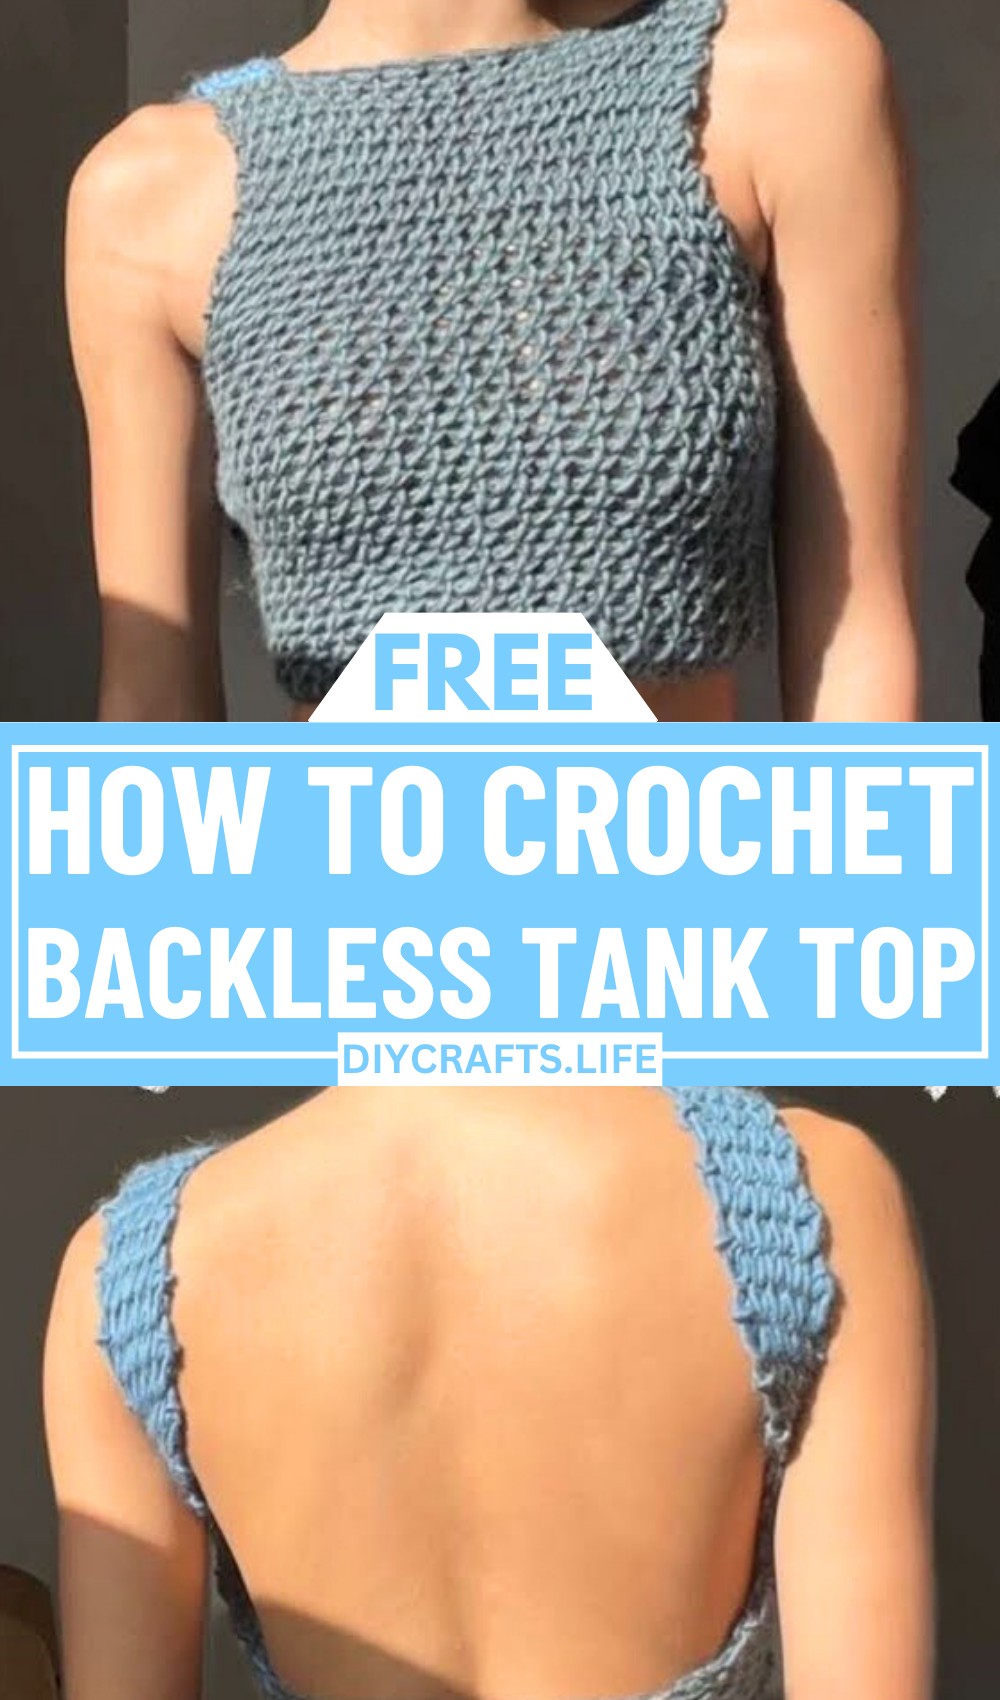
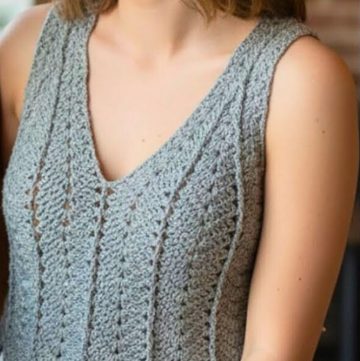
The crochet backless tank top is the perfect mix of timeless style and modern flair. Designed for those who love adding handmade charm to their wardrobe, this tank top is eye-catching and versatile. Whether layered with your favorite outfit or worn as a statement piece, it exudes creative energy and subtle elegance. Turn heads wherever you go with a top that blends comfort and sophistication effortlessly.
Backless Crochet Tank Top
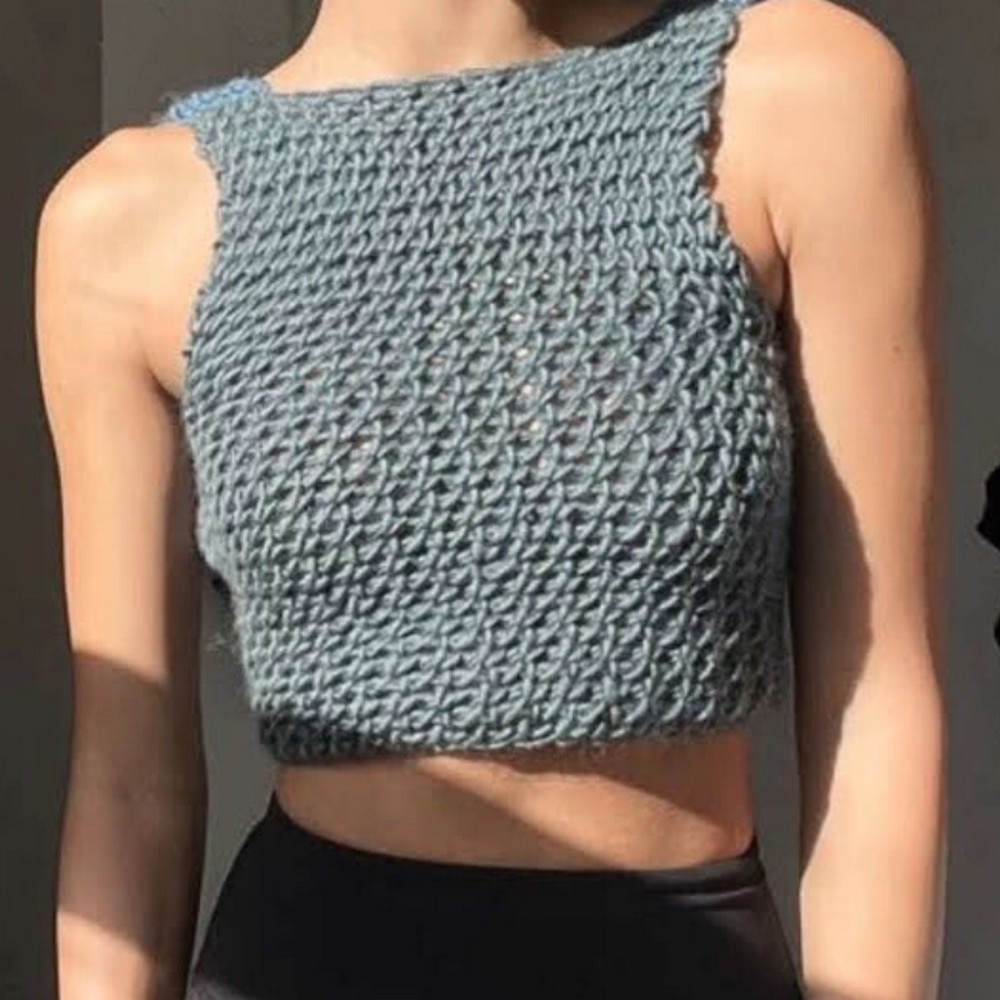
This design stands out for its unique backless silhouette, which adds a subtle touch of boldness to an otherwise simple piece. Crafted using an easy knit-like crochet stitch, it creates a sleek texture that mimics the look of traditional knitting but is much quicker and beginner-friendly. The top offers complete customization—from adjusting the size to picking different yarn weights for a personal spin. With its thoughtful details and flattering shape, this crochet top transforms your look into something truly one-of-a-kind.
Credit Nikita Nightingale
Materials & Tools Needed
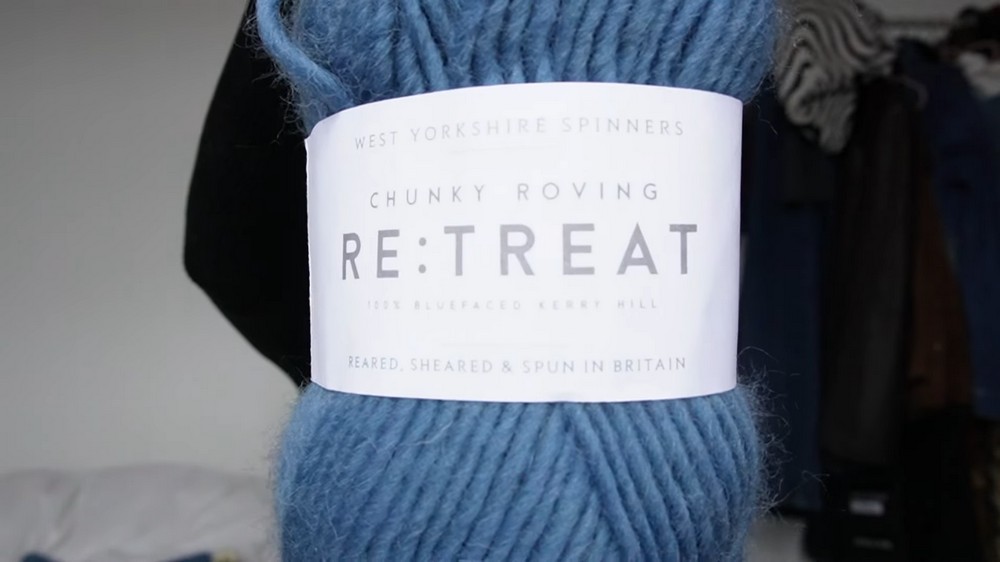
- Yarn:
- Retreat Chunky Roving Yarn (used in the tutorial).
- Approximately 6-pounds currency per skein (can also use similar chunky yarn).
- Alternative: Substitute for thinner yarn if desired, but the finished texture and timing will vary.
- Crochet Hook:
- 12 mm crochet hook.
- Note: The yarn calls for a 6.5mm hook, but the larger hook gives the top more stretch.
- Tapestry Needle:
- For sewing pieces together at the end.
- Scissors:
- For cutting yarn tails.
Finished Size & Customization Ideas
Approximate Sizing:
- Front Piece: The width should be long enough to wrap around the front of the body.
- Example: 19 chains were used for a snug fit.
- Back Piece (U-shape): Custom fit for a backless design and tied shoulders.
Customization Tips:
- Yarn Weight:
- Use thinner yarn and hook (like 5mm) for a lighter, more delicate top. However, this may take longer to complete.
- Length Adjustments:
- Add more rows to the front or back for a longer tank top or crop it for a shorter style.
- Strap Style:
- Widen or narrow the back straps for more or less coverage.
- Color Changes:
- Use multiple colors for a striped or block-color effect based on your preference.
Pattern Abbreviations & Terminology
(US Crochet Terminology):
- ch: Chain.
- sc: Single Crochet.
- st(s): Stitch(es).
- sl st: Slip Stitch.
Step-by-Step Crochet Instructions
Part 1: Front Piece (Rectangle)
- Create the Base Chain:
- Chain a length that wraps snugly around the front of your body.
- Example: 19 chains were used for the tutorial.
- Ensure the chain is slightly snug to allow the fabric to stretch and fit nicely.
- Chain a length that wraps snugly around the front of your body.
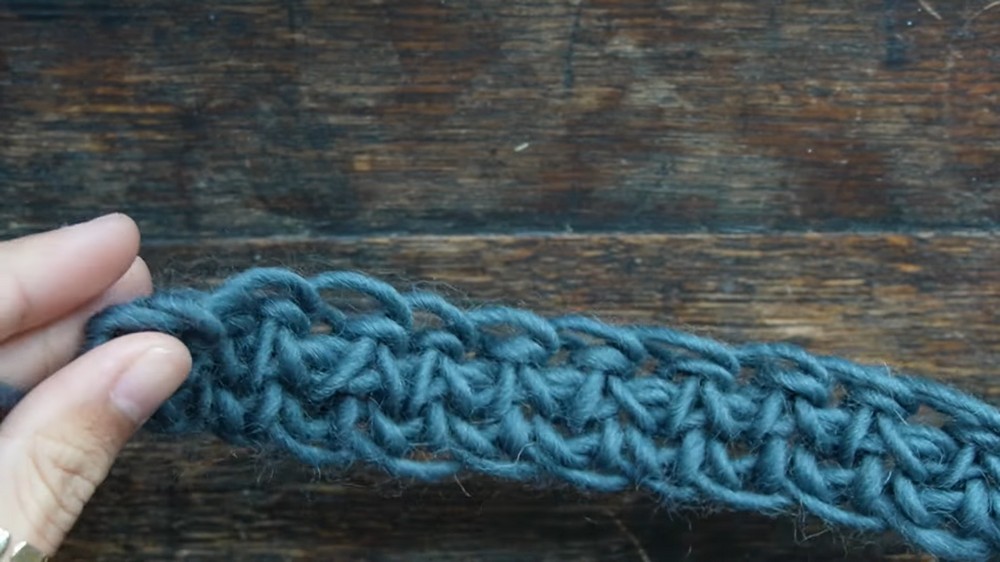
- Row 1: Single Crochet (Foundation Row):
- Place 1 sc into each chain, skipping the first chain on the hook (counts as the first sc).
- Keep your stitches loose to make subsequent rows easier.
- At the end of the row, turn your work.
- Row 2-37 (or Desired Length): Knit Stitch Look:
- Chain 1 at the start of each row.
- Instead of working into the traditional V-shaped stitches, insert your hook into the posts of the stitches from the previous row.
- Work 1 sc into each post across.
- Continue until the front piece matches the desired shoulder-to-waist length.
Example: 37 rows were completed in the tutorial.
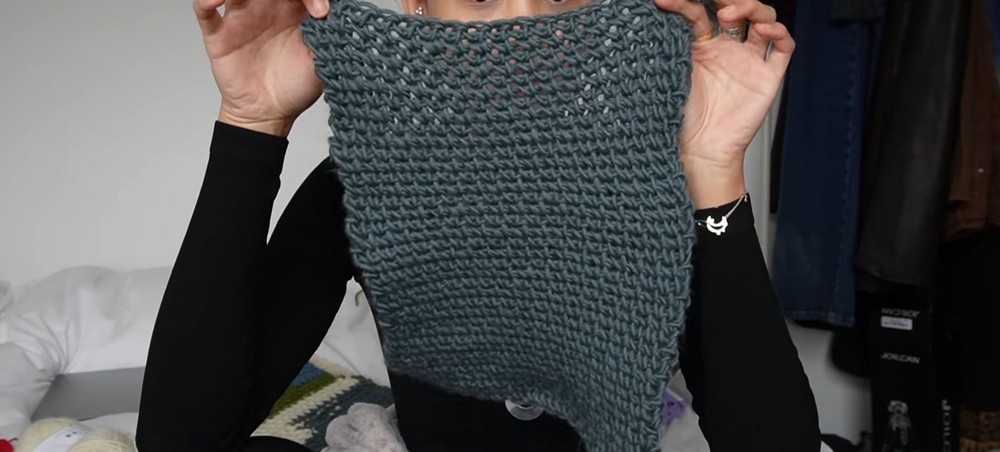
Part 2: Back Piece (U Shape)
- Start with a Base Chain:
- Chain the same number as the front piece (e.g., 19 chains).
- Work 7 rows of single crochet with the knit stitch technique as described above.
- Divide for Shoulder Straps:
- After the initial 7 rows, begin working on the shoulder straps.
- For the first strap:
- Chain 1, turn your work, and crochet 6 stitches across the row.
- Continue back and forth, chaining 1 at the start of each row, until the strap matches the length of the front piece.
- For the second strap:
- Attach your yarn 5 stitches from the opposite edge and repeat the same steps to create the second strap.
Note: Adjust the strap width and length as desired.
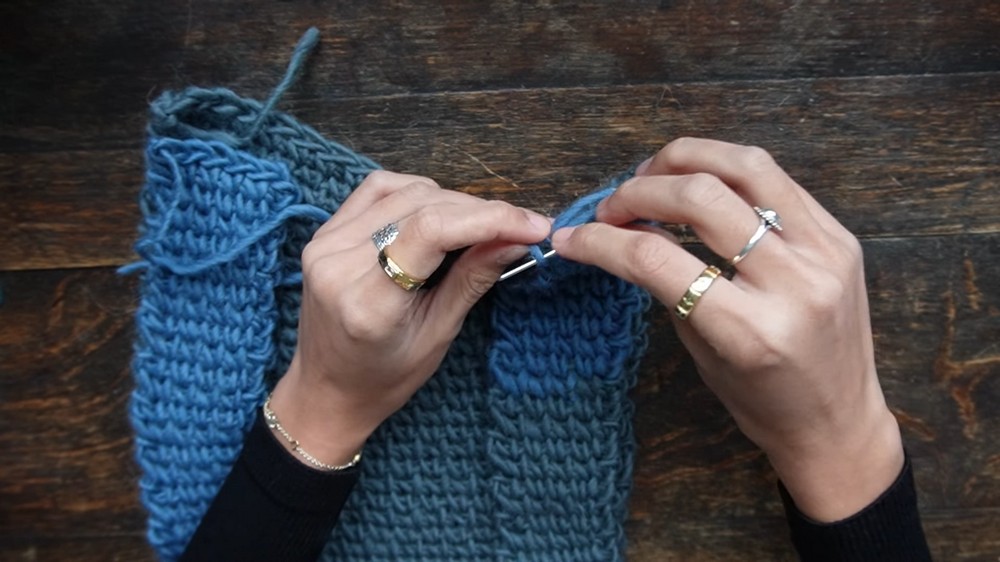
Part 3: Assembly
- Join the Shoulders:
- Use the tapestry needle to sew the front piece and back straps together at the shoulders.
- Align the edges and use a mattress stitch for a clean finish. Go over the seam twice for added durability.
- Sew the Sides:
- Leave room for armholes: Try the top on and mark where you want the openings to start.
- Example: 14 cm was left for the armholes in the tutorial.
- Stitch up the sides using the same mattress stitch until the desired armhole size is achieved.
- Leave room for armholes: Try the top on and mark where you want the openings to start.
Part 4: Finishing Touches
- Weave in any loose ends using a tapestry needle.
- For a clean edge finish, try adding a simple border of slip stitches or single crochet around the armholes or neckline (optional).
- Block the finished top lightly if necessary.
Additional Notes
- The tutorial creator used double the recommended hook size to ensure a stretchy and forgiving fabric that hugs the body nicely.
- For a lighter, delicate version of the top, switch to thinner yarn and a smaller hook (5mm recommended).
Customization Ideas
- Colors: Experiment with bold, bright hues or pastel tones. Stripe the top by alternating yarn colors every few rows.
- Straps: Adjust the width and placement of the back straps for a more modest or open back.
- Accessories: Add ties to the back or straps for an adjustable fit.
- Crochet Edging: Add a decorative shell, picot, or lace edging to give the top additional flair.