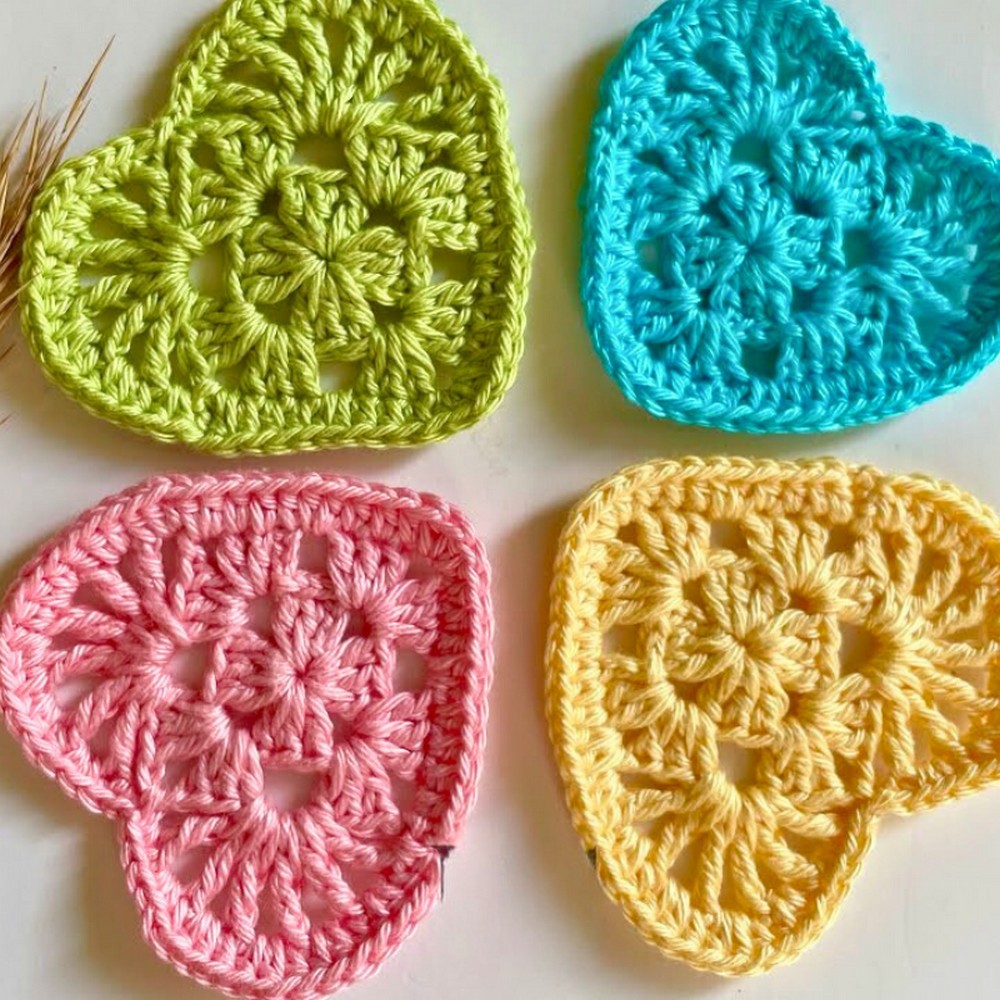
Create a charming crochet heart with our easy-to-follow pattern. This delightful design showcases beauty and elegance, perfect for any occasion. With its vibrant texture and endless uses, it’s an ideal project for crochet enthusiasts of all skill levels.
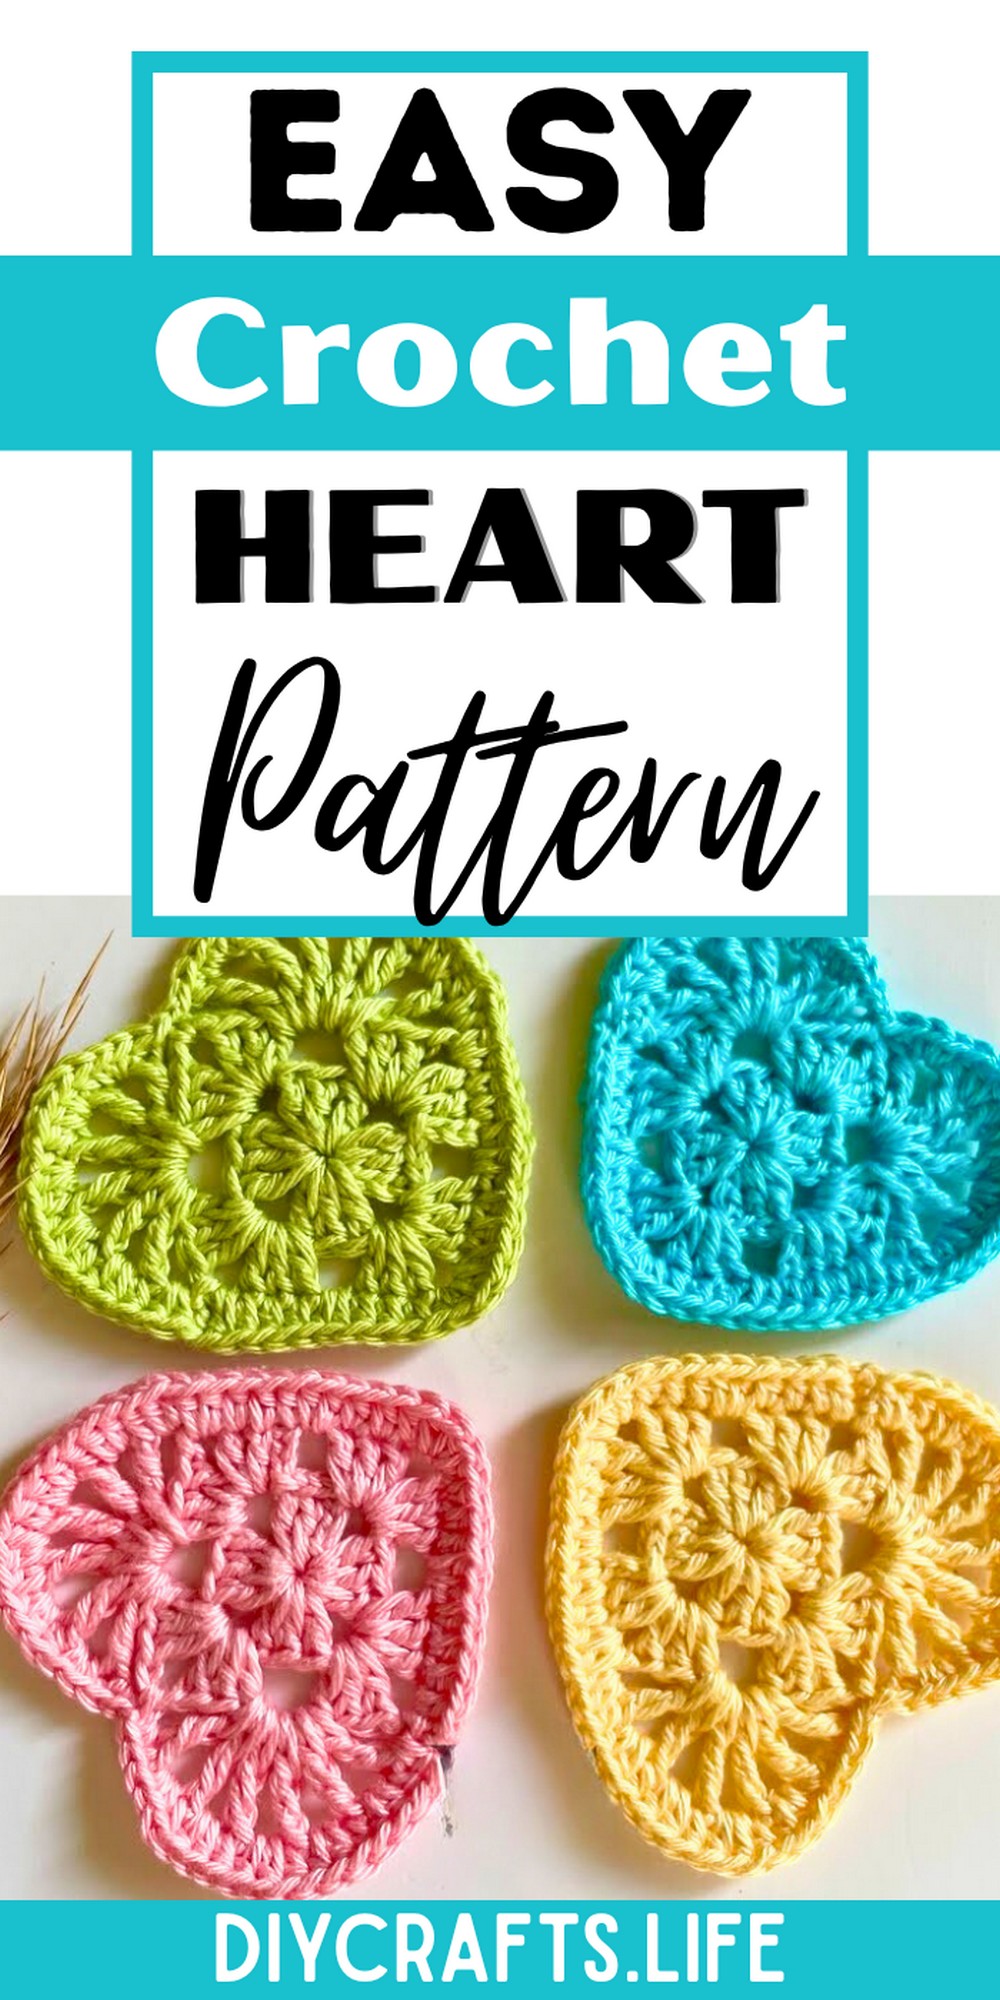
This durable, eye-catching crochet heart is perfect for home decor, gift wrapping, or personal accessories. Standout features include its intricate design and versatility, making it both a thoughtful gift and a fun crafting project.
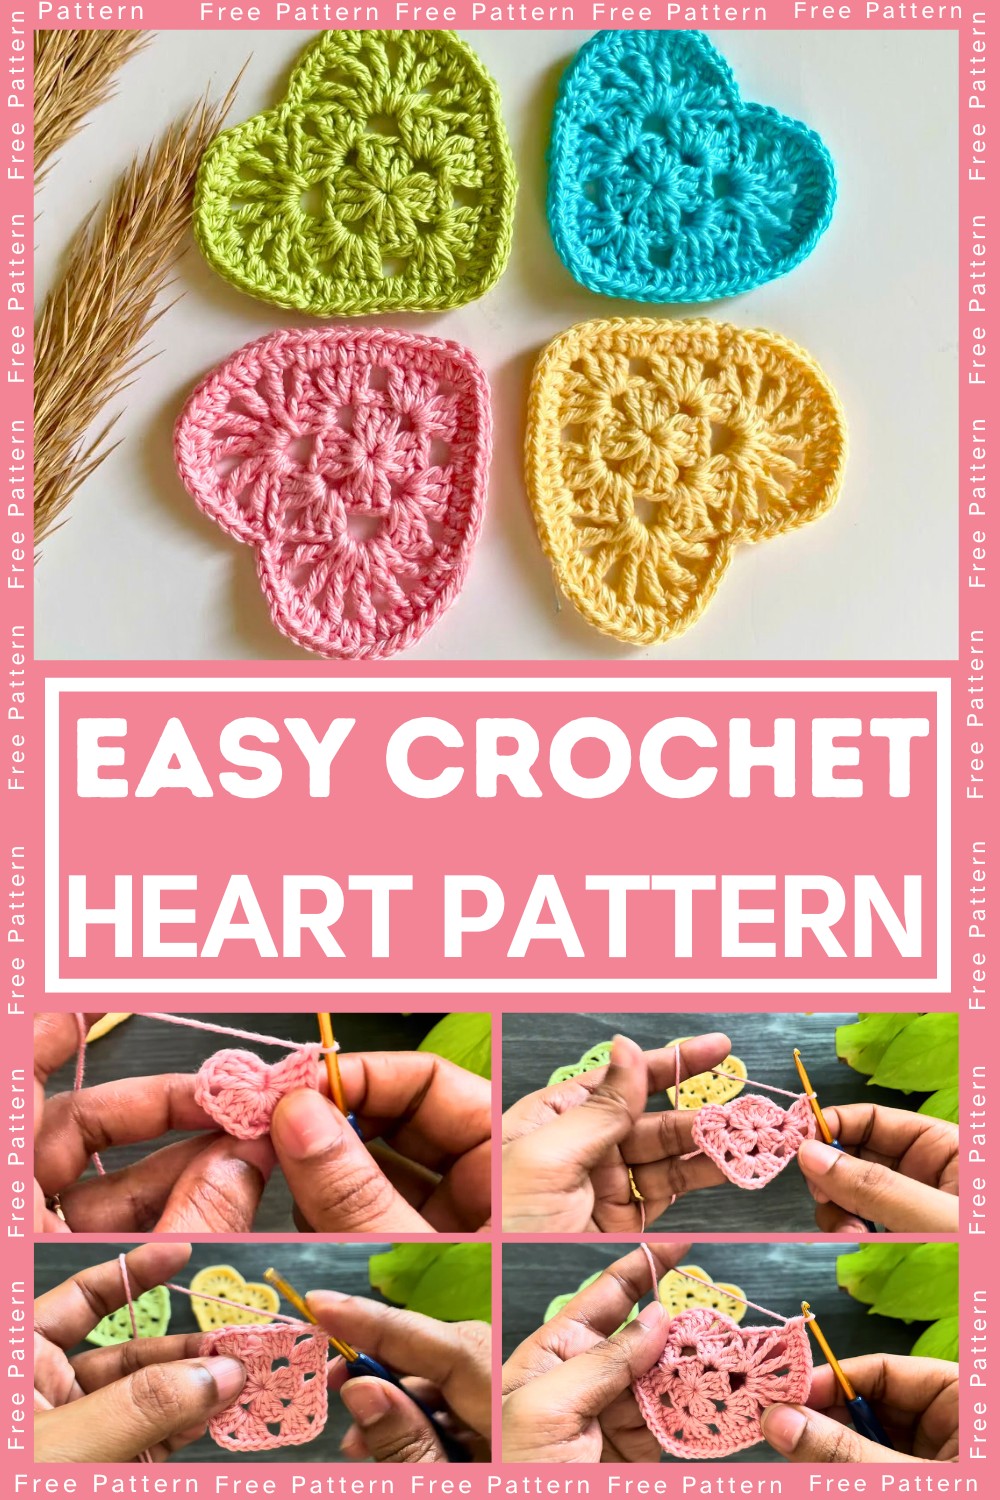
Crochet Heart Pattern
Craft this lovely heart using our step-by-step pattern. Suitable for beginners and experts alike, this project offers room for creativity and customization with different yarn choices and color schemes, allowing you to express personal flair.
Materials and Preparation:
To make this cute crochet heart, here’s what you’ll need:
- Yarn: Cotton yarn (size recommended in the video).
- Hook: 2.5 mm crochet hook.
- Additional Tools: Scissors, tapestry needle for weaving in ends.
- Yarn Weight: Light or fine weight yarn works best for this pattern.
Ensure your yarn and hook size match for a neat finish. This project is beginner-friendly and doesn't require complex tools.
Abbreviations and Notes:
Abbreviations:
- CH: Chain
- SC: Single Crochet
- HDC: Half Double Crochet
- DC: Double Crochet
- TR: Treble Crochet
- SL ST: Slip Stitch
Pattern Notes:
- Be mindful of tightness when forming magic rings or slip stitches.
- Chains count as stitches when noted.
- Keep track of corners with chain spaces to maintain symmetry.
- The heart begins with a foundation square that later morphs into the heart shape with a rounded “half-circle.”
Gauge, Approximate Size, and Pattern Notes:
Gauge:
This pattern doesn’t require a gauge swatch as the heart is meant to be flexible in size.
Approximate Finished Size:
The finished heart will be roughly 3-4 inches in width and height (depending on your tension and yarn used).
Special Techniques:
- Treble Crochet: Longer stitch used to form rounded edges of the heart.
- Slip Stitch: Used frequently to transition between stitch spaces without adding height.
Step-by-Step Pattern:
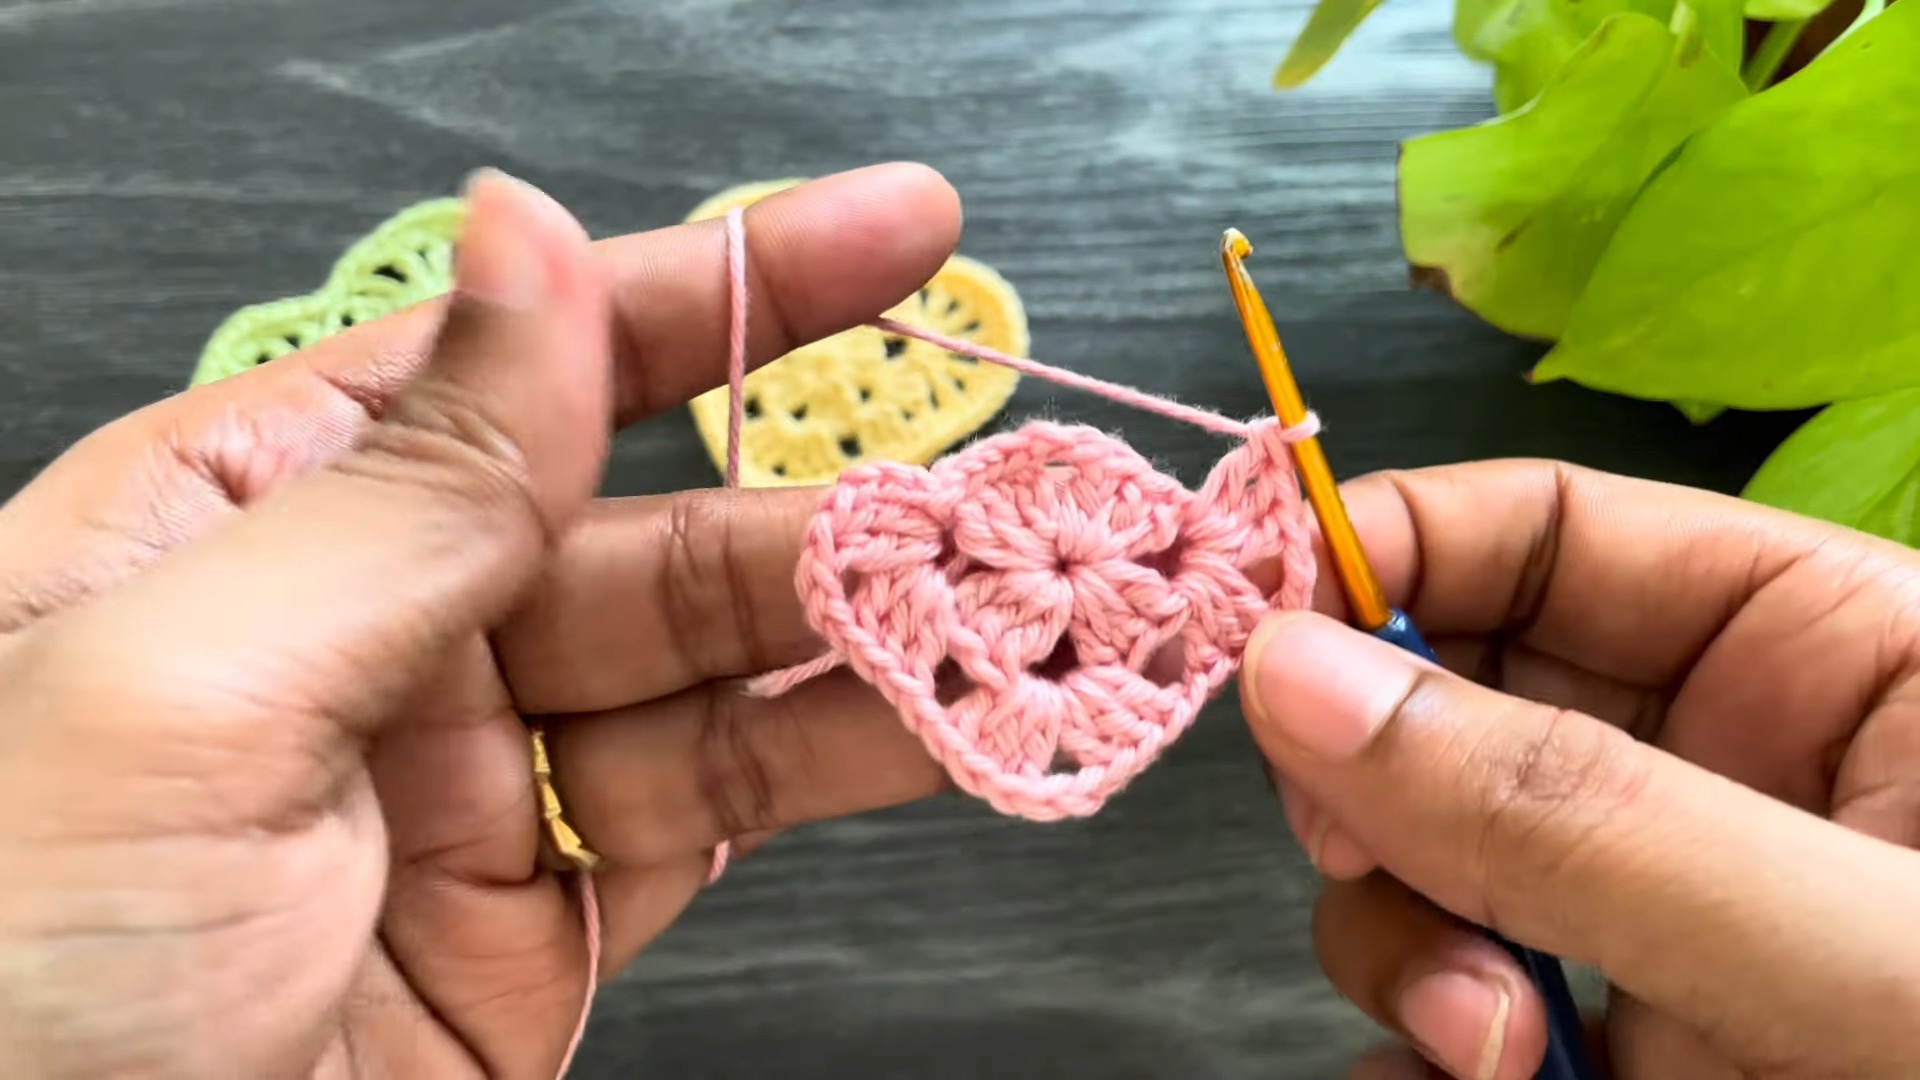
Round 1: Foundation Square
- Start with a slip knot.
- CH 4, then insert your hook into the 4th chain and create a SL ST to form a ring.
- Into the ring:
- CH 3 (counts as 1 DC).
- Work 2 DC, forming a total of 3 DC.
- CH 2, then work 3 DC into the same ring.
- Repeat CH 2, 3 DC two more times into the ring, forming four sets of corners.
- CH 2, then join the round with a SL ST to the 3rd chain of the initial CH 3.
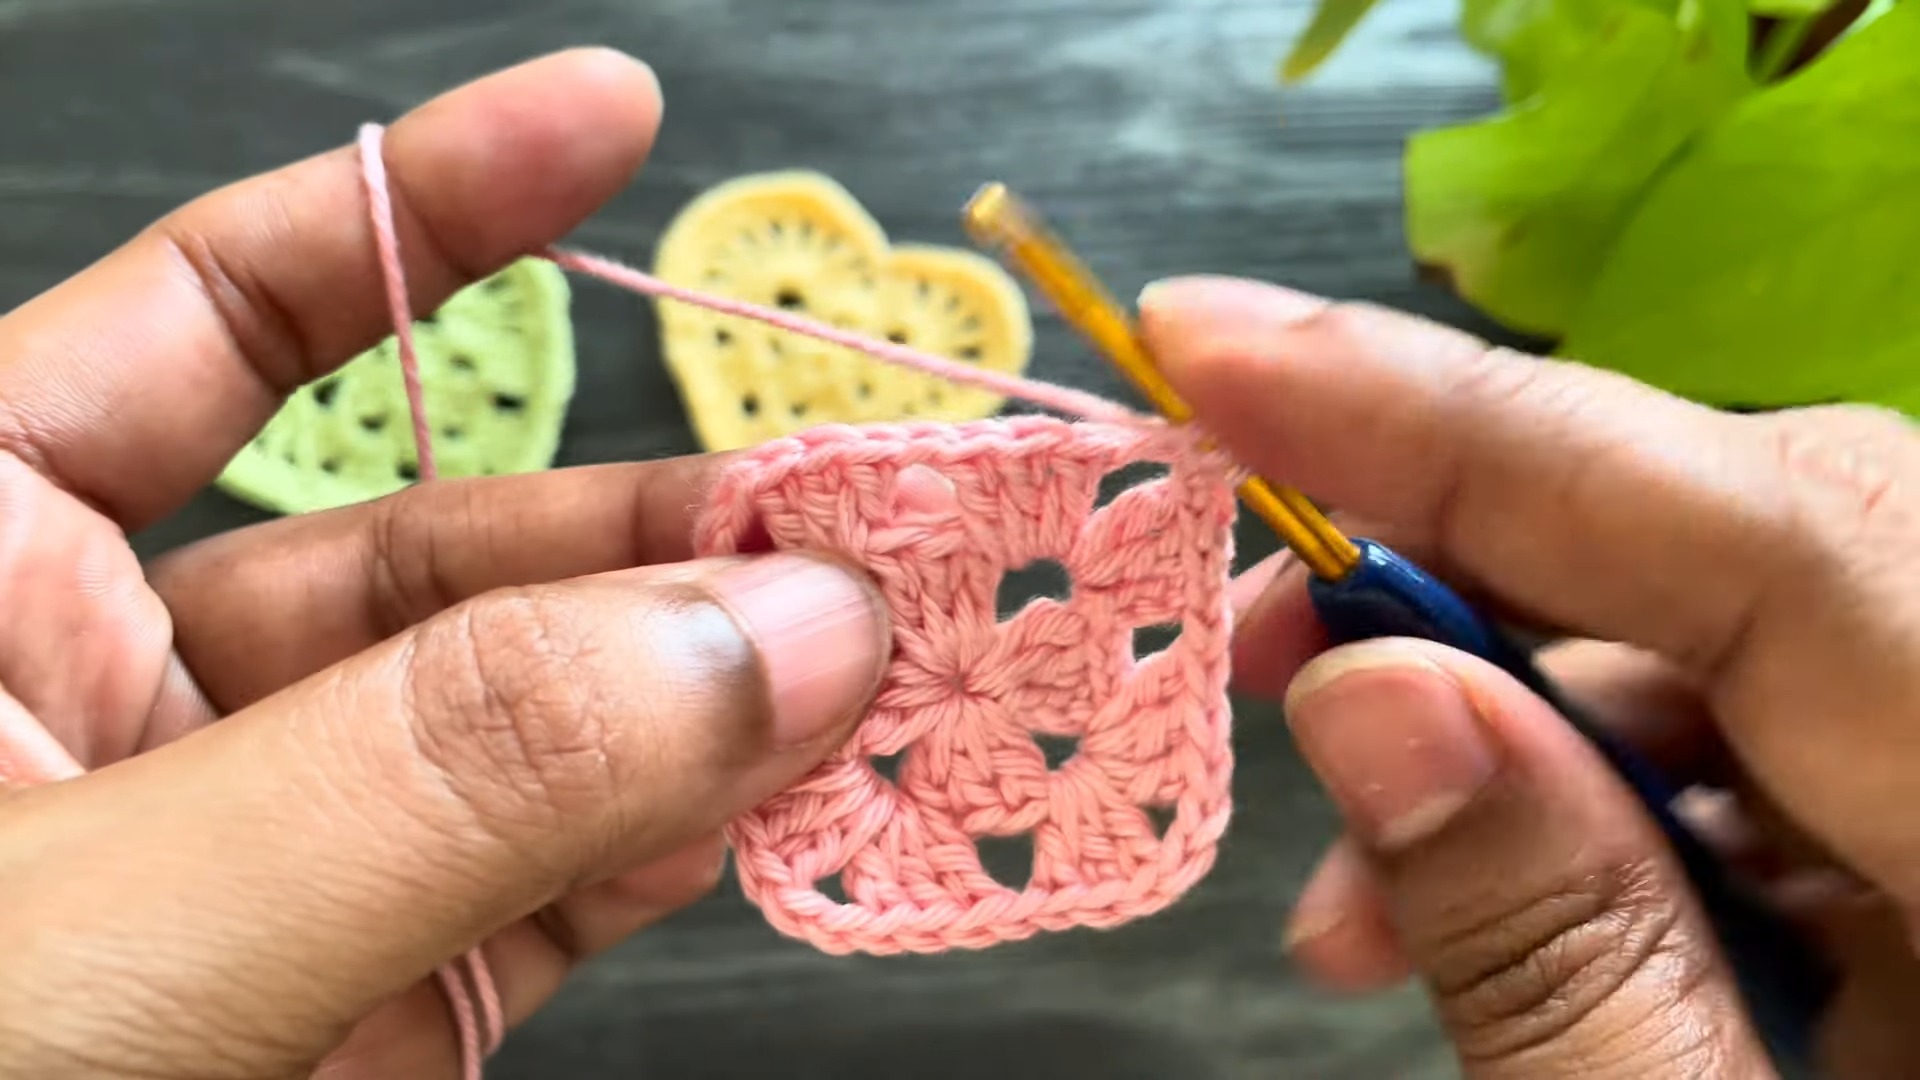
Round 2: Building the Corners
- Transition to a corner by working SL ST into the next DC, repeating 2 more times until you reach the CH 2 space.
- In the CH 2 space, CH 3 (counts as 1 DC), then:
- Work 2 DC, forming 3 DC total.
- CH 2, then work 3 DC again into the same space (corner made).
- CH 1, then move to the next corner. Repeat:
- (3 DC, CH 2, 3 DC) into each CH 2 space.
- CH 1 between each corner.
- Join the round with a SL ST into the 3rd chain from the initial CH 3.
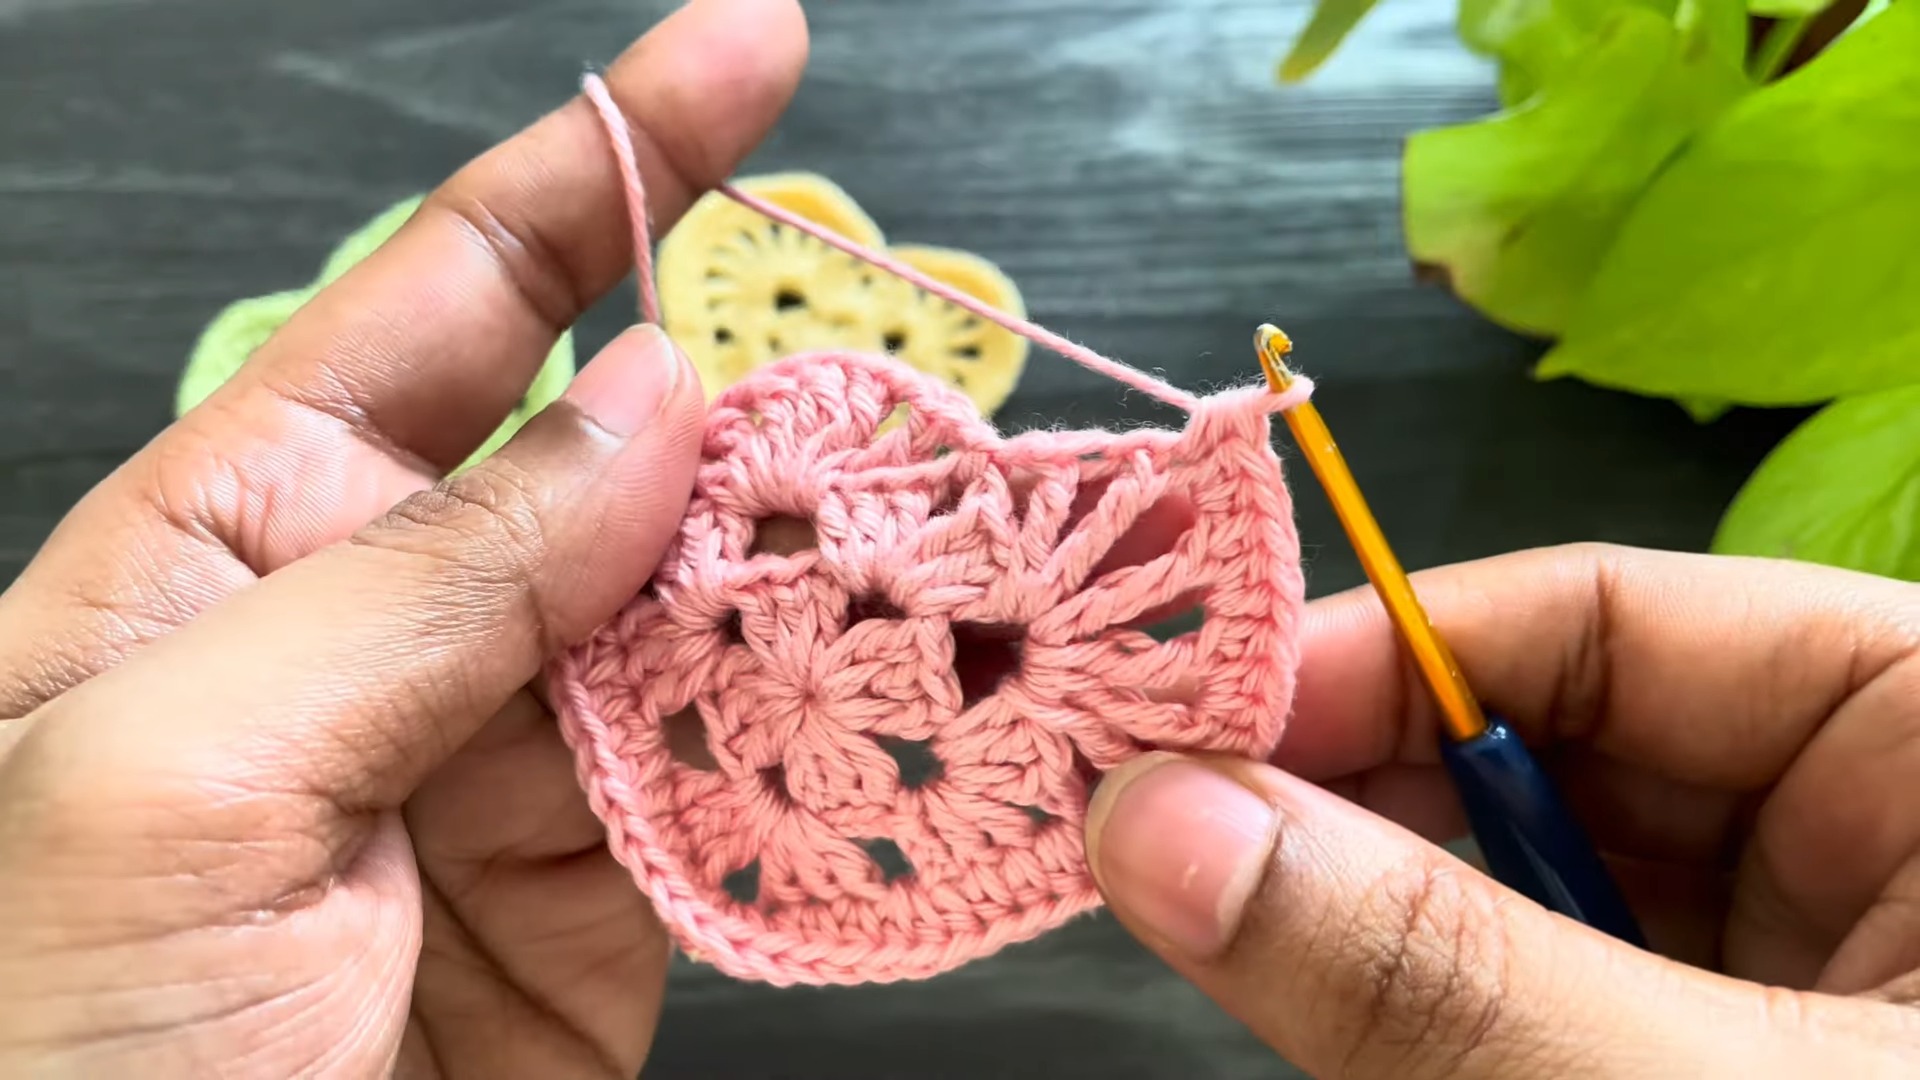
Creating the Half-Circle for the Heart
- Transition to the next corner space using SL ST across the DC stitches.
- Into the next CH 2 space:
- CH 1, then TR into the corner space.
- CH 1, repeat TR into the same space (you should have 6 TR stitches separated by CH 1).
- SL ST into the same corner to anchor this section.
- Skip to the next corner and repeat:
- Work 6 TR stitches separated by CH 1.
- Finish with a SL ST to anchor the second rounded side.
Round 3: Forming the Edge and Point of the Heart
- Transition using SL ST into the corner space again.
- CH 2, work HDC across the chain spaces and into the stitches:
- Work 2 HDC into each CH space.
- For the pointed tip (bottom of the heart), work 3 HDC into the central point.
- Continue working 2 HDC around the rounded edges.
- Near the top rounded edge:
- Work SC between the treble stitches to sharpen the curves.
- Use SL ST to anchor the stitches at each center point.
- Complete the round with SL ST into the first CH space.
- CH 1, then fasten off by cutting the yarn and weaving in any loose ends with your tapestry needle.
Pattern Question:
Q: How do I achieve the correct heart shape when crocheting this pattern?
A: To achieve the perfect heart shape, ensure each step, especially in forming the corners and curves with chain and treble crochets, is followed precisely. Pay attention to transitioning from the granny square shape to the half-circle design.
Conclusion
This crochet heart pattern is an enjoyable and rewarding project, perfect for relaxing creativity. Its versatility and utility make it a delightful addition to your crafting repertoire and a lovely handmade expression of care.