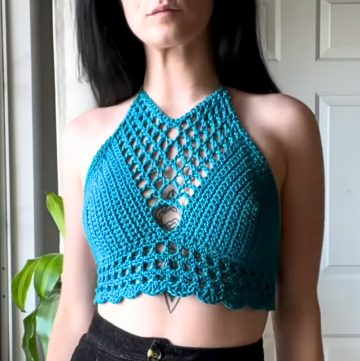
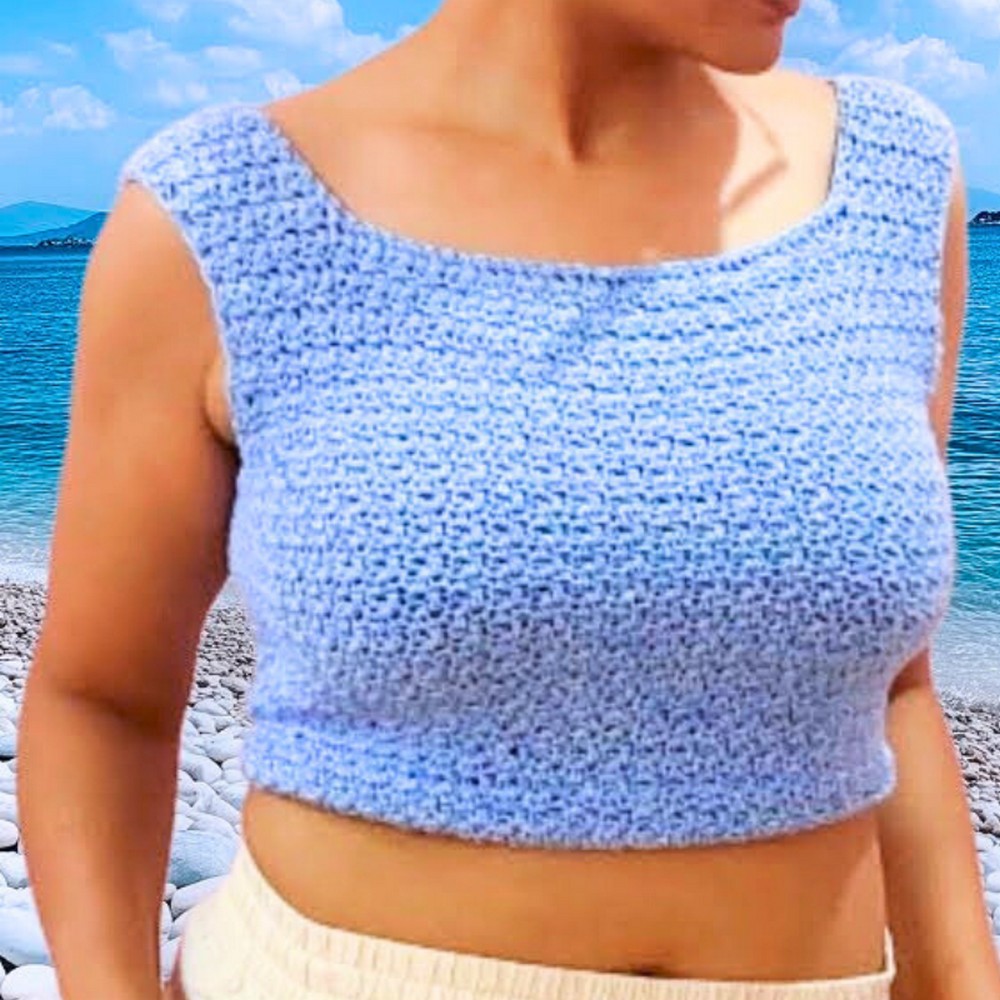
Turn heads this summer with a design that's the perfect mix of chic and effortless! This stunning crochet backless top is a must-have addition to any wardrobe, featuring a bold and airy style that screams elegance, yet keeps things light and breezy. The tie-up design adds the perfect finishing flair, bringing a flirty yet functional twist to your summer look.
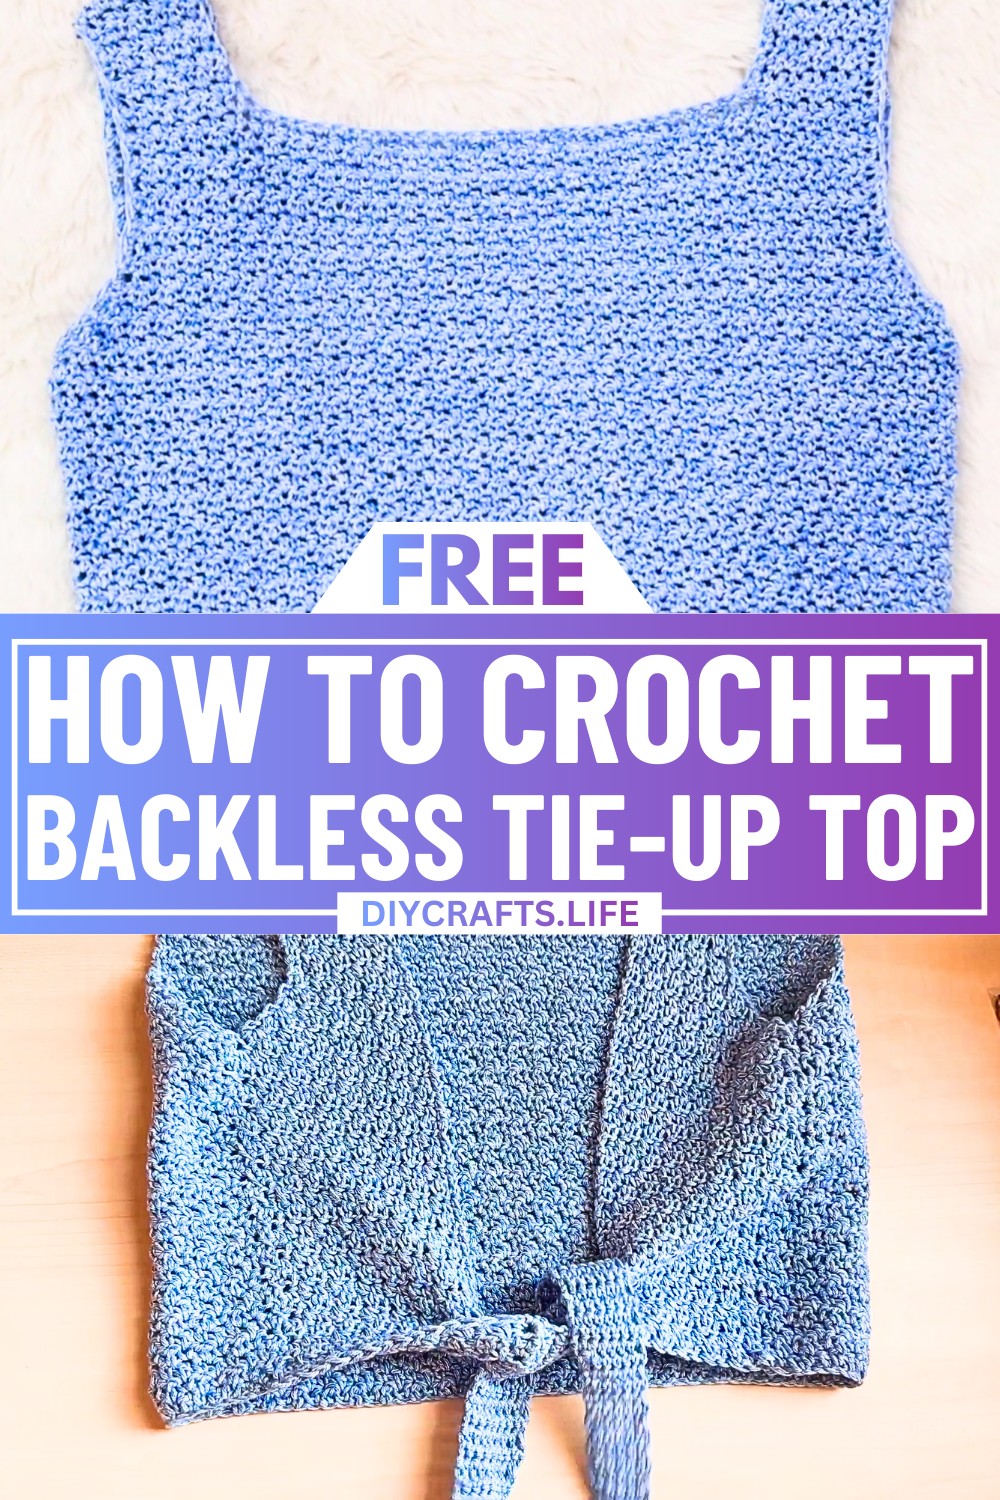
Crafted with intricate detail, this backless top stands out for its elegant crochet pattern and thoughtful design. The open-back feature adds a playful, daring touch, while the customizable tie straps make it an adjustable fit for any body shape. Perfect for warm days, beach outings, or paired with your favorite high-waisted skirt—this top combines creativity and fashion for your ultimate handmade statement piece.
Credit Handmade by Appy
Required Materials
- Yarn: Jeans yarn made of 100% cotton (200m per ball).
- Hook: 4.5 mm crochet hook.
- Measuring Tape: To measure bust size and other dimensions.
- Stitch Markers: To mark key points such as the neckline and panel separation.
- Scissors: For cutting the yarn.
- Tapestry Needle: To sew edges and weave in ends.
Important Notes
- The pattern requires working with an odd number of chains initially.
- Start by measuring your bust size and dividing that measurement by two. This gives the width for your front panel.
- Keep track of your row counts, as the front and back panels must match for uniformity.
- Decreases or increases are always made on either the outer edges or specific points as instructed.
- Ensure the straps (tie-ups) and panels are symmetrical for a neat and wearable finish.
Step-by-Step Instructions
1. Front Panel
- Foundation Row:
- Begin with a slip knot.
- Chain an odd number of stitches that corresponds to half of your bust size. For example, an 18-inch width may require 69 chains.
- Work the main stitch pattern:
- Skip the first chain and make a single crochet (SC) into the next chain.
- Alternate between single crochet (SC) and double crochet (DC) stitches across the row.
- At the end of every row, chain 1, turn your work, and continue the same alternating SC/DC pattern.
- Repeat rows until the panel reaches below the underarms:
- Work until the panel measures around 8–10 inches, depending on your size.
- In the example, 25 rows were made, measuring 7.5 inches.
- Decreasing rows for shaping:
- To shape the sides, work decrease rows as follows:
- Chain 1, make an SC in the first stitch, skip the next stitch and continue the SC/DC pattern across until the last two stitches.
- Skip the second last stitch and finish with a DC in the last stitch of the row.
- Work six rows of decreases (reducing 1 stitch on each side for every row). By the end, you should have fewer stitches than you started with (e.g., from 68 to 56 stitches).
- To shape the sides, work decrease rows as follows:
- Work without decreases for shaping:
- After the decreases, work 10 rows without any decreases. This helps shape the neckline and strap area.
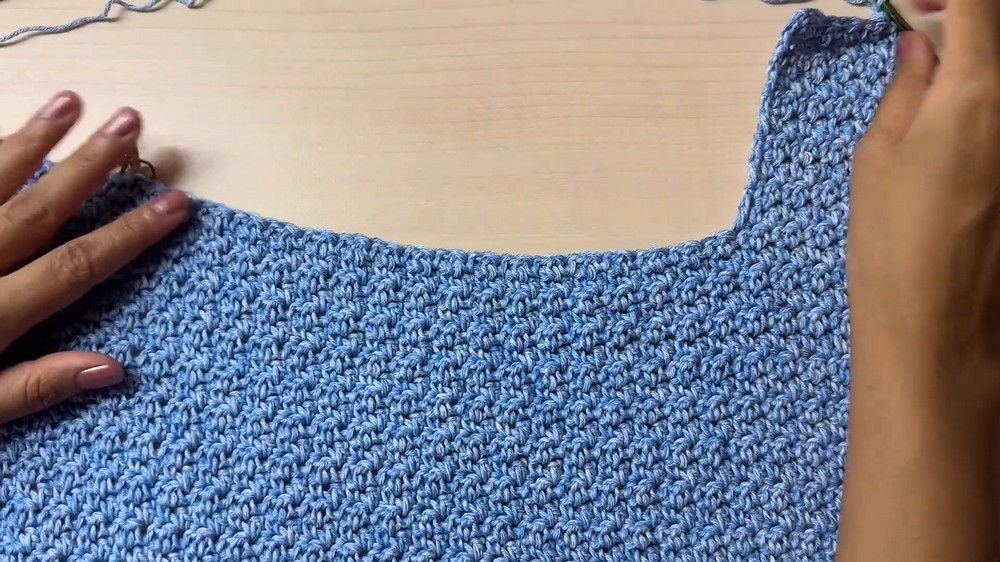
- Shape the neckline:
- Work across only a portion of the row to create neckline shaping. For example:
- Work 10 stitches of the SC/DC pattern, then stop, leaving the remaining stitches unworked.
- On the opposite side, mark 10 stitches and begin a similar neckline pattern. Use stitch markers to keep track.
- Repeat this for 10 rows.
- Work across only a portion of the row to create neckline shaping. For example:
- Mark and measure:
- Place a stitch marker at the last row and measure the panel. For example, the front panel may measure around 16 inches.
2. Back Panel
- Without breaking the yarn, chain 1 and continue to create the back panel following the same pattern used for the front panel.
- Work 20 rows in SC/DC pattern (10 rows for where decreases started and 10 for straps).
- Increases for shaping:
- To match the front panel’s decreases, make 6 rows of increases:
- Chain 3 (counts as DC).
- Work SC/DC as usual, and at the last stitch, make 2 stitches in one (1 SC, 1 DC).
- Repeat this for a total of 6 rows. Ensure the increases happen only on the outer edges.
- To match the front panel’s decreases, make 6 rows of increases:
- Work evenly:
- After completing the increases, continue working 25 rows of SC/DC without any increases or decreases. This completes the bulk of the back panel.
- Finishing the back panel:
- End the work at the inner edge of the panel. Cut the yarn, leaving a long tail to sew the edges.
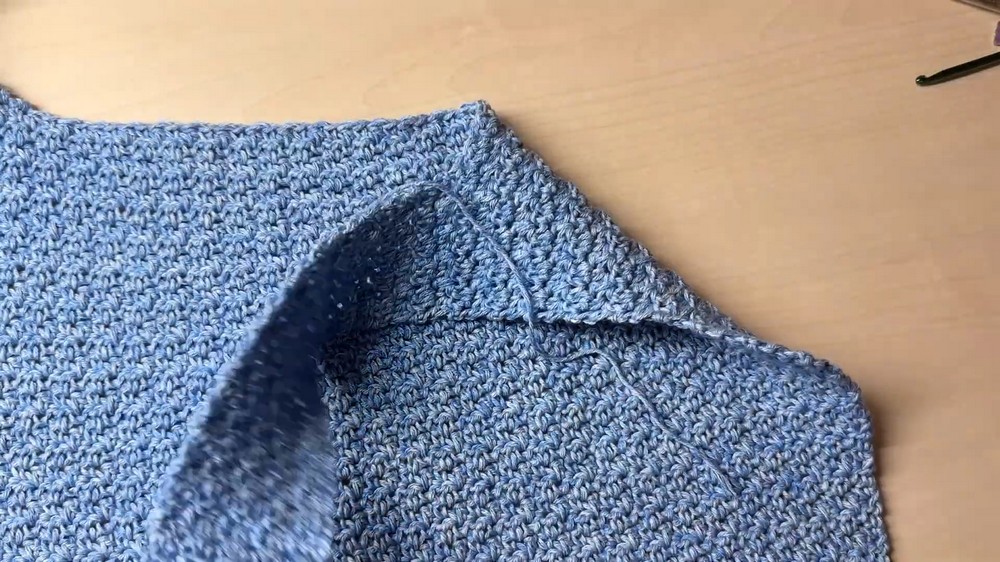
3. Assembly
- Fold the work so the right side (front panel) is facing inwards.
- Sew the back panel edges to the front panel from the bottom up to the point where the decreases start.
- Repeat the seam on both sides, ensuring everything aligns neatly.
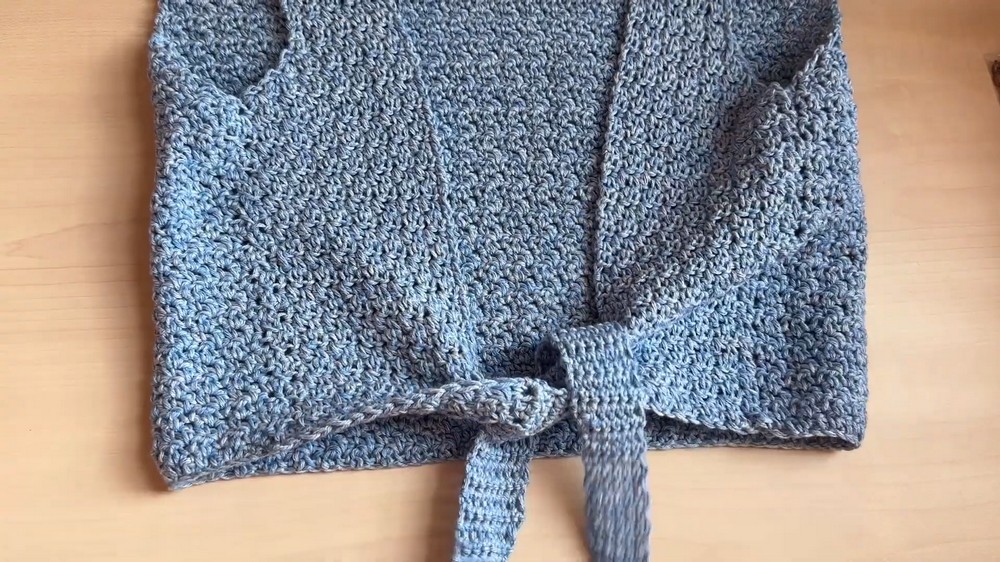
4. Tie-Ups (Straps)
- Attach the yarn to the bottom edge of each back panel.
- Create a foundation of 8 single crochets.
- Chain 1, turn, and make SC across the row.
- Begin decreasing:
- Every 10 rows, reduce the stitches by working two single crochets together at the end of the row.
- The strap will gradually taper, creating a neat shape.
- Continue until the strap is your desired length, approximately 18 inches, then cut the yarn.
5. Finishing
- Optionally, add edging with single crochet around the top to give it a clean finish.
- Weave in all loose ends, ensuring the straps and panels are secured neatly.
Final Notes
- This summer top is designed to be lightweight and breathable due to the cotton yarn and open neckline design.
- You can modify measurements or strap lengths to create a custom fit.
Enjoy your beautiful Crochet Backless Tie-Up Summer Top! 🌞