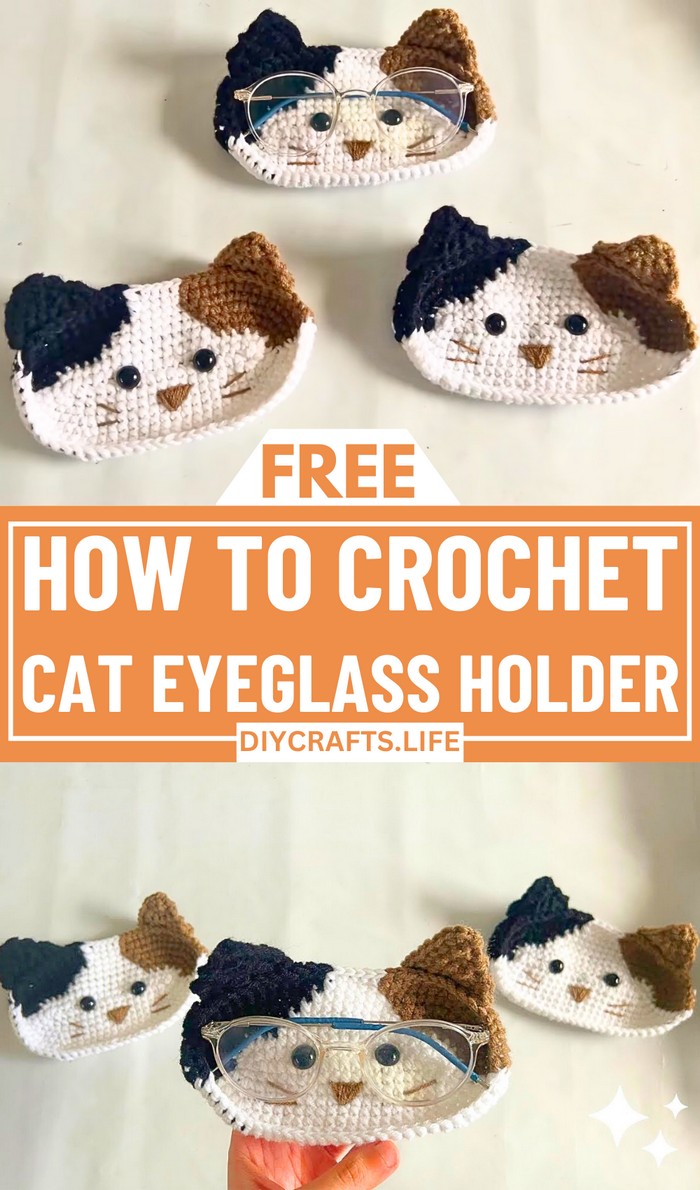
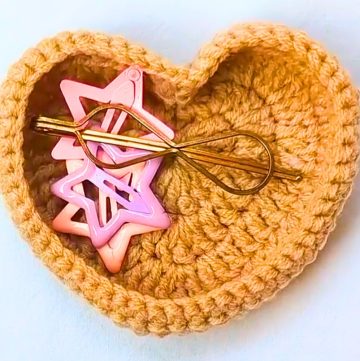
Add a touch of charm and practicality to your daily routine with this Crochet Cat Eyeglass Holder. Designed to bring a smile to your face while keeping your glasses safe, this playful and creative design blends function and personality effortlessly. Perfect for cat lovers or anyone looking to craft something adorable, this pattern brings joy to everyday organization.
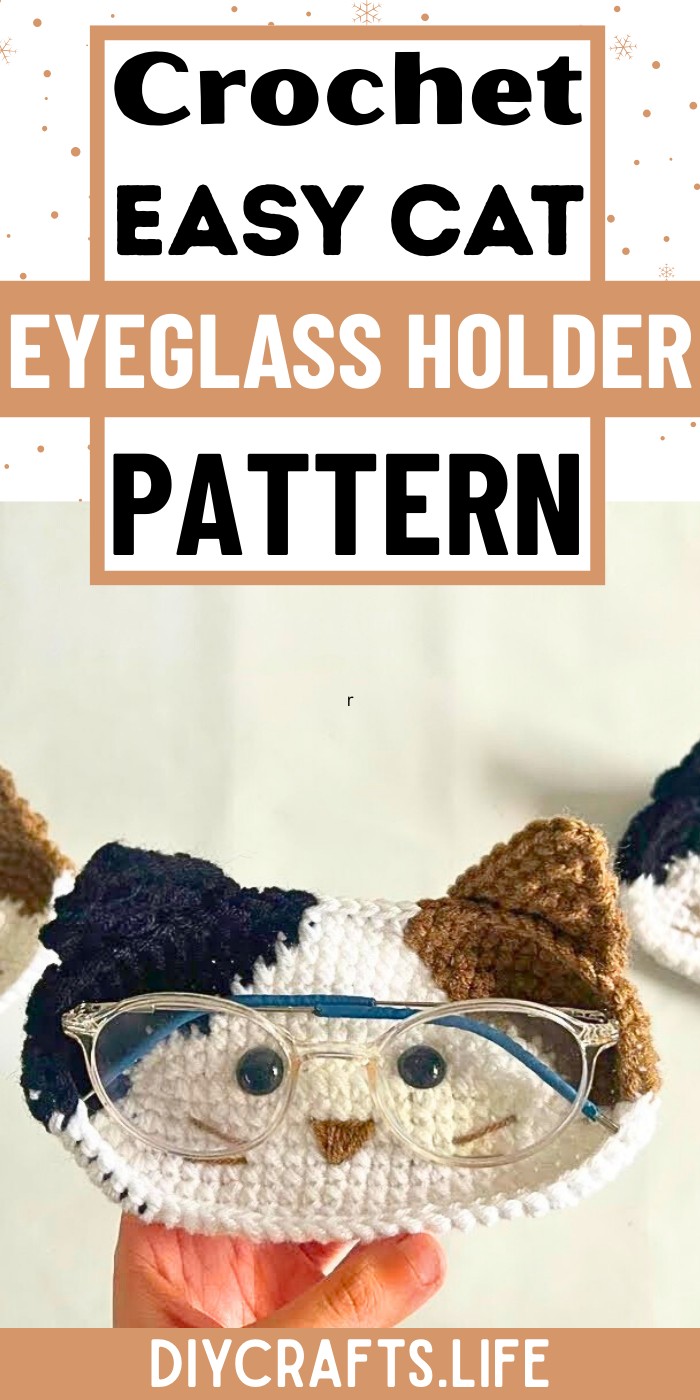
Crochet Cat Eyeglass Holder
The Crochet Cat Eyeglass Holder is special for its unique cat-inspired design that balances cuteness and utility. With carefully crafted details like whimsical ears and a gentle face, this holder adds personality to any space while neatly storing your eyeglasses. Whether made in classic tones or playful colors, it’s an eye-catching piece that you can personalize to your taste. Thoughtfully designed, it’s both stylish decor and a practical solution for keeping glasses visible and secure.
Credit Plakshi Jain | Crochet
Materials & Tools Needed
- Yarn:
- White yarn (3-ply): Used as the base color. If you're using thicker yarn (e.g., 4-ply), use only one strand; otherwise, double up the yarn.
- Brown yarn: Used for detailing and color changes.
- Black yarn: Used for additional details (e.g., ears and pattern features).
- Hook:
- A 3.5 mm crochet hook recommended for the stated yarn size.
- Needle:
- A tapestry needle for sewing the components (ears, eyes, nose) and weaving in ends.
- Safety Eyes:
- Two small safety eyes. Position the eyes appropriately, as suggested below.
- Scissors:
- Used to trim yarn ends.
- Optional: Stitch markers to help track rounds if needed.
Finished Size & Customization Ideas
- Approximate Finished Size:
- The eyeglass holder fits a standard pair of glasses and measures roughly 6–8 inches in width. Exact dimensions were not provided in the video but can vary based on yarn weight and tension.
- Customization Suggestions:
- Adjusting Size:
- Use thicker yarn for a larger holder or thinner yarn if you want a smaller appearance.
- Increase or decrease the number of starting chains for the base to modify the width.
- Style Variations:
- Color changes: Experiment with different yarn colors for the base, ears, or details to suit your style.
- Straps or hooks: Add straps for hanging the holder or loops/hooks if you want to mount it on a specific surface.
- Details:
- Make the cat ears bigger, smaller, or in patterns (e.g., stripes in contrasting colors).
- Add whiskers using embroidery stitching for a unique touch.
- Adjusting Size:
Pattern Abbreviations & Terminology
Here are the commonly used terms for this pattern:
- ch: Chain
- sc: Single crochet
- inc: Increase (2 sc in the same stitch)
- sl st: Slip stitch
- st(s): Stitch(es)
- YO: Yarn over

Step-by-Step Detailed Crochet Instructions
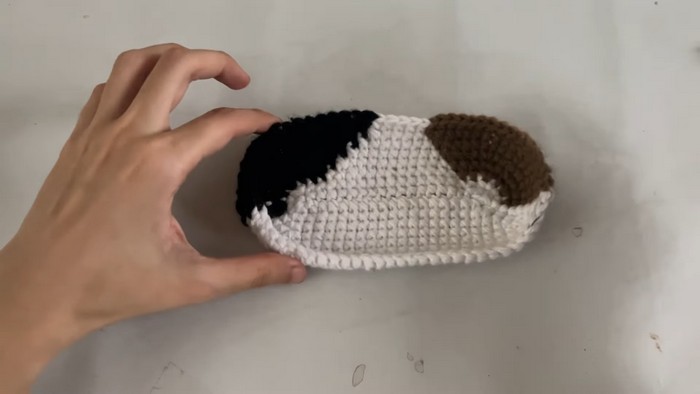
Base (Oval Shape)
- Start:
- Create a slip knot using two strands of white yarn.
- Chain 20. Yarn over and pull through to form chains.
- Round 1:
- Skip the first chain.
- In the 2nd chain, make 2 sc (inc).
- Work 17 sc across the chain.
- In the last chain, make 3 sc. Rotate your work to begin working on the opposite side.
- Work 16 sc along the opposite side.
- Make 1 inc in the final stitch of the round.
- Sl st to the starting stitch and chain 1.

- Round 2:
- Make 2 inc at the beginning of the round (one in each of the first two stitches).
- Work 17 sc down one side.
- At the curve, make 3 inc (one in each stitch).
- Continue 17 sc down the opposite side.
- Make 1 inc, then sl st into the starting stitch.
- Round 3 (Color Change):
- Attach the brown yarn and switch colors.
- Work the first 6 stitches with brown. Switch to white yarn:
- To switch, finish the stitch in progress by pulling through with the new color (white yarn).
- Continue pattern: 17 white sc, switch to black for 6 black sc, return to white for remaining sc stitches.
- Maintain increases at curves as follows: On curved ends, make inc in 3 consecutive stitches.
- Continue Increasing Rounds:
- Follow the color-change pattern, increasing 1 stitch of brown/black yarn in each successive round.
- For the middle sections, work sc as per the pattern.
- Repeat for 3 more rounds, adjusting for color changes and increases.
- Finish:
- Slip stitch into the starting stitch of the last round.
- Fasten off and weave in ends.
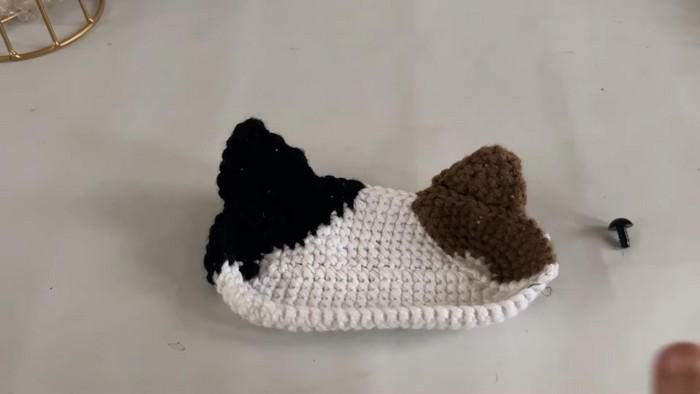
Ears
- Start:
- Chain 9 with either black or brown yarn.
- Skip the first chain and make 8 sc.
- Shaping:
- Chain 1, flip your work. Skip the first stitch and make 5 sc.
- Skip the next stitch and make 1 sc in the last stitch.
- Continue:
- Chain 1, flip your work, skip the first stitch, and make 4 sc in each round.
- Repeat until the ear narrows to a point.
- Create a border along the edges by working sc around.
- Finishing:
- Attach the ear to the top of the eyeglass holder using a needle and thread.
- Secure the yarn by weaving ends into the stitches.
Eyes
- Placement:
- Leave 5 stitches at the center as a gap. Position the safety eyes on either side of the holder.
- Alternatively, place glasses directly on the holder to decide eye positioning.
- Attachment:
- Insert and secure the safety eyes using their backing.

Nose
- Embroidery:
- Use brown yarn and a tapestry needle for nose embroidery.
- Stitch in the shape of a small triangle.
- Leave a small tail of yarn at the end and secure with knots.
Final Assembly
- Clean Up:
- Weave in any loose yarn ends to finish off the piece.
- Enjoy:
- Your Crochet Cat Eyeglass Holder is now ready to use! Place your glasses on the holder and admire the adorable design.