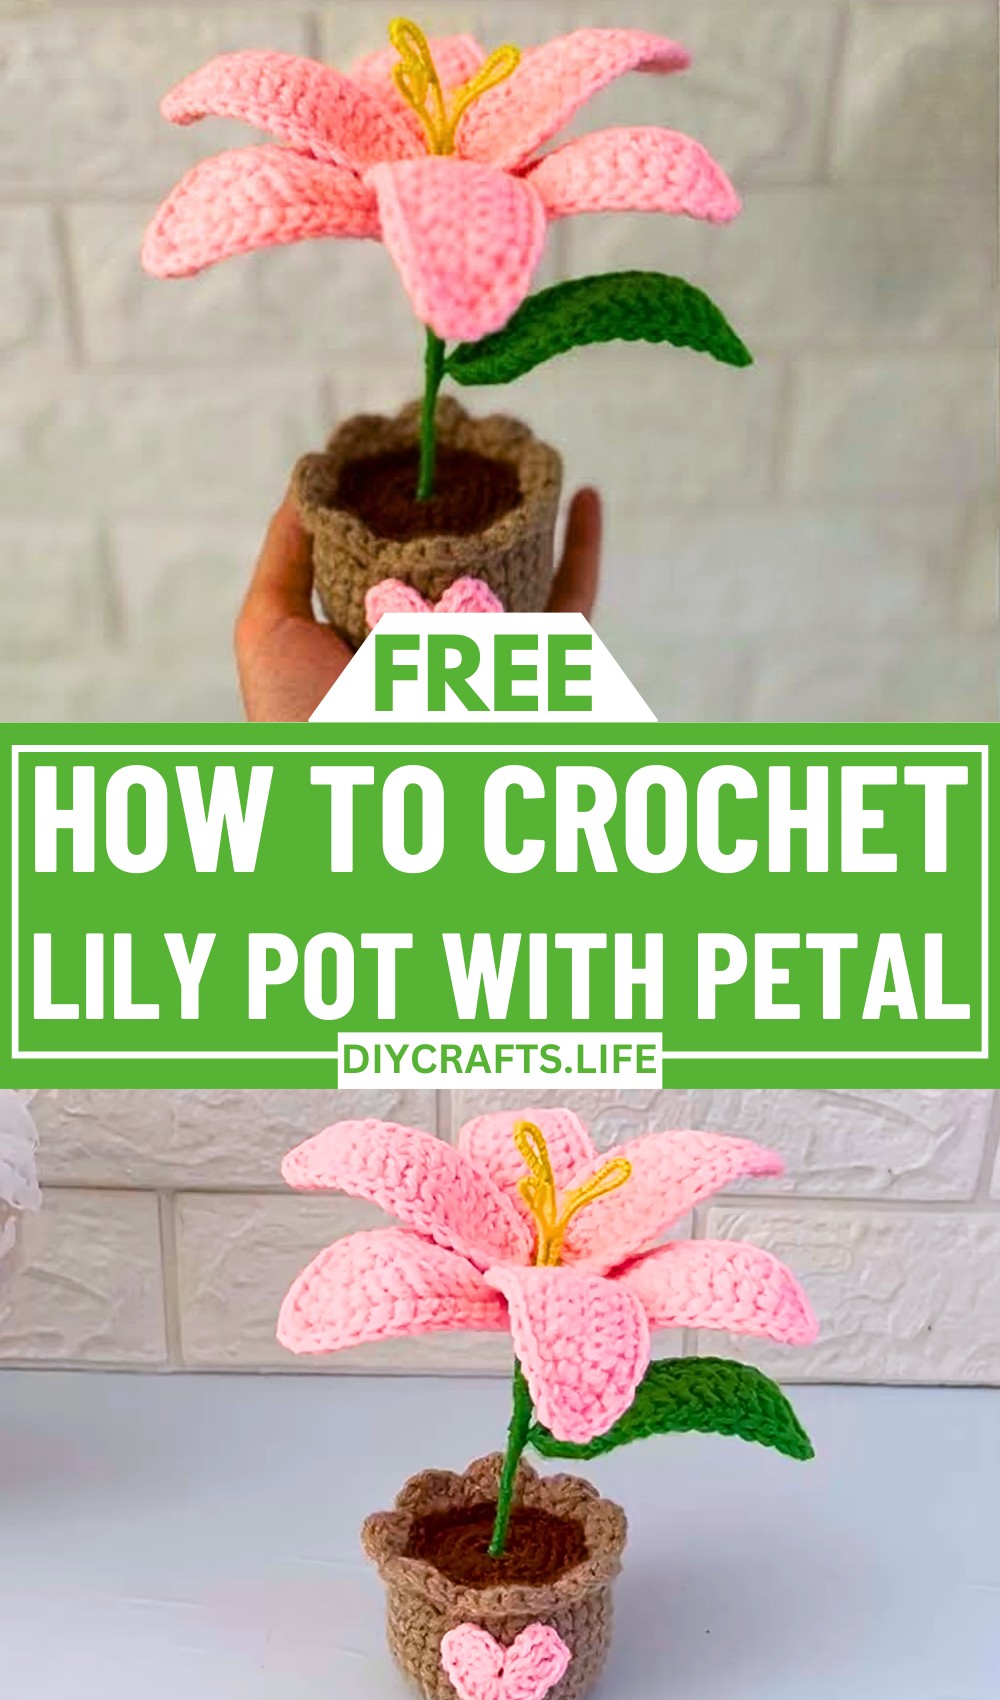
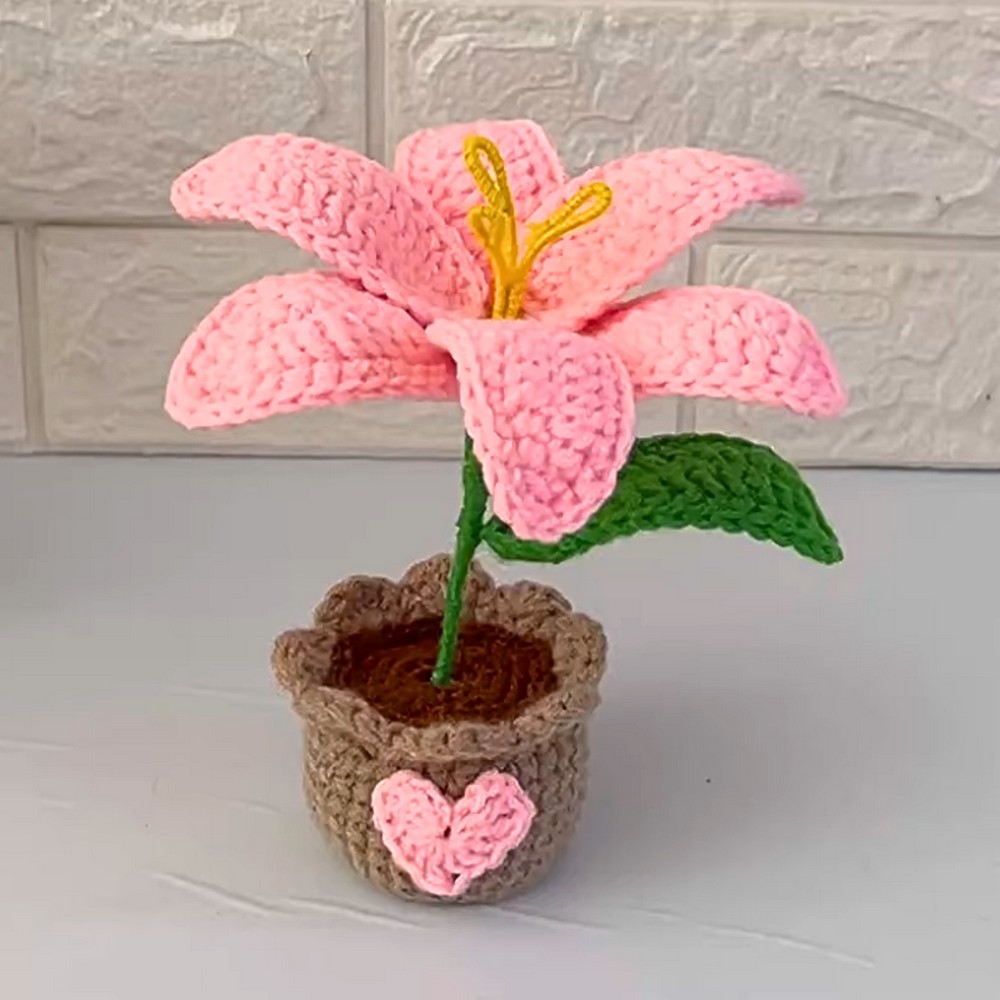
Bring nature’s charm indoors with a crochet creation that blooms with elegance and color! Crochet enthusiasts and beginners alike will adore the beauty in crafting this delightful lily pot pattern. Perfect for brightening up living spaces, work desks, or gifting to loved ones, this design gives you a chance to personalize your decor while showcasing your creativity and proficiency in crochet art.
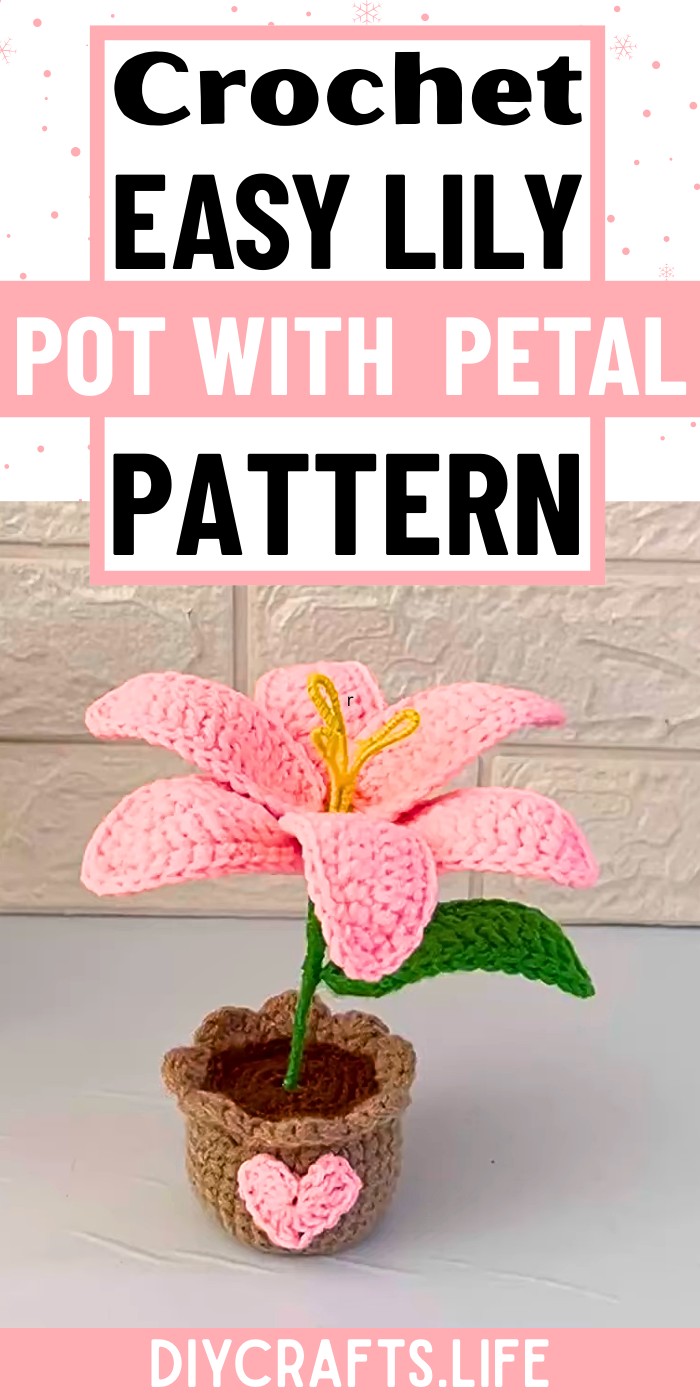
Crochet Lily Pot
The Crochet Lily Pot design stands out with its intricate petals, detailed pot structure, and thoughtful embellishments that mimic the natural beauty of lilies. Using techniques like magic rings, single crochets, double crochets, and wire work, this pattern creates lifelike petals and structured forms that blend style with artistry. Its delicacy, depth, and ability to merge color and texture make it a true celebration of craft. Whether used as a centerpiece or a unique handmade gift, the Crochet Lily Pot adds warmth and personality to any space.
Credit Plakshi Jain | Crochet
Materials & Tools Needed
- Yarn:
- Two strands of 3-ply yarn or one strand of 4-ply yarn for the pot.
- 3.5 mm crochet hook.
- 0.4 mm wire.
- Yellow yarn for the flower centers.
- Pink yarn for the petals.
- Additional Tools:
- Small sticks for the flower centers.
- Glue for assembly.
Finished Size & Customization Ideas
- Approximate Size: The size of the pot and the lilies will depend on the tension and yarn used.
- Customization Ideas:
- Adjust Size: Use different yarn weights (e.g., 5-ply for a larger pot).
- Style Variations:
- Vary lengths of pot handles or straps.
- Use a variety of colors for petals and pot for a customized look.
Pattern Abbreviations & Terminology
- sc - Single Crochet
- sl st - Slip Stitch
- ch - Chain
- dc - Double Crochet
- hdc - Half Double Crochet
- tr - Triple Crochet
- inc - Increase (2 sc in one stitch)
- dec - Decrease (combine 2 stitches into 1)
Step-by-Step Detailed Crochet Instructions
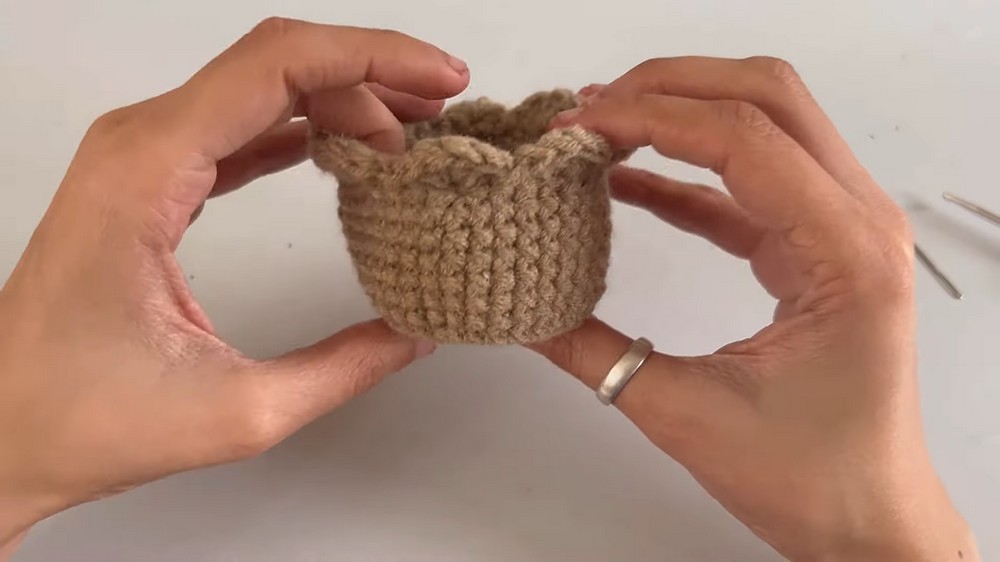
Pot Construction
- Magic Ring:
- Start by making a magic ring.
- Insert 6 sc into the magic ring. (6)
- Round 2:
- Insert 6 inc (total 2 sc in each stitch) (12)
- Round 3:
- "sc, inc", repeat 6 times. (18)
- Round 4:
- "2 sc, inc", repeat 6 times. (24)
- Round 5:
- "3 sc, inc", repeat 6 times. (30)
- Round 6 & Beyond:
- Slip st, work in BLO (Back Loop Only).
- "4 sc, inc", repeat 6 times. (36)
- Next Rounds:
- "4 sc, dec", repeat 6 times. (30)
- Final Touches:
- Slip st, ch 1.
- "Skip 1 st, 4 dc in next st," skip next st, sl st in next, repeat until end.
- Finish off and weave in ends.
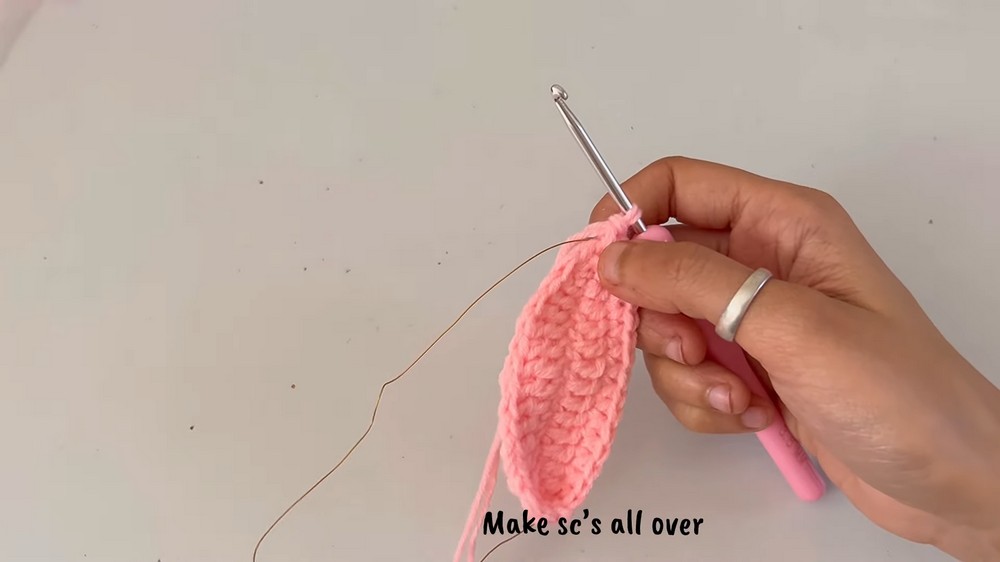
Lily Petals
- Start with Pink Yarn:
- Use 2 strands of 3-ply yarn or a 4-ply yarn.
- Make a slip knot, then ch 15.
- Row 1:
- sc in 2nd ch from hook.
- 2 hdc in next 2 chains (1 hdc each).
- dc in next 8 chains.
- Row 2:
- 3 sc in last stitch.
- Continue on the opposite side with 8 dcs.
- 2 hdc in next 2 stitches.
- sc in last stitch.
- Slip st to join the round and start the next round.
- Round with Wire:
- Attach 0.4 mm wire along the edge while crocheting.
- sc around the edge, ensuring wire is secured within stitches.
- Finish with sl st at the starting point.
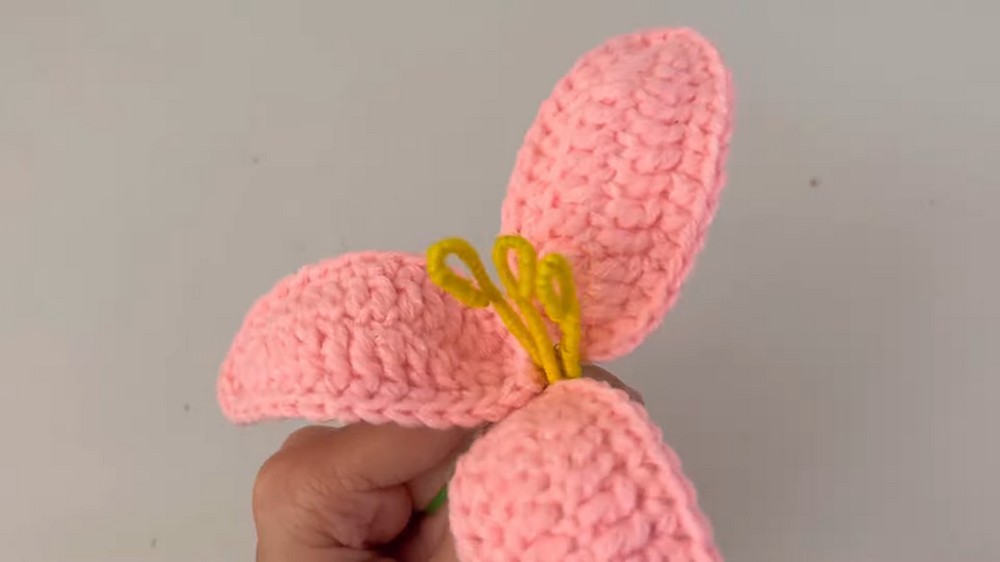
Lily Heart
- Using Yellow Yarn:
- Make a magic ring.
- ch 1, 2 tr, 3 dc, 1 tr, 3 dc.
- 2 tr, ch 3, sl st into the magic ring.
- Pull tight, knot, and trim the ends.
Assembly
- Lily Center:
- Wrap yellow yarn around sticks to form the flower center.
- Secure with glue.
- Final Assembly:
- Attach the petals to the center using glue, ensuring each petal is secured around the center.
- Arrange and secure flowers onto the pot as desired.