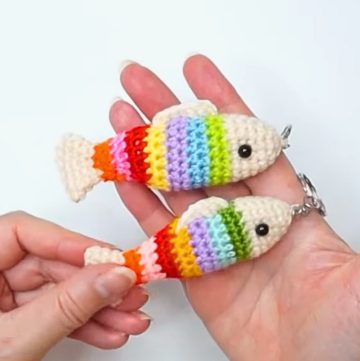
Turn your yarn into vibrant, playful creations with this charming crochet mini fish design! These adorable little fish are not only fun to make but bring a pop of whimsy to any project. Whether you're crafting an ocean-themed decoration, a keychain, or a delightful handmade gift, these intricately detailed mini fish are sure to brighten anyone's day.

Crochet Mini Fish Pattern
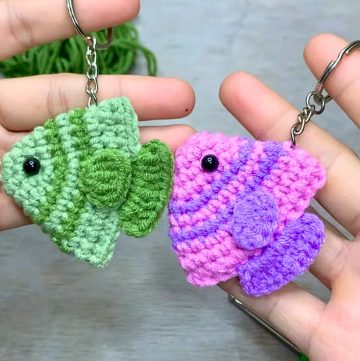
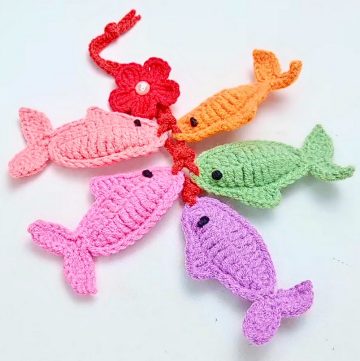
This unique pattern stands out with its simple yet clever design and versatile color options. The structure is thoughtfully crafted, featuring delicate fins, expressive bead eyes, and a textured body that feels lifelike. Its compact size makes it ideal for accessorizing bags, hats, or home decor. With endless possibilities to customize colors and designs, this crochet creation blends creativity with practicality, making it perfect for crafters of all skill levels.
Credit Crochnitting
Step-by-Step Pattern
Supplies Needed:
- Crochet hook (size as per the tutorial recommendation)
- White yarn and various colored yarns for body, tail, and fins
- Polyester filling
- Black beads or embroidery for the eyes
- Scissors and pointed tool
- Stitch marker (optional)

Steps to Crochet the Mini Fish
Round 1: Magic Ring
- Take white yarn and create a magic ring.
- Pull a loop and make 1 chain stitch to lock the ring.
- Into the magic ring, crochet 6 single crochet (sc) stitches:
- First, tighten the middle thread to close the ring.
- Attach the last stitch into the first stitch’s two loops using a slip stitch.
- Round 1 is completed.
Round 2: Increasing to 9 sc
- Start by making 1 chain stitch.
- Crochet 1 sc in the next stitch (NOT in the same stitch).
- Increase (make 2 sc) in the next stitch.
- Follow the pattern:
- 1 sc, then 2 sc (increase).
- At the end of Round 2, you should have 9 sc.
- Connect the last stitch to the first stitch with a slip stitch.

Round 3: Increasing to 12 sc
- Begin with 1 chain stitch.
- Crochet 1 sc in the next stitch.
- Follow this pattern:
- 1 sc, 1 sc, 2 sc (increase).
- Repeat until the end.
- At the end, you should have 12 sc. Connect the last stitch again with a slip stitch.
Round 4: Increasing to 15 sc
- Make 1 chain stitch.
- Follow this pattern:
- 1 sc in the next 3 stitches, then 2 sc in the fourth stitch (increase).
- Repeat this sequence.
- At the end of Round 4, you should have 15 sc.
- Switch to the next color at the last sc by pulling the next yarn through the 2 loops.
Round 5: Increasing to 18 sc
- Begin with 1 chain stitch.
- Follow the pattern:
- 1 sc in the next 4 stitches, then 2 sc in the fifth stitch (increase).
- Repeat until you have 18 sc.
- Switch colors at the last sc.
- Connect the last stitch to the first.

Round 6: Increasing to 21 sc
- Start with 1 chain stitch.
- Crochet according to the pattern:
- 1 sc in the next 5 stitches, 2 sc in the sixth stitch (increase).
- Repeat until you achieve 21 sc.
- Finish the round by changing colors again and connecting with a slip stitch.
Round 7: Increasing to 24 sc
- Start with 1 chain stitch.
- Work with this pattern:
- 1 sc in the next 6 stitches, 2 sc in the seventh stitch (increase).
- Repeat until you reach 24 sc.
- Attach with slip stitch.

Rounds 8 & 9: Maintaining 24 sc
- Crochet 1 sc in each stitch (no increase).
- Work this pattern for two rounds to give the body a steady shape with 24 sc.
- Once completed, secure the thread and prepare for closing.
Closing the Opening
- Use a single crochet stitch to seam the two sides together. Start by inserting the hook into stitches from both sides.
- After closing, fill the fish body with polyester stuffing.
- Smooth out the stuffing using a pointed tool.
Tail Segment
- Attach yarn at the 6th stitch from one side.
- Create the tail using the following sequence:
- Chain 3 stitches.
- Make 2 double crochet (dc) into the same stitch.
- Chain 3 and attach to the same stitch using a slip stitch.
- Move to the next stitch, make 3 chains, 2 dc, then chain 3 again, attaching with a slip stitch.
- Secure the tail by cutting off the extra thread and weaving it in.

Fin Segment
- Attach a new color at the 6th stitch of Round 7 (on the body).
- Follow this sequence for each fin:
- Chain 3 stitches.
- Make 3 double crochet (dc) in the same stitch.
- Attach with a slip stitch.
- Repeat the process for the opposite side fin.
Eyes
- Use black beads or embroider the eyes with black thread.
- Attach securely for a polished look.

Final Touch
- Trim any excess yarn.
- Double-check all stitches and secure any loose ends.
Completed Mini Fish
Now you have a cute little fish made in different colors of your preference. It can be used as embellishments, gifts, or even keychain designs