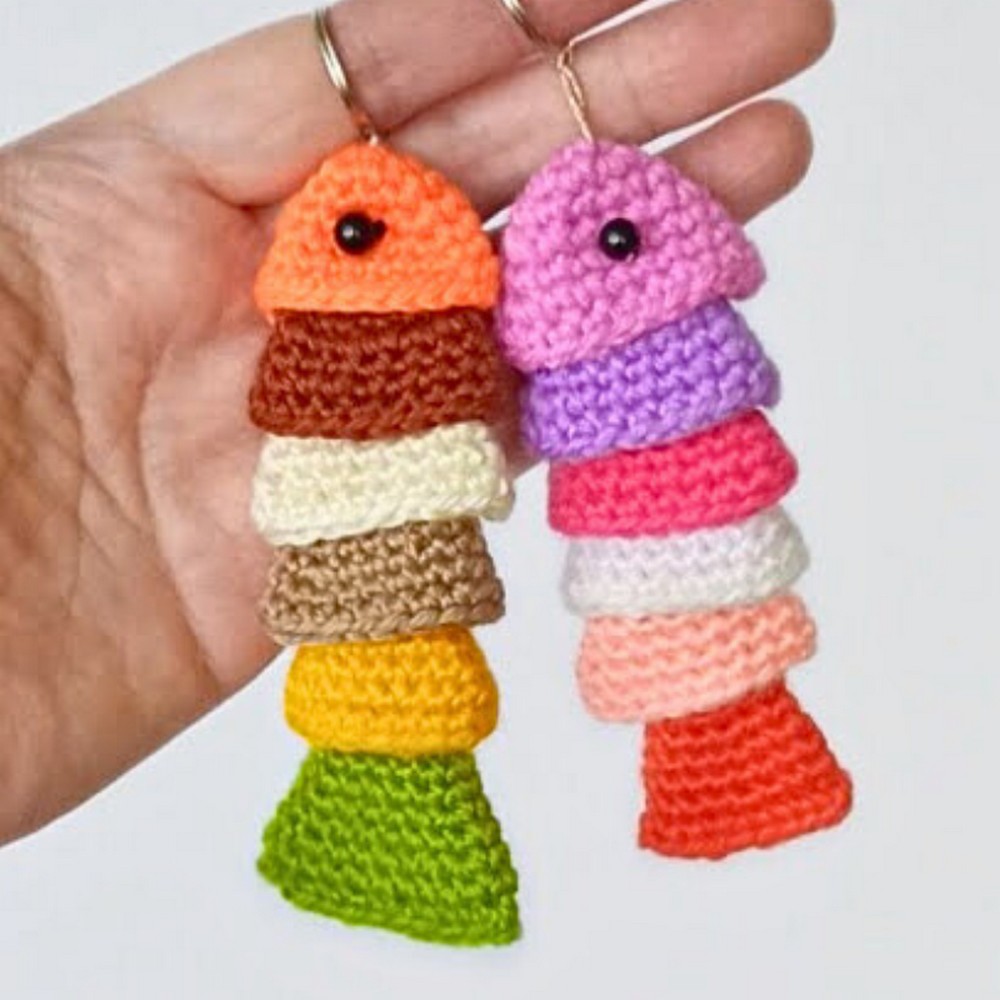
Turn your leftover yarn into something fun and adorable—a charming crocheted fish keychain! In just 30 minutes, you can create a vibrant little fish that is perfect as a gift, an accessory, or a meaningful keepsake. This project breathes life into scrap yarn, transforming it into something both practical and delightful, making it the perfect handmade addition to your daily essentials.

This crochet fish pattern blends simplicity and versatility. With just basic crochet skills, beads for the eyes, and a keyring, you can craft a cute, colorful piece that stands out. Its small size (10–11 cm) and unique design bring personality to your keychain, bag, or even festive decorations. Perfect for beginners or experienced crafters, the pattern sparks creativity, letting you choose colors and textures that reflect your style.
Credit Olga Garkusha
Required Materials:
To crochet the fish keychain, you will need:
- Leftover yarn (various colors work great).
- Metal keychain ring.
- Strong cord (tight and durable).
- 4-5 mm beads (to create the eyes).
- 1.75 mm crochet hook.
Important Notes:
- The finished toy will measure approximately 10-11 cm in size.
- This project is suitable for beginners with basic crochet skills (e.g., single crochet, increasing stitches).
- The project can be completed in about 30 minutes.
- Pay attention to stitch counts in each row to maintain the fish's shape.
- Prepare to sew the parts together and attach the eyes securely.
Detailed Step-by-Step Instructions
Here’s how to crochet the fish:
Step 1: Crochet the Fish Body
You will crochet 5 separate body parts. Follow these stitch patterns:
- Row 1: Crochet 6 single crochet (sc) stitches.
- Row 2: Increase in each stitch: 6 increases (6 /) → total of 12 sc.
- Row 3: Crochet 5 sc, 1 increase, repeat twice → total of 14 sc.
- Row 4: Crochet 6 sc, 1 increase, repeat twice → total of 16 sc.
- Row 5: Crochet 7 sc, 1 increase, repeat twice → total of 18 sc.
- Row 6: Crochet 8 sc, 1 increase, repeat twice → total of 20 sc.
- Row 7: Crochet a full round of 20 sc.
Repeat this process to create 5 identical pieces.

Step 2: Crochet the Tail
- Row 1: Crochet 6 single crochet (sc) stitches.
- Row 2: Work 1 sc, 1 increase, repeat 3 times → total of 9 sc.
- Rows 3-4: Crochet 9 sc around.
- Row 5: Crochet 2 sc, 1 increase, repeat 3 times → total of 12 sc.
- Rows 6-7: Crochet 12 sc around.
- Row 8: Crochet 3 sc, 1 increase, repeat 3 times → total of 15 sc.
- Rows 9-10: Crochet 15 sc around.
- Row 11: Crochet 4 sc, 1 increase, repeat 3 times → total of 18 sc.
Step 3: Assemble the Fish
- Use 10 single crochet (sc) stitches to join all 5 body pieces together.
- Between the 4th and 5th body parts, securely sew on the beads (eyes).
- Attach the tail to the body using a sewing needle or crochet stitches.
You should now have a cute crocheted fish! Feel free to attach a cord and the metal ring to create a keychain.

Final Notes:
- The tutorial was designed to be simple, even for beginners, so don’t stress if it’s your first attempt.
- If you enjoyed making this project, explore similar ideas in the playlists like "Crochet Keychains" or "Crochet Gifts."
- For more projects, subscribe to the creator's YouTube or Telegram channel.
Happy crocheting! 🎣


