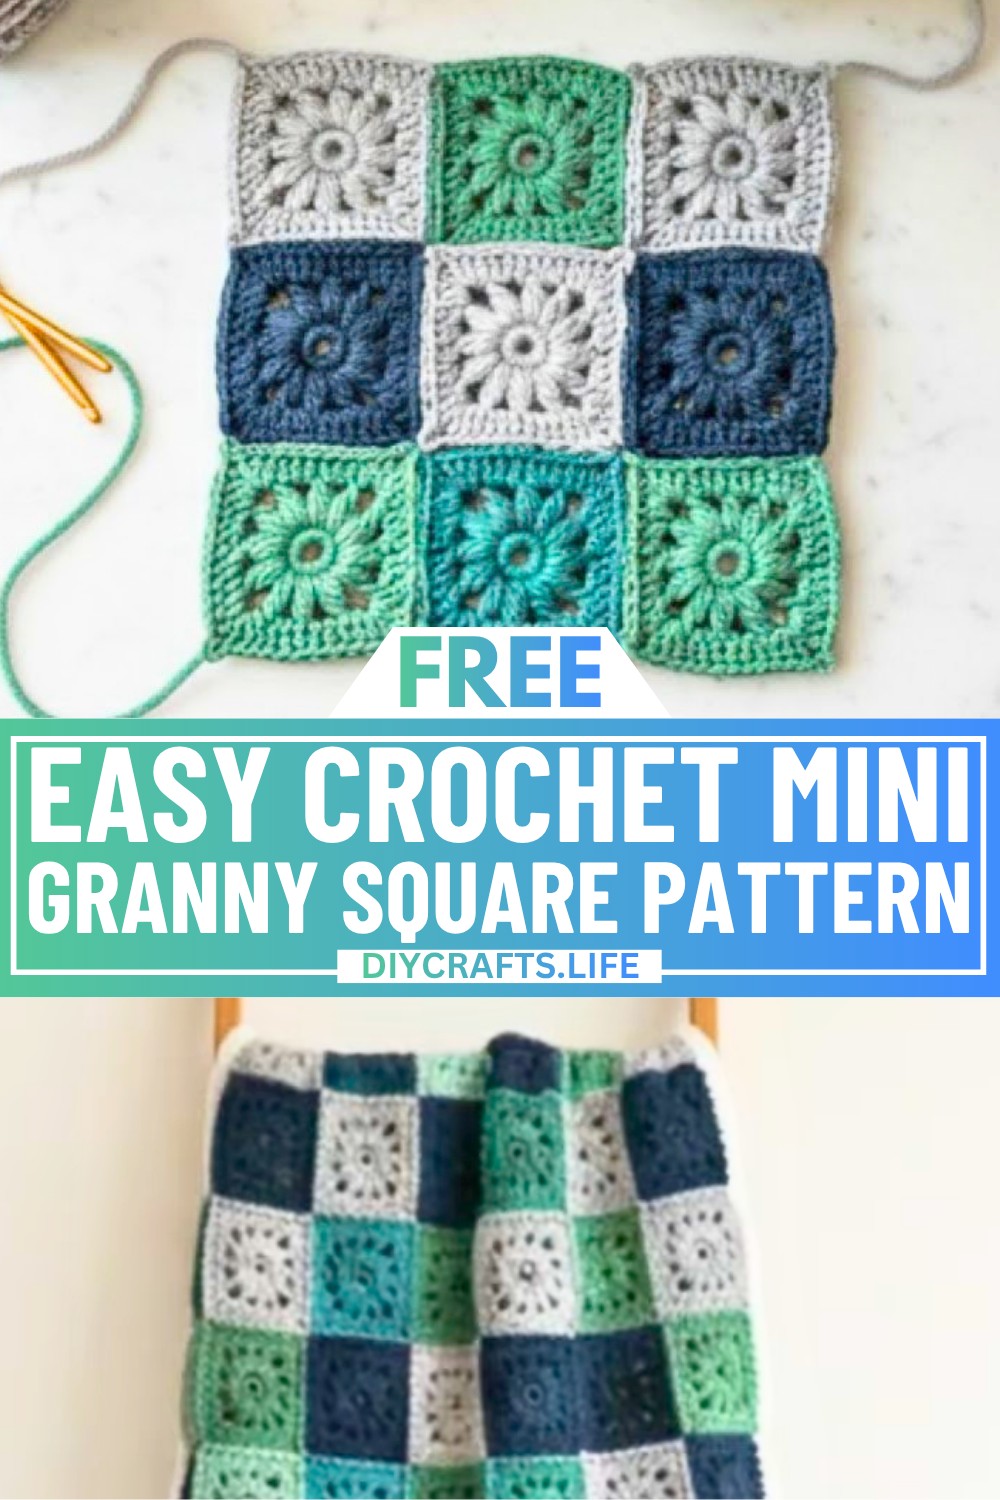
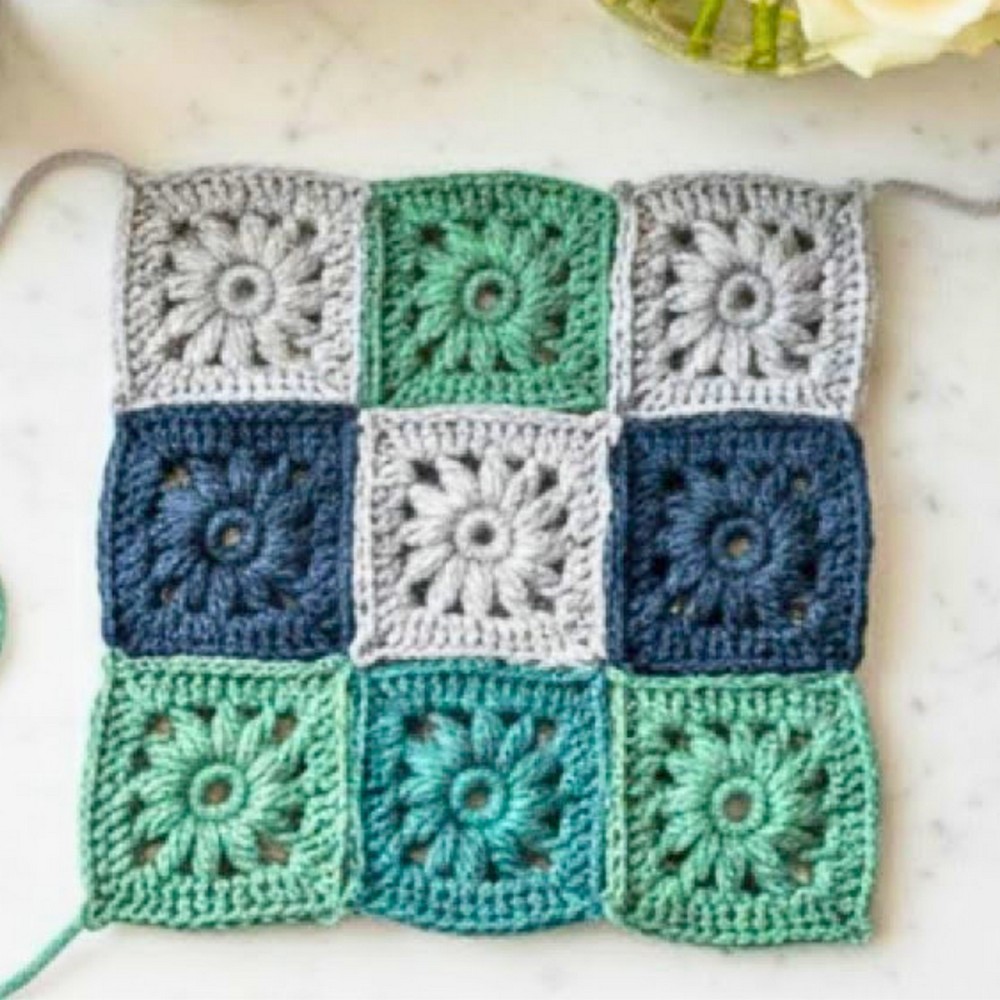
A mini floral granny square is the perfect crochet piece for anyone who loves small, versatile, and pretty designs. This square features a delicate floral pattern that adds a touch of charm to any creation. It’s small yet packed with detail, making it ideal for decorating items such as bags, pillows, or blankets. You could also join multiple squares together to craft vibrant scarves, curtains, or even doll accessories.
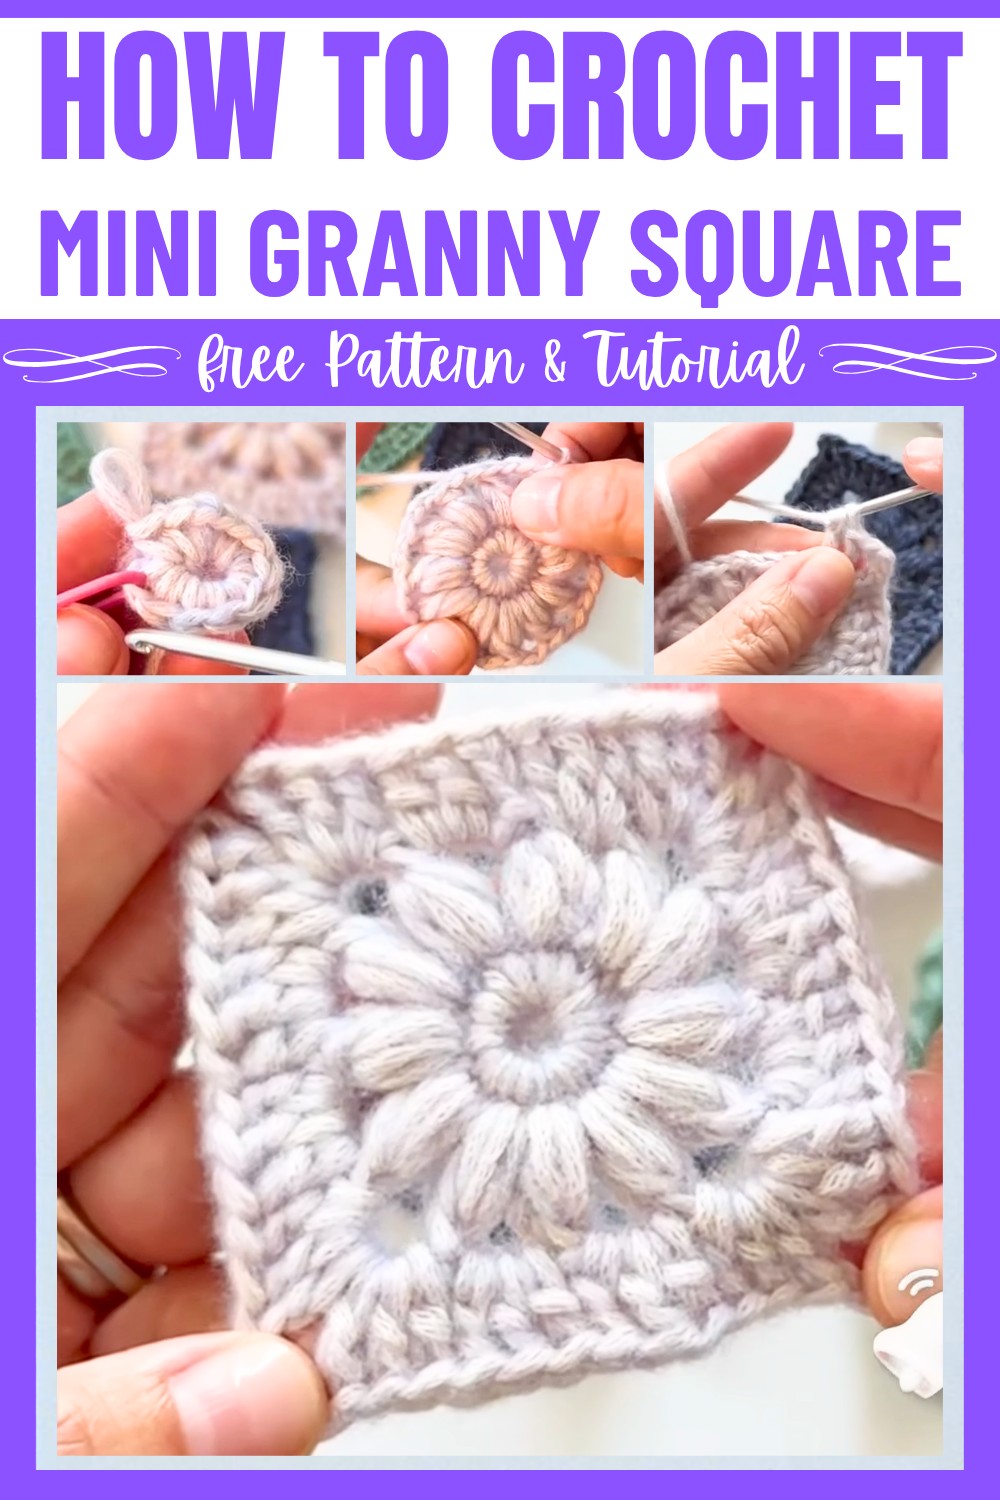
What makes this mini granny square stand out is the combination of simple steps and incredible style. With step-by-step guidance, along with a pattern diagram and a progress bar, following the tutorial feels easy and stress-free, even for beginners. Plus, the puff stitches and corners are what give this square its unique texture and personality. Once finished, it’s recommended to lightly block the piece with water to perfect its shape—it’ll look so neat and polished!
Get creative with your favorite yarn colors and start crocheting. You’ll love how quickly this little square brightens up anything in your home or wardrobe!
Credit Tasty Dumpling Living
Materials & Tools Needed
- Yarn: Any type of yarn you prefer (e.g., cotton or acrylic). The tutorial doesn’t specify the weight, but medium (4) yarn is recommended for most granny squares.
- Hook: Crochet hook size corresponding to yarn weight (e.g., 4.0mm or 5.0mm).
- Optional: Stitch marker (to keep track of the first stitch).
- Tapestry Needle: To weave in the ends and assist with the invisible join.
- Scissors: To cut the yarn.
Finished Size & Customization Ideas
- Finished Size: The exact dimensions will depend on the yarn and hook used but typically measures around 4 inches by 4 inches with medium-weight yarn and a suitable hook.
- Customization Ideas:
- Use different colors for each round to create a vibrant, floral effect.
- Increase the size by adding extra rounds with variation in double crochets and chain spaces.
- Use metallic or gradient yarn for elegant textured squares.
- Sew multiple squares together to make blankets, scarves, bags, or pillow covers.
Pattern Abbreviations & Terminology
The pattern uses standard US crochet terminology:
- ch: Chain
- ss: Slip Stitch
- sc: Single Crochet
- dc: Double Crochet
- ps: Puff Stitch
- st(s): Stitch(es)
- rep: Repeat
Step-by-Step Crochet Instructions
Round 1
- Start with a slip knot and chain 5. (This will form the base loop.)
- Join the chain ends into a loop with a slip stitch into the first chain.
- Ch 1. Work 12 single crochets (sc) into the loop. (Tip: Use a stitch marker to mark the first stitch.)
- Count your stitches to ensure accuracy (12 sc total).
- Join the round with a slip stitch into the first single crochet.
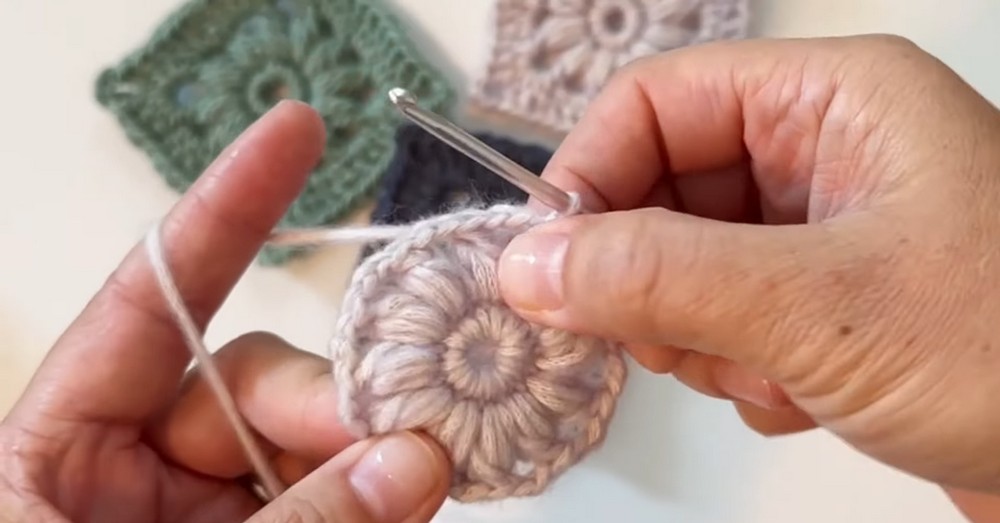
Round 2
- Begin with a puff stitch in the first stitch:
- Yarn over, insert hook into the first stitch, pull up a loop (same height as your previous loops). Repeat this process once more for a total of 5 loops on your hook. Yarn over and pull through all 5 loops.
- Ch 3 after the puff stitch.
- Create 12 puff stitches total:
- Yarn over, insert hook into the next stitch, pull up a loop. Repeat two more times (total of 6 loops when including the yarn over). Yarn over and pull through all loops except the last loop (leaving 2 loops on the hook). Yarn over again and pull through these last 2 loops.
- Chain 2 between each puff stitch.
- Finish the round:
- Join the last puff stitch to the first puff stitch with a slip stitch into the top of the stitch.
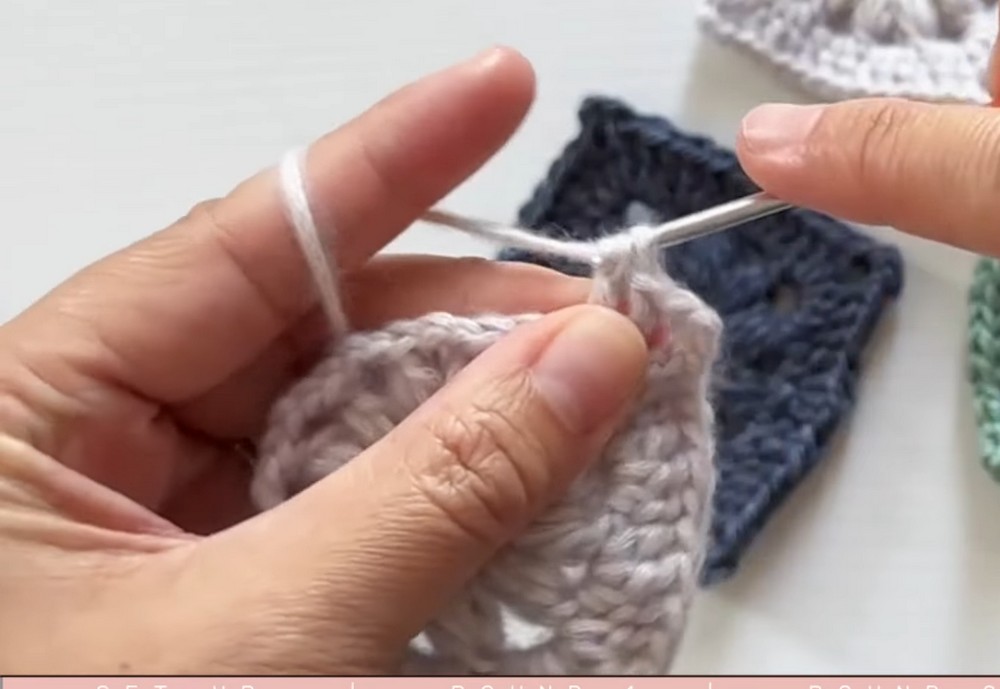
Round 3
- Slip stitch into the first chain-2 space to position yourself.
- Into each chain-2 space, work the following stitches:
- For regular spaces: 3 double crochets (dc) into each chain-2 space.
- For each corner: 3 dc, ch 3, 3 dc into the corner chain space (this creates the corner of the square).
- Continue working this pattern:
- Chain spaces: 3 dc.
- Corner spaces: 3 dc, ch 3, 3 dc.
- Finish the round:
- After your last corner, join the round with a slip stitch into the first double crochet (or chain-3 starting stitch).
Finishing and Joining
- End with invisible join:
- Cut the yarn and leave a tail. Using a tapestry needle, insert the needle through the first dc stitch of the round from front to back.
- Bring the needle to the last stitch, inserting it under the back loop only, and pull through gently, mimicking the shape of the round stitches.
- Weave in all loose ends.
Final Blocking
For a neat finish:
- Spray your granny square lightly with water or steam-block it.
- Pin it to a blocking mat and adjust the edges for a perfect square shape.
- Let dry completely.
Notes for Customization:
- Make multiple mini granny squares and seam them together for larger projects.
- Use contrasting colors for a floral appearance, swapping yarn between rounds.
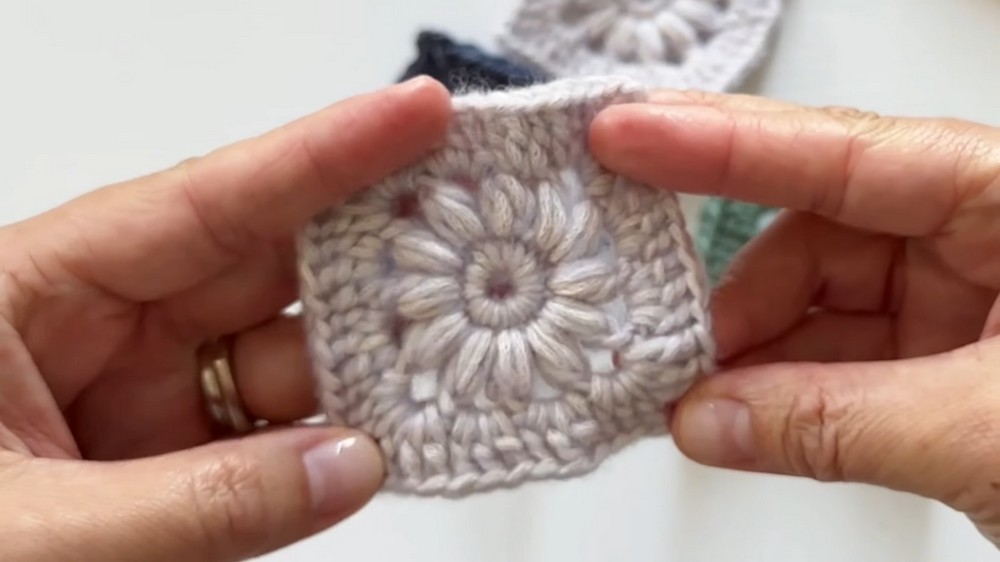
Finished Look:
Your mini granny square should be perfectly floral and square-shaped, and blocking will ensure neat edges and a uniform appearance.