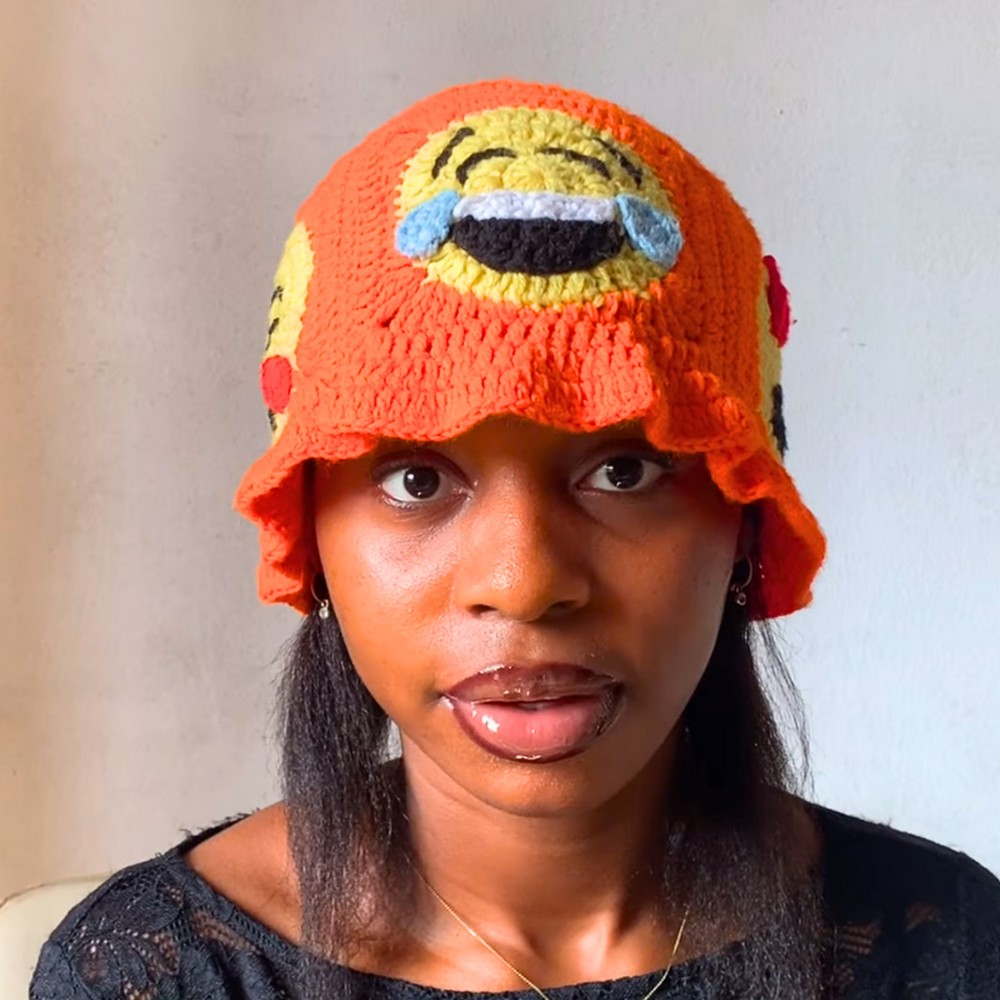
Why just wear a hat when you can wear one covered with your favorite emojis? This crochet hat is fun, colorful, and full of personality. Whether you choose a laughing face, heart eyes, or cool shades, it’s perfect for brightening up your outfit or gifting someone who loves emojis!
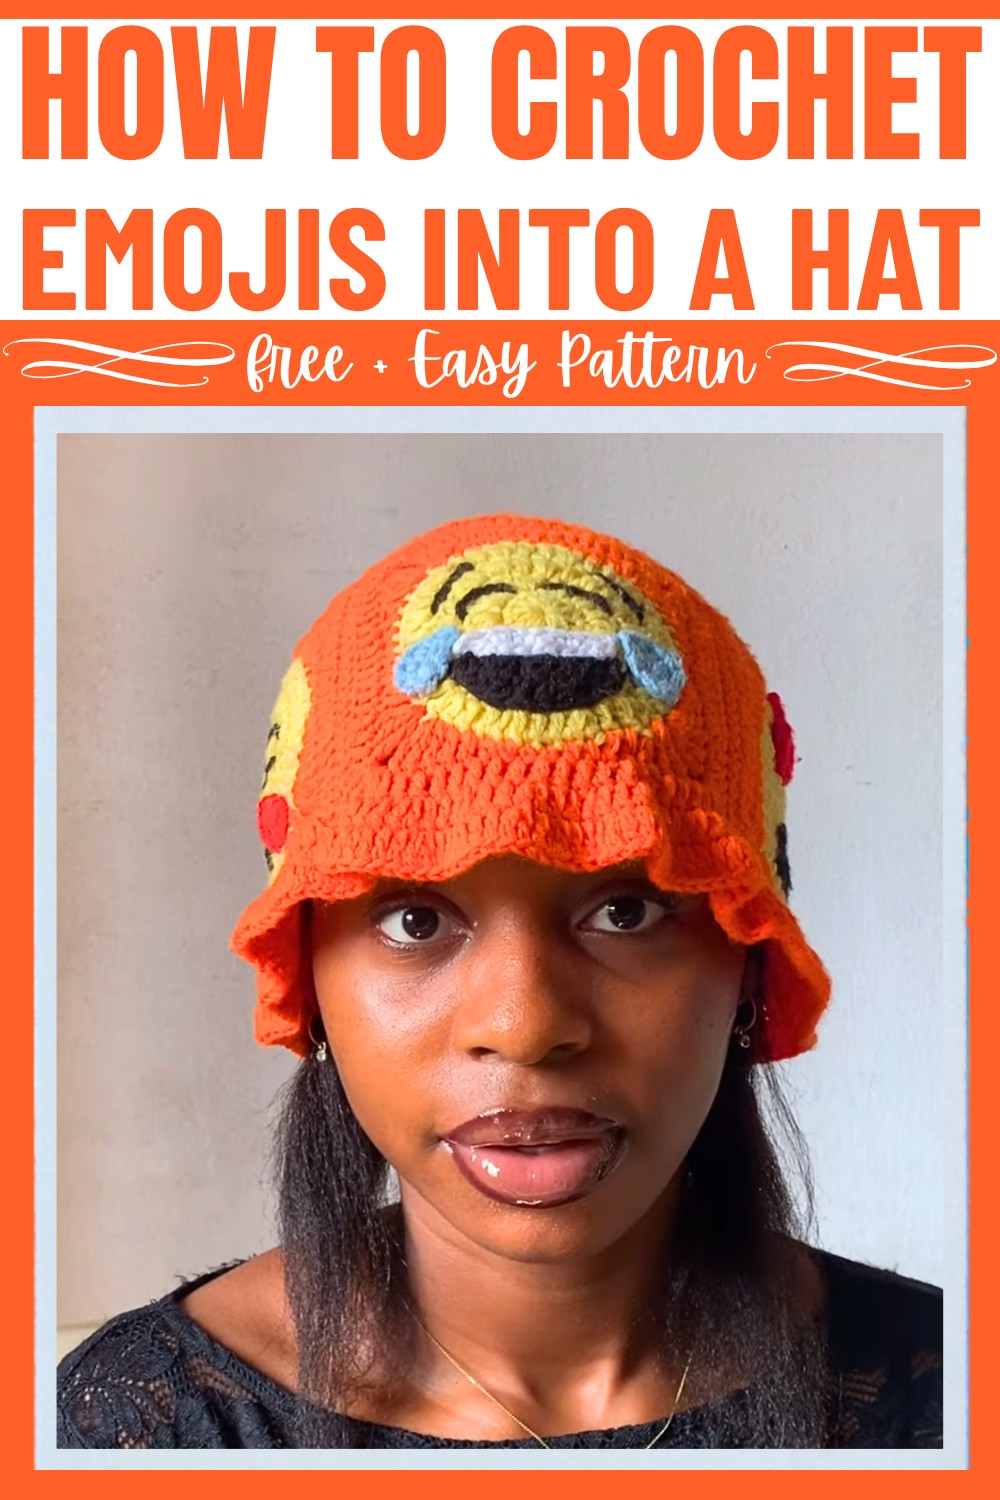
You’ll learn how to customize the size of the hat to fit any head comfortably and create adorable emoji patterns. Don’t worry, the process is explained step-by-step and even includes tips for different sizing techniques. This unique hat is a fantastic way to show off your crochet skills while expressing yourself in the most cheerful way.
Credit Vicole Crochets
Materials & Tools Needed:
- Hook Size: 4.0mm crochet hook (for the hat’s smaller size)
- Yarn Weight: Acrylic yarn (40g balls, 3-ply yarn doubled to create a 6-ply thickness).
- Colors: Black, Yellow (for the base), Red (for hearts), White, Blue (for face details)
- Measuring Tape: To ensure accurate sizing for hat dimensions.
- Scissors: For cutting yarn ends.
- Darning Needle: To sew the emojis onto squares and join components.
Finished Size & Customization Ideas:
- Default Sizes:
- Smaller size (as shown in the video): Dimensions using a 4.0mm hook and two triple crochet corners for squares.
- Larger size: Achieved by using a 4.5mm hook and three triple crochet corners for squares.
- Square Dimensions: Each finished square is approximately 4.2 inches (wider squares can be made using larger hook sizes or additional rows).
- Customization:
- Add another row to squares for more coverage.
- Alternate color combinations for unique looks.
- Switch emoji patterns or design your favorite emojis.
Pattern Abbreviations & Terminology:
- sc: single crochet
- dc: double crochet
- tr: trebble crochet
- ch: chain
- sl st: slip stitch
- inc: increase (two stitches in the same space)
- sts: stitches
- yo: yarn over
- RS: Right side of the work
- WS: Wrong side of the work
- Terminology: Written in US crochet terms.
Step-by-Step Instructions:
Part 1: Granny Square Base
- Round 1: Yellow Base
- Make a magic circle.
- Ch 2 (does not count as a stitch). Crochet 12 dc into the magic circle.
- Pull the tail to tighten the circle and sl st into the first dc. (12 sts)
- Round 2:
- Ch 2. Work 2 dc in each stitch around. Sl st into the first dc. (24 sts)
- Round 3:
- Ch 2. Work 1 dc in the first st, 2 dc in the next. Repeat around. Sl st into the first dc. (36 sts)
- Round 4 (Corners):
- Ch 4 (counts as first tr). Work 1 tr, 1 dc, 1 hdc, 2 sc, 2 sc, 1 hdc, 1 dc, 2 tr into the corner spaces. Repeat for all four corners.
- Sl st into the first ch-4 to secure. You should see a defined square with stitch increases in each corner.
- Additional Rounds: To adjust sizing, you can add additional rounds or increase as needed by continuing the established corner pattern.
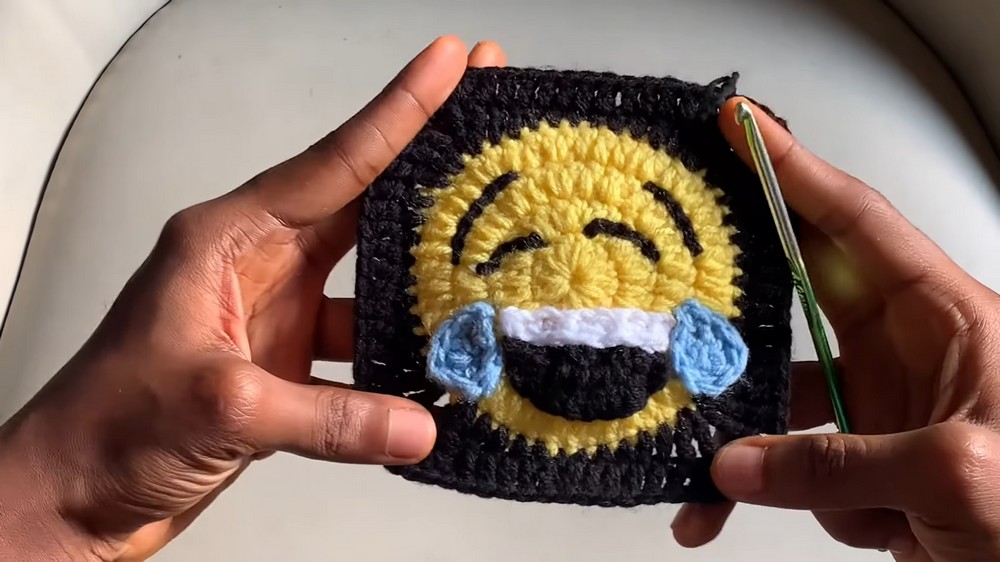
Part 2: Emoji Faces
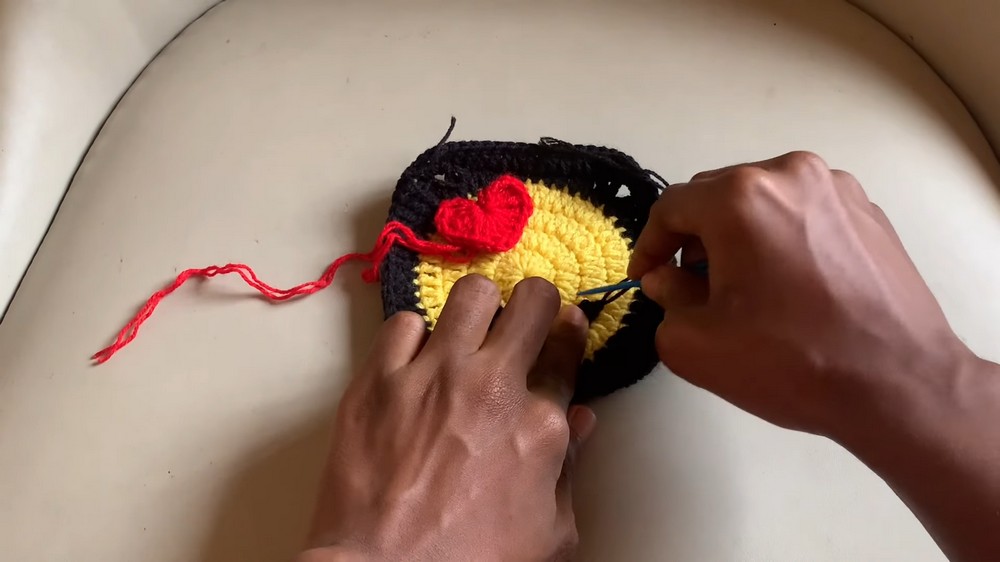
Heart Emoji:
- Use red yarn to make a magic circle.
- Ch 4, then work:
- 3 tr, 3 dc, ch 1, 1 tr, ch 1, 3 dc, 3 tr, ch 4, sl st into magic circle.
- Pull the circle tight, fasten off, and leave a long tail for sewing.
Smiling Mouth:
- Ch 11.
- Skip the first ch, sc in the next 2 ch, dc in the next 6 ch, sc in the final 2 ch.
- Fasten off, leaving a long tail for sewing.
Eyes:
- Use black or white yarn for eye details.
- Make a small magic circle, work 1 dc followed by 2 sc, and then fasten off.
Tear Drops:
- Start with blue yarn and ch 3.
- Work 6 dc into the final ch and curve it into a teardrop shape.
- Fasten off and sew onto the square.
Sunglasses (for Cool Emoji):
- Ch 16, sl st back along one side, sc in the next, and work dc along the majority of the chain.
- Create a curve-like “glasses” shape, fasten off, and sew the loop onto the face.
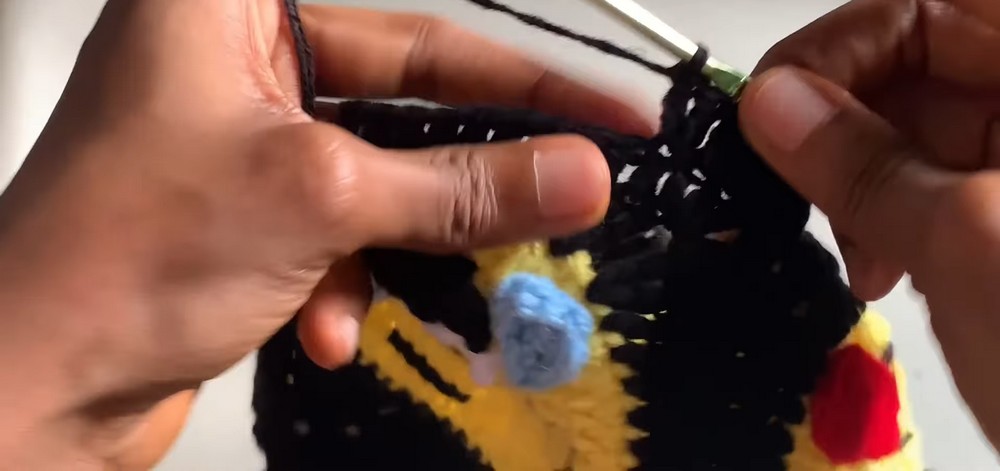
Part 3: Joining Granny Squares
- Arrange four completed squares in your preferred alignment.
- With the WS facing out, sl st or sc through the edges of adjacent squares, ensuring corners align.
- When joining the four squares into a circular shape, ensure emojis are upright.
Part 4: Hat Crown
- Using black yarn (or crown color), create a magic circle.
- Follow similar steps to the granny squares for the initial rounds:
- Round 1: 12 dc into a magic circle.
- Round 2: Inc in each stitch (24).
- Round 3: 1 dc in the next st, 2 dc in the next st. Repeat around (36).
- Round 4: 1 dc in the next 2 sts, 2 dc in the next. Repeat (48).
- Continue increasing by 12 sts each round until the crown fits the diameter of your square assembly.
Part 5: Attaching Crown to Squares
- With RS of the hat facing you, align the crown with the top edges of your joined squares.
- Evenly sc around the edges, joining the crown to the top squares.
Part 6: Adding the Ruffle Border
- Attach yarn to the bottom of the hat where the squares connect.
- Work 1 dc in first st, 2 dc in next st for the first round.
- For more ruffles, work additional rounds of increases:
- 1 dc in next 2 sts, 2 dc in the 3rd st for round 2.
- Fasten off and weave in loose ends.
Finishing Touches
- Sew all emoji pieces securely onto their respective squares.
- Weave in any remaining yarn ends.
- Block your finished hat if desired to smooth and shape it.
Tips for Customization
- Use additional granny squares for a larger construction.
- Experiment with different emoji designs or custom patterns.
- Adjust the hook size to modify size more easily without altering stitch counts.