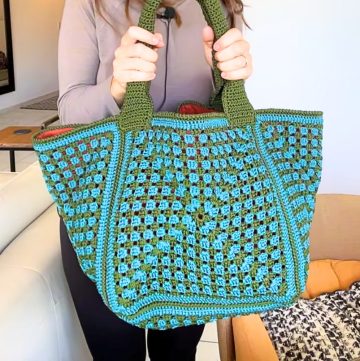
A crochet Granny Square bag is a useful and stylish accessory made by creating small square patterns and joining them together to form a beautiful bag. What’s special about this design is its simplicity and flexibility—you can play with any color combination you love! It’s great for daily use, whether you use it to carry small items, books, or even a quick grocery run. It’s lightweight, colorful, and unique, making it a must-have addition to your collection.
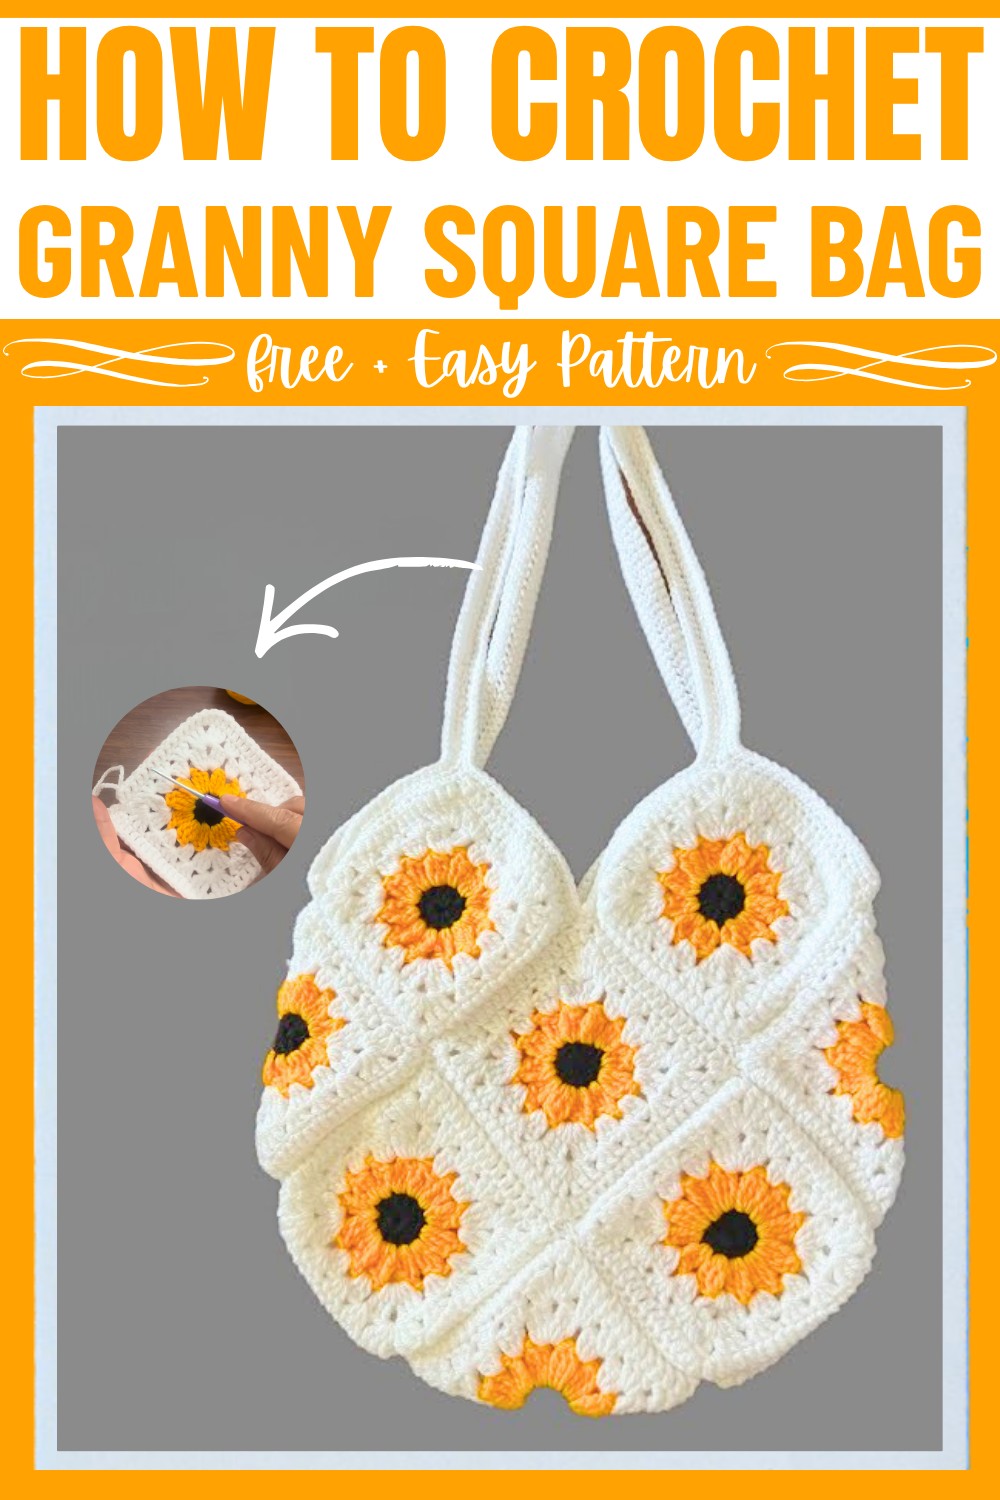
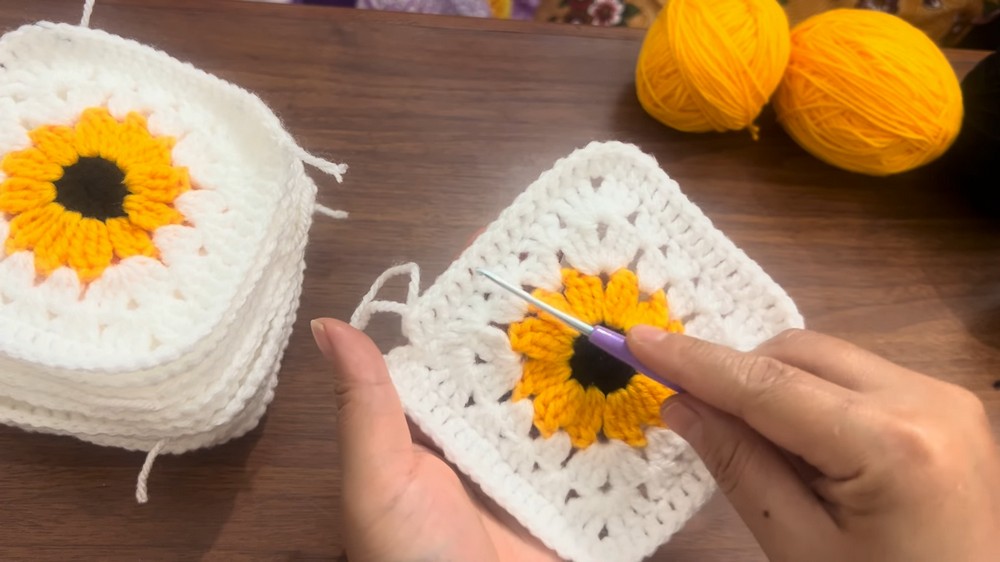
To make this bag, you create 13 granny squares using simple crochet stitches, choosing colors like black, white, orange, or any others that you prefer. After making the squares, they are joined neatly to craft the body of the bag. Once complete, you crochet a strong handle, and the bag is ready to use. What’s amazing is that you can customize its look and size according to what you need. This Granny Square bag is not just fun to make but also a useful handmade tool for everyday life.
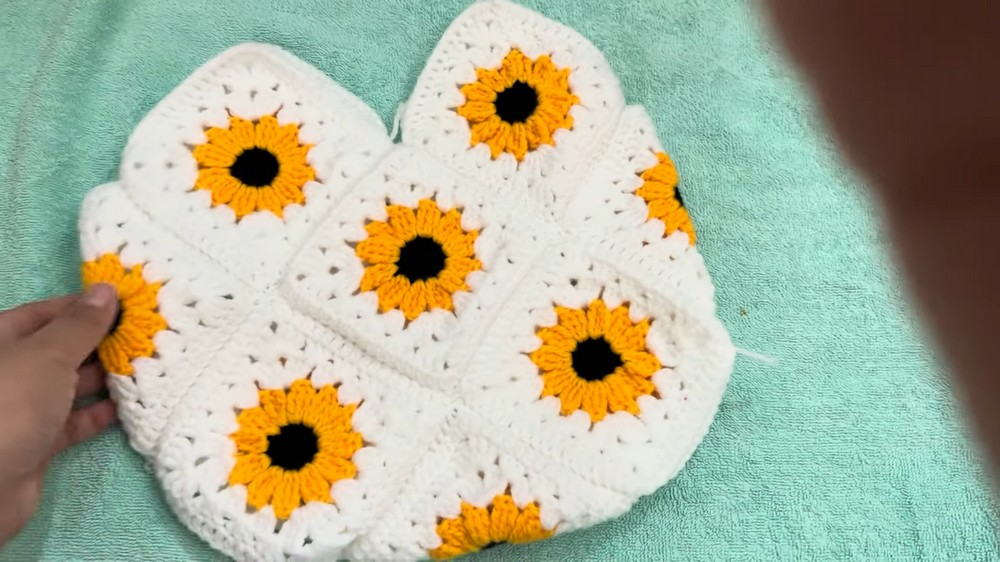
Credit Ghale DIY🌷
Materials & Tools Needed
- Yarn: Three colors of your choice (e.g., black, orange, and white).
- Ensure the yarn weight is suitable for the hook size.
- Use double strands for thinner yarn.
- Crochet Hook: 3 mm.
- Adjust the hook size according to the thickness of your yarn.
- Scissors.
- Tapestry Needle.
- Stitch Marker (optional but recommended for joining rounds).
Finished Size & Customization Ideas
- Finished Size: Determined by the number of granny squares and the dimensions of each square.
- This tutorial uses 13 granny squares (12 around, 1 in the center) to form the bag.
- Customization Ideas:
- Color Variations: Swap black, orange, and white for other color combinations.
- Size: Add or subtract granny squares to adjust the size.
- Yarn Type: Use cotton, acrylic, or a blend for durability or aesthetic preferences.
Pattern Abbreviations & Terminology
- ch: Chain
- sl st: Slip Stitch
- dc: Double Crochet
- sp: Space
- rnd: Round
- st(s): Stitch(es)
- sk: Skip
- beg: Beginning
- yo: Yarn Over
Terminology: The pattern uses US crochet terms.

Step-by-Step Detailed Crochet Instructions
A) Making the Granny Squares
- Create the Magic Circle:
- Using black yarn (or your first color), make a magic circle.
- Ch 3 (counts as the first dc).
- Work 12 dc into the magic circle. (You’ll have 13 sts including the ch-3.)
- Pull the circle tight and join to the top of the ch-3 with a sl st.
- Cut the yarn and fasten off.
- Attach the Second Color (e.g., Orange):
- Attach the orange yarn to any st.
- Ch 3 (counts as first dc), then work 2 more dc into the same space.
- Ch 2, then work 3 dc into the next st.
- Repeat this process of 3 dc + ch 2 around the circle, creating 12 groups of 3-dc clusters.
- Join with a sl st to the top of the ch-3 and fasten off.
- Attach the Third Color (e.g., White):
- Attach the white yarn to any ch-2 sp from the previous rnd.
- Ch 3, then work 2 more dc into the same ch-2 sp.
- Ch 2, then work 3 dc into the next ch-2 sp.
- Continue around, working clusters of 3 dc + ch 2 in each ch-2 sp.
- Join with a sl st to the top of the ch-3.
- Fasten off and weave in all ends.
- Make 13 Granny Squares Total:
- Repeat steps 1–3 to make 13 total granny squares for the bag.
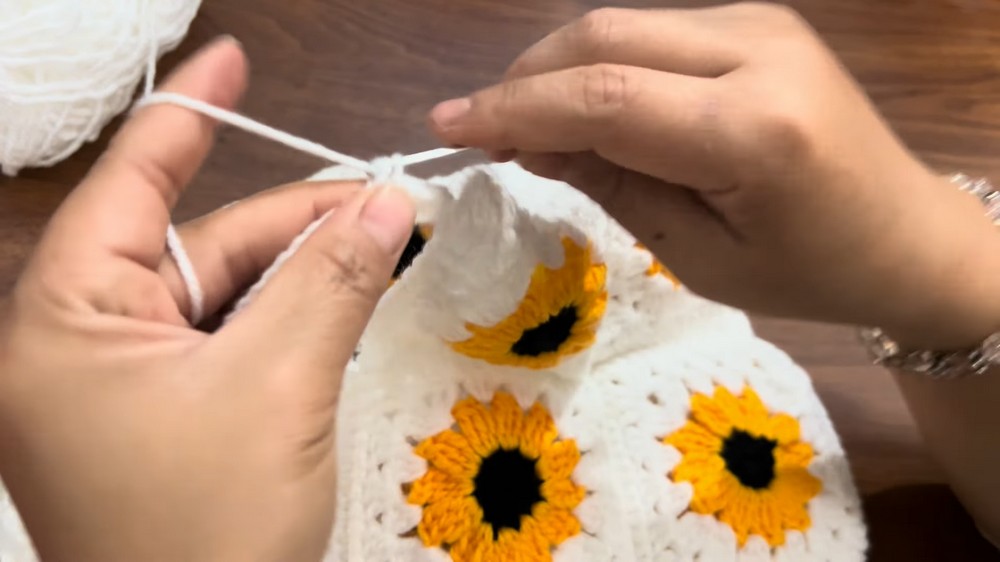
B) Joining the Squares
- Prepare for Joining:
- Lay out the squares based on the bag's shape:
- 12 squares for the bag perimeter.
- 1 square for the bottom.
- Lay out the squares based on the bag's shape:
- Use the Reverse-Slip Stitch Method:
- Place two squares wrong sides facing out (the front of each square faces inward).
- Using the last color of your squares (e.g., white), join the yarn to the corner of both squares.
- Insert the hook through the back loops only of both sts and sl st the edges together.
- Repeat along all edges, ensuring alignment.
- Form the Bag Shape:
- After joining the 12 squares into a ring, attach the 13th square at the bottom.
- Use the same slip stitch method to attach the bottom square to the perimeter.
C) Adding the Border
- Create the Top Edge:
- Attach the yarn to the top corner of the bag.
- Work 1 row of sc around the entire bag opening to create a clean edge.
- Optional Second Border:
- For added thickness, repeat another round of single crochet.
D) Adding the Handle
- Handle Base:
- Attach the yarn to one side of the bag’s top edge (start at a corner).
- Ch 100 (or your desired handle length).
- Attach the chain to the opposite side of the bag’s top edge.
- Reinforce the Handle:
- Work single crochet stitches along the entire chain to reinforce it.
- Repeat 2–3 rounds of single crochet along the handle to make it thicker and sturdier.
- Finish the Handle:
- Work sc around the joining points of the handle to blend it with the bag’s edge.
- Fasten off and weave in all ends.
Finishing Techniques
- Trim and Weave in Ends:
- Use a tapestry needle to weave in the loose ends from the granny squares, joins, and border.
- Shape the Bag:
- Block the bag if desired (optional, but recommended for an even finish).
- Customize the Handle:
- Add decorations (e.g., tassels, beads) to personalize your bag.
Helpful Tips
- Always count your stitches and clusters in each round to match the tutorial and ensure uniform granny squares.
- When joining squares, align edges carefully to avoid uneven joins.
- To make the bag more structured, consider lining it with fabric after it's completed.
Customization Notes
- Alternate Joining Methods: If you prefer a flat joining technique, try a whip stitch or an invisible join.
- Size Adjustments: You can make mini bags with fewer squares (e.g., 9 squares for a smaller bag).
- Strap Variations: Attach a pre-made leather strap or chain for a modern look.